
Introduction
This guide will guide you through the process of establishing a Site-to-Site IPsec tunnel between your Check Point SASE network and your AWS environment.
This configuration is best suited for scenarios where the connection is intended for a single VPC.
If you are dealing with multiple VPCs, please refer to our guide on configuring a Site-to-Site IPsec tunnel to AWS Transit Gateway.
Breakdown of topics
- Pre-requisites
- Configuration Steps
- Verifying the Setup
- Troubleshooting
- Support Contacts
Pre-requisites
To successfully follow this guide, you should have:
- An active Check Point SASE account and network.
- The Check Point SASE app installed on your devices.
- An active AWS account with admin permissions.
Configuration Steps
Configuring the tunnel in the AWS Console
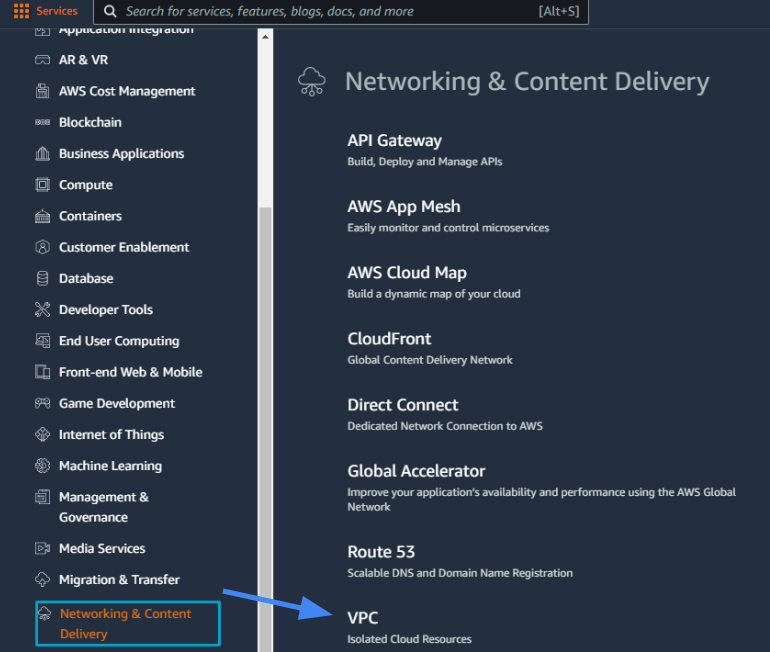
- Go to the VPC section in the AWS Console.
- Under Services, scroll down to Networking & Content Delivery and select VPC.
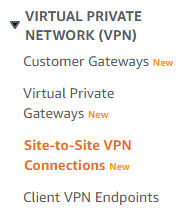
- Under the left menu Virtual Private Network (VPN) section, go to Customer Gateways.
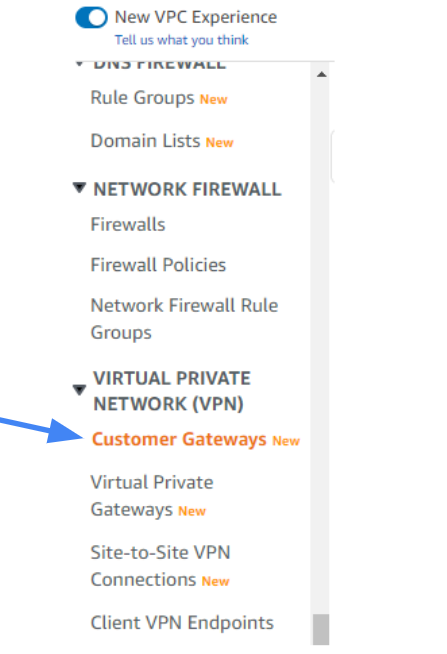
- Select Create Customer Gateway.
- Select static routing.
- Fill in the IP Address of the Check Point SASE Gateway. This can be obtained within the Check Point SASE Panel, under Networks.
 7. Select Create Customer Gateway. A message should display indicating the gateway was created successfully.
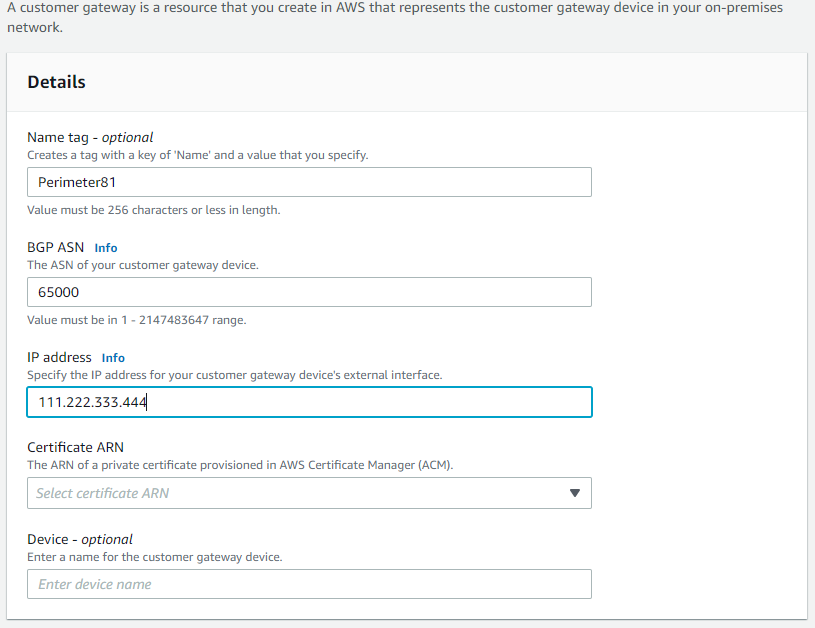
Configuring a virtual private gateway
If you already have a virtual private gateway attached to your VPC, skip this section and continue with Creating a virtual private network connection.
- Go back to Services, scroll down to Networking & Content Delivery, and select VPC.
- On the left side, under Virtual Private Network (VPN) select Virtual Private Gateways.
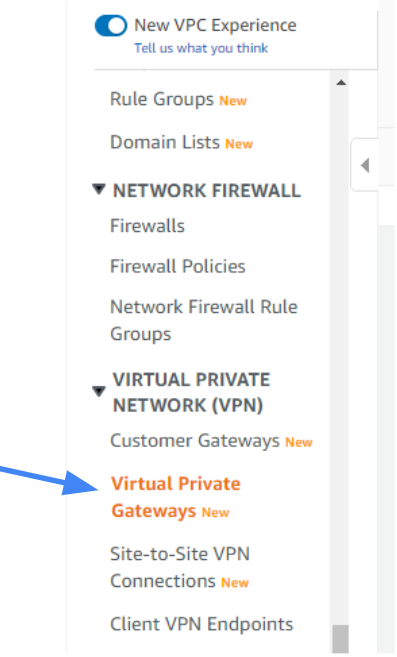
- Select Create Virtual Private Gateway.

- Type the name of the gateway (for example US_HQ ).
- Select ASN as Amazon's default ASN.
- Select Create Virtual Private Gateway.
.png)
A message should display indicating that the virtual Private Gateway was created successfully.
7. Select the newly created gateway and select Actions; on the context menu select Attach to VPC.
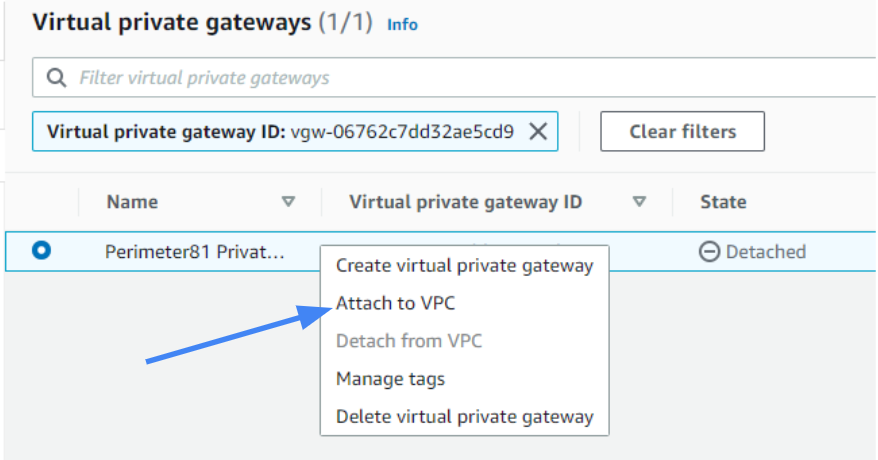 8. From the drop-down menu, select the VPC and select Yes, Attach.
Creating a virtual private network connection
- Under Virtual Private Network in the left menu, go to Site-to-SiteVPN Connections.
- Select Create VPN Connection.

- Enter the name tag (for example, US_HQ).
- Select the created Virtual Private Gateway.
- Under Customer Gateway, select Existing.
- Select the Customer Gateway that you have created.
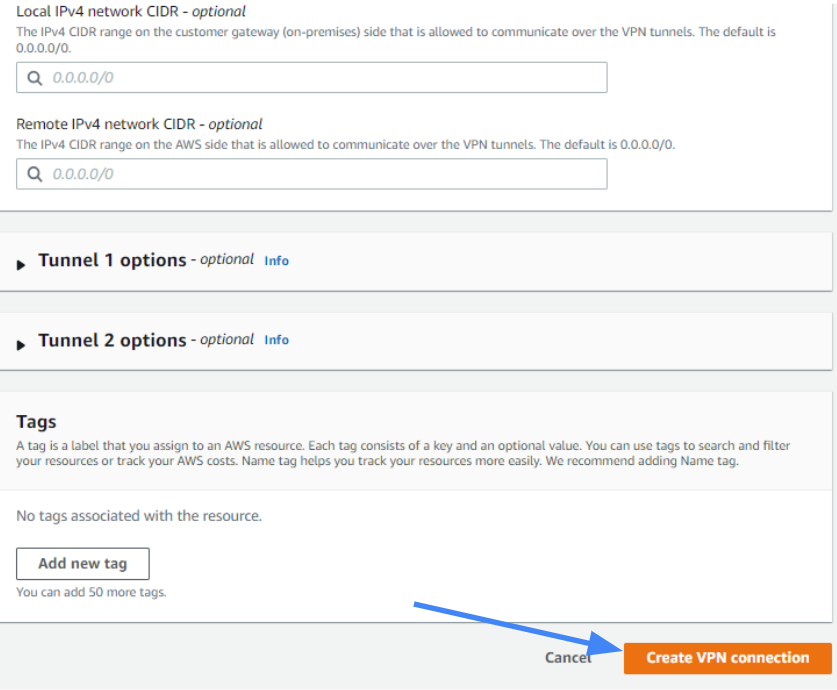
- Under Routing Options, select Static.
- Fill in your Check Point SASE network subnet (Usually 10.255.0.0/16).ImportantThis address might differ in case you haven't chosen the default subnet mask for your tunnel.
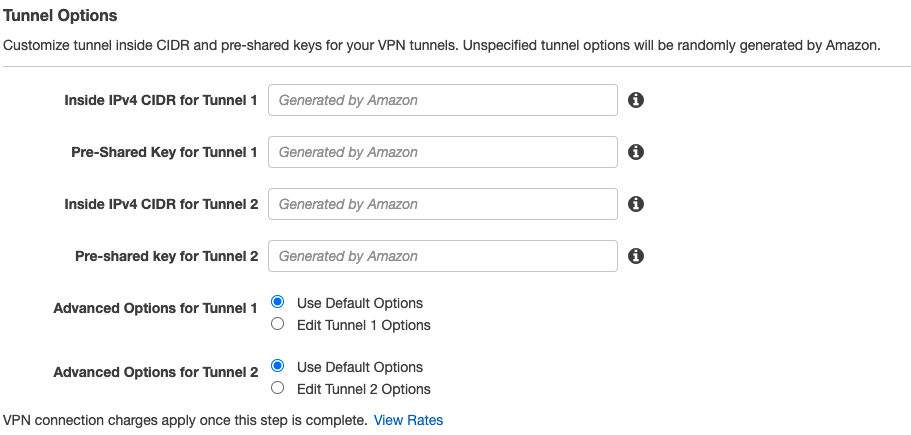
9. Under Tunnel Options, in advanced options choose Edit tunnel options, and under DPD timeout set the value to 60.

 In this screen, you can also select the inside subnets you would like to connect via the tunnel.
10. Select Create VPN Connection.
 11. A message should display indicating that a VPN Connection Request was created successfully.
Configuring the routing rules to the default gateway
- Select the VPC section in the AWS Console and enter the Route table associated with your VPC.
 2. For the Route Tables menu option, select the routing table that is associated with the VPC you have created for the tunnel.
 3. Select Edit and add the new static routes for the subnets below:
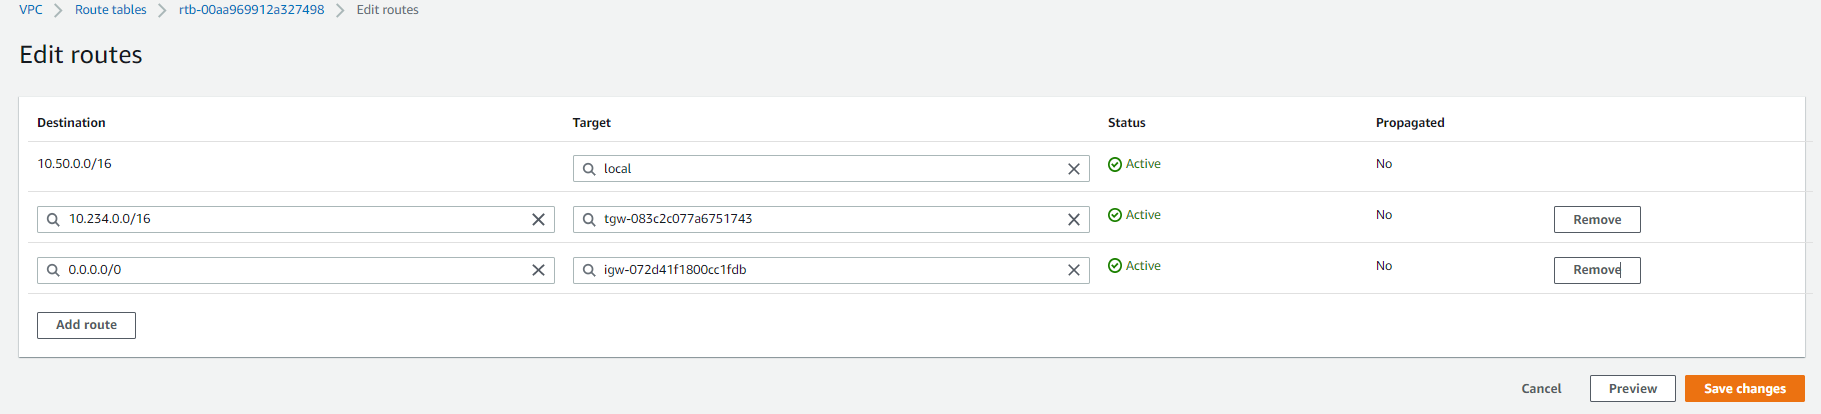
Fill in your Check Point SASE network subnet listed in the Check Point SASE web portal, in Networks > Gateway > Settings (Usually 10.255.0.0/16) at the destination field, and your new VPN Gateway ID as the target (it will appear under the subcategory Virtual Private Gateway).
4. Select Save.
Configure your AWS security groups to allow all traffic from Check Point SASE subnets (usually 10.255.0.0/16) or allow only particular traffic using the port and IP restrictions.
Configuring the tunnel in your Platform
- Return to Site-to-Site VPN Connections and select Download Configuration.
 2. Fill in the following information, and download the config file:
- Be sure to choose Strongswan under Vendor, and Ikev2 for Ike Version.
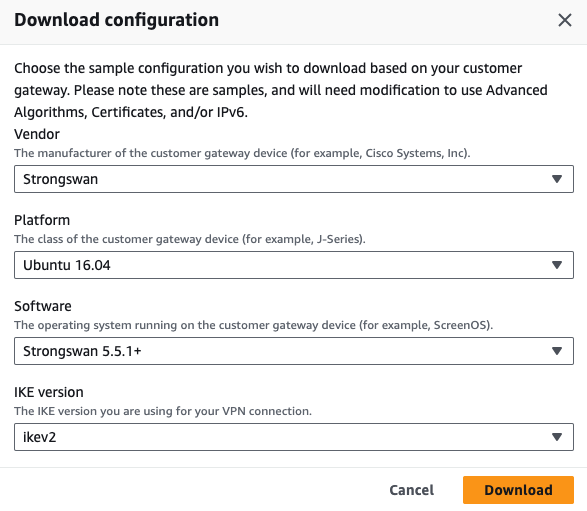
You may randomly choose any of the two, but for consistency purposes and to avoid possible confusion we advise you to use the one that appears first in the file.
3. Go to the Management Platform. Under the Networks tab in the left menu, select the name of the network where you'd like to set the tunnel.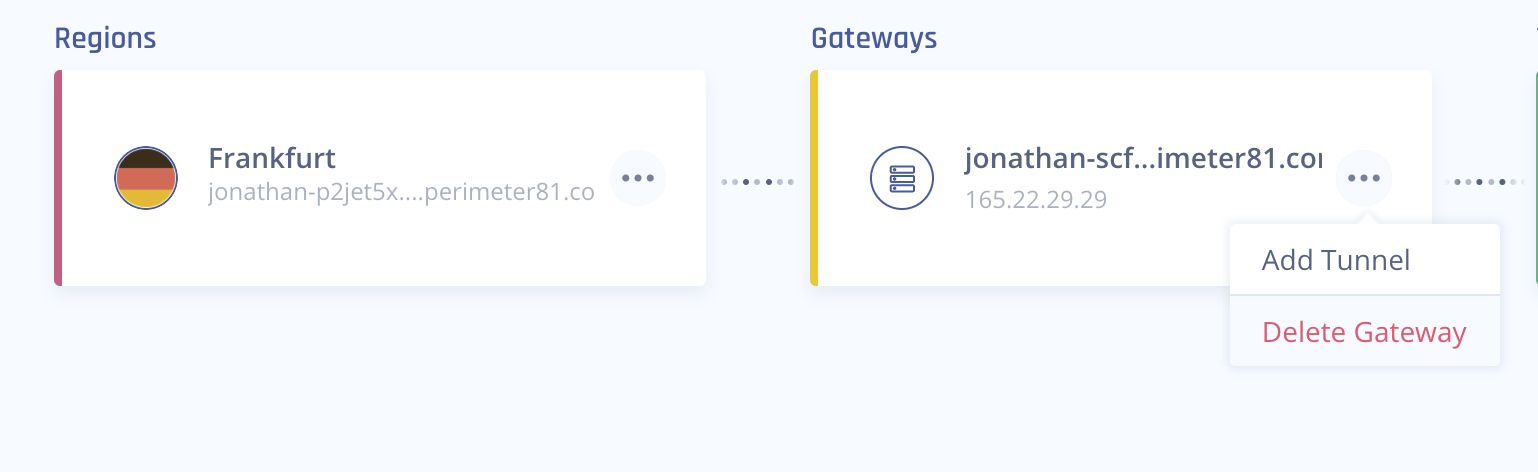
4. Locate the desired gateway, select the three-dotted menu (...), select Add Tunnel, and then IPSec Site-2-Site Tunnel.
5. Click Upload File and upload the configuration file downloaded from the AWS portal. The system automatically populates Shared Secret, Public IP, and Remote ID.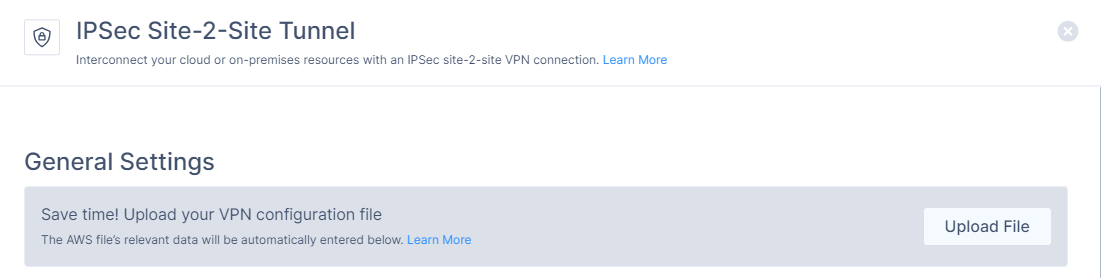
6. In the General Settings section, specify these:
- Name: Enter a name for the tunnel.
- Check Point SASE Gateway Proposal Subnets: Leave Any (0.0.0.0/0) selected here.
- Remote Gateway Proposal Subnets: Leave Any (0.0.0.0/0) selected here.
.PNG)
7. In the Advanced Settings section, if you selected the default tunnel options on AWS, enter these :
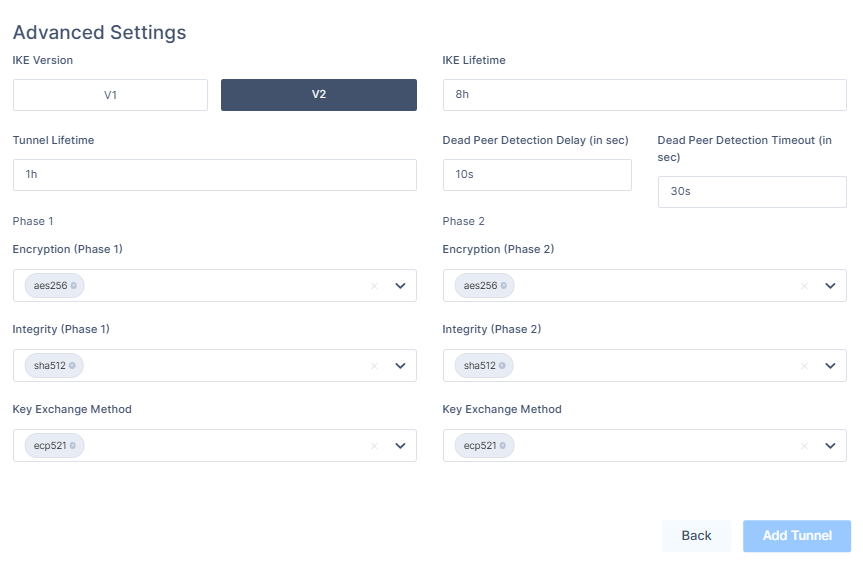
- IKE Version: V2
- IKE Lifetime: 8h
- Tunnel Lifetime: 1h
- Dead Peer Detection Delay: 10s
- Dead Peer Detection Timeout: 30s
- Phase 1:
- Encryption(Phase 1): aes256
- Integrity (Phase 1): sha512
- Key Exchange Method: ecp521
- Phase 2:
- Encryption(Phase 2): aes256
- Integrity (Phase 2): sha512
- Key Exchange Method: ecp521
Verify the tunnel settings under section 3 in the configuration.
8. Click Add Tunnel.
9. On your network, select your three dots and click on Routes Table: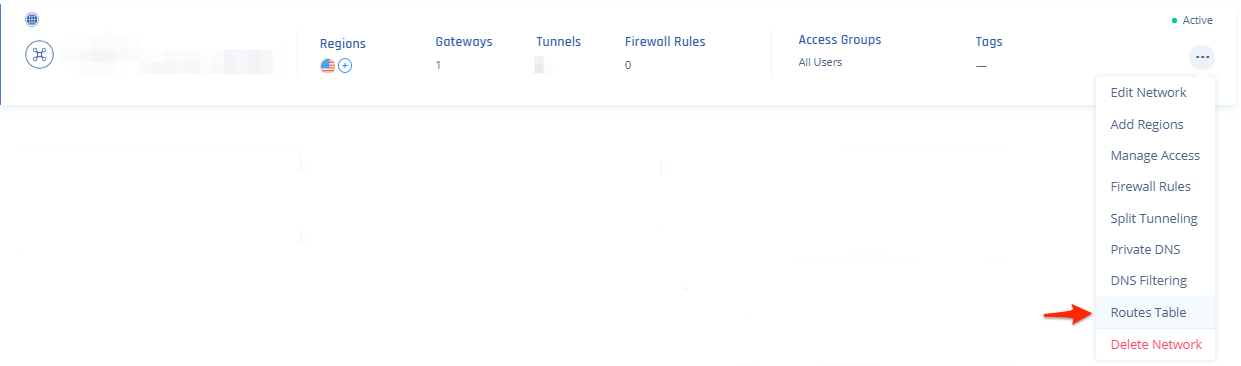
- Click the Add Route button on the top right, then on this popup fill out accordingly (Tunnel will match the name above, and Subnets will be the subnets you want to reach on the AWS side of the tunnel) and click the Add Route button:
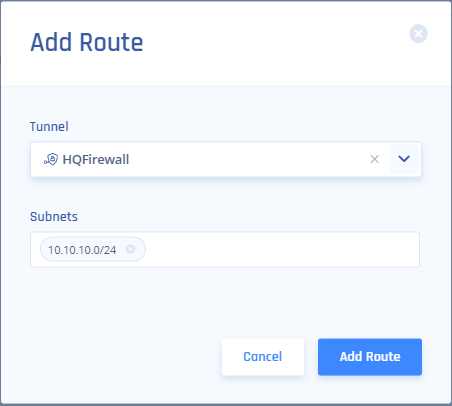
- Be sure to click Apply Configuration when done.

Verifying the Setup
After following the above steps, your tunnel should be active.
To verify, go to your Check Point SASE dashboard, locate the tunnel you just created, and check the tunnel status.
It should indicate that the tunnel is "Up", signifying a successful connection.
Next, connect to your network using the Check Point SASE agent and attempt to access one of the resources in your environment.
Troubleshooting
If you encounter issues during or after the setup, try reviewing your settings to ensure everything matches the instructions. In particular, check the IP addresses and other details you entered during setup. If issues persist, please consult our dedicated support.
Support Contacts
If you have any difficulties or questions, don't hesitate to contact Check Point SASE's support team. We offer 24/7 chat support on our website at sase.checkpoint.com, or you can email us at sase-support@checkpoint.com. We're here to assist you and ensure your VPN tunnel setup is a success.