Understanding Private DNS
A Custom DNS allows you to dictate which DNS server your network should use when resolving domain names.
Private DNS will enable you to reach an internal resource by its hostname (as published by your local DNS server).
This can ease your workflow, as you will no longer need to specify the resource's IP address and will be able to resolve resources that are not directly exposed to the Harmony SASE Network.
How to Set Up Private DNS
You cannot use Regional DNS and Private DNS at the same time.
When you configuring Private DNS, choose one level only:
- Network level – applies to the entire Harmony SASE Network
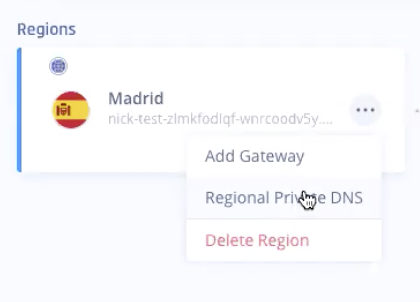
- Region level – applies to a specific region in your Harmony SASE Network
The Private DNS will allow you to utilize your organization’s DNS servers, as well as local domain names while the Regional DNS will allow your users to resolve resources via a local DNS server rather than waiting for a response from a remote one.
Connecting a Private DNS to a Network
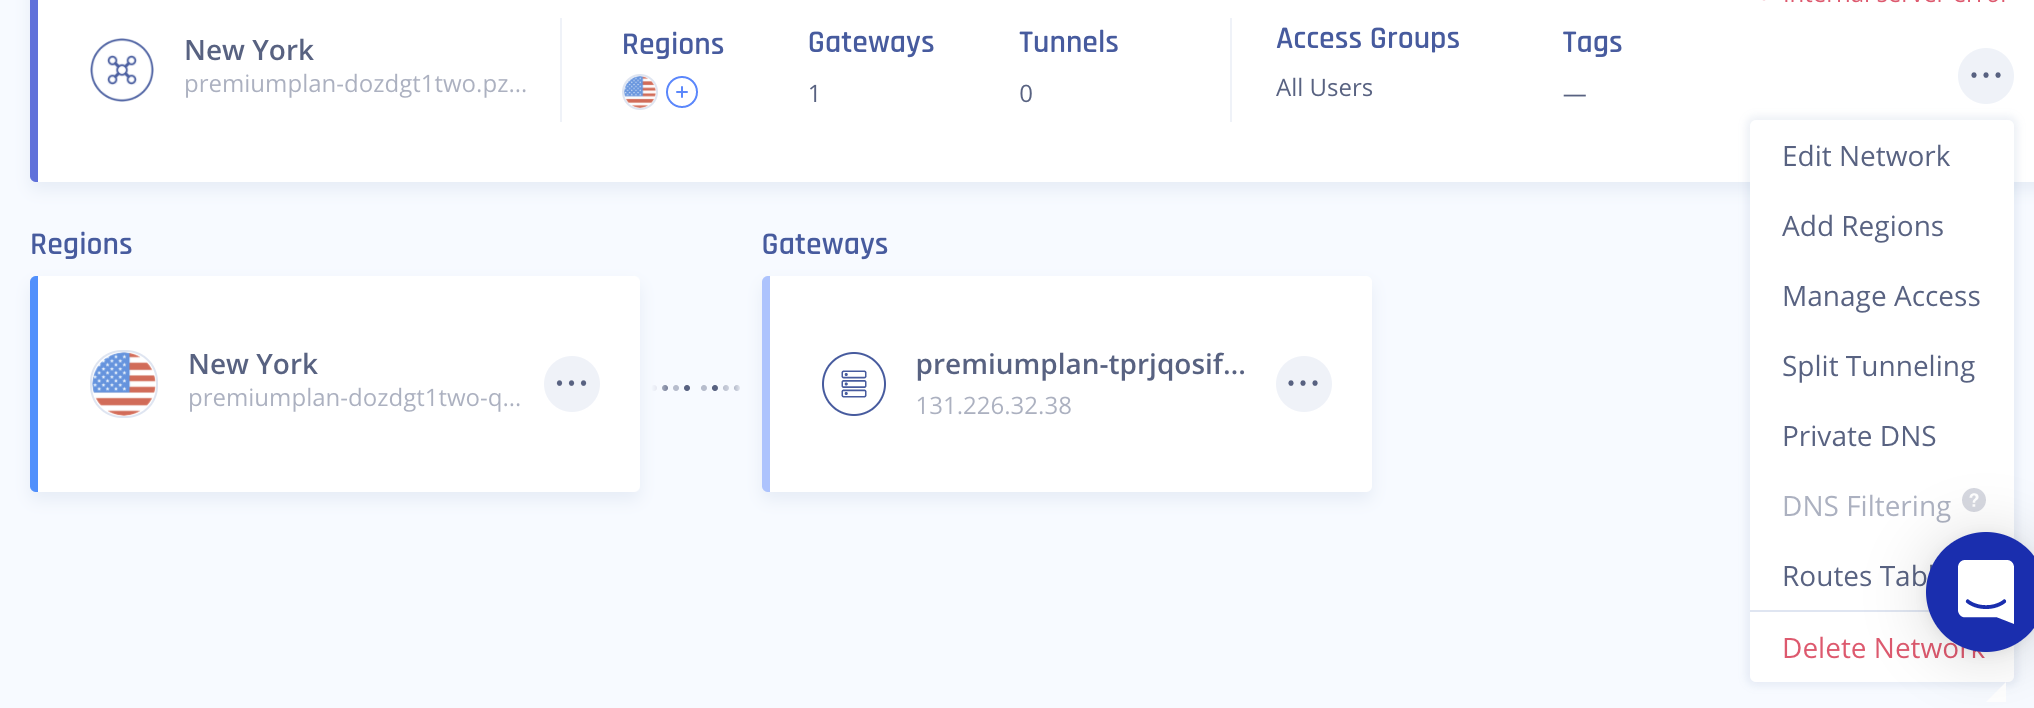
A Private DNS server can be connected to the Harmony SASE Network by following those steps:
- Click on the (...) icon on the Network section.

2. Click on Private DNS.
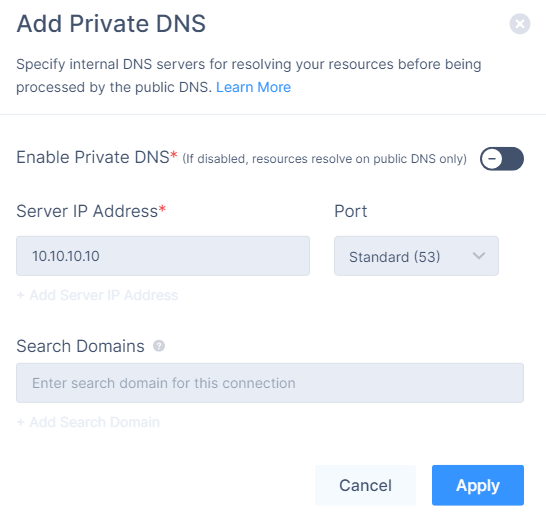
3. Turn on the Enable Private DNS toggle.

4. Enter the IP address of each one of your DNS servers. You can enter up to four different IP addresses.
5. Wait for the Network status to change from Deploying... to Active.
Connecting a Private DNS server to a Region
- Click on the (...) icon on the desired Region.

2. Turn-on the Enable Private DNS toggle.
If you want to configure more than one DNS server under Private DNS, know we use them randomly to spread the load between all servers.
Therefore the DNS endpoint must have either zone sharing or zone forwarding. This can be done with both cloud DNS providers and on-premise resolvers.
3. Enter the IP address of each one of your DNS servers. You can enter up to four different IP addresses.
4. Enter any suffix that you'd like to add to the DNS query (for example, if you enter perimeter81.com as a search domain, and then type in the address bar support, you'll be directed to support.perimeter81.com).
5. Select apply, then wait for the Network status to change from Deploying... to Active.
Recommendations
- Before changing your DNS, understand the benefits and potential drawbacks.
- Ensure you use trusted DNS servers to avoid security issues.
Troubleshooting
If you encounter issues during or after the setup, try reviewing your settings to ensure everything matches the instructions. In particular, check the IP addresses and other details you entered during setup. If issues persist, please consult our dedicated support.
Support Contacts
If you have any difficulties or questions, don't hesitate to contact Harmony SASE's support team. We offer 24/7 chat support on our website at sase.checkpoint.com, or you can email us at sase-support@checkpoint.com. We're here to assist you and ensure your VPN tunnel setup is a success.