
Introduction
This guide will walk you through the process of establishing a Site-to-Site VPN tunnel between your Check Point SASE network and your Azure environment.
Breakdown of topics
- Pre-requisites
- Configuration Steps
- Verifying the Setup
- Troubleshooting
- Support Contacts
Pre-requisites
To successfully follow this guide, you should have:
- An active Check Point SASE account and network.
- The Check Point SASE app installed on your devices.
- An active Azure account with admin permissions.
Creating a Gateway Subnet
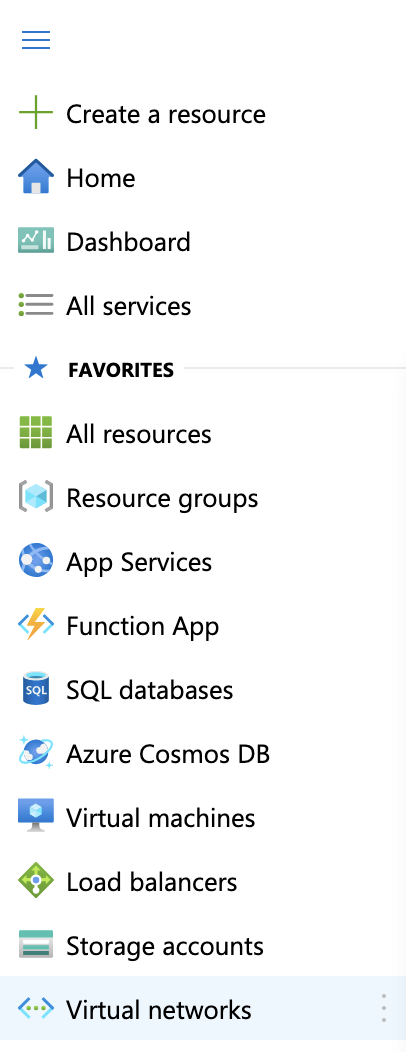
- In your Azure Management Portal, navigate to the Virtual networks.
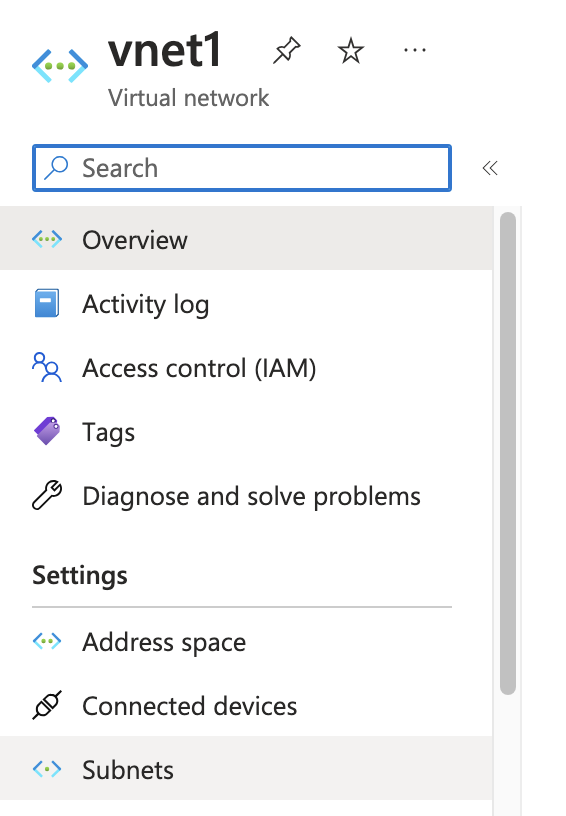
- Select the Virtual Network to which you'd like to create a gateway, and click Subnets.
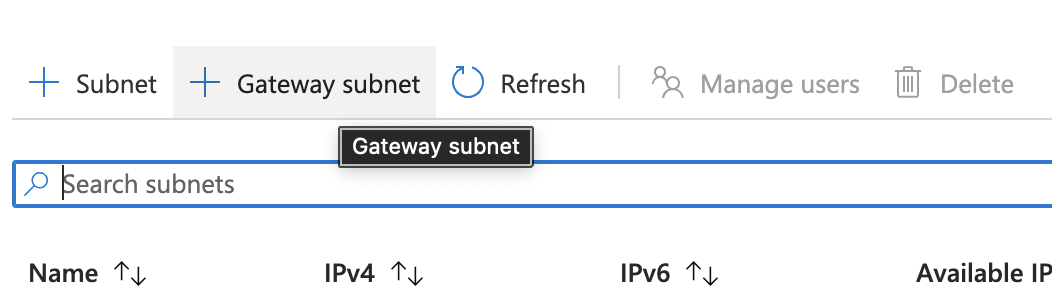
- Select + Gateway subnet (the name of the subnet is filled in with the value "Gateway subnet" by default).
- If needed, adjust the auto-filled Address range values. This subnet is going to be used for the Virtual Gateway only.
- In case this range is not automatically filled in:
- Go to address space-> +Add
- Select a random /27 bit mask subnet space (for example 10.1.255.0/27)
Creating a Virtual Network Gateway
- Click Home to go back to the Azure Portal.
- On the left side of the portal page, select +Create a resource.
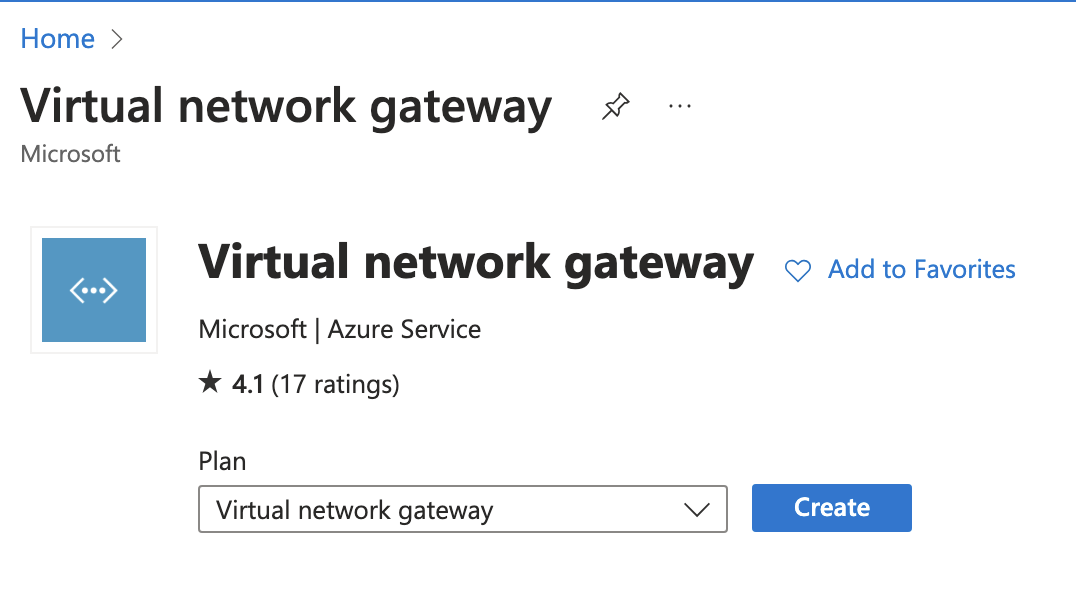
- Type Virtual Network Gateway in the Search line.
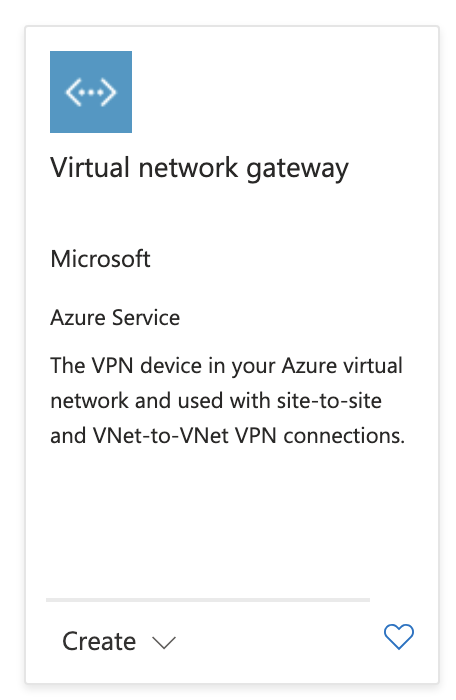
- Select Create.
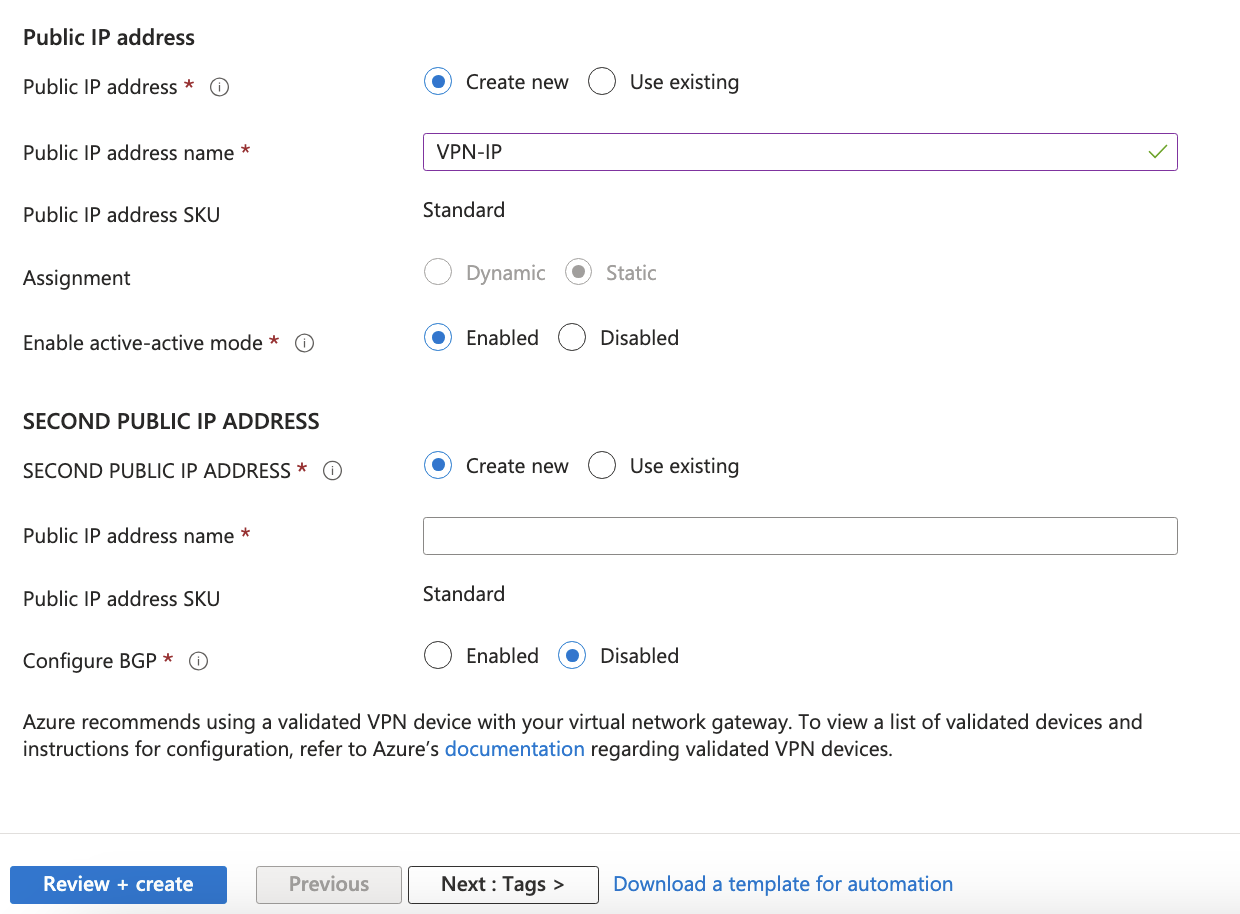
 Fill in the fields with the following information:
- Name: Your gateway name.
- Region/Location: Select the Virtual Network location\region where your resources are.
- Gateway type: Select VPN.
- VPN type: Select Route-based.
- SKU: Select the gateway SKU from the dropdown. The SKUs listed in the dropdown depend on the VPN you select.
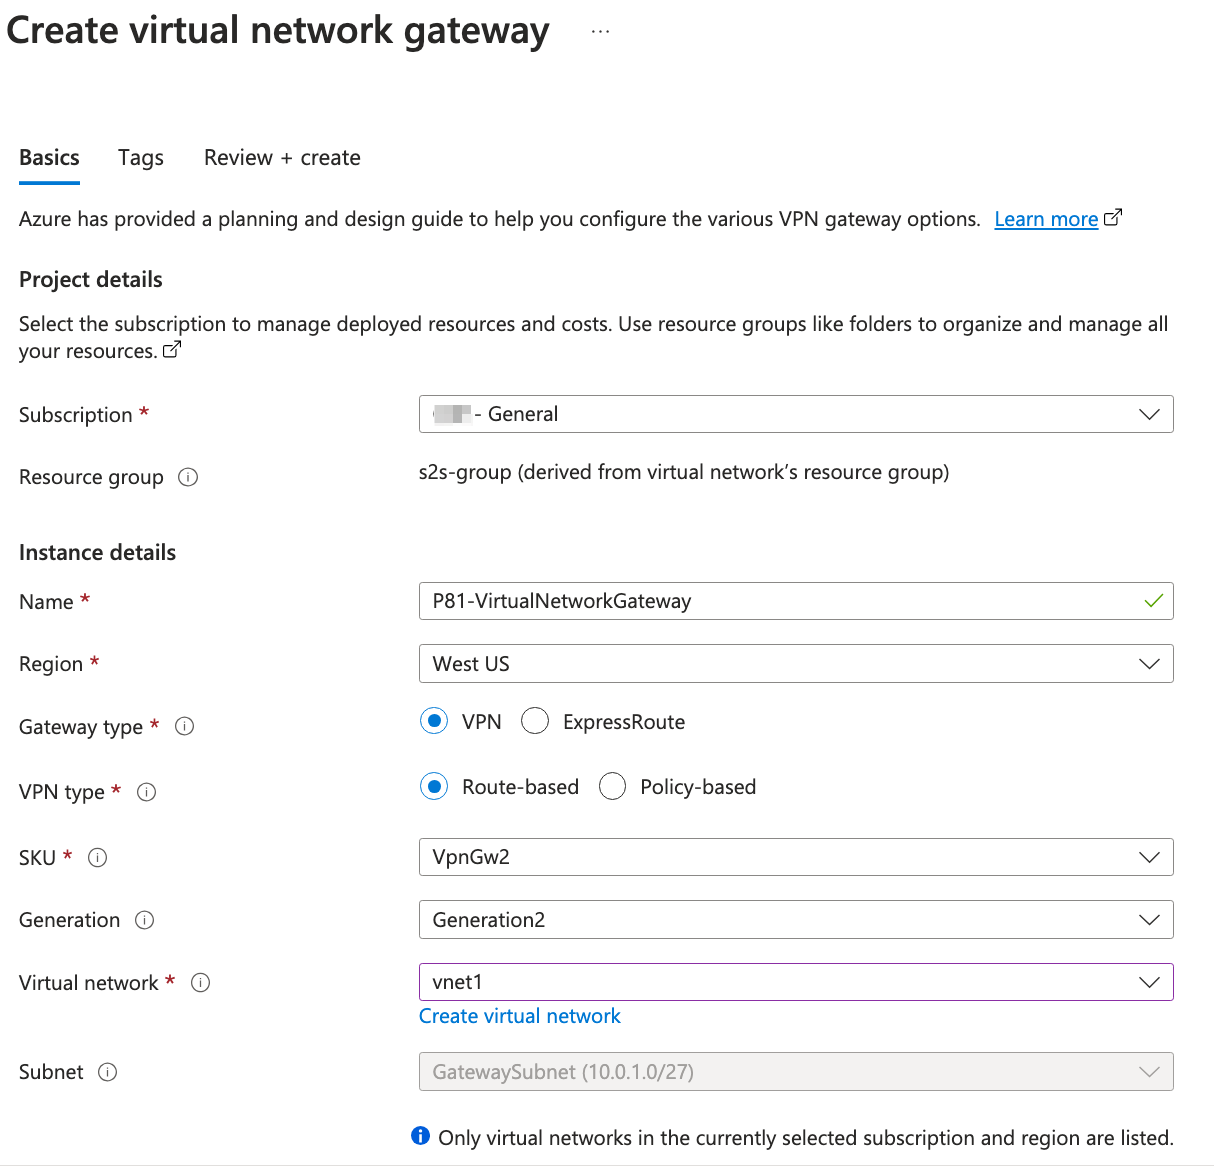
- Virtual network: Select the Virtual network that contains the resources you want to reach via the tunnel.
- Select a Virtual network to open the Choose a virtual network page.
If you don't see your VNet, make sure the Location/Region field is pointing to the region in which your virtual network is located. - Gateway subnet address range: You will only see this setting if you did not previously create a gateway subnet for your virtual network. If you previously created a valid gateway subnet, this field will not appear.
- Public IP address: Click Create New, or choose an existing IP used by your organization.
- Enable active-active mode: Disabled.
- Configure BGP ASN: Disabled.
- Select Review+create to begin creating the VPN gateway.
- Select a Virtual network to open the Choose a virtual network page.
Creating a Local Network Gateway
- Click Home to go back to the Azure Portal.
- On the left side of the portal page, select +Create a resource.

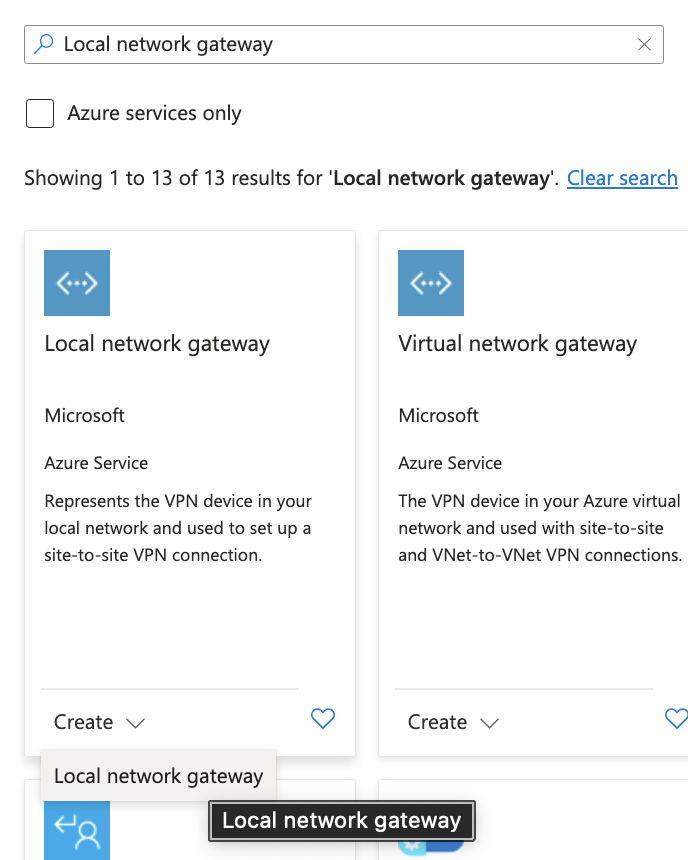
- In the search box, type "Local network gateway," Select Local network gateway, then select Create to open the Create local network gateway page.
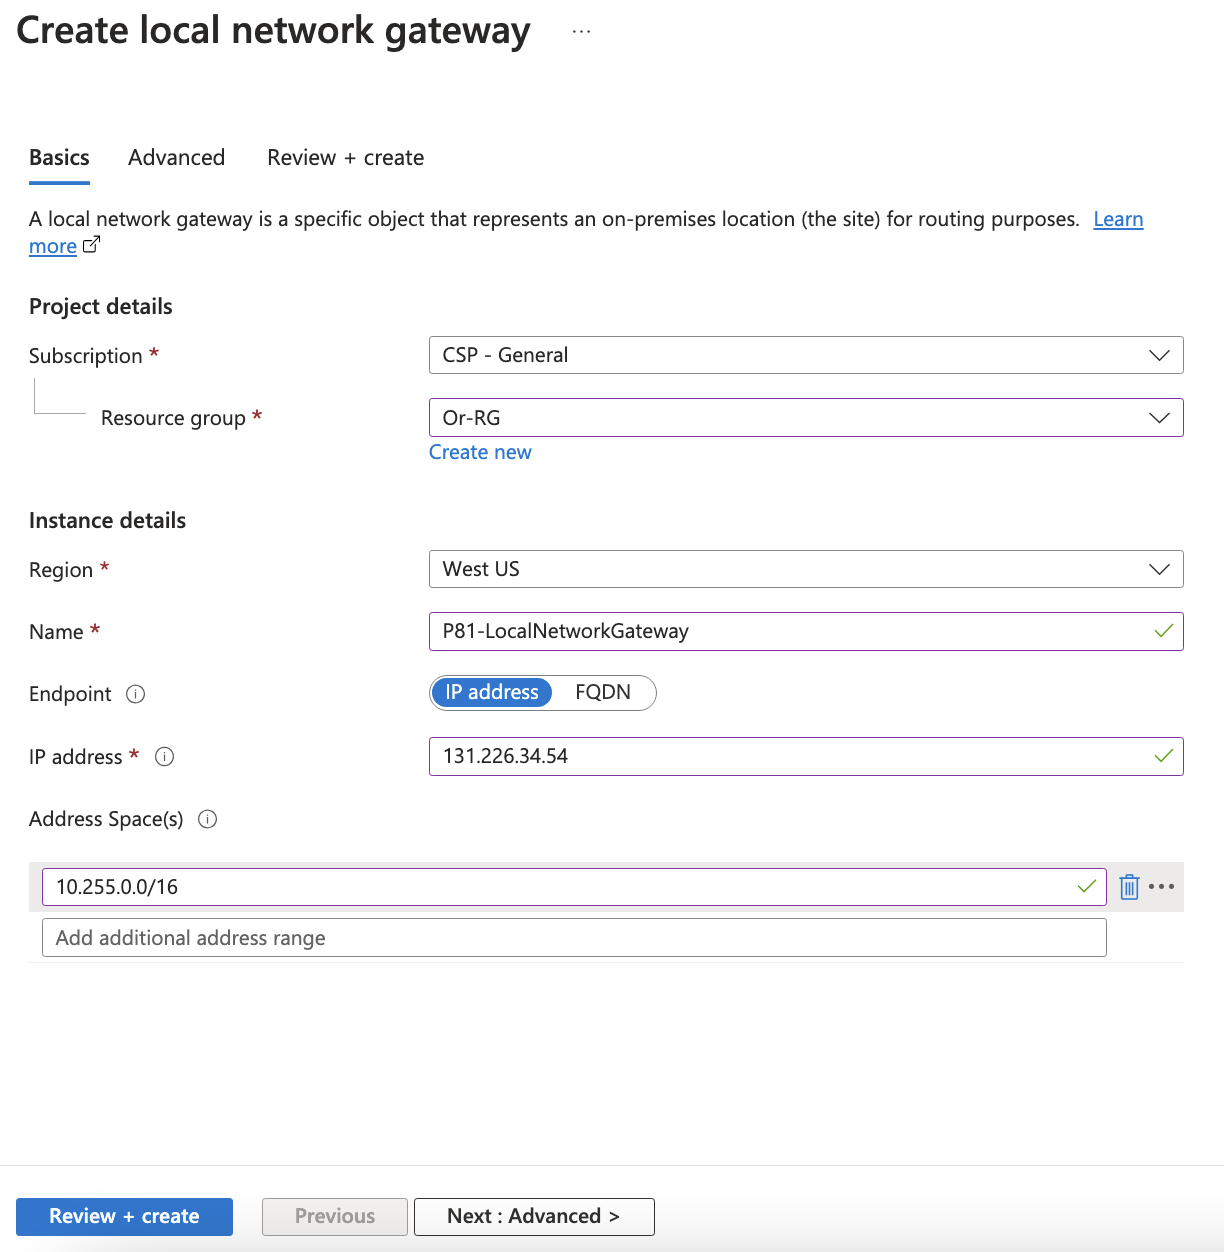
 Fill in the fields with the following information:
- Name Your gateway name.
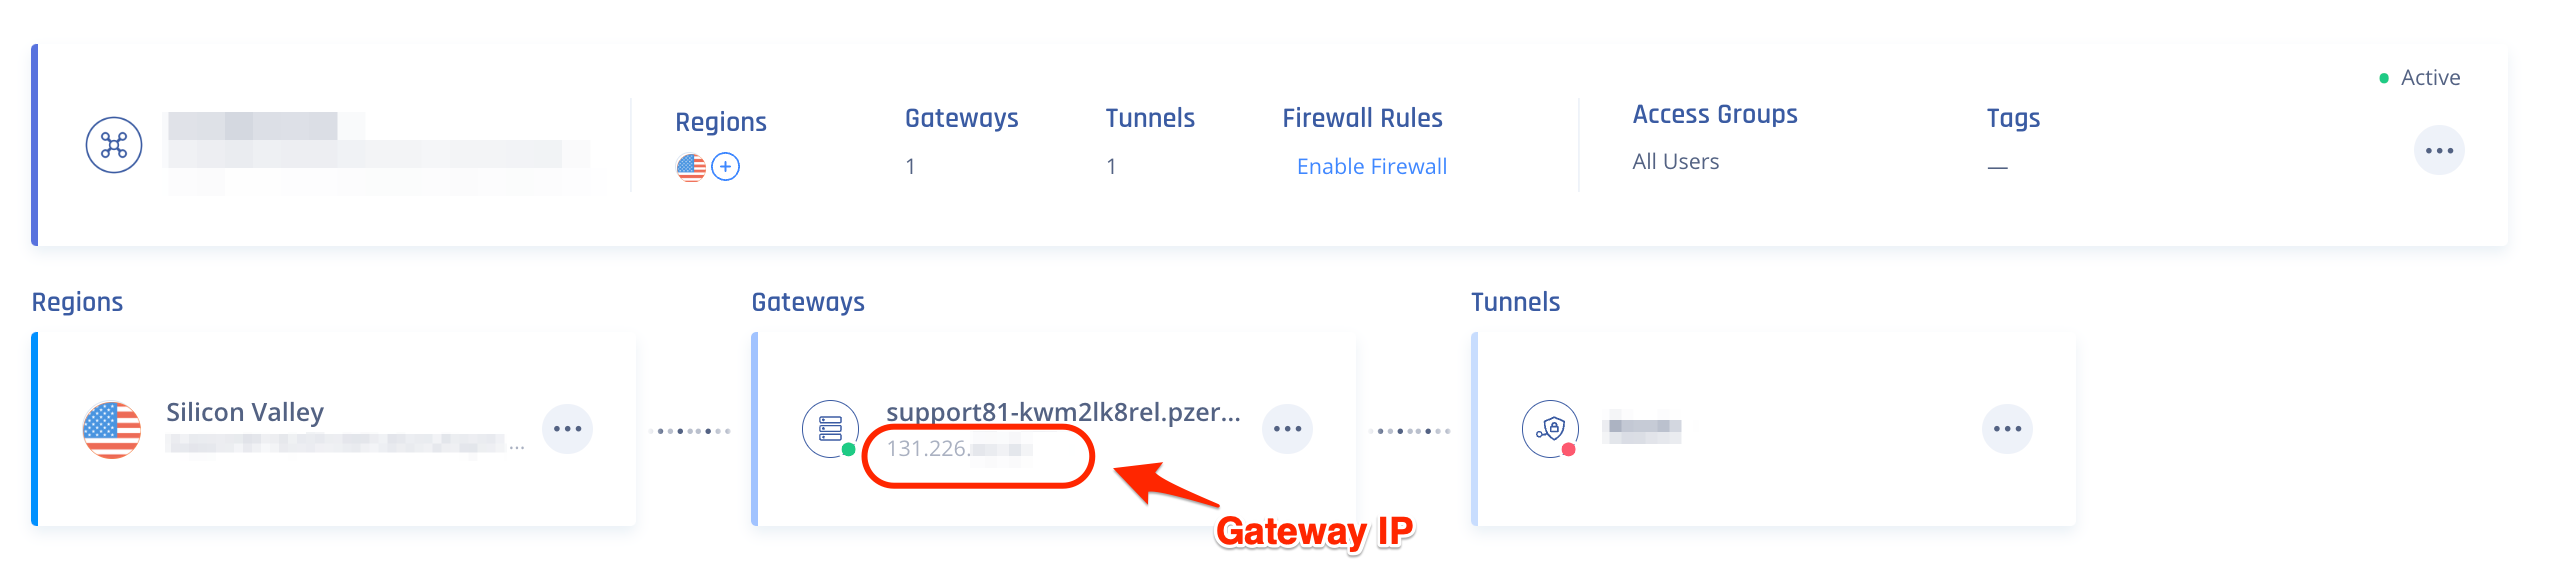
- IP address: Specify your Check Point SASE gateway IP.
- Address Space: Insert your Check Point SASE subnet (make sure that the ranges you specify here do not overlap with ranges of other networks that you want to connect to).
- Subscription: Verify that the correct subscription is showing.
- Resource Group: Select the resource group that you want to use. You can either create a new resource group or select one that you have already created.
- Location: Select a location that this object will be created in.You may want to select the location in which your Virtual Network resides, however it is not a requirement.
- SKU: Select the gateway SKU from the dropdown. The SKUs listed in the dropdown depend on the VPN you select.
- Select Create at the bottom of the page to create the local network gateway.
Creating the IPSEC tunnel connection
- Open your Virtual Network Gateway page.
- Once it opens, go to Settings, and select Connections.
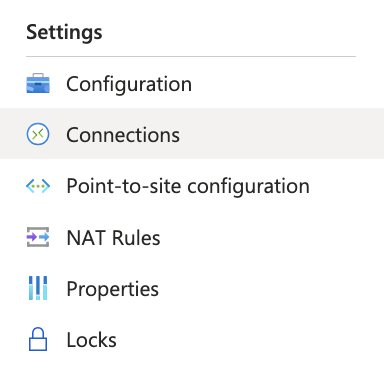
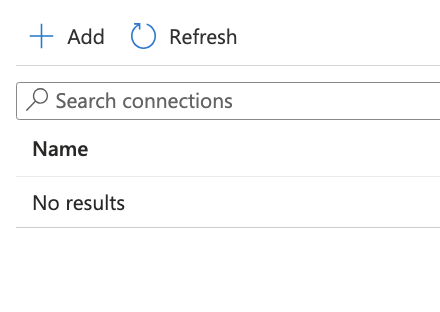
- Click +Add.
- Fill in the fields with the following information:
- Name Your connection name.
- Connection type: Select Site-to-site (IPSec).
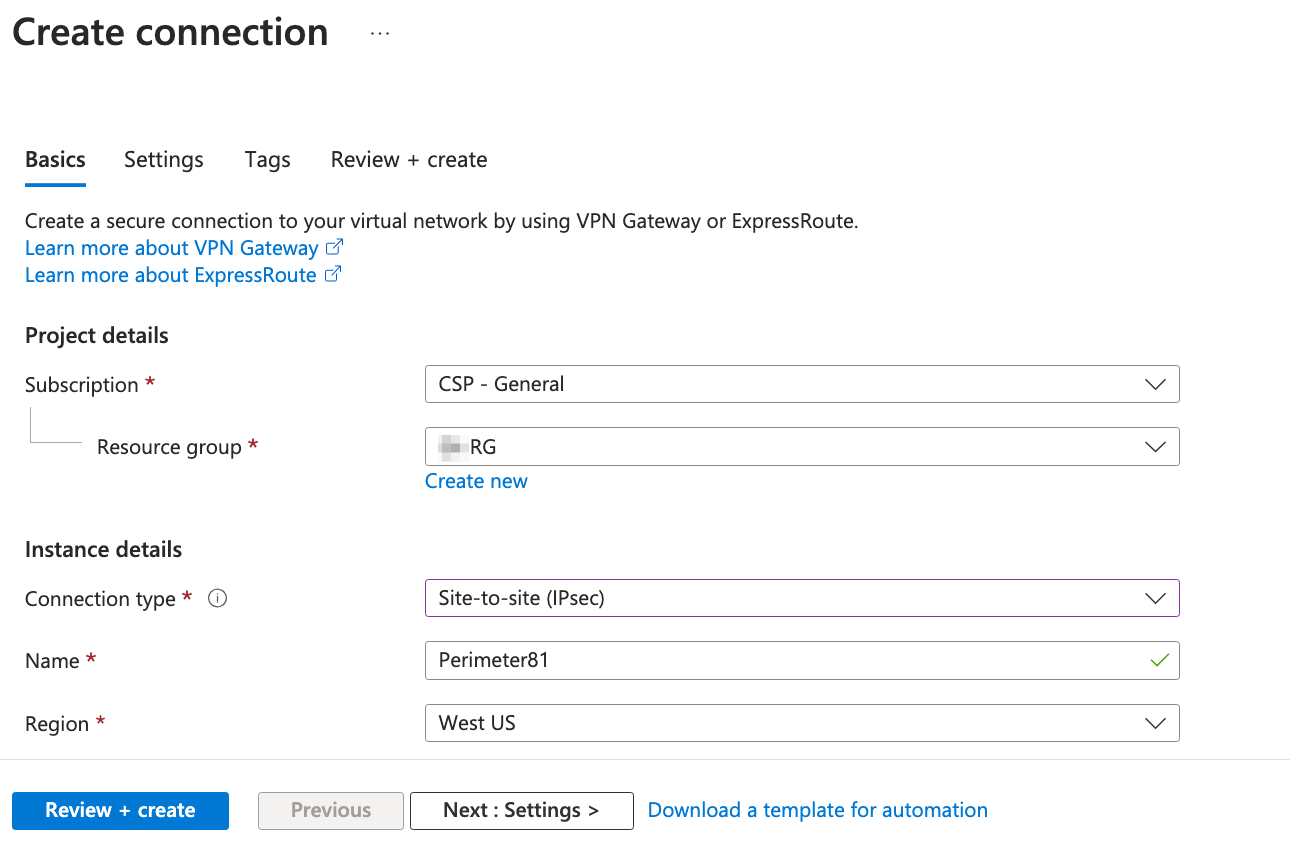
- Click the "Next: Settings >" button.
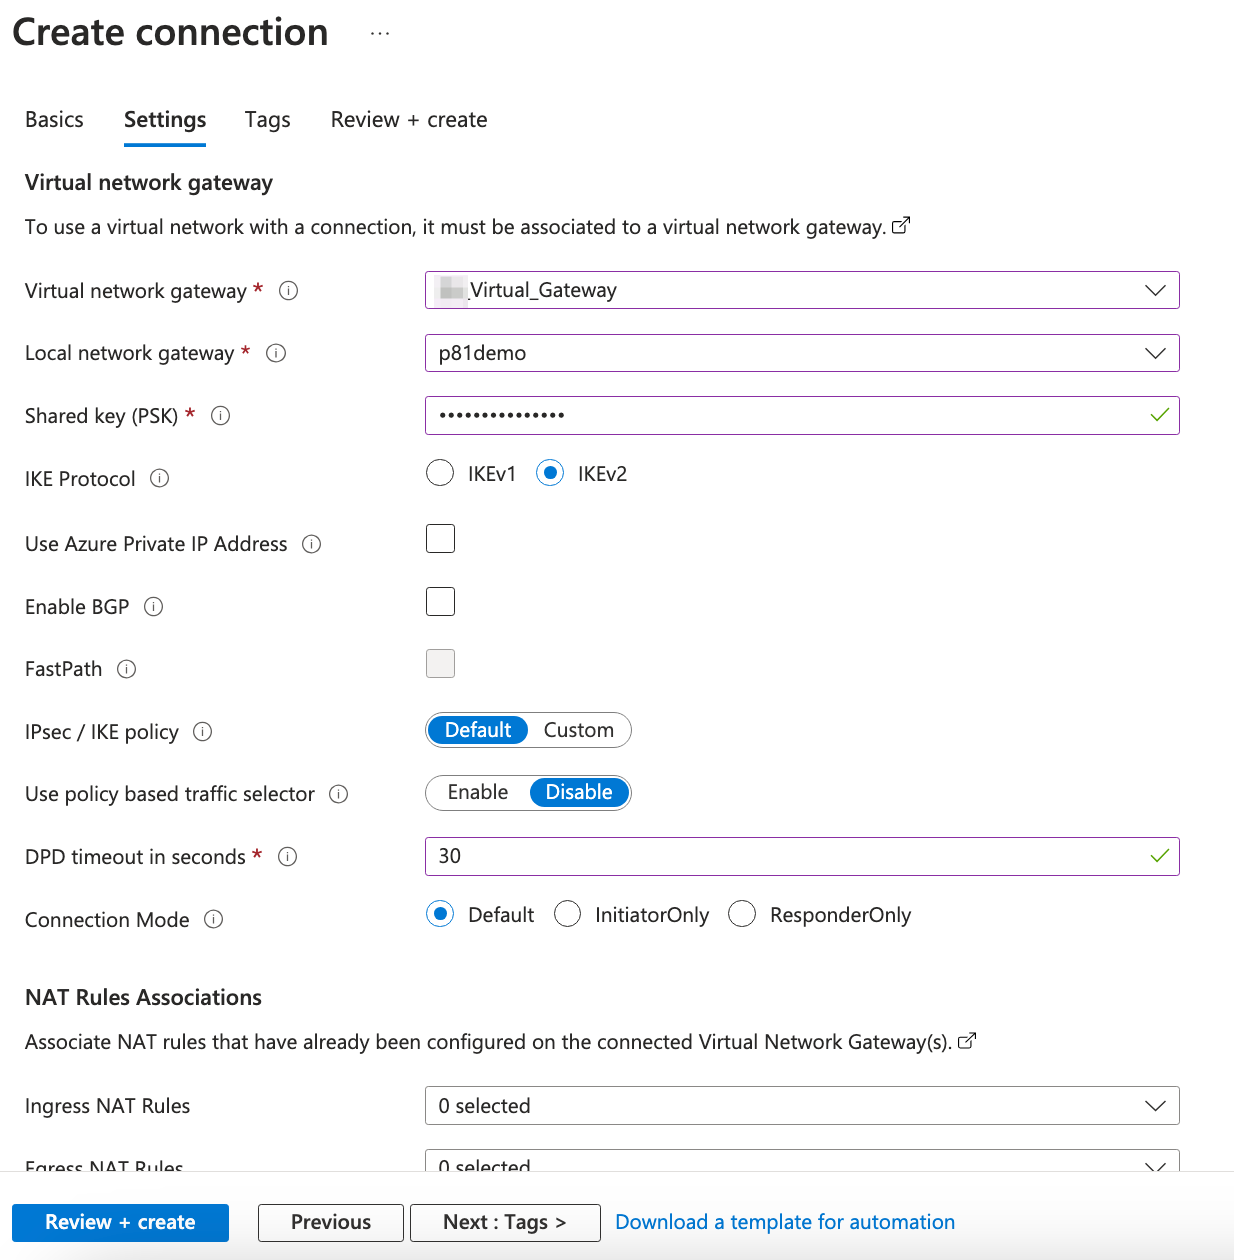
- Virtual network gateway: Since you are connecting from this gateway this value (the IP you received from Azure) is fixed.
- Local network gateway: The local network gateway (your Check Point SASE network address) which you have just created is the fixed value.
- Shared Key (PSK): Create a unique value that will later match the value that you are using for your Check Point SASE tunnel.
- IKE Protocol: Select IKev2.
- DPD timeout in seconds: 30
- Select Review + Create to create your connection.
- Select the connection you just created and select configuration.Under IPsec / IKE policy, choose Custom and use the following values to align with the values set in Check Point SASE's tunnel settingsEncryption: AES256
Integrity/PRF: SHA1
DH Group: DHGroup2IPsec Encryption: AES256
IPsec Integrity: SHA1
PFS Group: PFS2IPsec SA lifetime in KiloBytes: 102400000
IPsec SA lifetime in seconds: 27000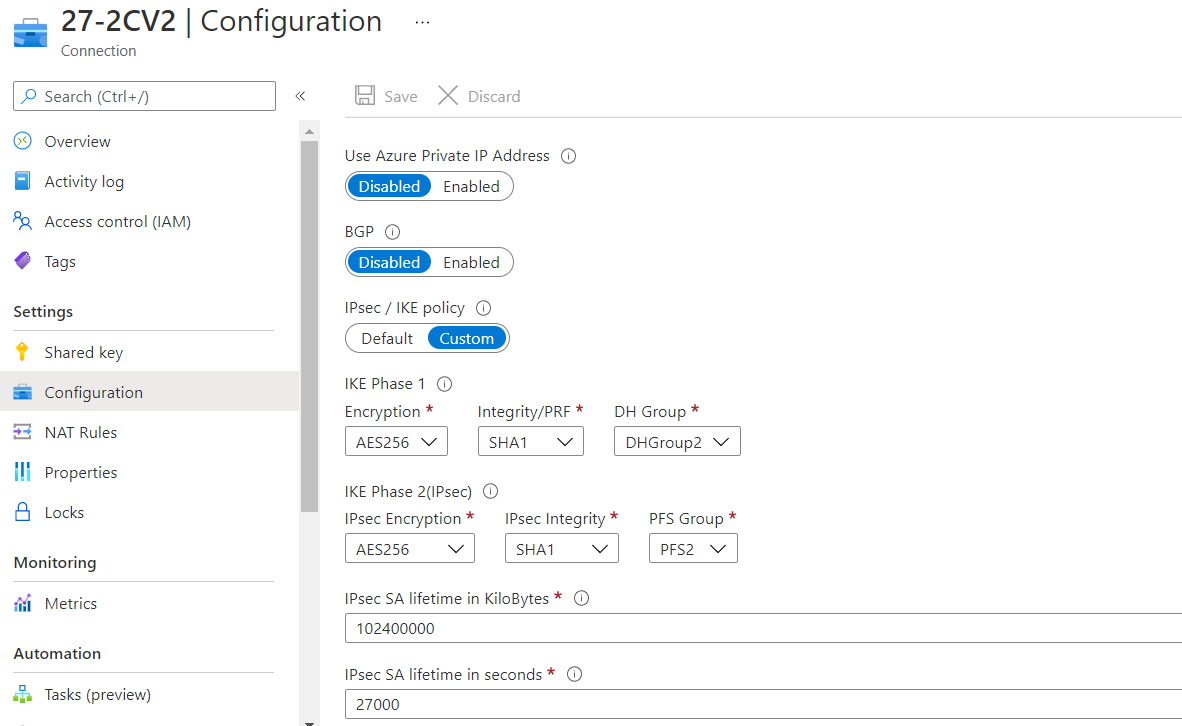
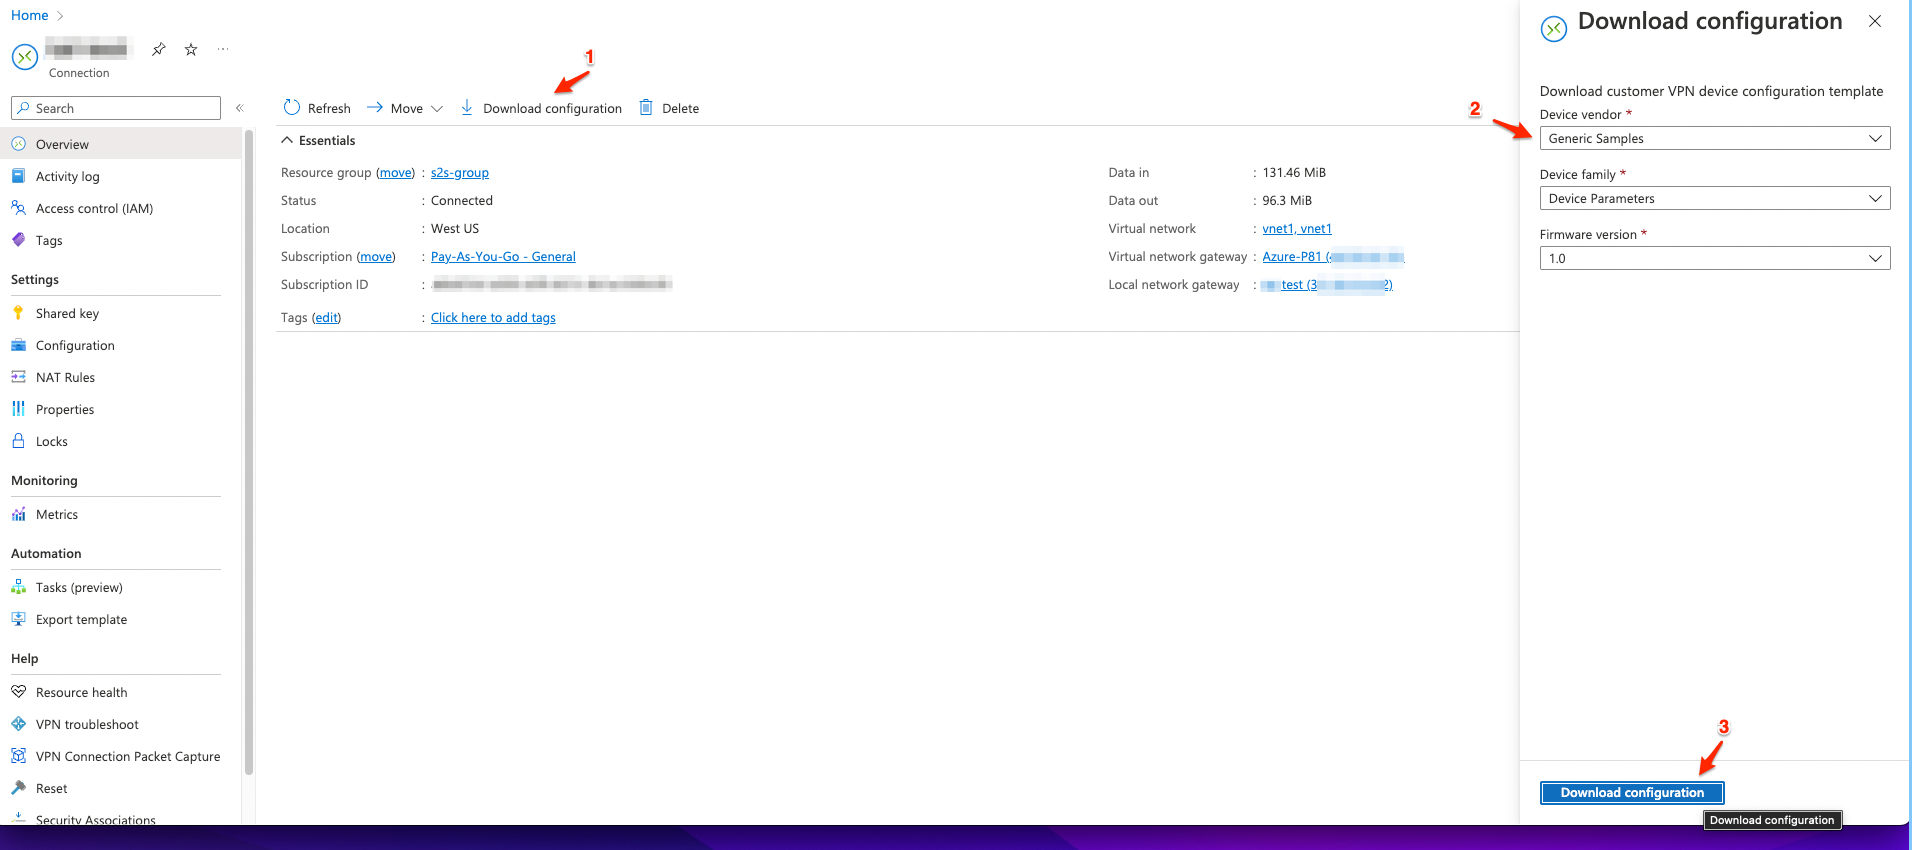
- After you are done, a configuration file can be downloaded by navigating to Overview -> Download configuration
- Select "Generic Samples", then "Device Parameters". For the Firmware version, select 1.0.
- Click "Download Configuration"
Check Point SASE Settings
- Open your Check Point SASE Management Platform and go to the Network tab.
.png)
- Go to the gateway in your network from which you want to create the tunnel to Azure, select the three-dotted menu (...) beside it, and select Add Tunnel.
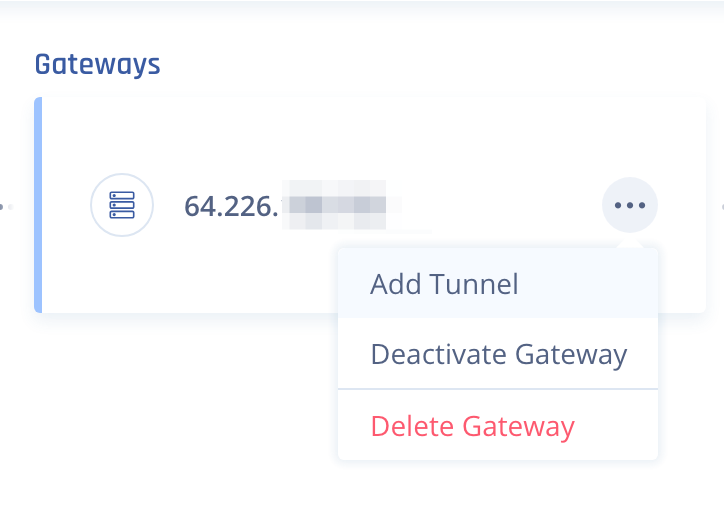
- Select IPSec Site-2-Site Tunnel and select Continue.
- Fill in the fields with the following information:
- Name: Enter a name of your choice.
- Shared Secret: Enter the same Shared secret you set in the Azure Portal.
- Public IP: Enter the Azure Virtual network gateway public IP.
- Remote ID: Enter the Azure Virtual network gateway remote ID.
- Check Point SASE Gateway Proposal Subnets: Any (0.0.0.0/0).
- Remote Gateway Proposal Subnets: Any (0.0.0.0/).
.PNG)
- Advanced Settings
- Open the configuration file that you downloaded earlier, and scroll to [2] IPsec/IKE parameters.
- Fill in your Check Point SASE tunnel configuration per the values in the file.
- For example, if your file looks like this:
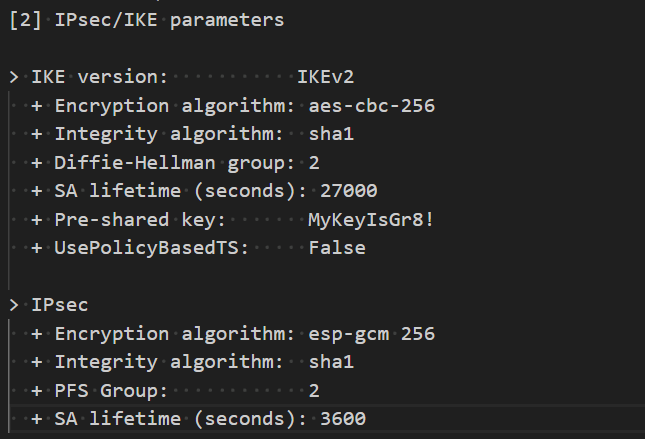
- Specify these:
- IKE Version: V2
- IKE Lifetime: 3600s
- Tunnel Lifetime: 27000s
- Dead Peer Detection Delay: 10s
- Dead Peer Detection Timeout: 45s
- Phase 1:
- Encryption(Phase 1): aes256
- Integrity (Phase 1): sha1
- Key Exchange Method: modp1024
- Phase 2:
- Encryption(Phase 2): aes256
- Integrity (Phase 2): sha1
- Key Exchange Method: modp1024
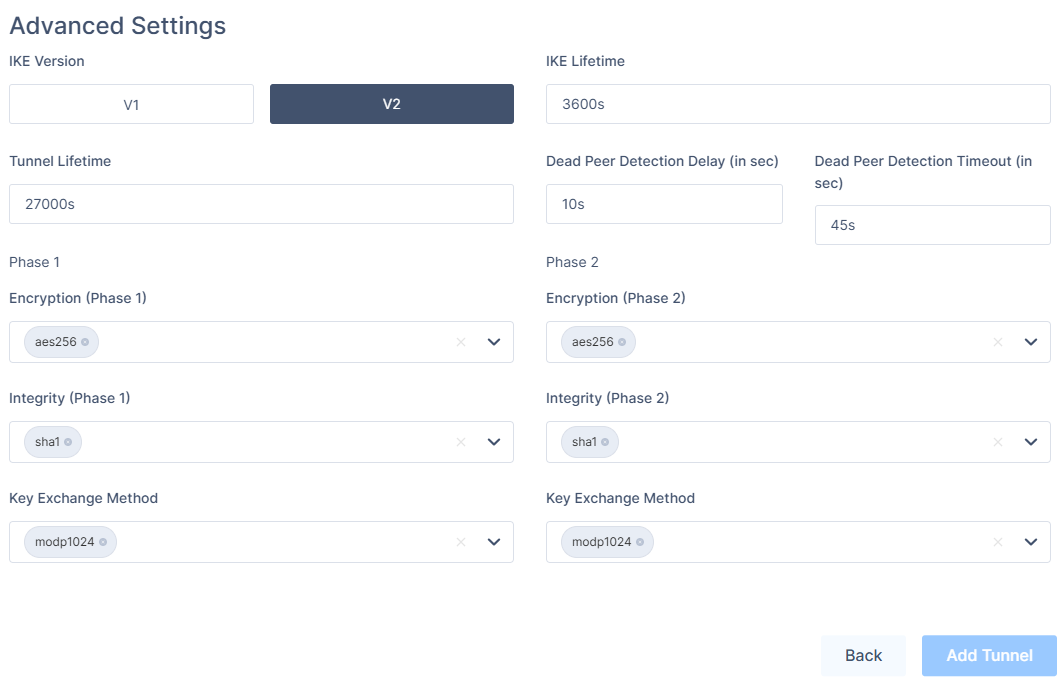
- When the tunnel values match, select Add Tunnel.
- Once the tunnel is done, to add the routes - Click the "..." button at the top right corner of the network -> then select Routes Table.
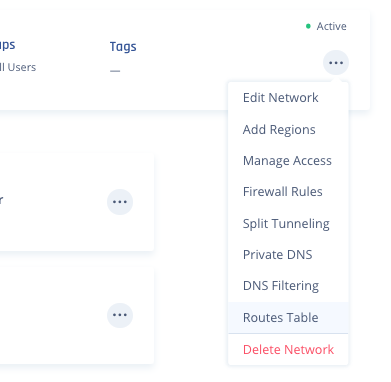
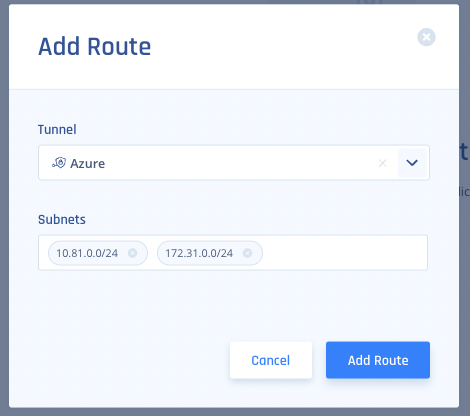
- Click on Add Route.
.png)
- Input all of the Subnets on the Azure Side, then click "Add Route"
- After you are done, click Apply Configuration.

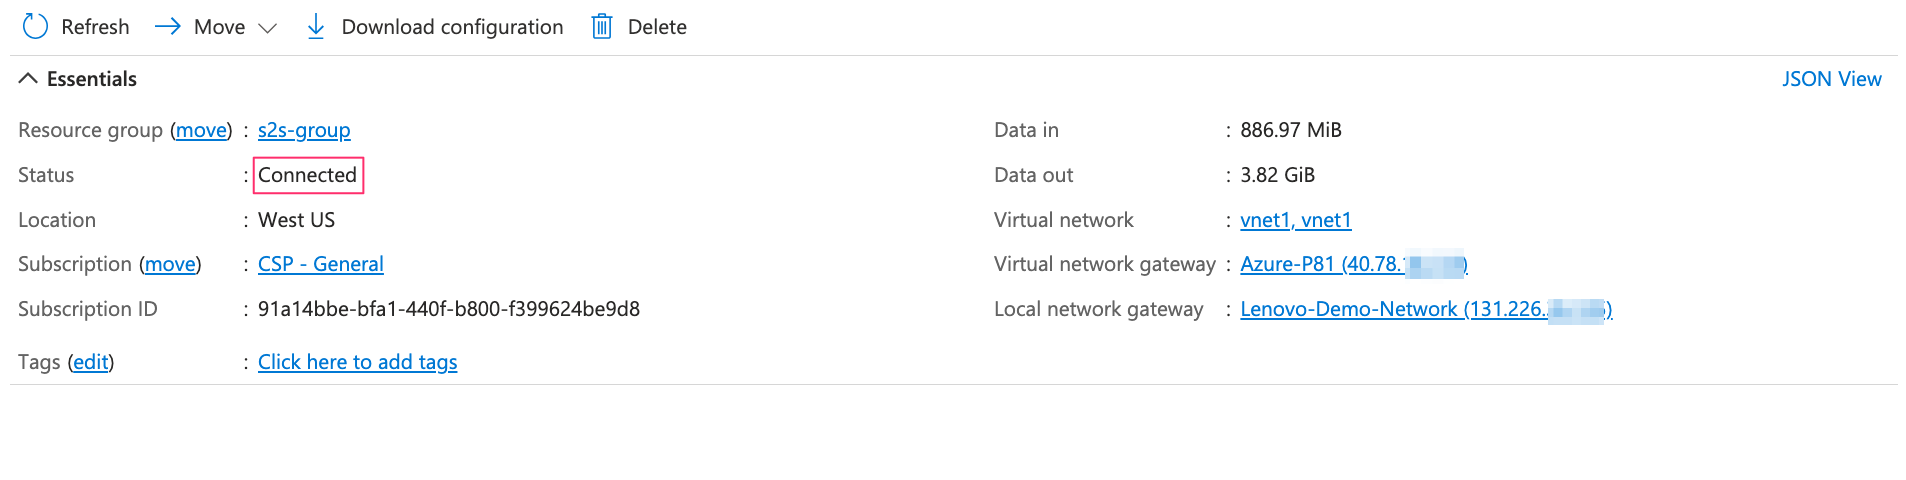
Verifying the VPN connection
- Open your Virtual Network Gateway page.
- Once it opens, go to Settings, and select Connections.
- Select the connection you created. Under the Overview tab, make sure that the Status is Connected and that there is data going out and coming in.
Verifying the Setup
Once set up, your redundant tunnels should be active. To confirm, go to your Check Point SASE dashboard, find the tunnels you started, and ensure their status shows "Up". Connect to your network with the Check Point SASE agent and try accessing resources in your Azure environment.
Troubleshooting
If you encounter issues during or after the setup, try reviewing your settings to ensure everything matches the instructions. In particular, check the IP addresses and other details you entered during setup. If issues persist, please consult our dedicated support.
Support Contacts
If you have any difficulties or questions, don't hesitate to contact Check Point SASE's support team. We offer 24/7 chat support on our website at sase.checkpoint.com, or you can email us at sase-support@checkpoint.com. We're here to assist you and ensure your VPN tunnel setup is a success.