
Understanding Data Exporting to S3 bucket
- The Amazon S3 integration in Check Point SASE is planned for deprecation.
- The integration stops working on December 1, 2026.
- Customers without an existing configuration no longer see this integration as an available option in the portal.
Recommended action - Migrate to the export option available in the Check Point Infinity Portal before December 1, 2026. This action prevents disruption to log forwarding.
The configuration steps remain available for reference while the integration stays active for existing customers.
This article describes the Amazon S3 service and how to configure it. Amazon Simple Storage Service (Amazon S3) is an object storage service that offers industry-leading scalability, data availability, security, and performance. You can configure your Check Point SASE data stream to an S3 bucket to have full visibility of your Check Point SASE activity.
Create a new Bucket
- Open the AWS Management Console and select S3.
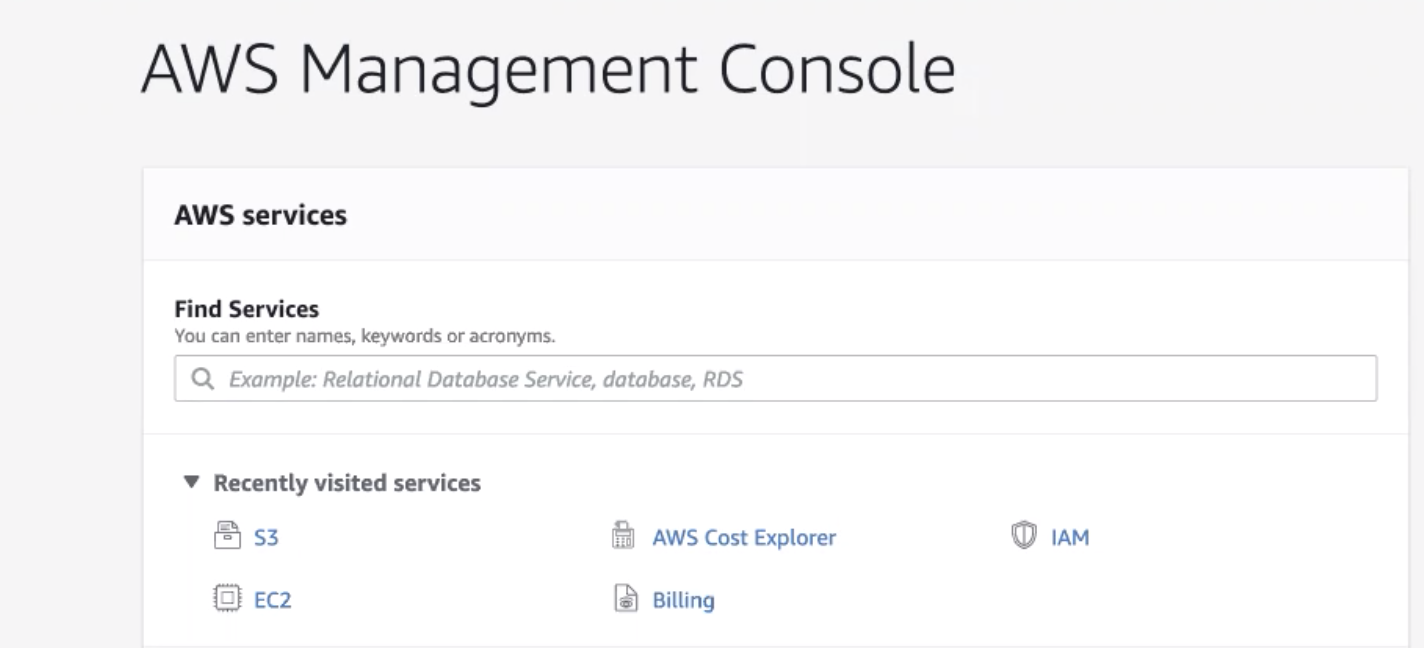
- Select Create Bucket.

- Fill in the following information:
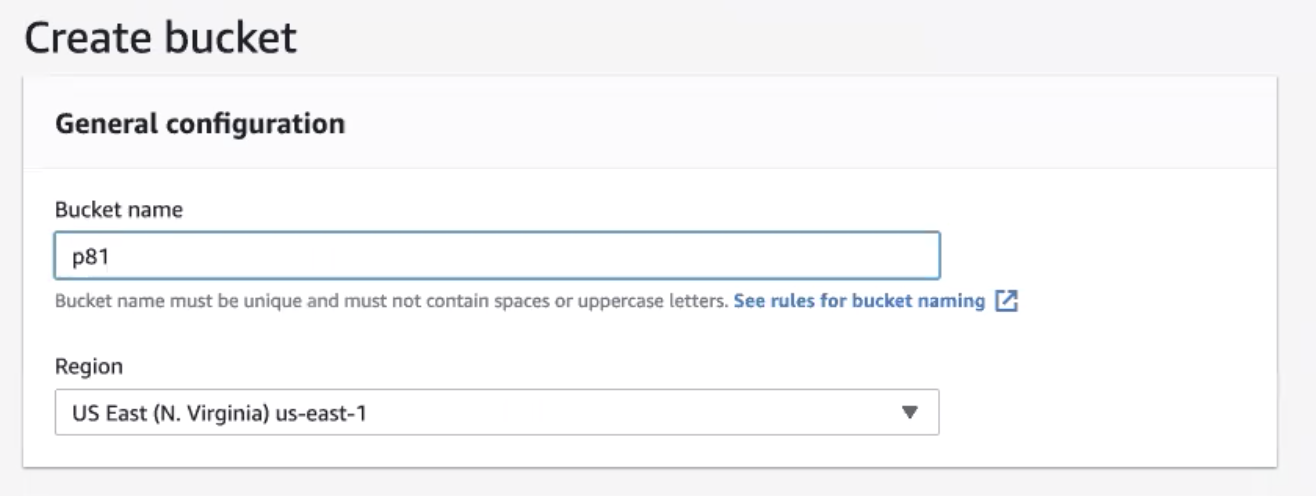
- Bucket name: Enter a name of your choice
Please note that Check Point SASE doesn't support "-" or "." (dots), please use letters only. - Region: Amazon S3 creates buckets in a Region you specify. To optimize latency, minimize costs, or address regulatory requirements, choose any AWS Region that is geographically close to you.
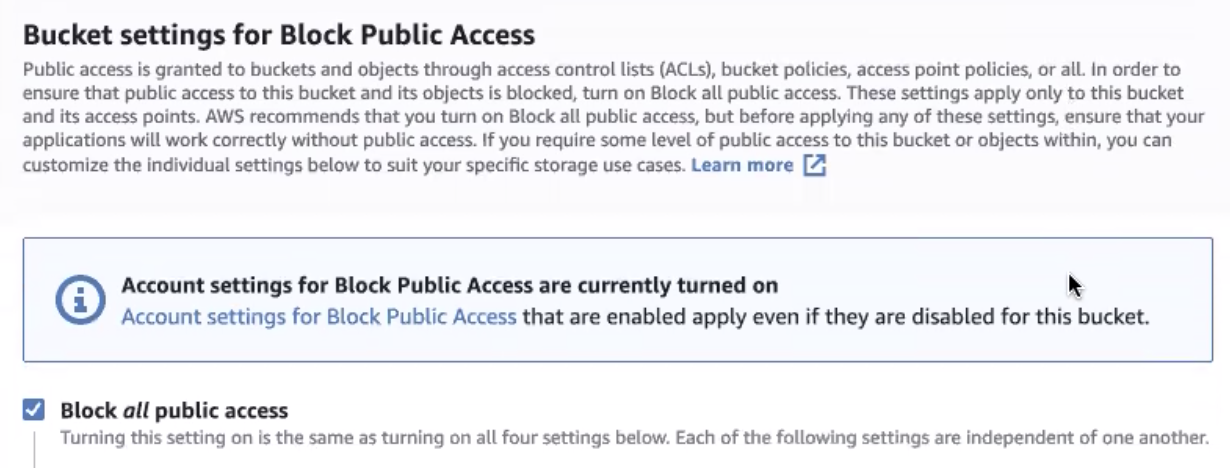
- Block all public access is checked by default. You may choose to customize it according to your company policy.
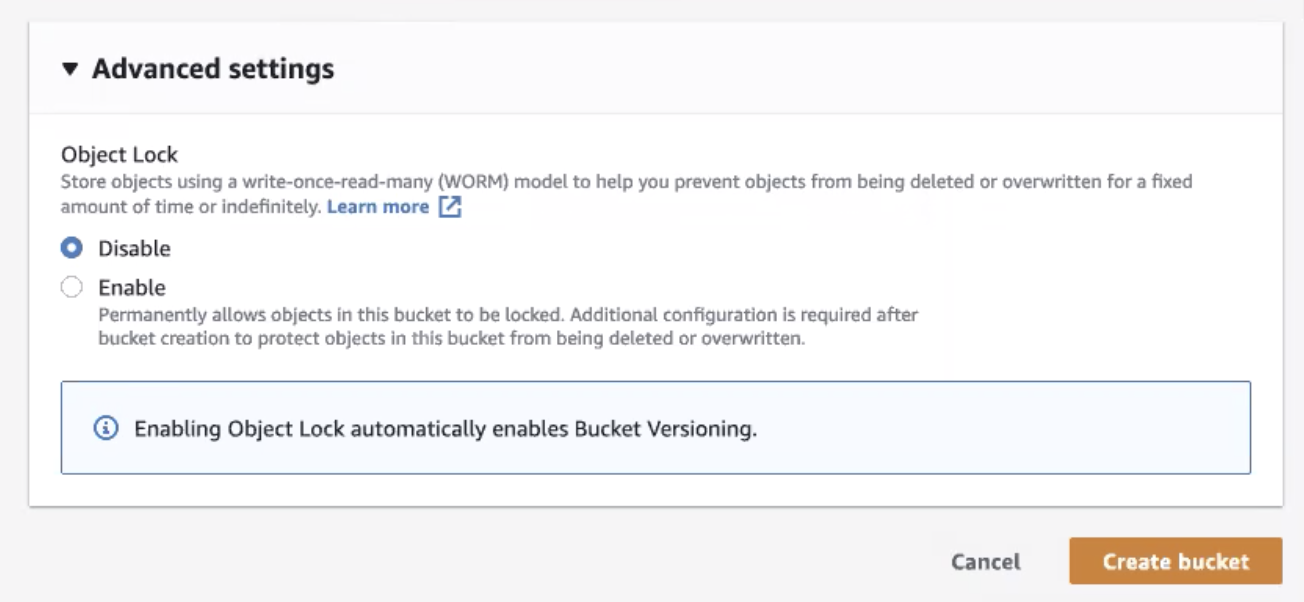
- Disable object lock, then select Create bucket.
Create a new IAM Policy
Important: At this point, you can choose to grant the user full access to your S3 buckets (by attaching the appropriate AWS managed policy) or create a new policy that applies only to the Check Point SASE bucket. If you choose the first option, you may skip this section.
- Open the AWS Identity and Access Management (IAM) dashboard.
- Go to the Policies tab and select Create policy.
- Paste the following snippet as a JSON file. Replace test with the bucket name, then select Review policy.
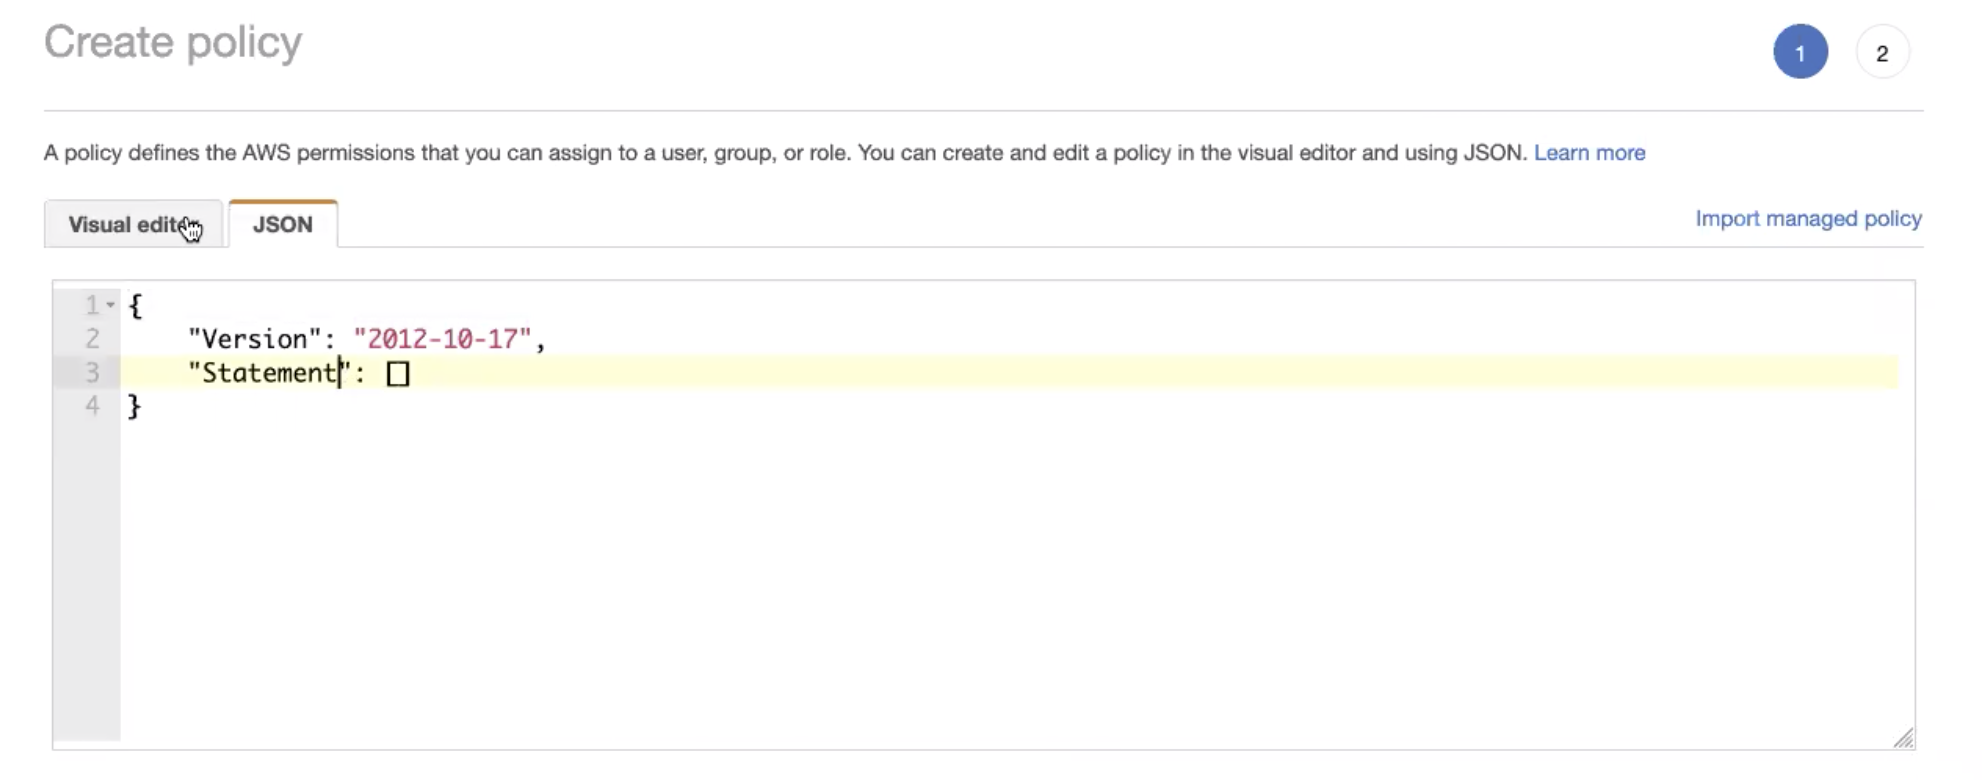
{
    "Version": "2012-10-17",
    "Statement": [
        {
            "Effect": "Allow",
            "Action": "s3:*",
            "Resource": "arn:aws:s3:::test"
        },
        {
            "Effect": "Allow",
            "Action": "s3:*",
            "Resource": "arn:aws:s3:::test/*"
        }
    ]
}{
"Version" : "2012-10-17",
"Statement" : [
{
"Effect" : "Allow" ,
"Action" : [
"s3:ListBucket",
"s3:GetBucketLocation"
],
"Resource" : ["${aws_s3_bucket.pm81-logs.arn}"]
},
{
"Effect" : "Allow" ,
"Action" : [
"s3:PutObject" ,
"s3:GetObject" ,
"s3:DeleteObject" ],
"Resource" : ["${aws_s3_bucket.pm81-logs.arn}/*" ]
}
]}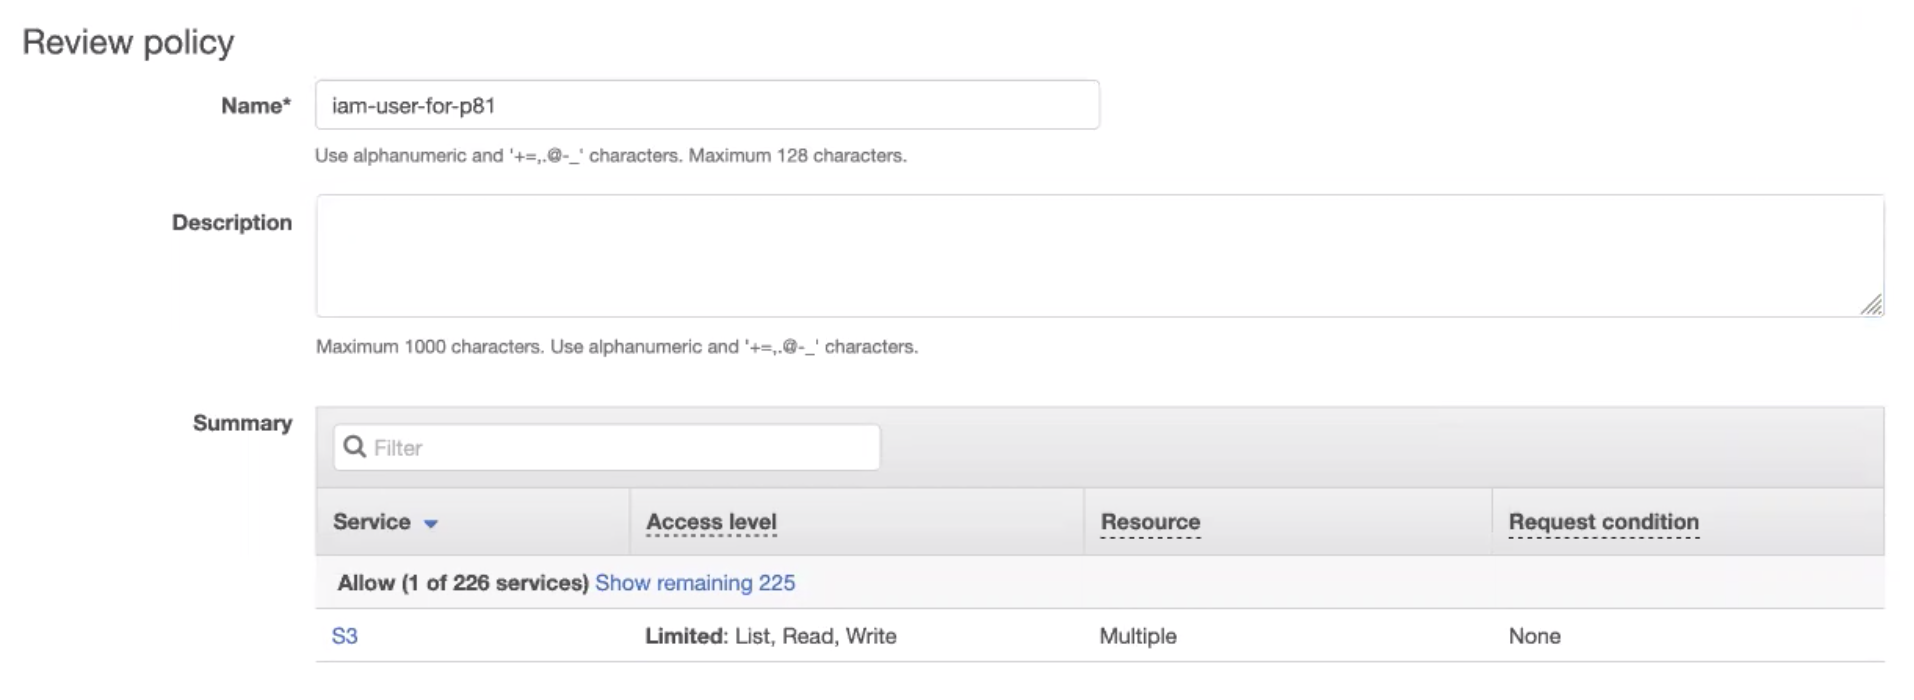
4. Fill in the following information, and then select Create policy.
- Name: Enter a name of your choice.
- Description (optional): Let other users in your account know what this policy aims for.
Create an AWS user
- Open the AWS Identity and Access Management (IAM ) dashboard.
- Go to the Users tab and select Add user.
- Username: Enter a name of your choice.
And select next.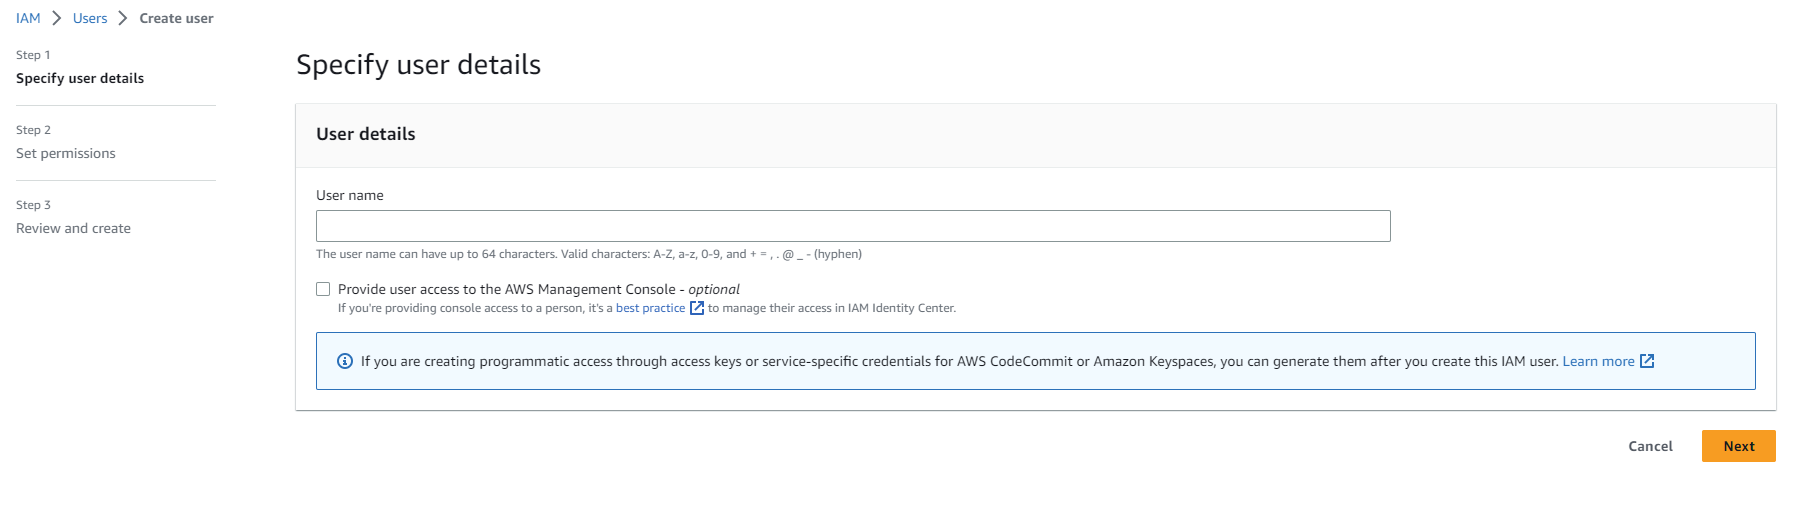
- Username: Enter a name of your choice.
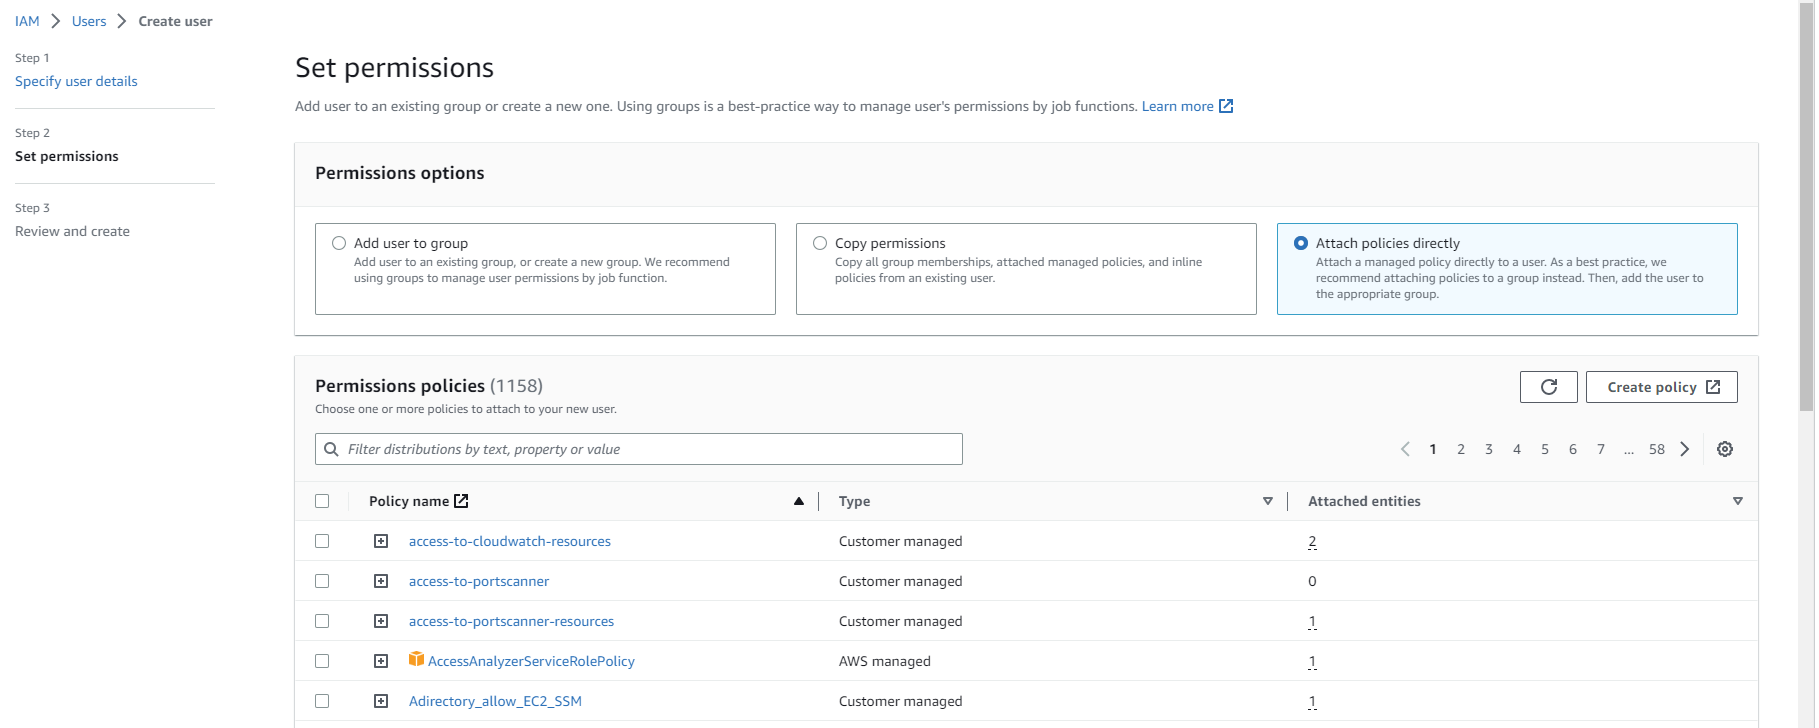
- Select Attach existing policies directly and choose the policy you created earlier (if you skipped the previous section, select the S3 full access AWS managed policy). Select Next.
Create an AWS access key
- Open the AWS Identity and Access Management (IAM ) dashboard.
Navigate to the Users tab and select the user you have created.Navigate to the Security credentials tab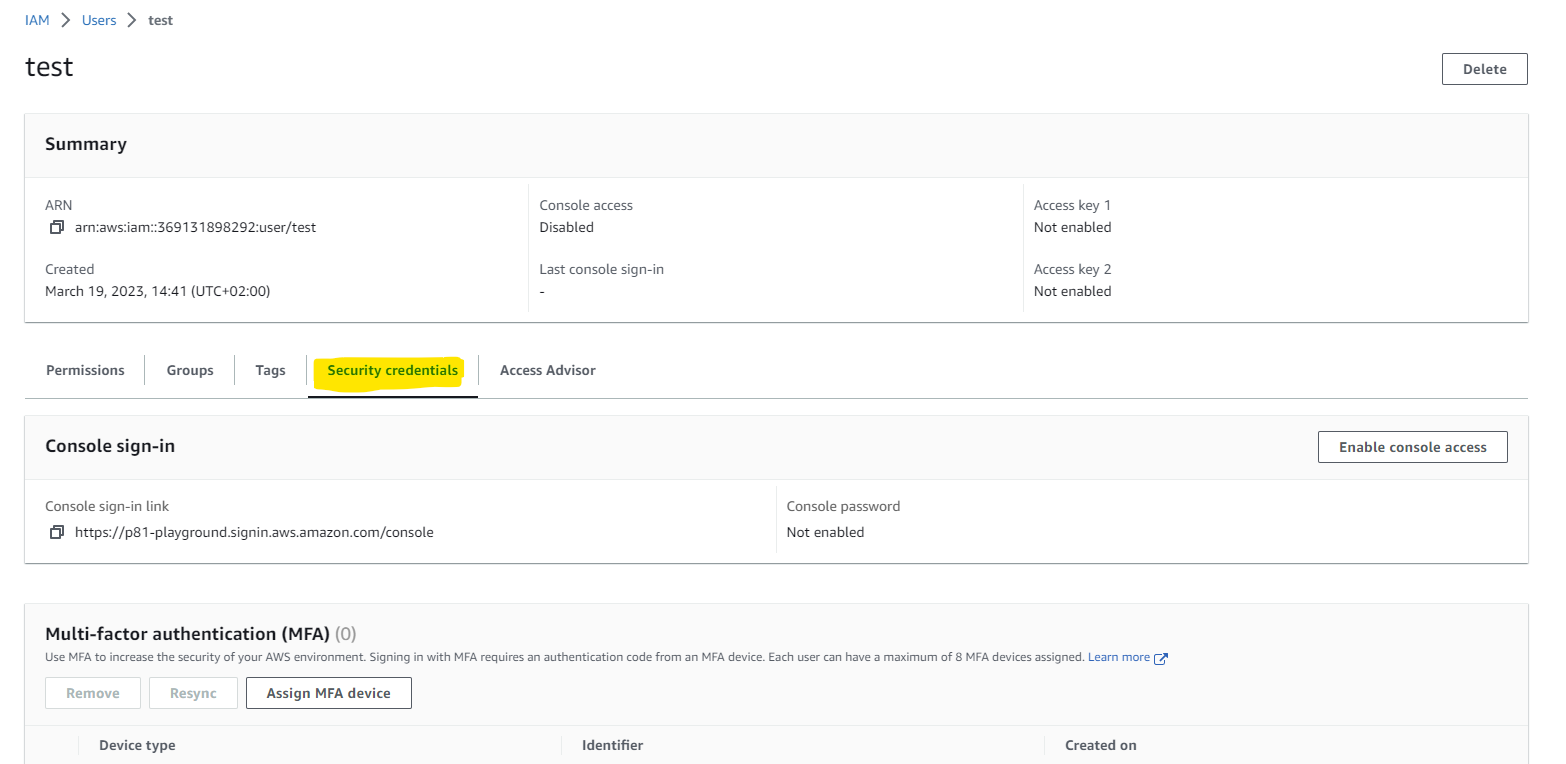
- Scroll down to Access keys and select Create access key

Choose Application running outsideAWS and click next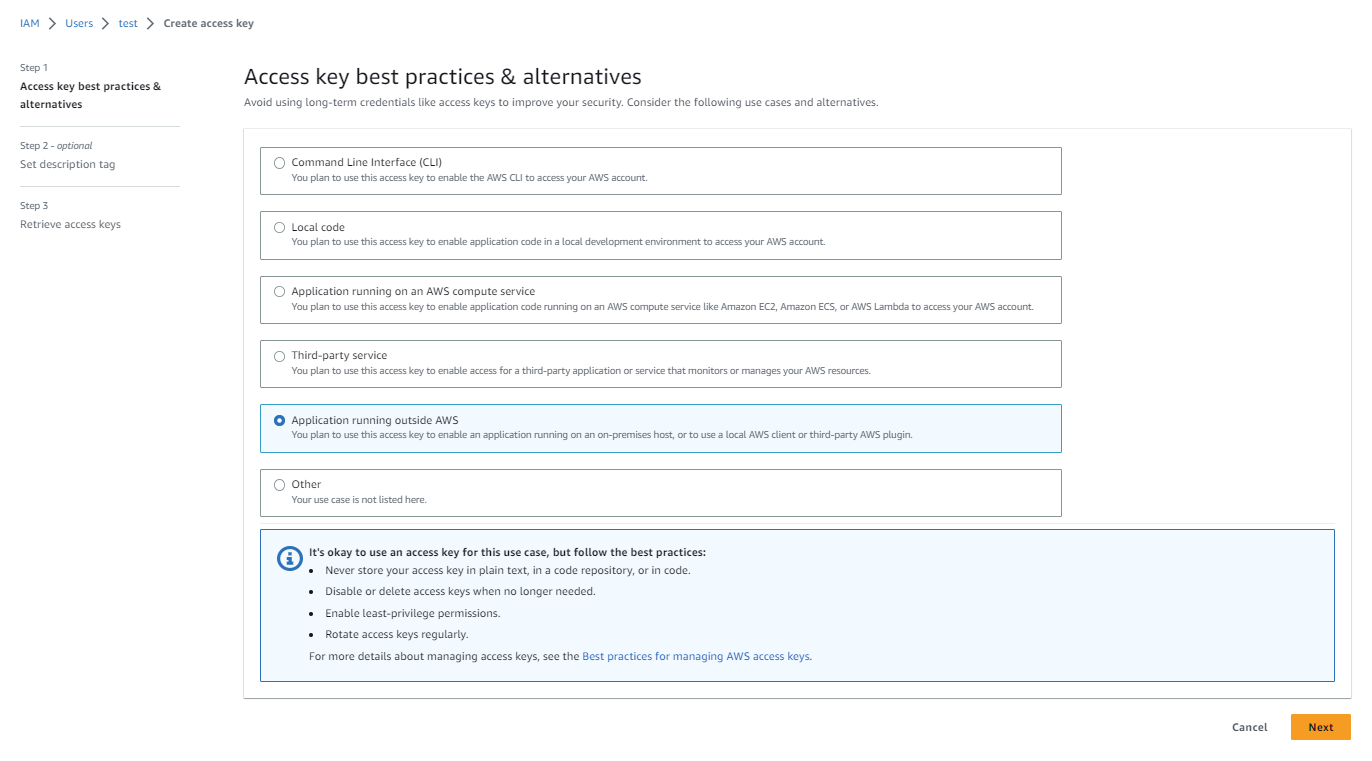
Choose Create access key (you can add Description tag value if you like)Copy the Secret accesskey and the Access key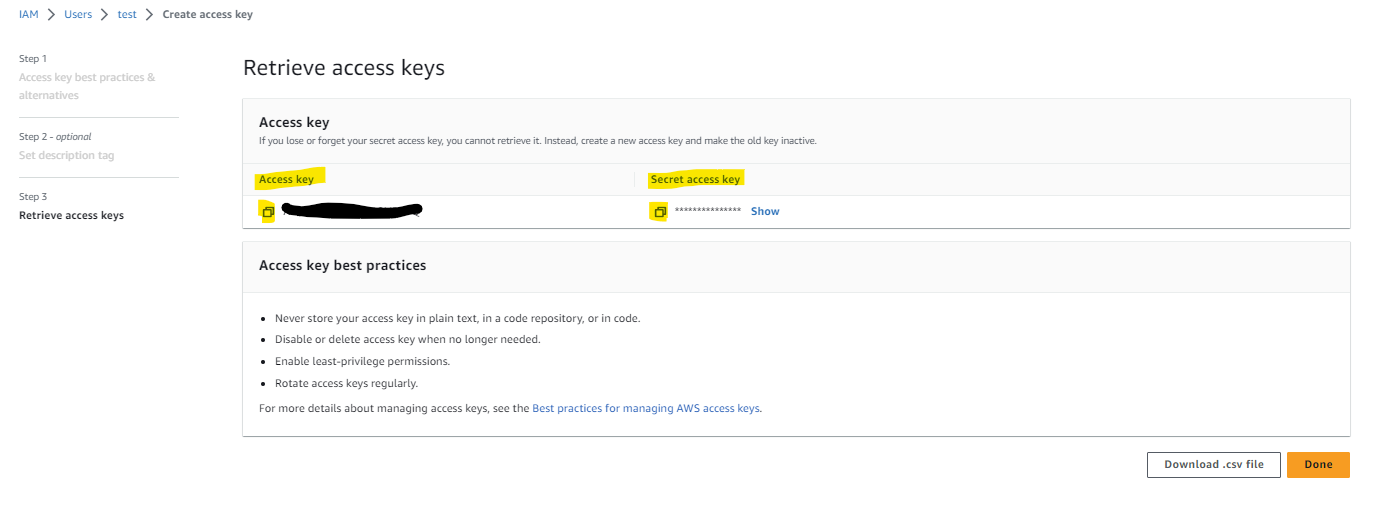
Connect the S3 bucket to Check Point SASE
- Log in to your Check Point SASE Management Platform, and navigate to Settings/Integrations, and select Add at the Amazon S3 row.

- Fill in according to the values copied in the previous steps (the primary key will be used as your workspace key)
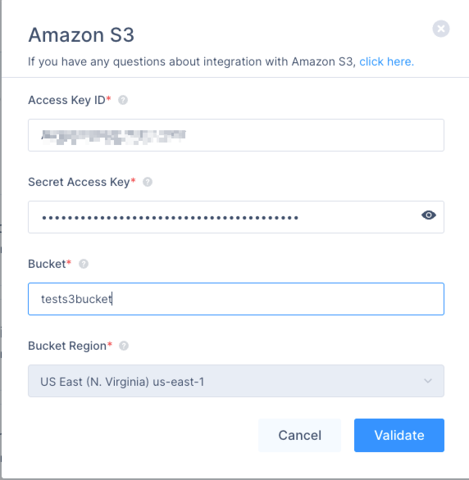
Access key ID = Access key (copied from AWS)Secret access key = Secret access key (copied from AWS)Bucket = Your S3 Bucket Identifier(for example- if your bucket name is "arn:aws:s3:::tests3bucket", you will only need to input "tests3bucket")Bucket region = The region youchose in the first step
- Select Validate.
Recommendations
- Ensure that the IAM user has the necessary permissions to access the S3 bucket.
- Regularly review and update your S3 bucket settings to align with your organization's security policies.
- When setting up the integration, double-check the provided AWS credentials to avoid connectivity issues
- US tenant:
- 44.199.0.186
- 44.198.227.127
- 50.19.134.176
- 23.20.83.77
- 54.85.165.134
- EU tenant:
- 52.50.186.78
- 79.125.50.175
- 34.246.127.40
Troubleshooting
| Status message | Action required |
| Success | None |
| S3_INVALID_ACCESS_KEY_ID | Make sure you copied correctly the access key ID |
| S3_INVALID_SECRET_ACCESS_KEY | Make sure you copied correctly the secret access key. |
| S3_INVALID_BUCKET | Make sure the Bucket name in Check Point SASE matched the Bucket name in S3 (case sensitive). |
| S3_ACCESS_DENIED_BUCKET | The IAM user doesn't have the required access permissions to the bucket. Make sure to attach the appropriate policy. |
Support Contacts
If you have any difficulties or questions, don't hesitate to contact Check Point SASE's support team. We offer 24/7 chat support on our website at sase.checkpoint.com, or you can email us at sase-support@checkpoint.com. We're here to assist you and ensure your VPN tunnel setup is a success.