
Introduction
This article provides a comprehensive guide on how to set up PingOne for Enterprise as an identity provider.
By integrating with PingOne, Check Point SASE can authenticate users using the Security Assertion Markup Language (SAML) protocol, ensuring a secure and streamlined login experience.
Steps
- Log in to your PingOne for Enterprise account.
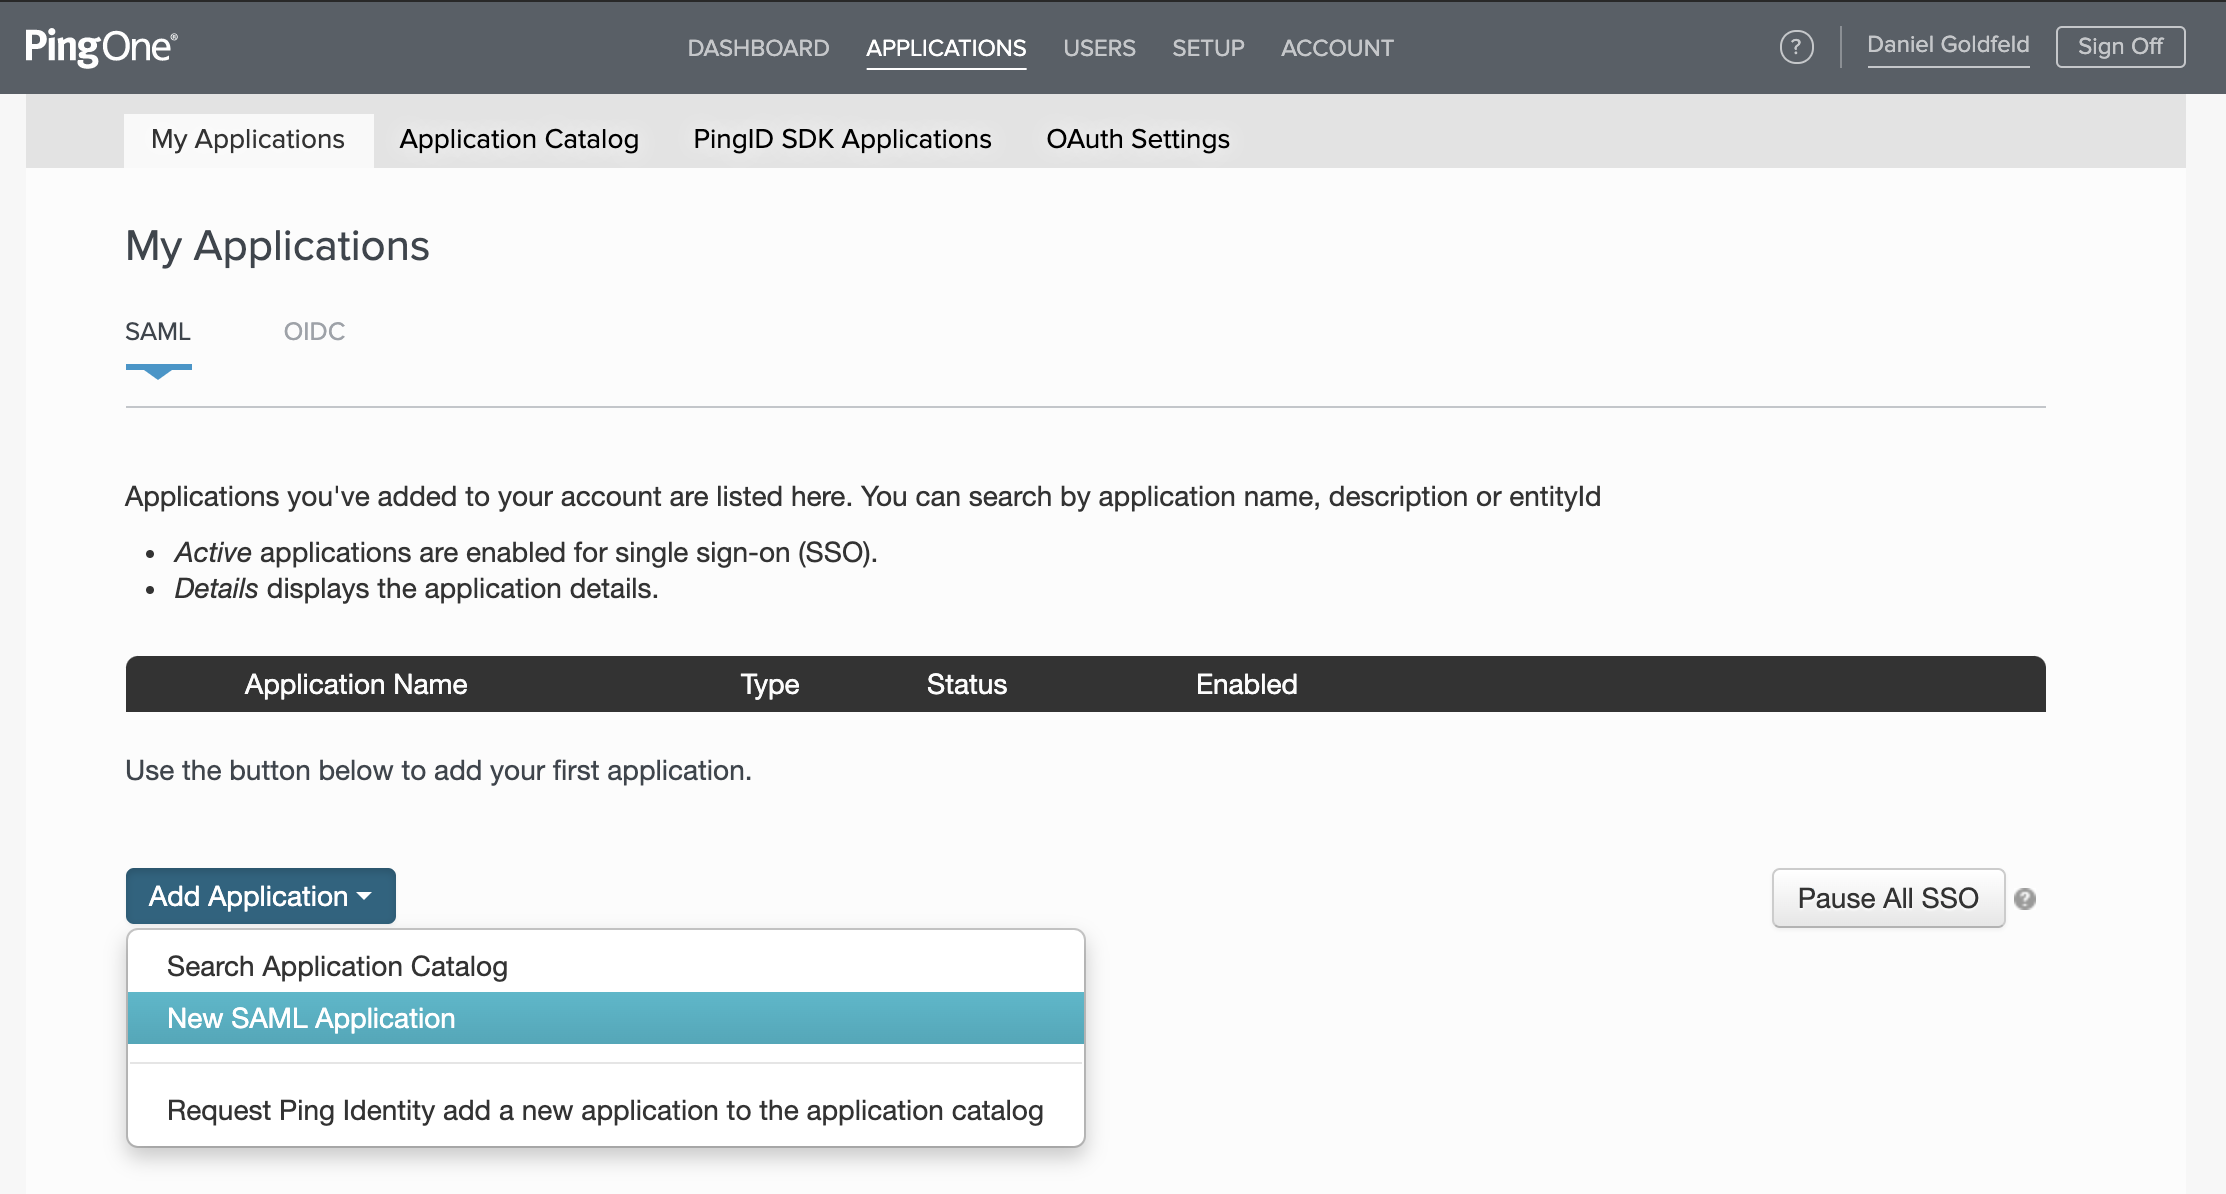
- On the upper toolbar in your PingOne for Enterprise screen select Applications. This takes you to the My Applications screen.
- Click on SAML. Open the Add Application drop-down and select New SAML Application
- On the pop-up window, fill in the following details:
- Application Name: Check Point SASE
- Application Description: Check Point SASE SAML Connection
- Category: Information Technology
- Graphics: Add the Check Point SASE Logo (Optional)
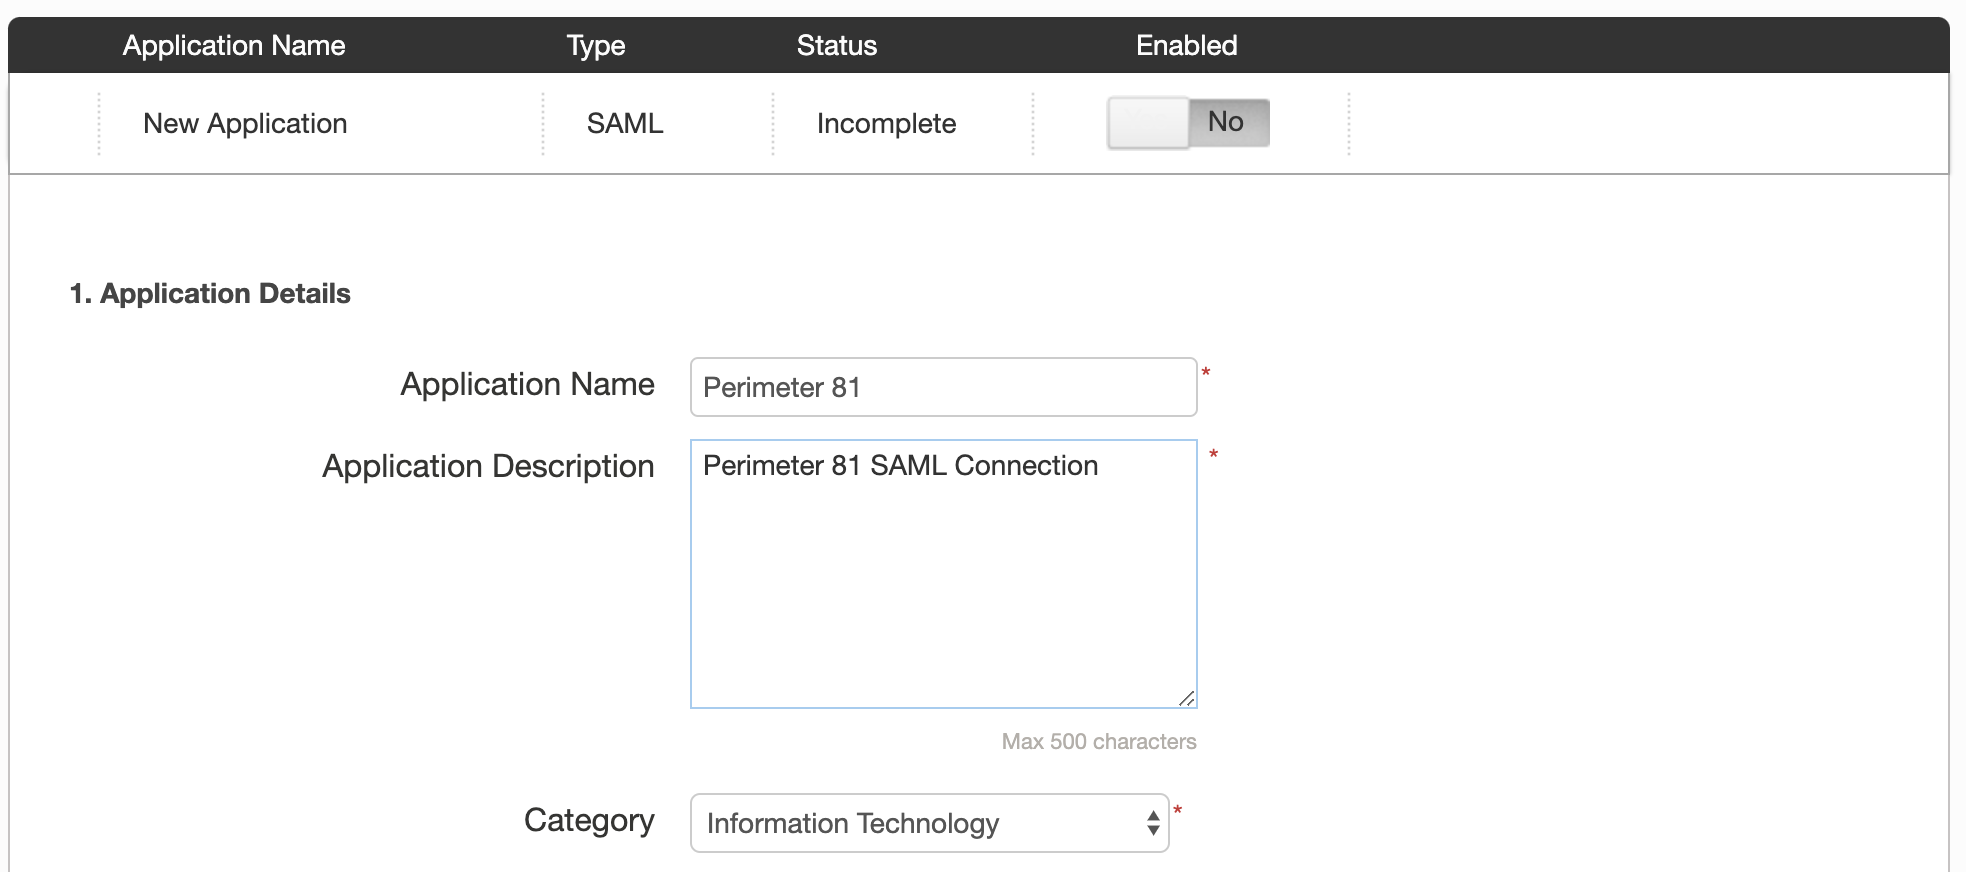
6. Click Continue to Next Step to proceed.
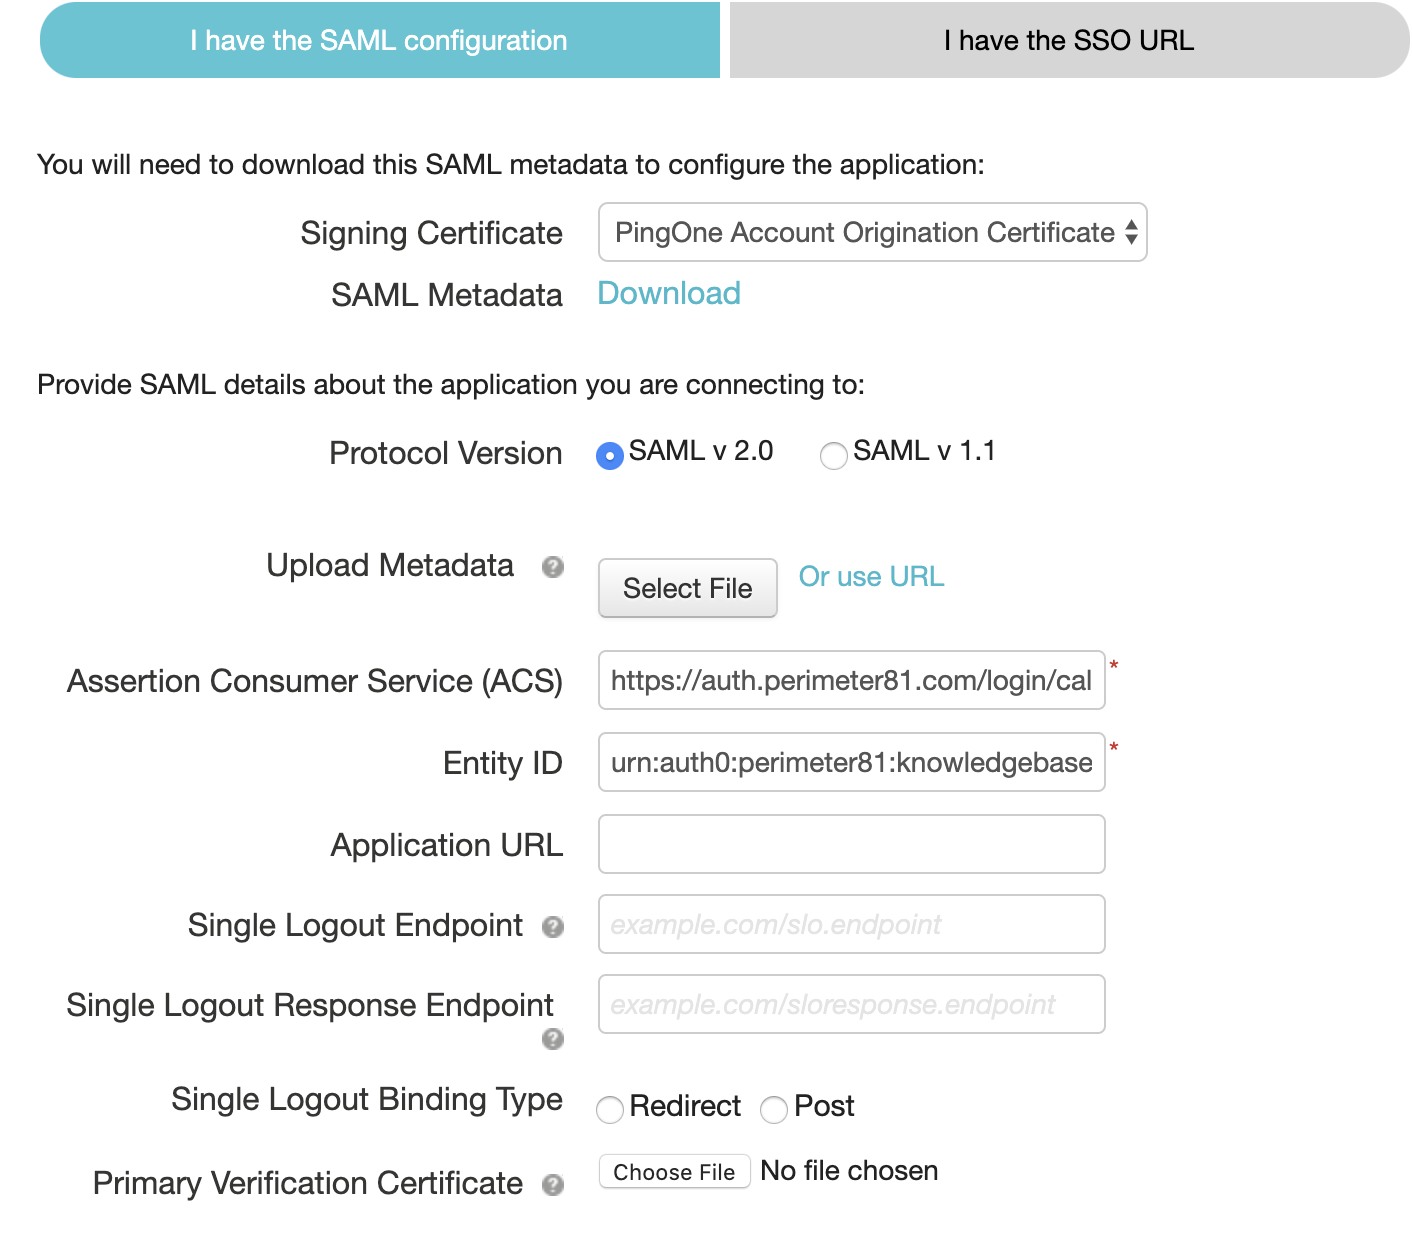
7. On the Application Configuration window click on I have the SAML configuration.
8. Fill in the following information:
- Signing Certificate: PingOne Account Origination Certificate
- Protocol Version: SAML v 2.0
- Assertion Consumer Service (ACS):
- For US based platform - https://auth.perimeter81.com/login/callback?connection={{WORKSPACE}}-oc
- For EU based platform - https://auth.eu.sase.checkpoint.com/login/callback?connection={{WORKSPACE}}-oc
- For AU based platform - https://auth.au.sase.checkpoint.com/login/callback?connection={{WORKSPACE}}-oc
- For IN based platform - https://auth.in.sase.checkpoint.com/login/callback?connection={{WORKSPACE}}-oc
- Entity ID:
- US based platform - urn:auth0:perimeter81:{{WORKSPACE}}-oc
- EU based platform - urn:auth0:eu-sase-checkpoint:{{WORKSPACE}}-oc
- AU based platform - urn:auth0:au-sase-checkpoint:{{WORKSPACE}}-oc
- IN based platform - urn:auth0:in-sase-checkpoint:{{WORKSPACE}}-oc
Note: The workspace should be changed to your Check Point SASE tenant name.
9. Click Continue to Next Step to proceed.
10. On the SSO Attribute Mapping window, you will need to map the following attributes:
| Application Attribute | Identity Bridge Attribute or Literal Value |
|---|---|
| given_name | First Name |
| family_name | Last Name |
| groups | memberOf |
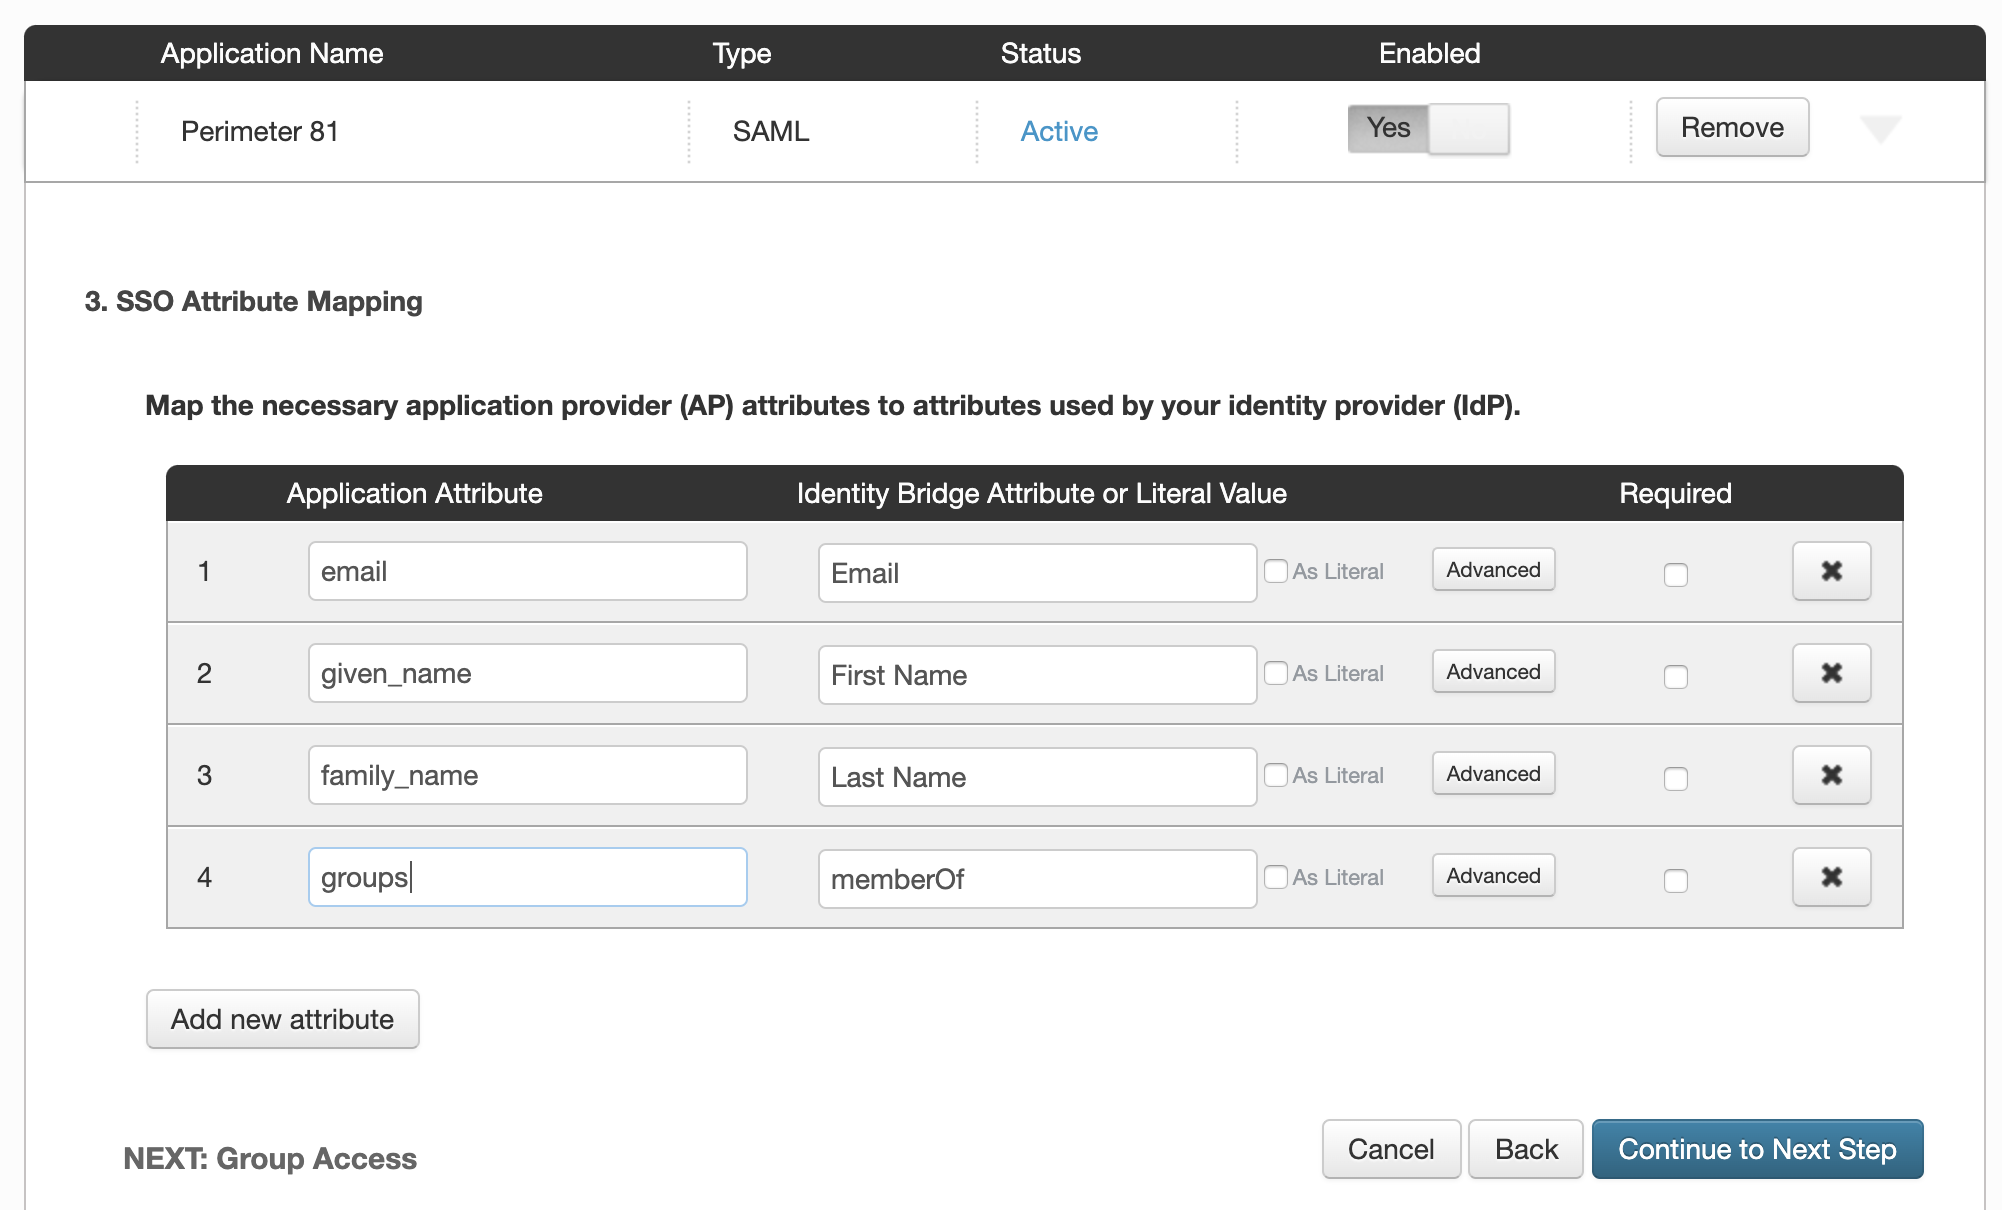
11. Click Continue to Next Step to proceed.
12. On the Group Access window select the user groups that should have access to the PingOne for Enterprise Login Page. To allow access to all users we recommend adding Users@Directory.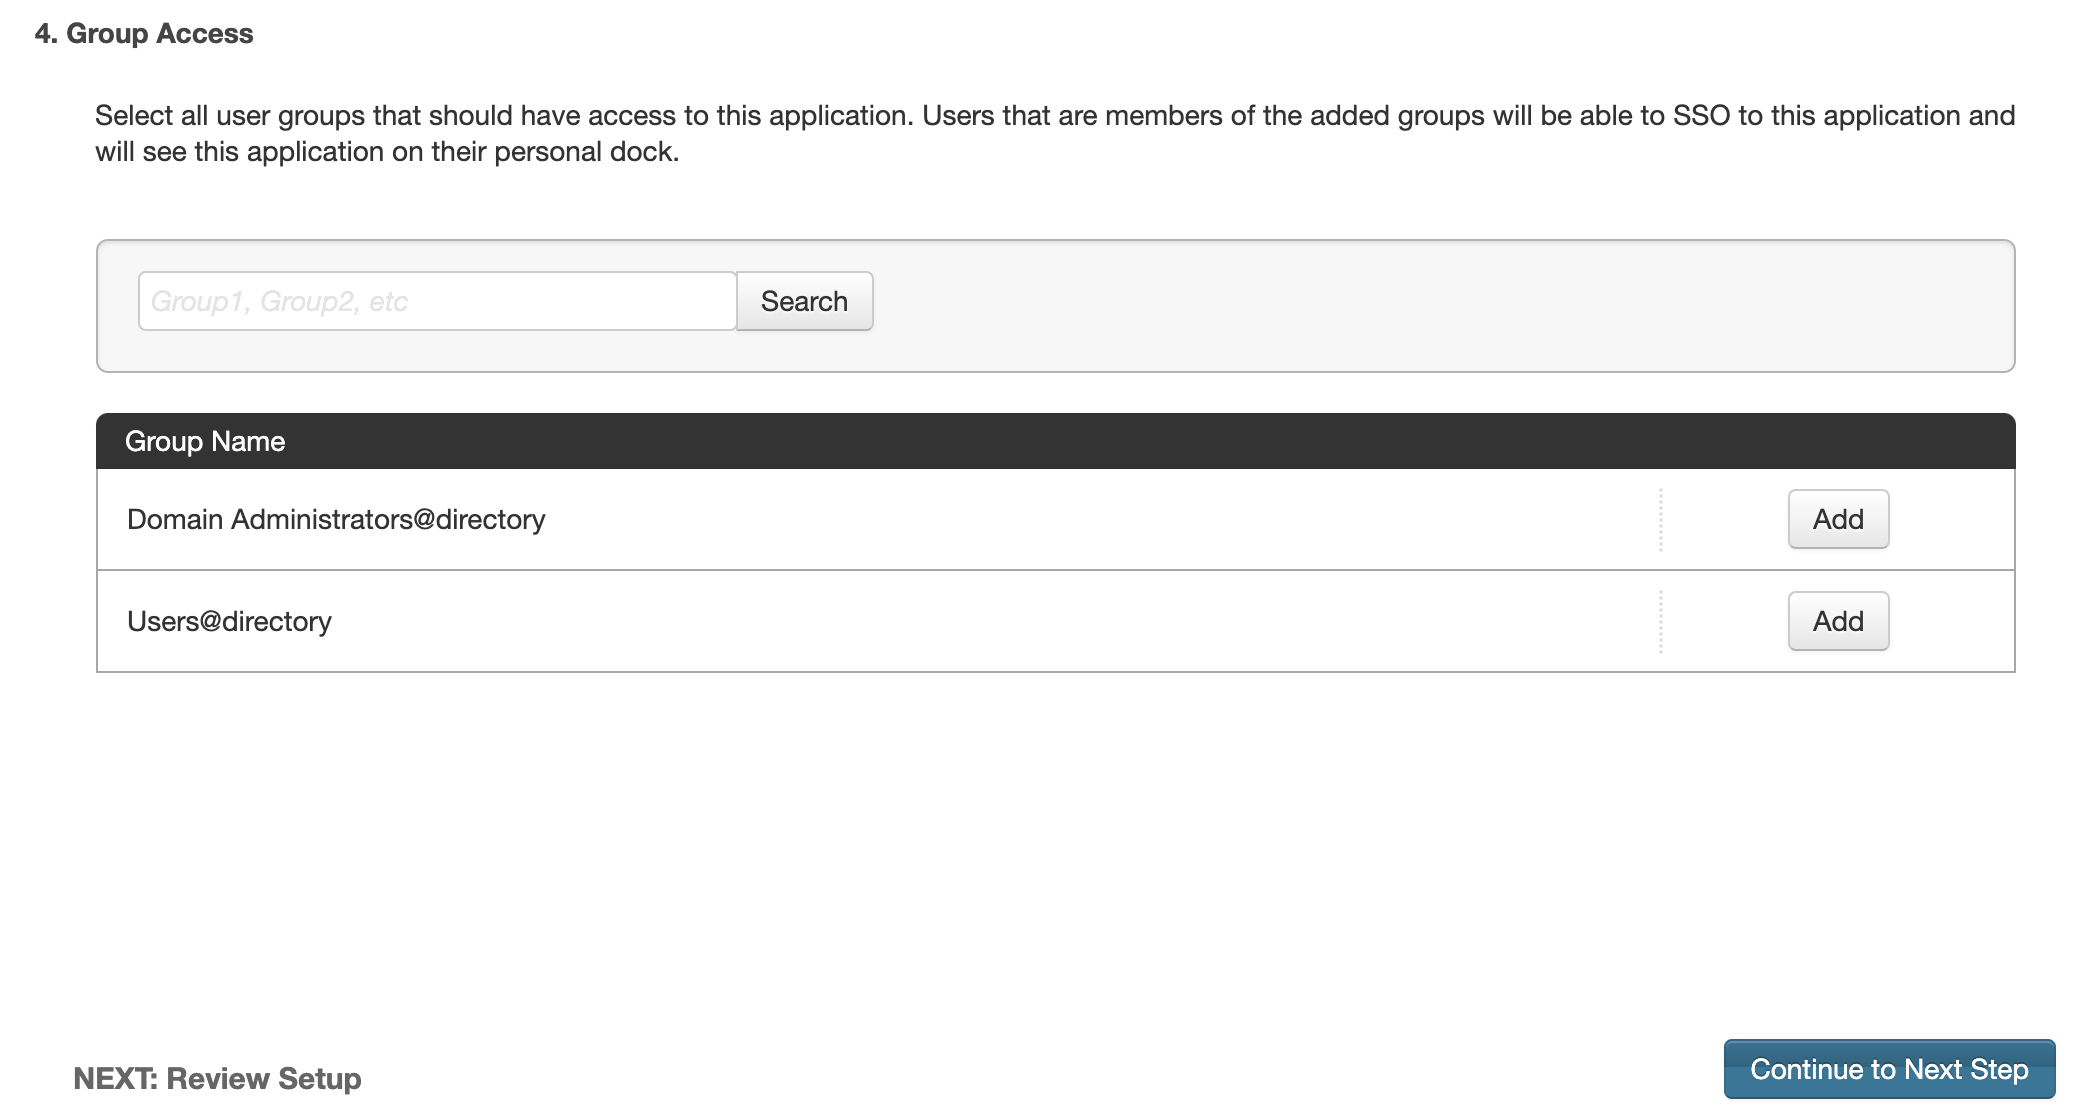
13. Click Continue to Next Step to proceed.
14. On the Review Setup window copy the "idpid" and click on the Download link next to Signing Certificate.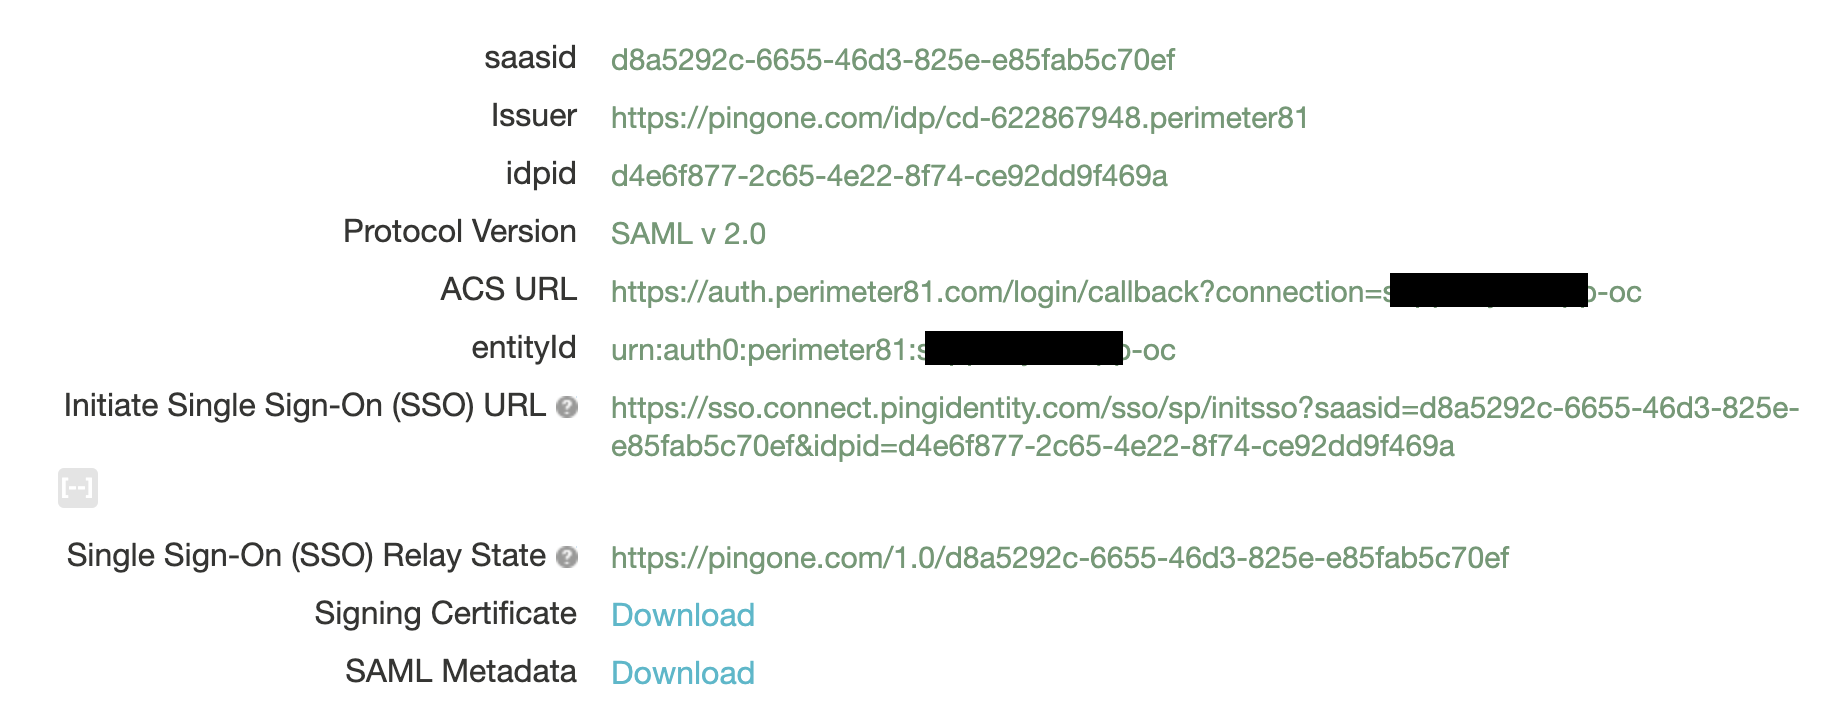
15. Click Save and Close.
16. On My Applications screen verify that the Check Point SASE application is set to Enabled - Yes.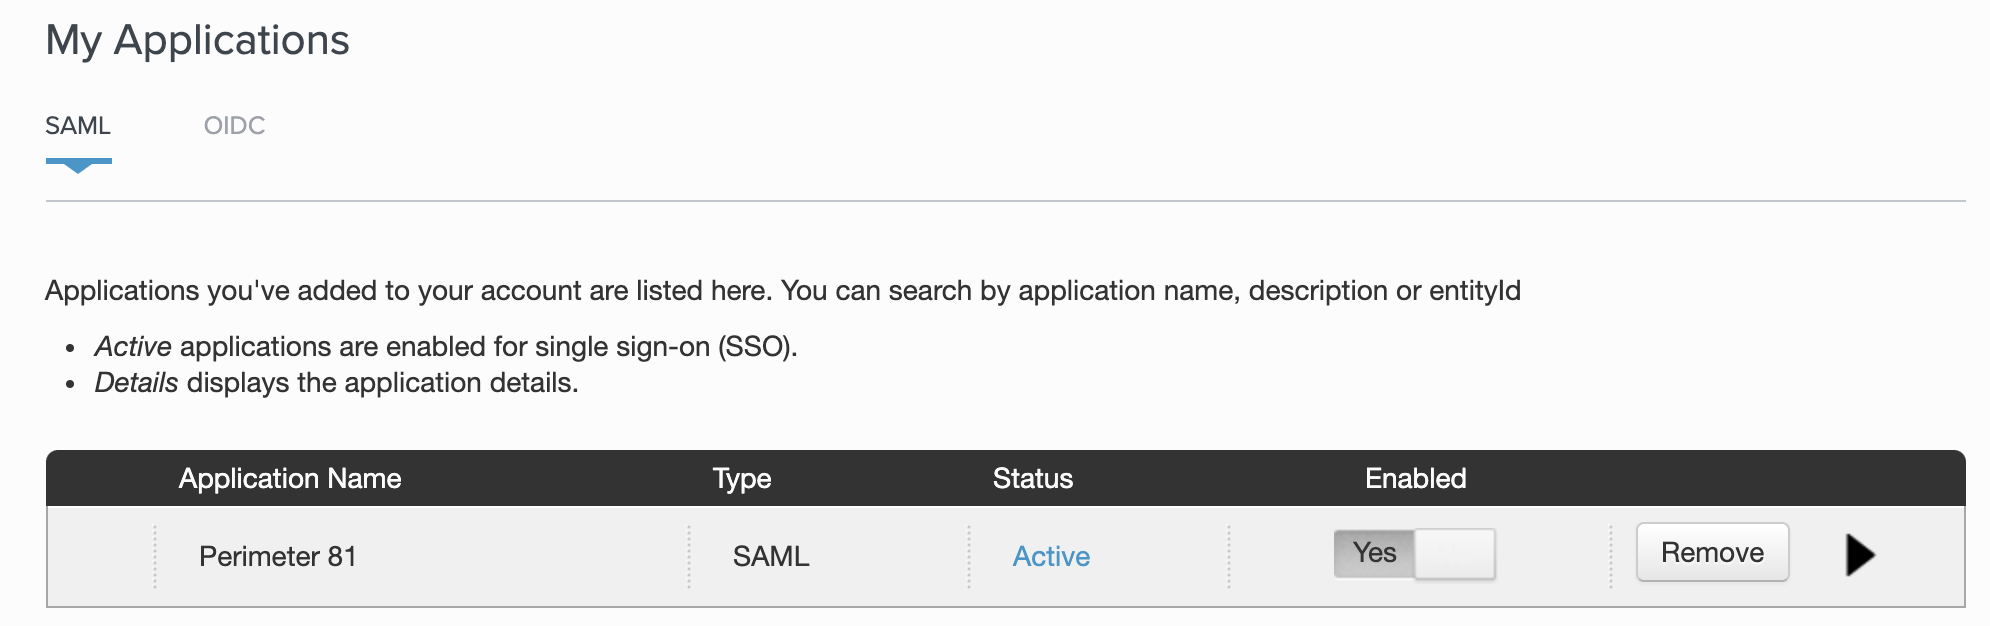
Configuring Check Point SASE
You need to configure the integration from the Check Point SASE side.
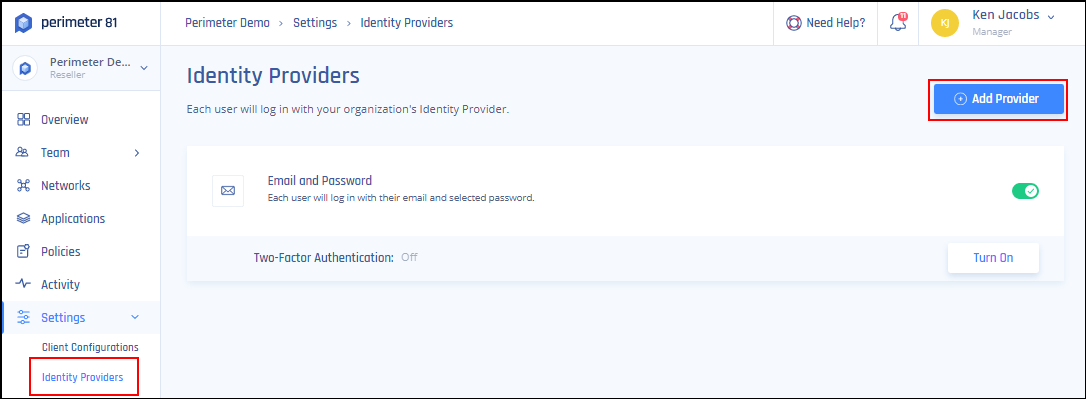
- Log in to your Check Point SASE Management Platform, and navigate to Settings and then IdentityProviders.
- Select + Add Provider.
- Select SAML 2.0 Identity Cloud.
- Fill in the Sign In URL with the following URL: https://sso.connect.pingidentity.com/sso/idp/SSO.saml2?idpid={{idpid}} (fill in the idpid from step 14).
- Add your organization domains.
- Paste the certification from the downloaded idp-signing.crt file (begin and end line included).
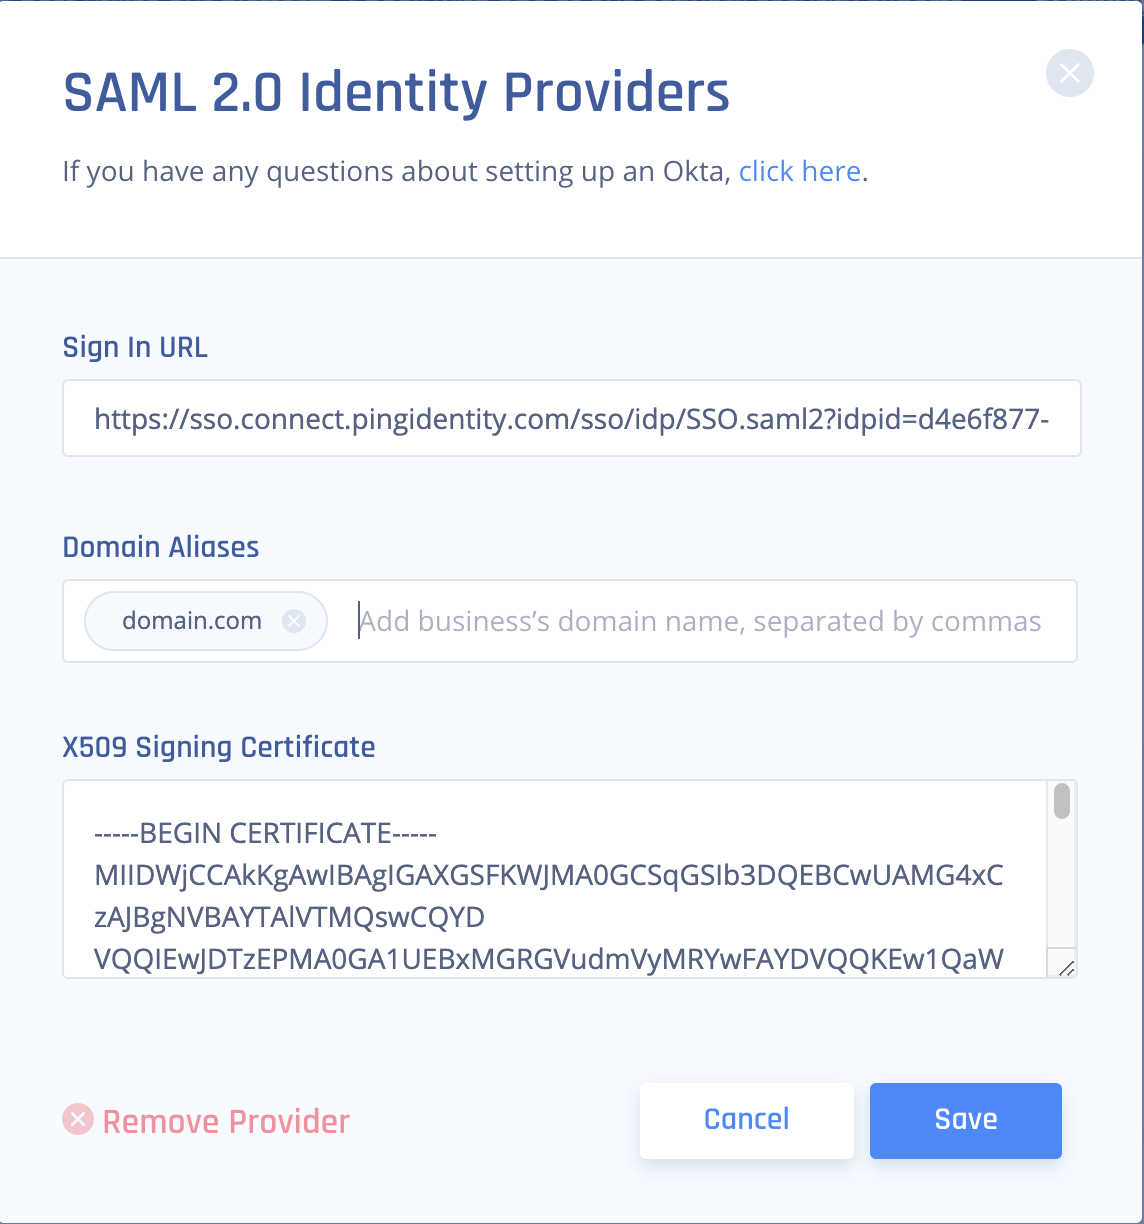
- Select Save.
Recommendations
- Always replace placeholders like {{WORKSPACE}} with the appropriate values during setup.
- Ensure that the correct attributes are mapped in PingOne for accurate user authentication and authorization in Check Point SASE.
- Periodically review your PingOne configuration settings to ensure they align with any updates or changes made within the Check Point SASE platform.
Troubleshooting
If you encounter issues during or after the setup, try reviewing your settings to ensure everything matches the instructions. In particular, check the IP addresses and other details you entered during setup. If issues persist, please consult our dedicated support.
Support Contacts
If you have any difficulties or questions, don't hesitate to contact Check Point SASE's support team. We offer 24/7 chat support on our website at sase.checkpoint.com, or you can email us at sase-support@checkpoint.com. We're here to assist you and ensure your VPN tunnel setup is a success