Understanding SCIM for OKTA
This guide delves into setting Okta as your identity provider, leveraging SCIM provisioning.
This integration facilitates continuous synchronization of users between the SCIM Okta App and Harmony SASE.
Supported Features
The following features are supported by Harmony SASE at the moment:
- Push Users: Users in Okta that are assigned to the Harmony SASE application within Okta are automatically added as users in Harmony SASE.
- Push Profile Updates: When user attributes are updated in Okta, they will be updated on Harmony SASE as well.
- Deactivate Users: When users are deactivated or removed from the SCIM App in Okta, they will be deleted within Harmony SASE which prevents the user from logging in and frees up a user license.
- Push Groups: Groups in Okta that are assigned to the Harmony SASE application within Okta are automatically added as groups in Harmony SASE.
Requirements
SCIM-based user provisioning is available to Harmony SASE's Enterprise customers only. If you would like to upgrade your plan, you can reach out to your assigned Account Manager. If you are unfamiliar with your Account Manager, you can reach out to our support team at sase-support@checkpoint.com, they will be able to assist you with contacting your assigned Account Manager.
- To successfully integrate Okta and Harmony SASE you must have admin access to both platforms.
- You must have an active Harmony SASE Okta Application for Single Sign-On configured.
Steps
- In your Harmony SASE Admin Console, navigate to Settings -> Identity Providers.
- Select Turn On next to SCIM Integration.
.png)
- Click on Settings.

- Click Generate Token; Once the SCIM Token has been generated, click Copy Token. Be sure to save this as it will be used later, once you close this pop-up, you will not be able to see the token anymore and if lost, a new token will need to be generated.
Enabling SCIM on Okta
- Log in to your Okta account. In the general Okta dashboard, select Applications, and using the list of shortcuts on the left-hand side of the screen, select Browse App Catalog.
- Search for "Harmony SASE", select our application and click Add Integration.
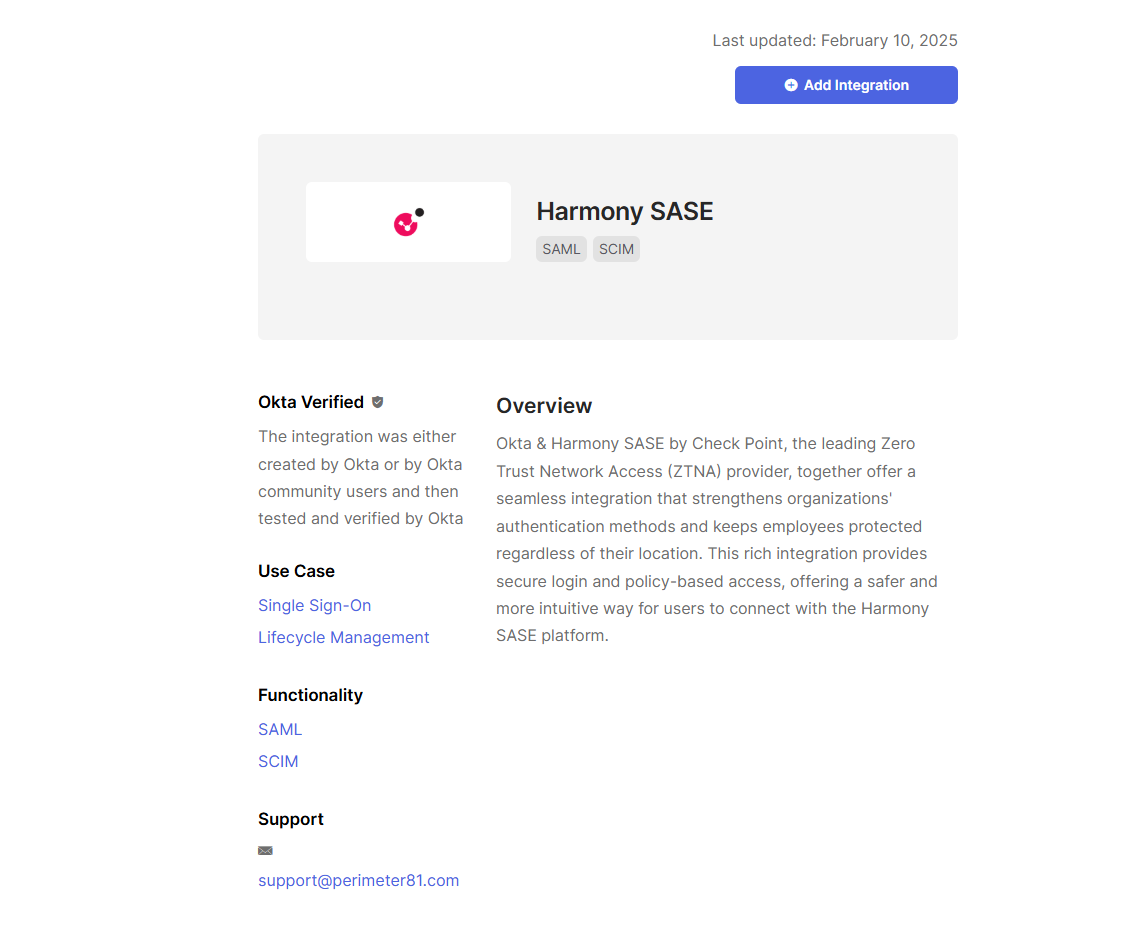
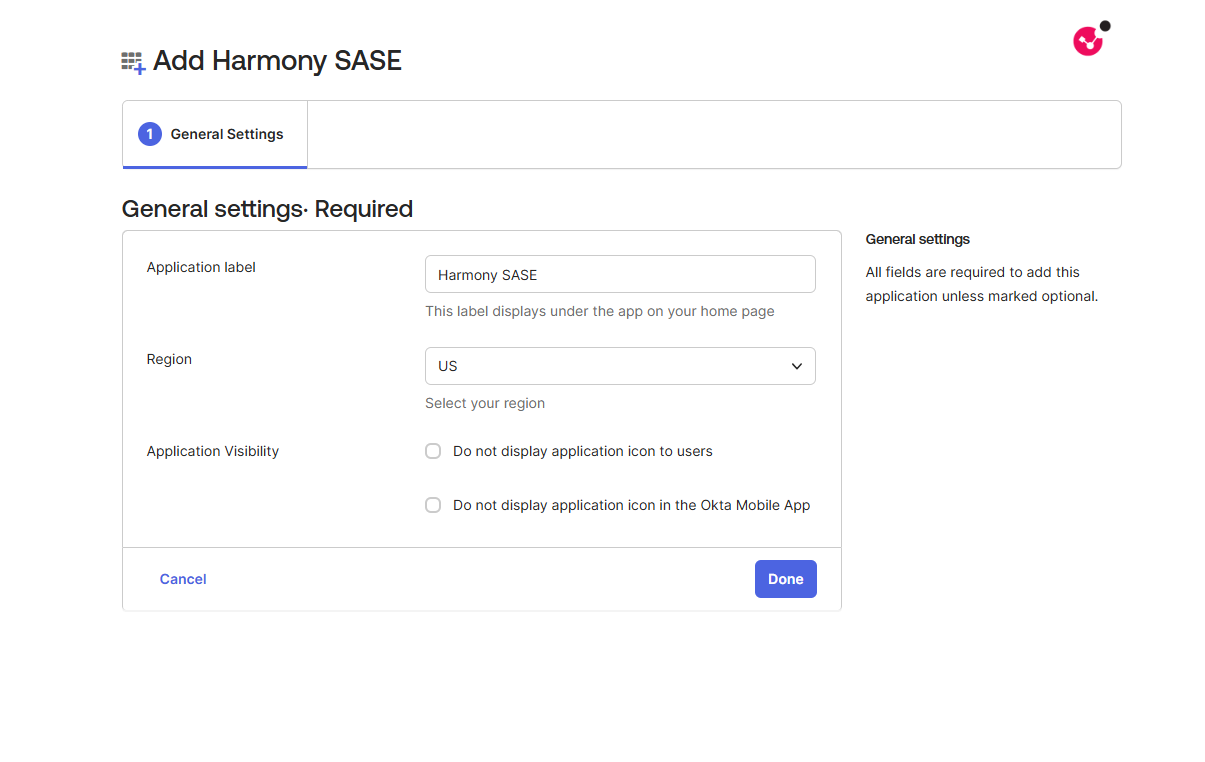
- From the Region list, select your data residency region and click Done.
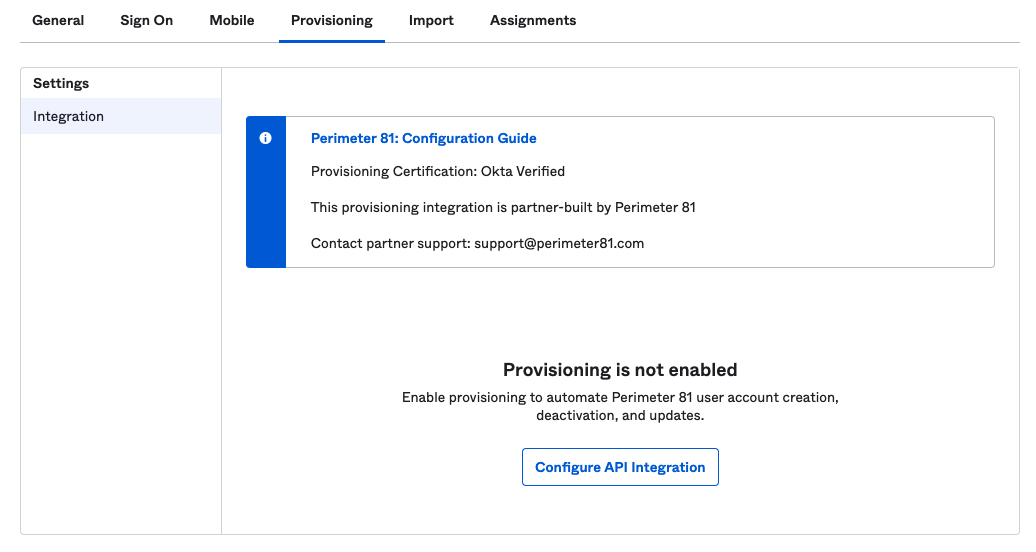
- Click Provisioning
- Click Configure API integration
6. Check the Enable API Integration checkbox
7. Paste the Generated Token that you've obtained in step 4 in the Harmony SASE platform SCIM configuration.
8. Click the Test API Credentials button.

9. Click the Save button.
10. Once Saved, click the To App link in the Settings left pan.
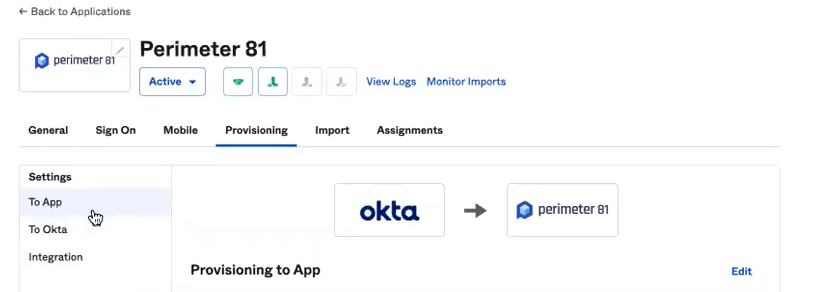
11. Click the Edit link on the right side of the pan.
12. Check the Enable checkbox for "Create Users", "Update User Attributes" and "Deactivate Users".
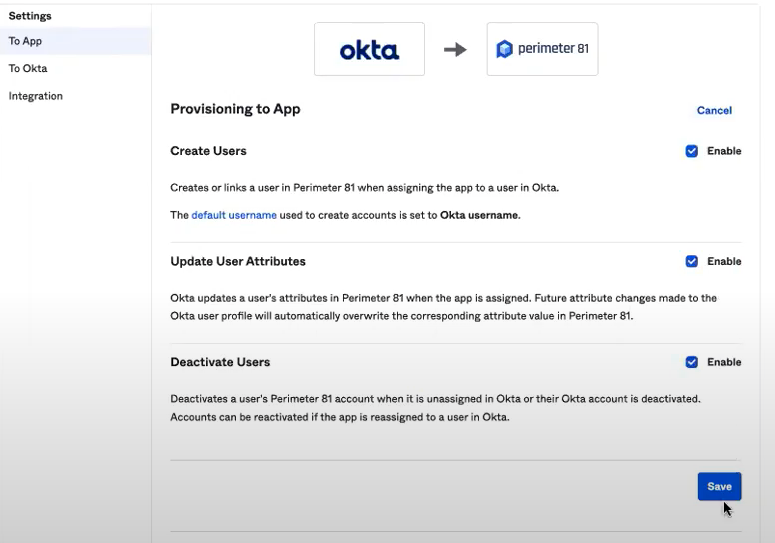
13. Click Save
Provisioning Users and groups
- In Okta, navigate to Applications and select your SAML 2.0 Application.
- Click Assignments.
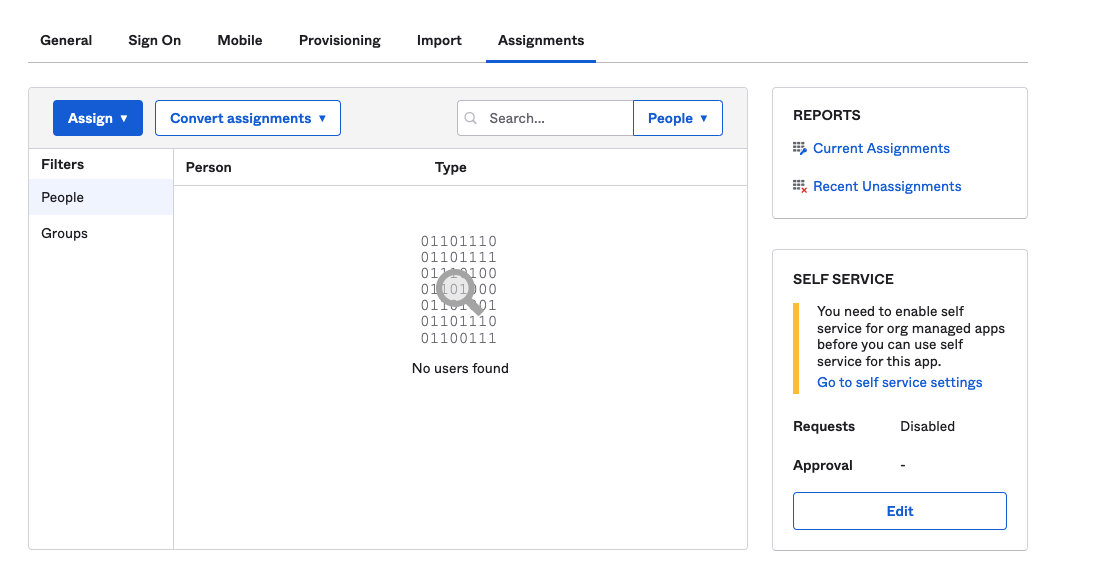
- Assign the People or Groups you would like to get provisioned over to Harmony SASE.
- To push groups, click the Push Groups tab and select By name.
.png)
- In the Push groups by name field, enter the group name.
- Select the Push group memberships immediately checkbox.
- Fill in any additional information, click Save and Go Back, and then click Done.
- Assigning the Application can also be done from the User menu on Okta by navigating to Applications on the User Profile and selecting Harmony SASE.
- Assigning the Application will sync the user Immediately.
- Removing the Assignment will delete the user within Harmony SASE which prevents the user from logging in and frees up a user license.
- The 'Name' field does not support the following special characters such as "@", ",", "#", "$", and "!".
- Users and can be created with alphanumeric characters from both English and non-English character sets (Hebrew, European languages, Russian…) and also specific special characters: space, period ( . ), underscore ( _ ), dash ( - ), parenthesis ( ), apostrophe (').
Notes
The following SAML attributes are supported:
| Name | Value |
| given_name | user.firstName |
| family_name | user.lastName |
| user.email | |
| groups | Configured in the app UI; See "Group Support" section above |
Recommendations
- Assign users or groups in Okta that you wish to provision to Harmony SASE.
- Ensure that the 'Name' field does not contain unsupported special characters.
- Regularly check Okta's Dashboard -> Tasks for any failed assignments or errors.
- Note that the Okta SCIM integration doesn't support email modifications. If needed, delete the user from Harmony SASE and have them log in with the new email address via Okta.
Troubleshooting
- To check if the provisioning was successful, in Okta- navigate to Dashboard -> Tasks.
- Any failed assignments should appear under Tasks. Clicking the failed task will show you the error.
 Harmony SASE uses the email address of each user as the unique identifier of the tenant. This means that the Okta SCIM integration doesn't support email modification and updates.
Should you require to modify the email address - please delete the user from the Harmony SASE Admin console, then have it login to the platform with the new email address via Okta.
- This means that the user belongs to a group that is not permitted on Harmony SASE.
- To fix this issue, go to Settings -> Identity Providers and click the lock icon next to Okta:

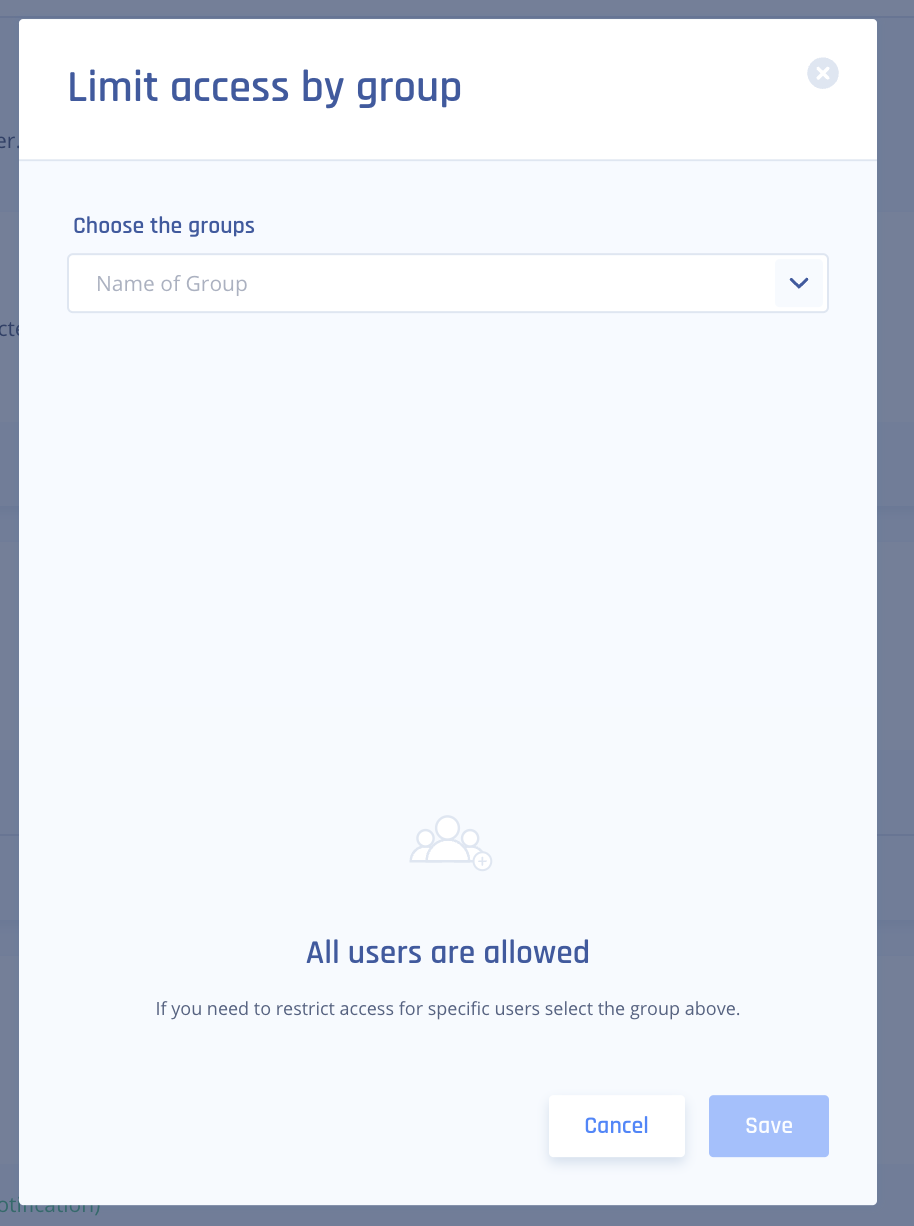
- Remove all groups from the list so that all users are allowed
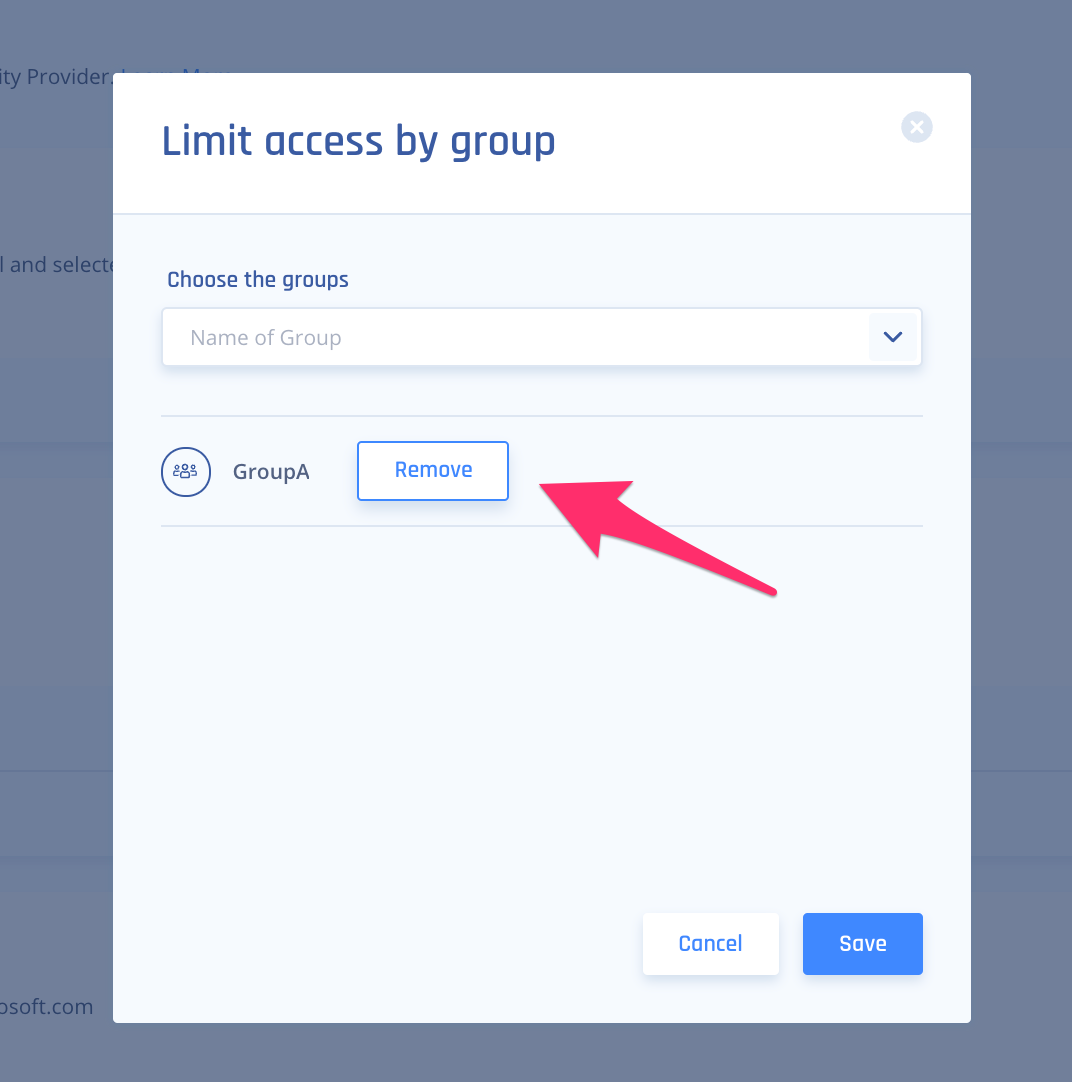
- Click Save. The menu should look like this:
Important notes regarding group assignments1. Local users who are not defined through Okta will not be added/removed to/from any Okta-associated group they are assigned to automatically. You will need to manually add/remove them to any needed group.
2. Linked groups are not supported - you must assign each required group directly.
2. Linked groups are not supported - you must assign each required group directly.
Support Contacts
If you have any difficulties or questions, don't hesitate to contact Harmony SASE's support team. We offer 24/7 chat support on our website at sase.checkpoint.com, or you can email us at sase-support@checkpoint.com. We're here to assist you and ensure your VPN tunnel setup is a success.