
How to manually collect Logs in case the automatic collection encounters an issue
In case the automatic log collection tool fails, you can manually collect and send logs using the following dedicated scripts for each operating system:
Windows
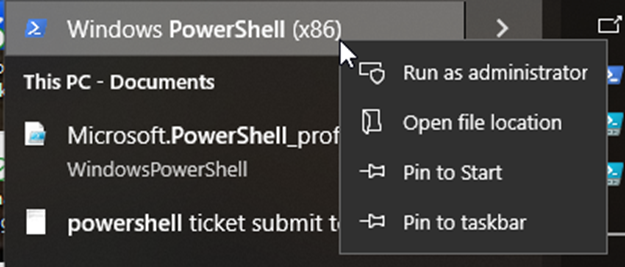
- Right-click Windows PowerShell and click Run as administrator.
- Run:
Invoke-Expression ((New-Object System.Net.WebClient).DownloadString('https://supportbucketshare.s3.us-east-1.amazonaws.com/Custom+Scripts/Log+Collector/Log+Collector+PS.ps1')) - When prompted, enter Y. If support requests extended logs, enter Y again.Note - Enable extended logs only if instructed by support, as they are significantly larger.
- Once the script completes, an Explorer window opens with the log files. The logs are saved in:
C:\Users\Public\Harmony SASE Logfiles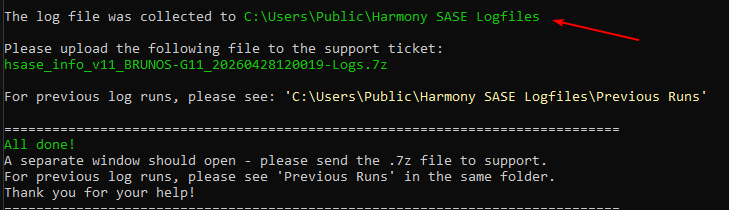
- Submit the required files to your support ticket.
- Once the support confirms receipt, manually delete the Check Point SASELogfiles directory from:
C:\Users\Public
MacOS
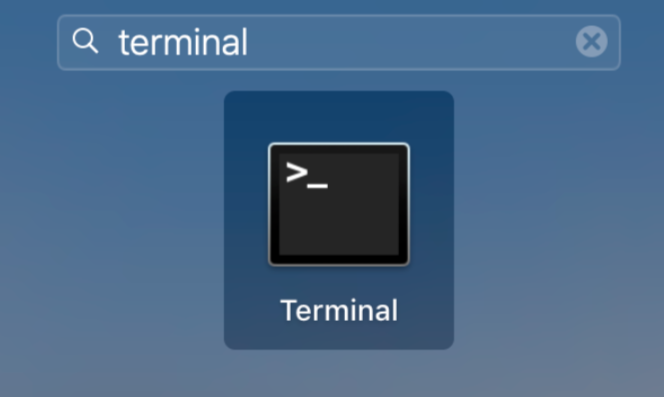
- Open the Terminal application (search Terminal in the Launchpad).
- Copy and run:Shell
curl -s "https://supportbucketshare.s3.us-east-1.amazonaws.com/Custom+Scripts/Log+Collector/Log+Collector+SH.sh" -o temp.sh;sudo bash temp.sh;rm temp.sh - Once the script completes, a Finder window opens with the log files.
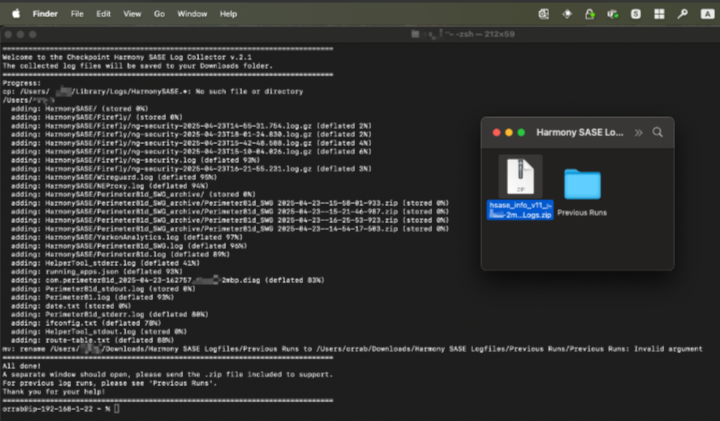
- Submit the .zip file to your support ticket. Older runs are saved under Previous Runs.
- Once support confirms receipt, manually delete the Check Point SASE Logfiles directory from the Downloads folder.
Linux
- Run the following command in Terminal:Shell
/opt/Perimeter81/perimeter81 collect-logs
2. Send the log file to sase-support@checkpoint.com