How to resolve MDM Deployment issues on MacOS
Symptoms
- Disk space rapidly fills the system directory /Library/SystemExtensions/.staging.
- Users will receive a Harmony SASE Would like to Add Proxy Configurations notification giving users the ability to “Don’t Allow” connection.
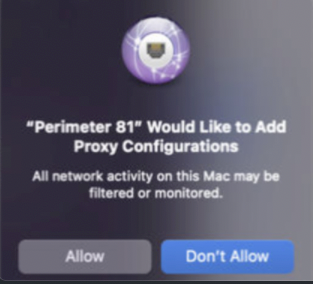
- Users will receive a System Extensions Blocked notification until the Harmony SASE system extensions are enabled.
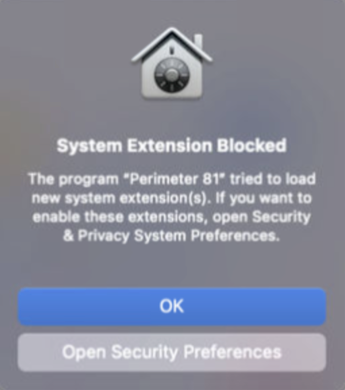
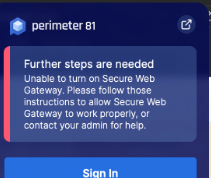
- Users cannot log in to the agent with the error Further steps are needed after deploying the agent with MDM.
Solution using an MDM tool
- Create a Content Filter for Harmony SASE:
- To Create a Content Filter profile, please add these Device Profilewith the provided configuration:
- Filter Type: Plug-in
- Connection Name: Harmony SASE
- Identifier: com.safervpn.osx.smb
- Filter Webkit traffic: Yes
- Filter Socket Traffic: Yes
- Socket Filter Bundle ID: com.safervpn.osx.smb
- Socket Requirement: identifier "com.safervpn.osx.smb" and anchor apple generic and certificate 1[field.1.2.840.113635.100.6.2.6] /* exists */ and certificate leaf[field.1.2.840.113635.100.6.1.13] /* exists */ and certificate leaf[subject.OU] = "924635PD62"
- Filter Network Pockets: Yes
- Pocket Bundle ID: com.safervpn.osx.smb
- Packet Requirement: identifier "com.safervpn.osx.smb" and anchor apple generic and certificate 1[field.1.2.840.113635.100.6.2.6] /* exists */ and certificate leaf[field.1.2.840.113635.100.6.1.13] /* exists */ and certificate leaf[subject.OU] = "924635PD62"
- Filter Grade: Firewall
- To Create a Content Filter profile, please add these Device Profilewith the provided configuration:
- Configure P81 System Extensions:
- Navigate to where you add the VPN Payload Profiles and add a MacOS profile and context Device Profile
- Allow User Overrides: Yes
- Allowed System Extension Types: Network
- Team ID: 924635PD62
- Bundle Identifier: com.safervpn.osx.smb.proxy
- Navigate to where you add the VPN Payload Profiles and add a MacOS profile and context Device Profile
P81 Deployment with MDM - Jamf
You can deploy perimeter 81 security agents by leveraging the power of your MDM.
To provide the user with a silent install of the P81 Agent, add the payload configurations to the MDM profile and install provided cert PKG before installing the Perimeter 81 Agent.
Required Configuration profiles
- P81 system extensions - If not enabled before the installation, users receive the System Extensions Blocked notification until P81 system extensions are enabled.

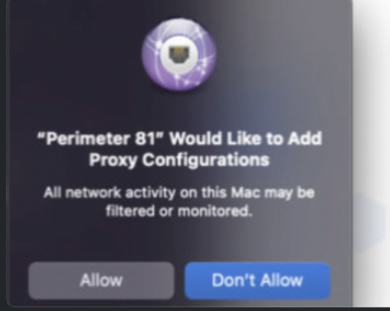
- P81 VPN Payload - If VPN payload is not deployed before the installation, users receive the Perimeter 81 Would like to Add Proxy Configurations notification giving users the ability to Don’t Allow connection.
- Install Cert PKG - If the cert PKG is not installed before, users receive the You are making changes to the System Certificate Trust settings notification and require admin credentials.
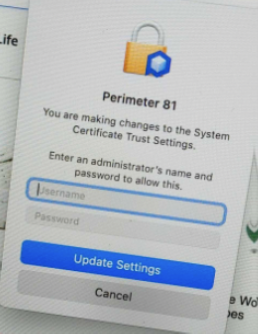
Configuring Payloads and Install Cert PKG
Configure P81 System Extensions
In the Jamf Pro configuration profiles, add these at the computer level:.png)

- Team ID - 924635PD62
- Extensions bundle ID - com.safervpn.osx.smb.proxy
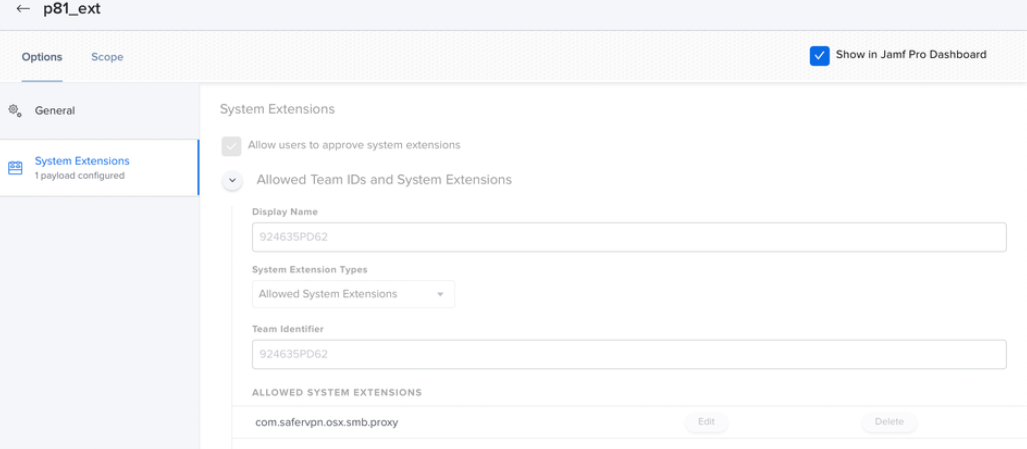
P81 VPN Payload
Enter these to create VPN payload:
- Connection Name - Perimeter 81
- VPN Type - VPN
- Connection type - Custom SSL
- Identifier - com.safervpn.osx.smb
- Server - localhost
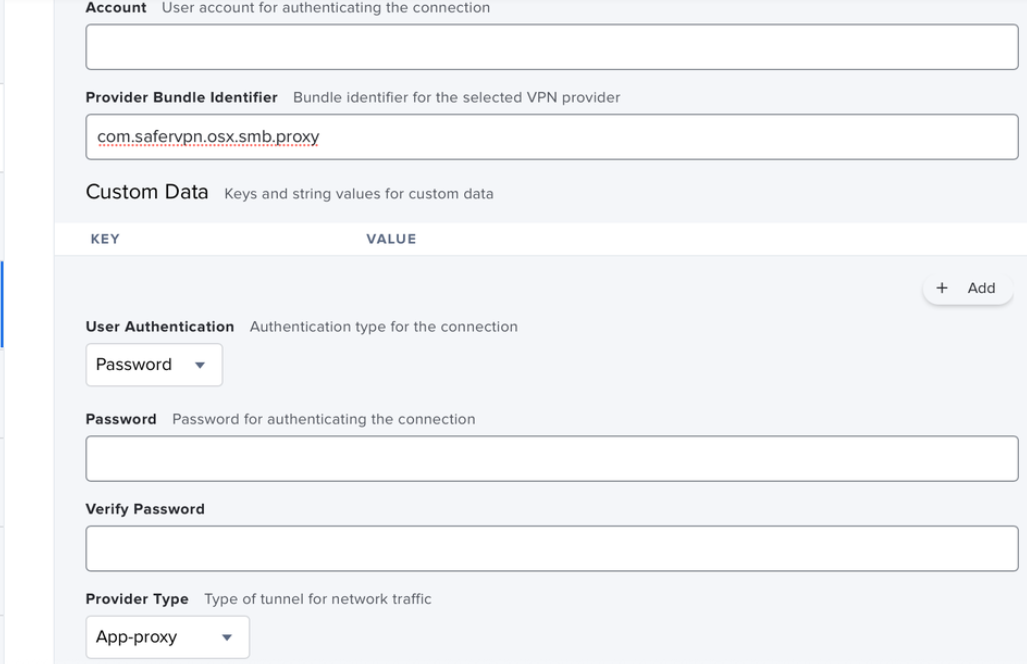
- Provider Bundle Identifier - com.safervpn.osx.smb.proxy
- User Authentication - Password
- Provider Type - App-Proxy
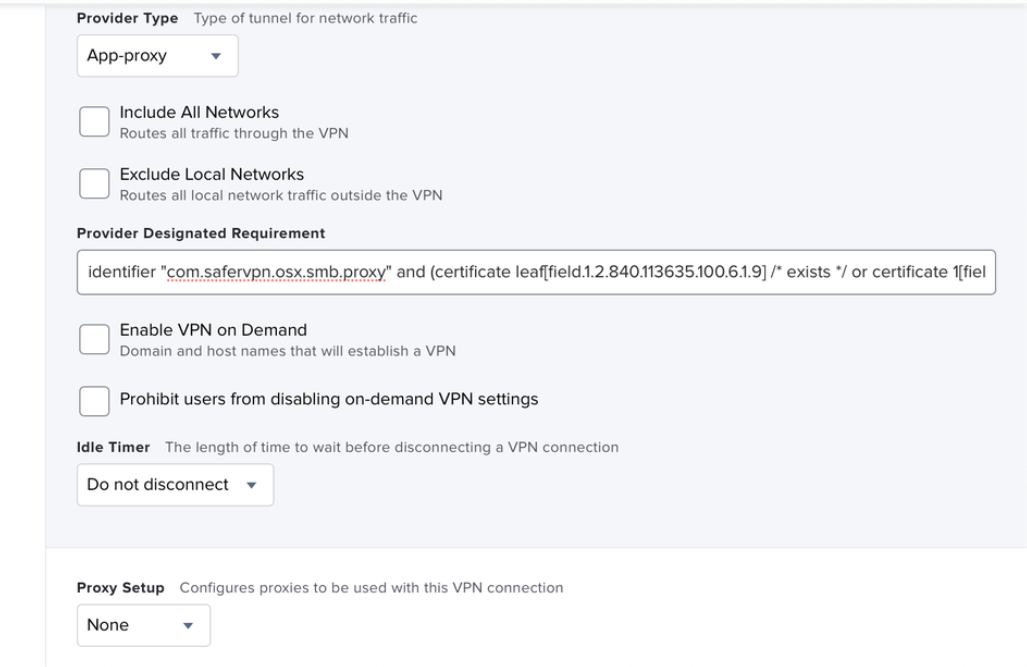
- Provider Designated Requirement - identifier "com.safervpn.osx.smb.proxy" and (certificate leaf[field.1.2.840.113635.100.6.1.9] /* exists */ or certificate 1[field.1.2.840.113635.100.6.2.6] /* exists */ and certificate leaf[field.1.2.840.113635.100.6.1.13] /* exists */ and certificate leaf[subject.OU] = "924635PD62")) tunnelProtocol.providerBundleIdentifier=Optional("com.safervpn.osx.smb.proxy")
- Idle Timer - Do not disconnect
- Proxy Setup - None
Install cert PKG
- To deploy the certificate, upload the file to the MDM certificate payload.
Example: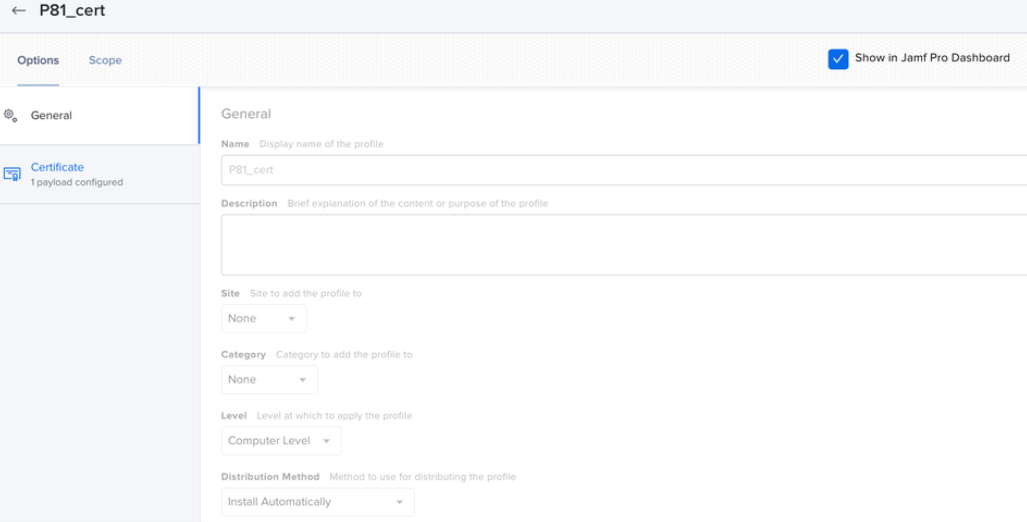 Note:Generate a dedicated root certificate file per customer. To do that, contact @Oleksii Glukhanyk or @Ilya Baudin.
 - Go to Policies and Install Cert PKG provided silently using MDM.
You can verify the installation by checking for com.perimeter81d in root directory:
/private/var/root/Library/Application\ Support/com.perimeter81d
Now, you can successfully launch the Perimeter 81 Agent and run install without user intervention by leveraging your MDM solution.
P81 deployment with MDM - Jumpcloud
To provide the user with a silent install of the P81 Agent, you need to add the payload configurations to the MDM profile and install provided cert PKG before installing the Perimeter 81 Agent.
Required Configuration profiles
- P81 system extensions - If not enabled before the installation, users receive the System Extensions Blocked notification until P81 system extensions are enabled.

- P81 VPN Payload - If VPN payload is not deployed before the installation, users receive the Perimeter 81 Would like to Add Proxy Configurations notification giving users the ability to Don’t Allow connection.

- Install Cert PKG - If the cert PKG is not installed before, users receive the You are making changes to the System Certificate Trust settings notification and require admin credentials.

Configuring Payloads and Installing Cert PKG
Configure P81 System Extensions
Configure the system extensions profile with these settings:
- Team ID: 924635PD62
- Extensions bundle ID: com.safervpn.osx.smb.proxy
- Enable Security Extension
- Enable Driver extension
- Enable Network Extension
- Filter Data Provider Bundle ID: com.safervpn.osx.smb.proxy
- Filter data Provider Designated Requirement: anchor apple generic and identifier "com.safervpn.osx.smb" and (certificate leaf[field.1.2.840.113635.100.6.1.9] /* exists / or certificate 1[field.1.2.840.113635.100.6.2.6] / exists / and certificate leaf[field.1.2.840.113635.100.6.1.13] / exists */ and certificate leaf[subject.OU] = "924635PD62")
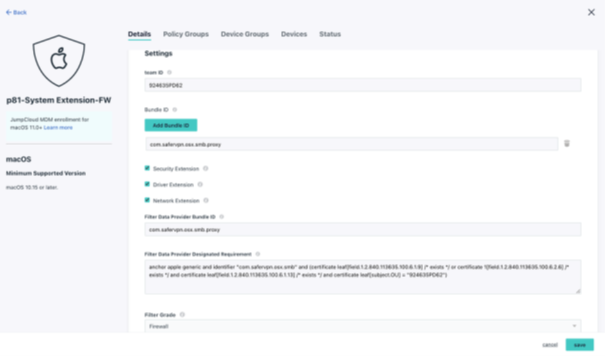
- Filter Grade: Firewall
- Enable Filter Packets
- Enable Filter Sockets
- Filter Type: Plugin
- Organization: Perimeter 81
- Plugin Bundle ID: com.safervpn.osx.smb.proxy
P81 VPN Payload
In order to configure a VPN payload, use apple configuration with these settings:
- Connection Name: Perimeter 81
- Connection Type: custom ssl
- Identifier: com.safervpn.osx.smb
- Server: localhost
- Provider Bundle Identifier: com.safervpn.osx.smb
- Provider designated requirement: anchor apple generic and identifier "com.safervpn.osx.smb" and (certificate leaf[field.1.2.840.113635.100.6.1.9] /* exists
/ or certificate 1[field.1.2.840.113635.100.6.2.6] / exists / and certificate leaf[field.1.2.840.113635.100.6.1.13] / exists */ and certificate leaf[subject.OU] = "924635PD62")
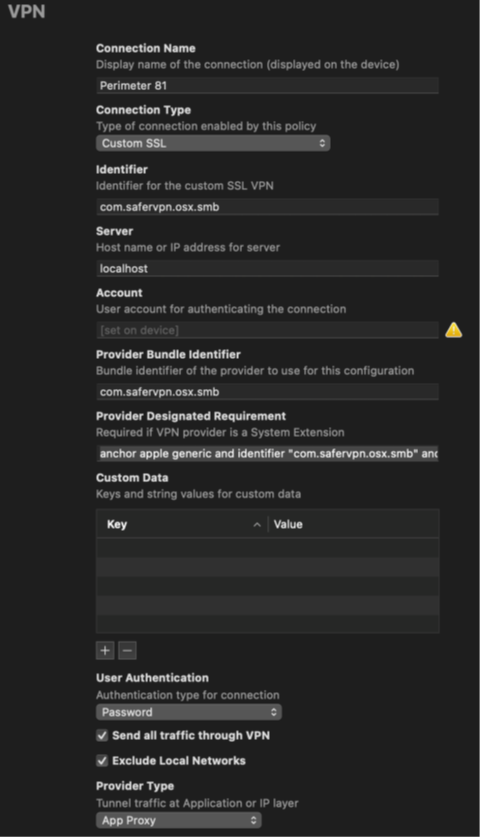
- User Authentication: Password
- Enable send all traffic through VPN
- Enable exclude local networks
- Provider type: app proxy
.png)
Save and upload the new mobileconfig to Jumpcloud as a custom profile.
.png)
Install cert PKG and deploy cert
Generate a dedicated root certificate file per customer. To do that, contact @Oleksii Glukhanyk or @Ilya Baudin.
Upload the provided cert.pkg and .cer and install on target computer.
You can verify the installation by checking for com.perimeter81d in the root directory:
/private/var/root/Library/Application\ Support/com.perimeter81d

Now you can successfully launch Perimeter 81 Agent and run install without user intervention by leveraging your MDM solution.
P81 deployment with MDM - VMware Workspace ONE
To provide the user with a silent install of the P81 Agent, you will first need to add these payload configurations to the MDM profile and install provided cert PKG before installing the Perimeter 81 Agent.
Required Configuration profiles
- P81 system extensions - If not enabled before the installation, users receive the System Extensions Blocked notification until P81 system extensions are enabled.

- P81 VPN Payload - If VPN payload is not deployed before the installation, users receive the Perimeter 81 Would like to Add Proxy Configurations notification giving users the ability to Don’t Allow connection.

- Install Cert PKG - If the cert PKG is not installed before, users receive the You are making changes to the System Certificate Trust settings notification and require admin credentials.

Configuring Payloads and Installing Cert PKG
Configure P81 System Extensions
- In the ONE UEM workspace, navigate to Resource > Profiles & Baselines > Profiles.
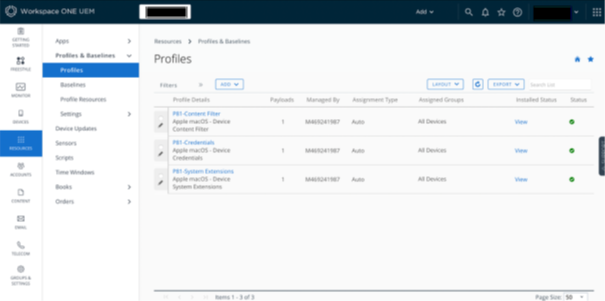
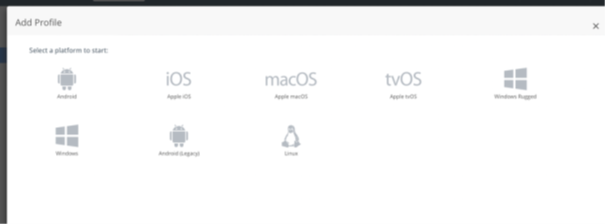
- Click macOS and add a macOS profile.
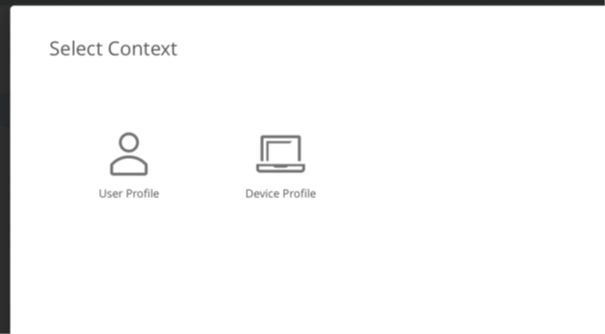
- Select Device Profile.
- Specify these:
- Enable the Allow User Overrides toggle button.
- Allowed System Extension Types: Network
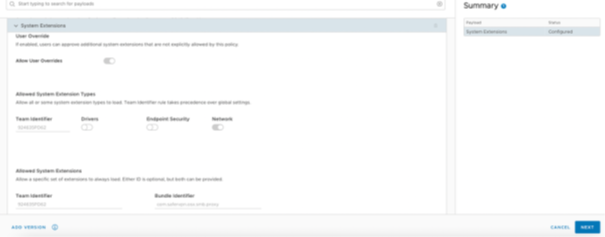
- Team ID: 924635PD62
- Bundle Identifier: com.safervpn.osx.smb.proxy
P81 Content Filter
To create Content Filter profile, add these Device Profile with these configuration:
- Filter Type: Plug-in
- Connection Name: Perimeter 81
- Identifier: com.safervpn.osx.smb
- Filter Webkit traffic: Yes
- Filter Socket Traffic: Yes
- Socket Filter Bundle ID: com.safervpn.osx.smb
- Socket Requirement: identifier "com.safervpn.osx.smb" and anchor apple generic and certificate 1[field.1.2.840.113635.100.6.2.6] /* exists */ and certificate leaf[field.1.2.840.113635.100.6.1.13] /* exists */ and certificate leaf[subject.OU] = "924635PD62"
- Filter Network Pockets: Yes
- Pocket Bundle ID: com.safervpn.osx.smb
- Packet Requirement: identifier "com.safervpn.osx.smb" and anchor apple generic and certificate 1[field.1.2.840.113635.100.6.2.6] /* exists */ and certificate leaf[field.1.2.840.113635.100.6.1.13] /* exists */ and certificate leaf[subject.OU] = "924635PD62"
- Filter Grade: Firewall
Install cert PKG
- To deploy the certificate, use Credentials Payload to push the certificate into keychain.
- Enable the Allow Access to all applications toggle button.
- Disable the Allow export of private key from keychain toggle button.
- Go to Apps > Native and add cert .pkg as a Bootstrap Package and make sure to install before installing the P81 Agent.
- You can verify the installation by checking for com.perimeter81d in this directory:
/private/var/root/Library/Application\ Support/com.perimeter81d
Now you can successfully launch the Perimeter 81 Agent and run install without user intervention by leveraging your MDM solution.


.png)


 /private/var/root/Library/Application\ Support/com.perimeter81d