
Private DNS lets the network resolve hostnames through configured DNS servers instead of public resolvers. Configure Private DNS at two scopes:
- Network - Applies to all regions in the network.
- Region - Overrides the network-wide settings for agents connected to that region.
Open the panel from the network or region. The title reads Manage Network Private DNS or Manage Region Private DNS accordingly. Turn on Use Private DNS Servers to enable the rest of the panel.
- Network-level Private DNS and regional Private DNS can be used at the same time.
- Regional DNS overrides network-level Private DNS for that region. If no regional DNS exists, network-level Private DNS applies.
What you can configure
- Choose which DNS queries are sent to the private DNS servers - either all queries, or only the domains in the list.
- Add domains as exact names (
mysite.acme.com) or wildcards (*.acme.org), up to 100 entries. - Decide whether queries that fail on the private servers fall back to public DNS or are returned as a failure to the client.
- Define up to 4 private DNS servers (IPv4 and port).
- Add optional Search Domains that agents append to short hostnames.
Resolution modes
| Mode | What it does | When to use |
|---|---|---|
| Specify Private Domains | Only DNS queries that match a domain in the list are forwarded to the private DNS servers. All other queries go directly to public DNS. | Route only internal or corporate domains through the private servers. All other queries go directly to the internet. |
| All Domains | Every DNS query is forwarded to the private DNS servers. If a query fails, the agent falls back to public DNS. | Have the private DNS servers answer every query the network handles. |
Adding private domains
In Specify Private Domains mode, use the Add Private Domains field to list the domains resolved through the private servers. Enter a domain and press Enter. Entered domains appear as chips and can be removed with the × next to each chip.
| Pattern | Matches |
|---|---|
mysite.acme.com | The exact host. Subdomains are not matched. |
*.acme.com | Any subdomain of acme.com (for example, mysite.acme.com or mail.eu.acme.com). The bare apex acme.com is not matched — add it explicitly if you need it. |
*.mysite.acme.com | Any subdomain of mysite.acme.com. |
The list accepts up to 100 domains and requires at least one entry. If the list is empty, the panel shows At least one domain is required and Apply is disabled.
Public DNS fallback
The Use Public DNS Servers on Failure checkbox controls what happens when the private DNS servers fail to answer a query (timeout, SERVFAIL, REFUSED, or NXDOMAIN).
- In Specify Private Domains mode, the checkbox is editable:
- Off - Failures from the private servers are returned to the client. The query is not retried against public DNS, so internal domain names are not exposed to public resolvers.
- On - If the private servers fail, the agent retries the query against public DNS.
- In All Domains mode, the checkbox is selected and locked. Any query that fails on the private servers is automatically retried against public DNS.
Private DNS servers
Add up to 4 private DNS servers. For each server, enter an IPv4 address in Server IP Address and select a Port (default Standard (53)). Click + Add Server IP Address to add more entries. At least one server is required.
(Optional) Search domains
Add suffixes that agents append when resolving short hostnames. Search domains apply in both resolution modes. Click + Add Search Domain to add more entries.
Configure private DNS
- Access the Check Point SASE Administrator Portal and click Networks.
- Select the network. To configure Private DNS for a single region, open that region instead.
- To add a Private DNS.
- For a network, click
 and click Private DNS.
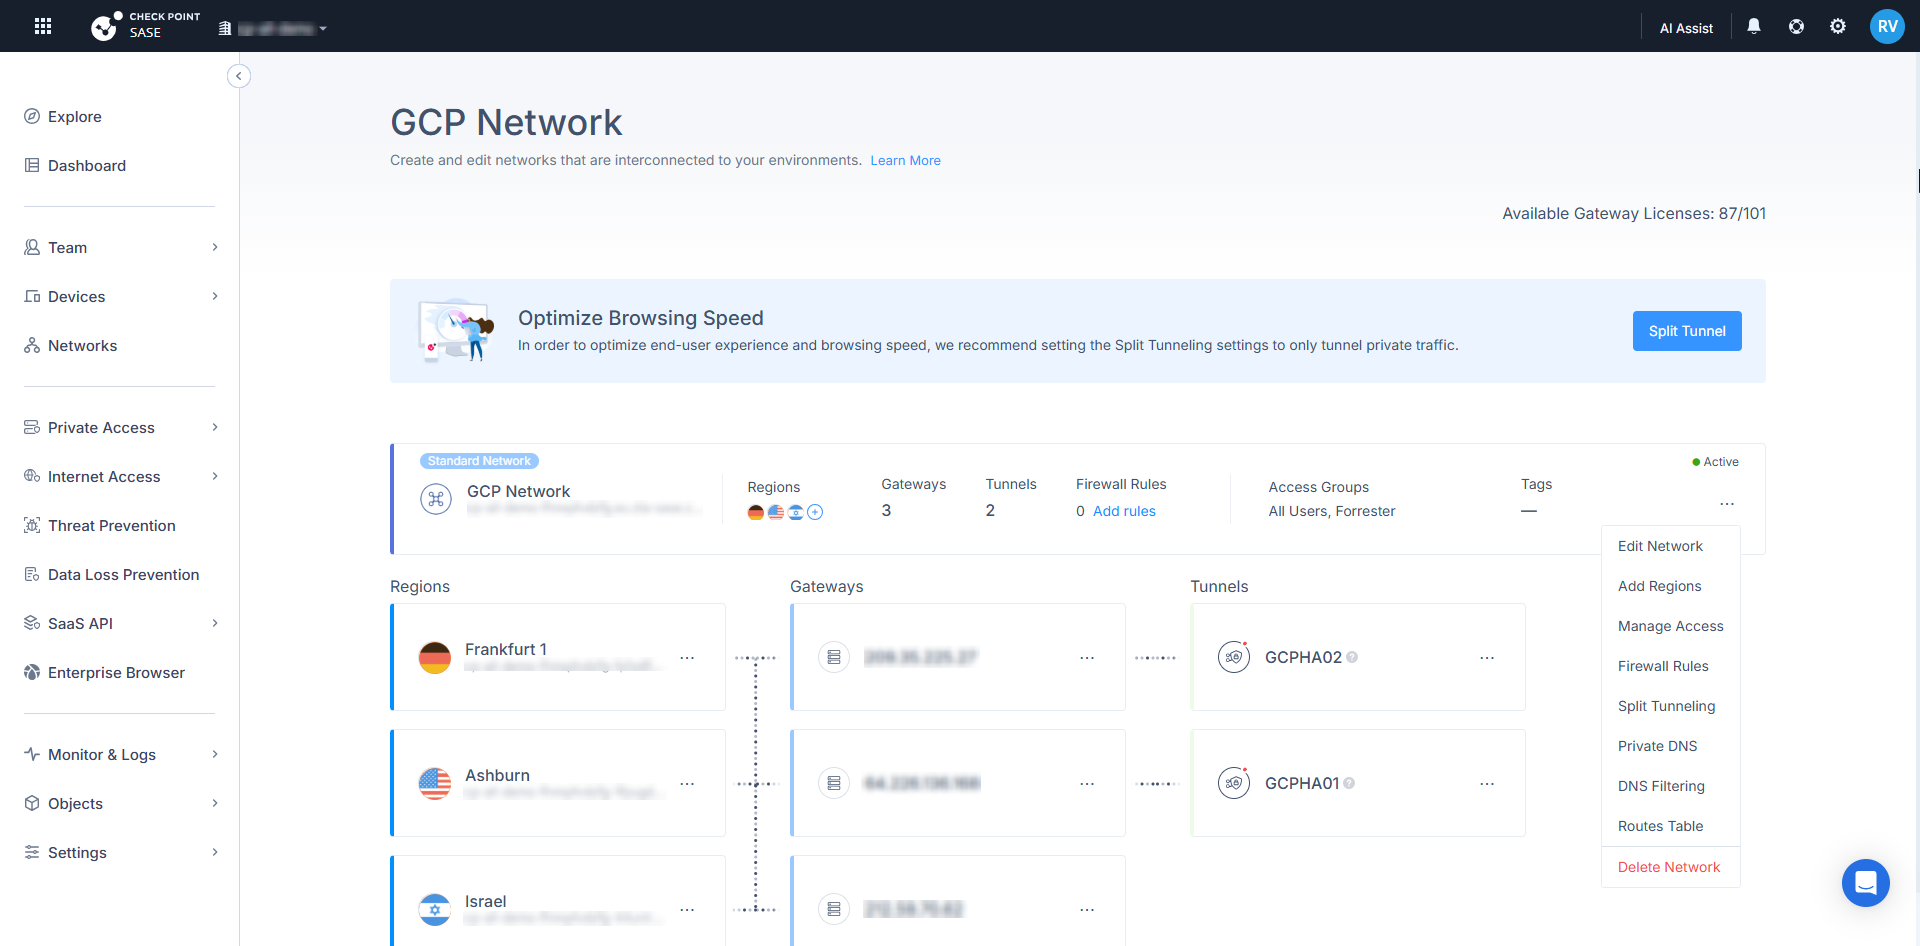
- For a region, in the Regions section, click ⋮ and click Regional Private DNS.
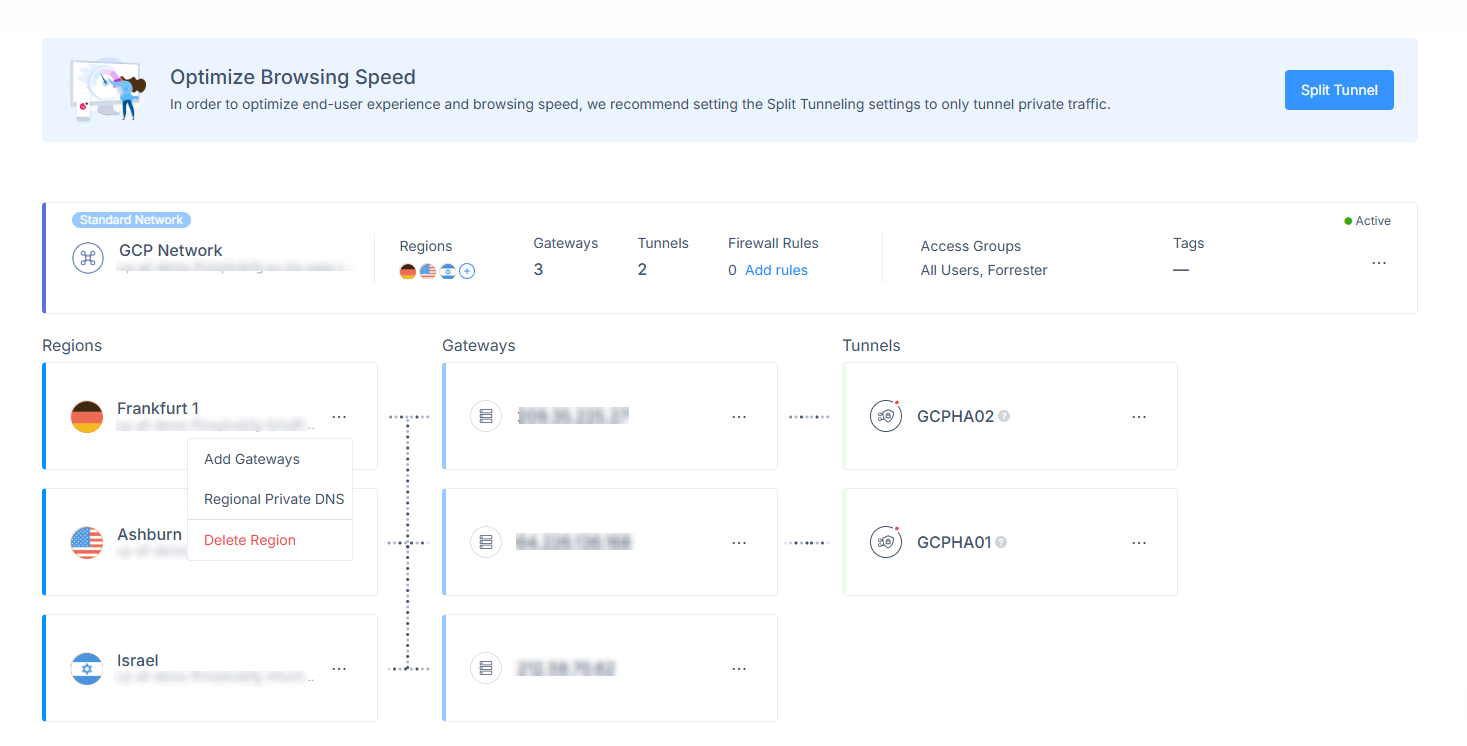 The Manage Network Private DNS for networks and Manage Region Private DNS for regions popup appears.
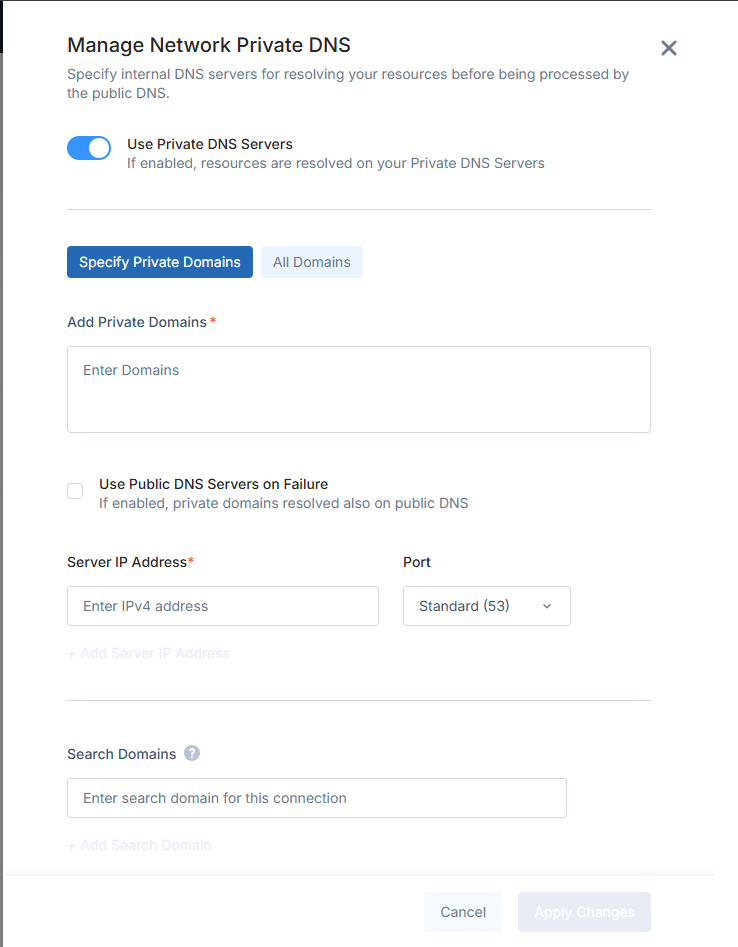
- For a network, click
- Turn on Use Private DNS Servers.
- Select a resolution mode:
- Specify Private Domains - Add at least one domain (exact or wildcard) to Add Private Domains.
- All Domains - No domain list is needed. Every query is forwarded to the private servers.
- Set Use Public DNS Servers on Failure as required. The checkbox is locked on in All Domains mode.
- Add up to 4 private DNS servers (Server IP Address and Port).
- (Optional) Add Search Domains.
- Click Apply and wait for the configuration to deploy.