Introduction
This article elucidates the methods to set up Google Suite as your identity provider using either Google Service or Google SAML applications.
The integration with Google Suite allows Harmony SASE to authenticate users seamlessly.
Steps
You can connect your Account to Google Suite by providing the Google Client ID and Client Secret to Harmony SASE. Follow the steps below:
- Generate the Google Client ID and Client Secret
- Enable the Admin SDK service
- Enable and configure the Harmony SASE GSuite Connection
Generating the Google Client ID and Client Secret
- While logged in to your Google admin account, go to the API Manager and then Credentials in the Management Portal on the left side. (https://console.developers.google.com/projectselector/apis/credentials?pli=1 )
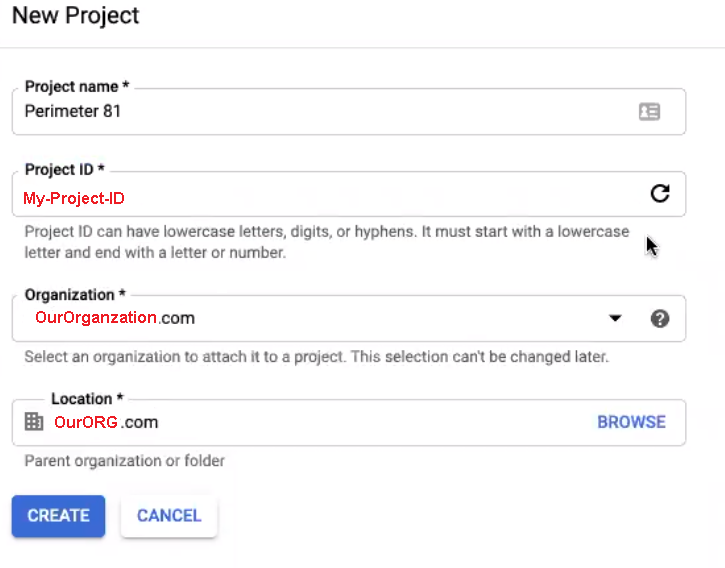
You should follow steps 2-3 only in case you do not have already a project defined on Google Cloud Platform. - Select Create to create a new project.

- In the dialog box that appears, provide a Project name, answer Google's email- and privacy-related questions, and select Create:
- Under OAuth consent screen, User Type is External
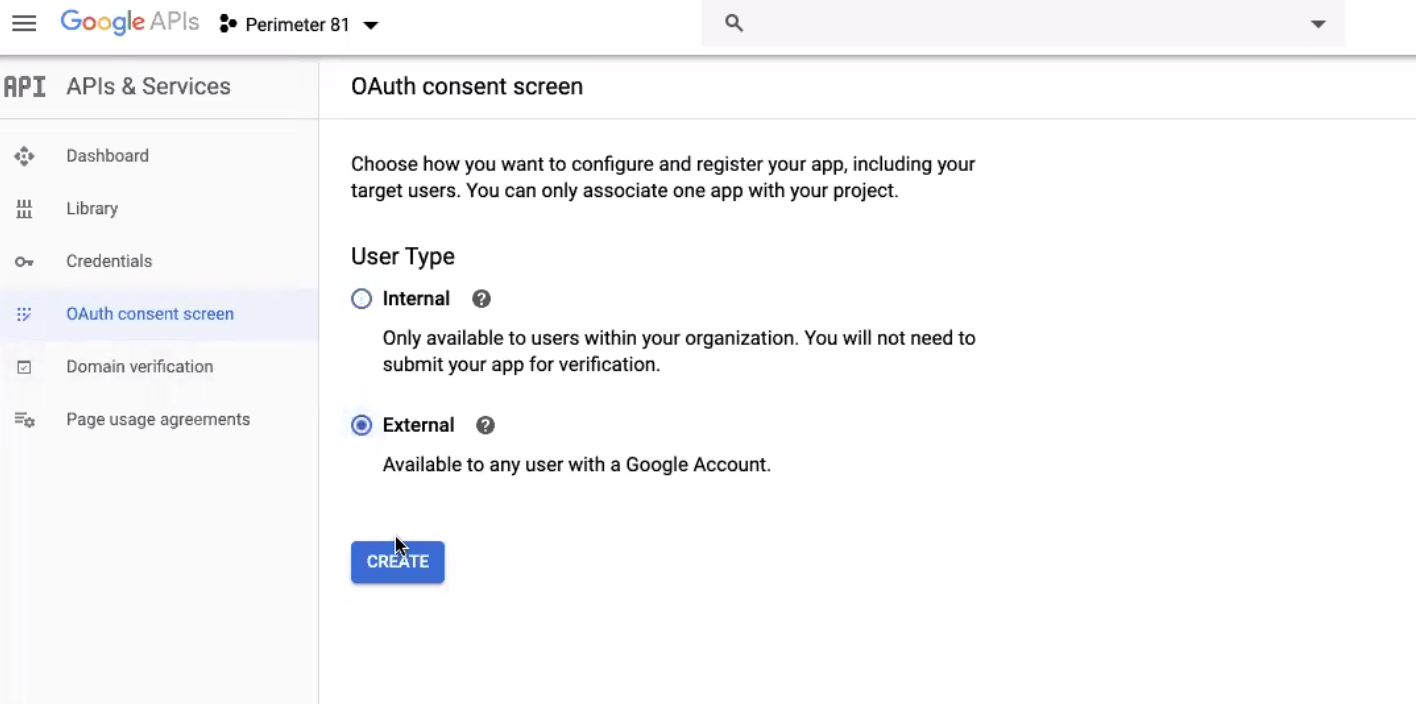
Click Create. - Application Type is Public; write down the Application Name (for example, Harmony SASE)
User support email is your email address
App logo is optional and can be found using this link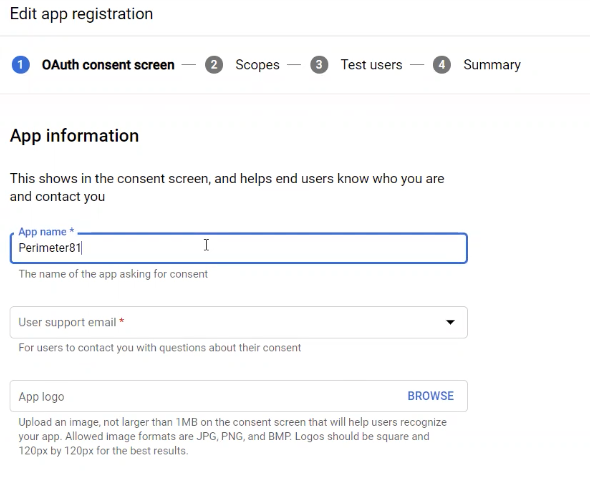 Fill in the application Homepage Link with your workspace URL
You will also need to add “perimeter81.com” into the “Authorized domains” list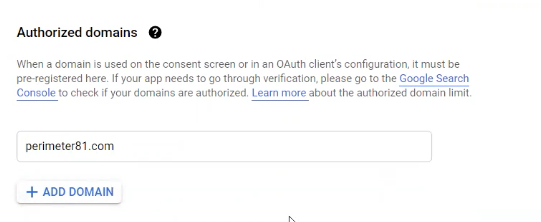 Developer contact information is sase-support@checkpoint.com and click Save and continue
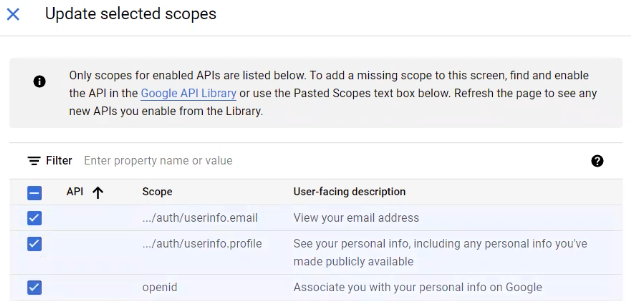
 - Click Add or remove Scopes
 Select the following Scopes , click update, and Click Save and Continue
- You can either test the app with some Test users, or just click Save and Continue
(Selecting Test users will require you to Publish the App at a later point)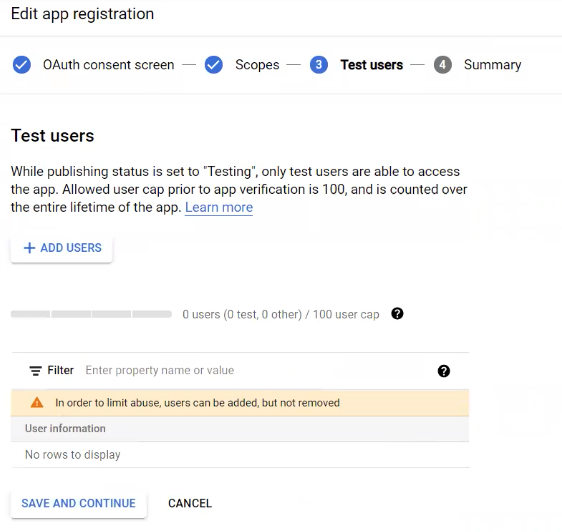
- Google will take a moment to create your project. When the process completes, Google will prompt you to create the credentials you need.
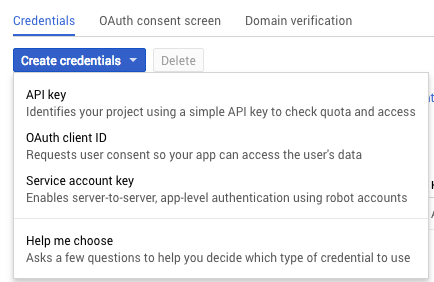
- Select Create credentials to display a pop-up menu listing the types of credentials you can create. Select the OAuth client ID option.
- At this point, Google will display a warning banner that says, "To create an OAuth client ID, you must first set a product name on the consent screen." Select the Configure consent screen to begin this process. Provide a Product Name that will be shown to users when they log in through Google.
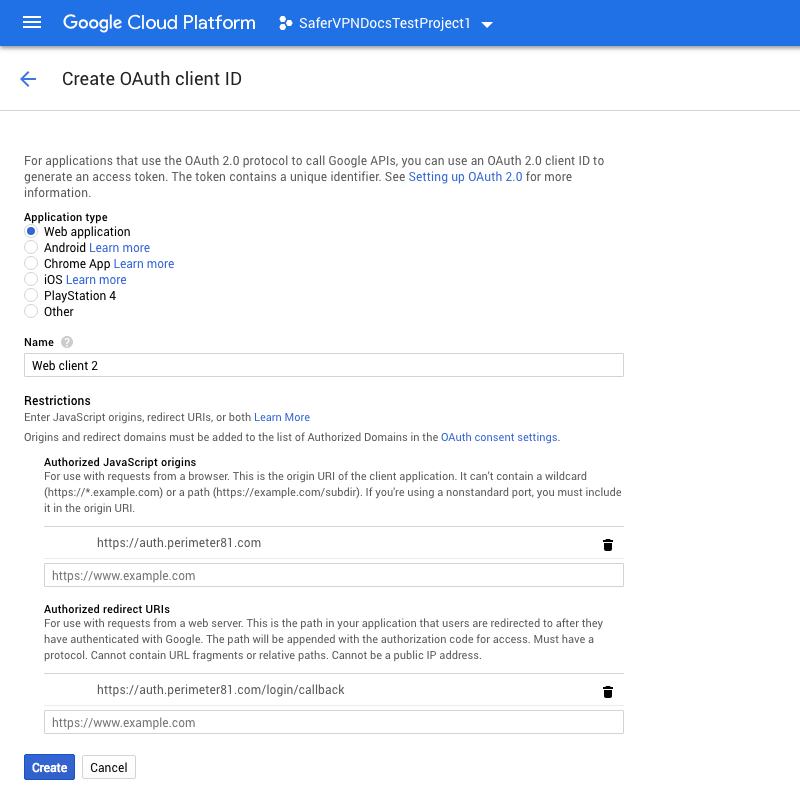
- At this point, you will be prompted to provide additional information about your newly-created app.
- Select Web application, and enter Harmony SASE as the name for the app.
- Under Restrictions, enter the following information:
- Authorized JavaScript origins: https://auth.perimeter81.com
- Authorized redirect URI: https://auth.perimeter81.com/login/callback
- Select Create. Your Client ID and Client Secret will be displayed.
Google may show an "unverified app" screen before displaying the consent screen for your app. To remove the unverified app screen, complete the OAuth Developer Verification process.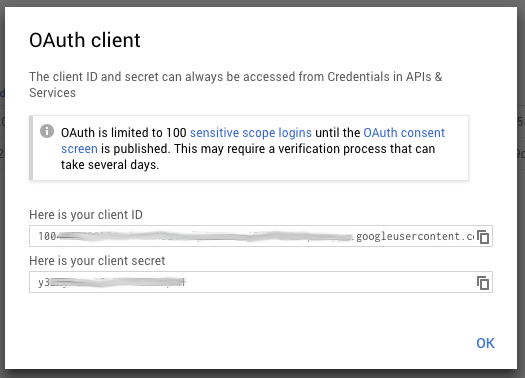
- Save your Client Id and Client Secret in a separate location to enter later into the Connection settings in Harmony SASE.
Enabling the Admin SDK Service
If you are planning to connect to Google Suite enterprise domains, you will need to enable the Admin SDK service.
- Navigate to the Library page of the API Manager.
- Select Admin SDK from the list of APIs.
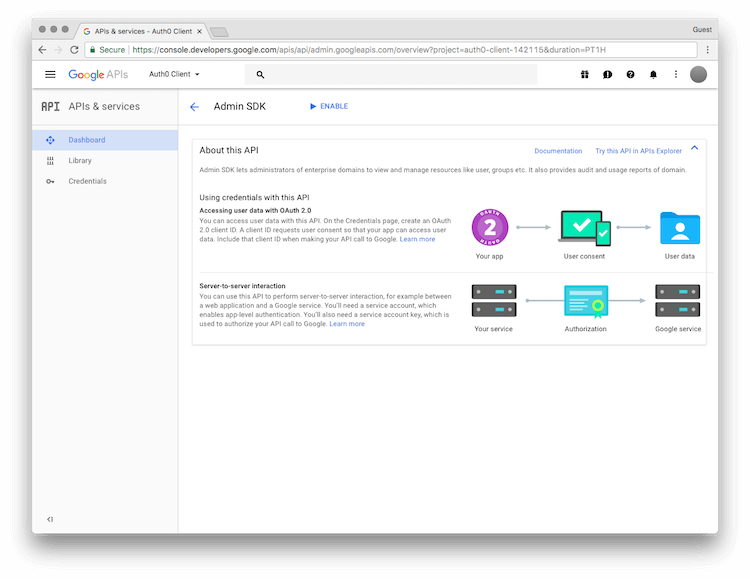
- On the Admin SDK page, select Enable.
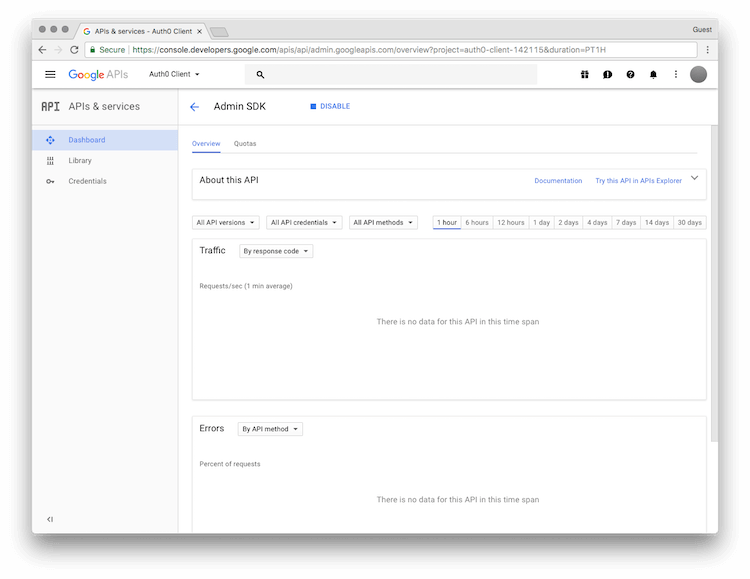
Enabling and Configuring the Google Suite Connection
- Log in to your Harmony SASE Management Platform, and navigate to Settings and then IdentityProviders.
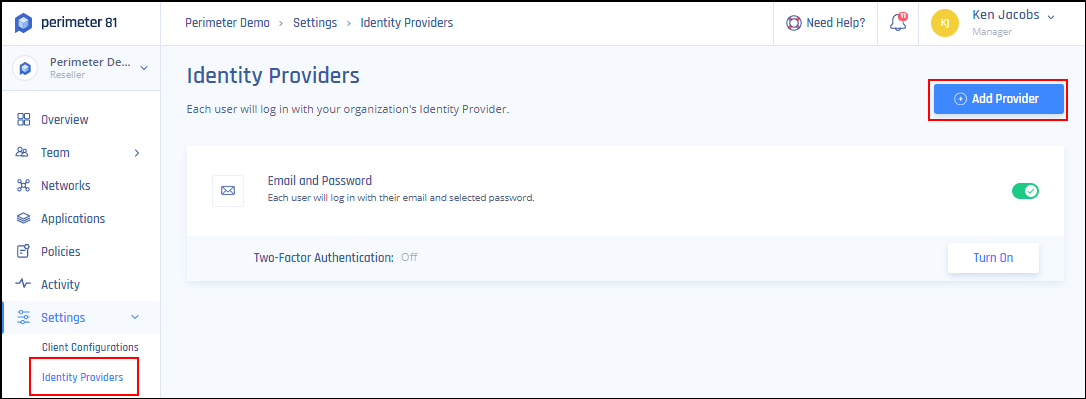
- Select + Add Provider.
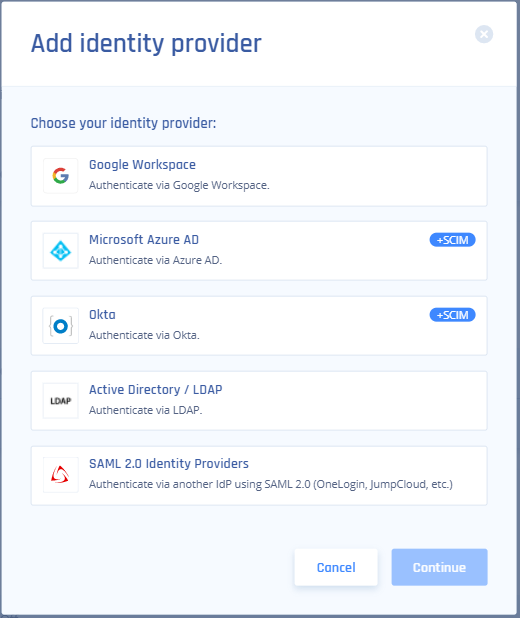
- Select Google Workspace then click Continue.
- Fill in the Google Apps Domain, Domain Aliases, Client ID, and Client secret.
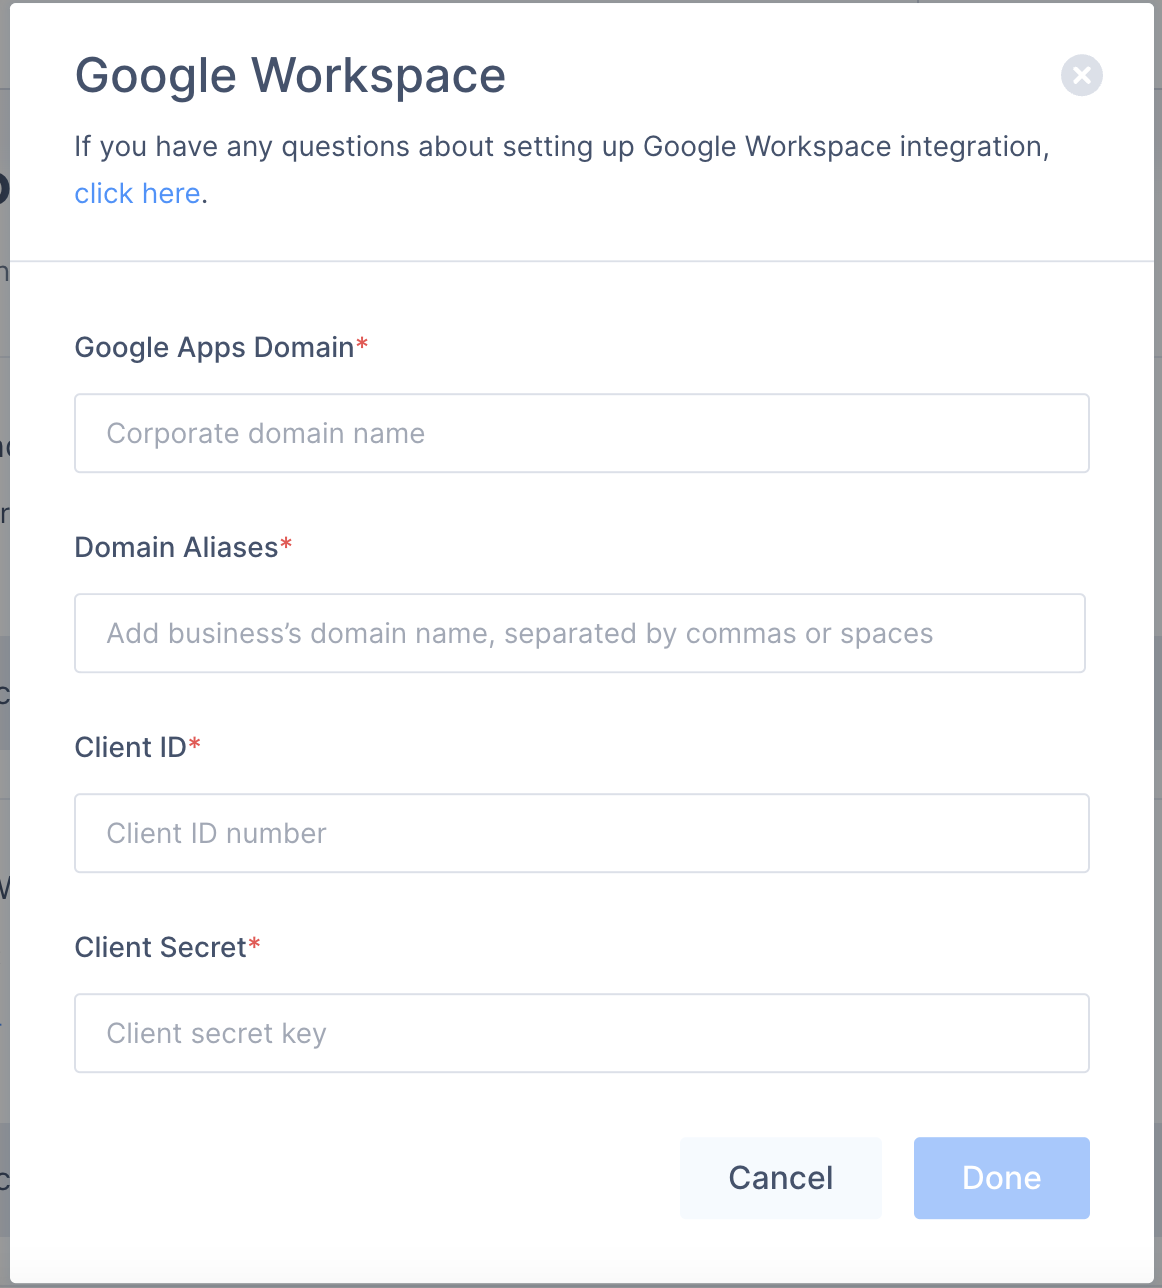
- Select Done.
- You will need to configure your settings so that your app can use Google's Admin APIs. If you're the administrator, you can select Continue on the Connection's Settings page to do so. If not, provide the URL you're given to your administrator so that the required settings can be adjusted.
- Please noteBest practice is to authenticate this with a service user (such as it@<yourcompany>.com) with sufficient permissions.
If the user leaves the organisation you will have to create new Client ID and Secret and then re-authenticate with a new user. 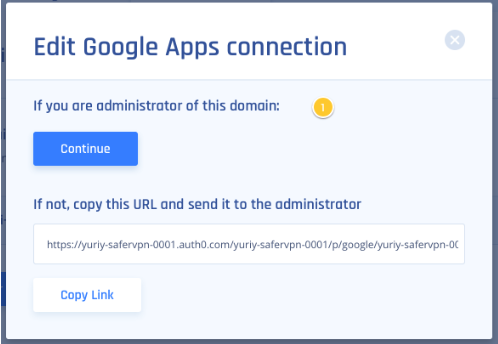
You're all set. Google Suite is now connected and users should be able to login with their G Suite account.
Recommendations
- When choosing between Google Service and Google SAML applications, consider the potential cost implications on Google's side for using Google Services.
- A SAML integration mandates all users to authenticate using Google Suite, whereas a Google Service setup offers more flexibility, allowing specific user groups only.
- Ensure you have the necessary permissions in both Google Suite and Harmony SASE for a successful integration.
- When setting up, always replace placeholders with the correct values, such as your workspace name.
- Save the generated Google Client ID and Client Secret for later use in Harmony SASE.
- If connecting to Google Suite enterprise domains, remember to enable the Admin SDK service.
- Periodically review your Google Suite configuration settings to ensure alignment with any updates or changes in the Harmony SASE platform.
Troubleshooting
If you encounter issues during or after the setup, try reviewing your settings to ensure everything matches the instructions. In particular, check the IP addresses and other details you entered during setup. If issues persist, please consult our dedicated support.
Support Contacts
If you have any difficulties or questions, don't hesitate to contact Harmony SASE's support team. We offer 24/7 chat support on our website at sase.checkpoint.com, or you can email us at sase-support@checkpoint.com. We're here to assist you and ensure your VPN tunnel setup is a success