Introduction
This guide elaborates on how Harmony SASE integrates with Active Directory/LDAP through the Active Directory/LDAP Connector installed on your network.
The AD/LDAP Connector serves as a bridge between your Active Directory and the Harmony SASE Service.
Steps
The AD/LDAP Connector (1) is a bridge between your Active Directory (2) and the Harmony SASE Service (3). This bridge is necessary as AD is typically restricted to your internal network, and Harmony SASE is a cloud service running in a completely different context.
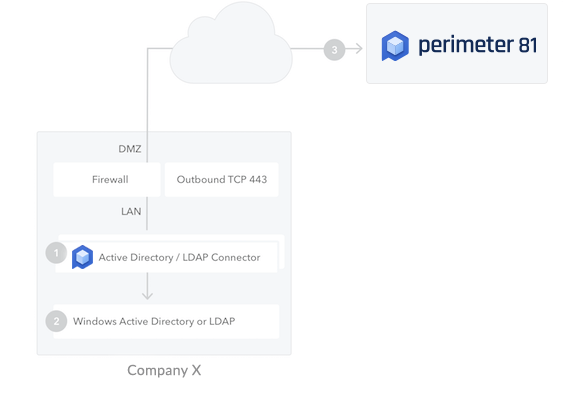
For high availability and load balancing, you can install multiple instances of the connector. All connections are outbound from the connector to Harmony SASE, so changes to your firewall are generally unnecessary.
Enabling an AD/LDAP Connection
- Log in to your Harmony SASE Management Platform and navigate to Settings and then Identity Providers.
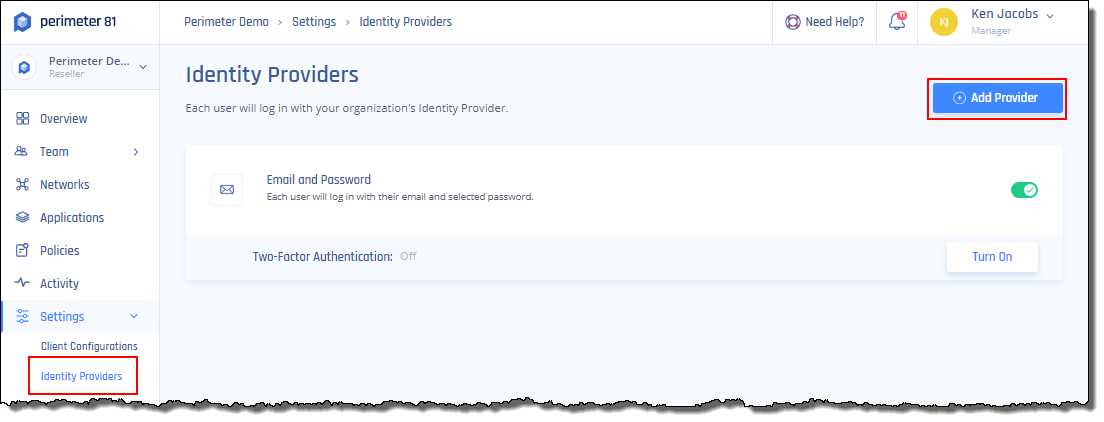
- Select + Add Provider.
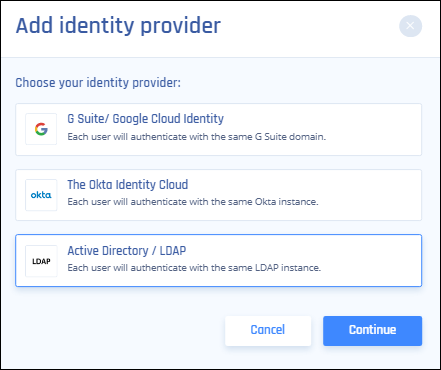
- Choose Active Directory / LDAP and select Continue.
- In the List of domain names field, list the user email domains that will be allowed to log in to this AD/LDAP connection. For example, harmonysase.com.
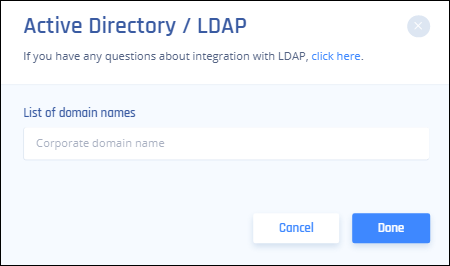
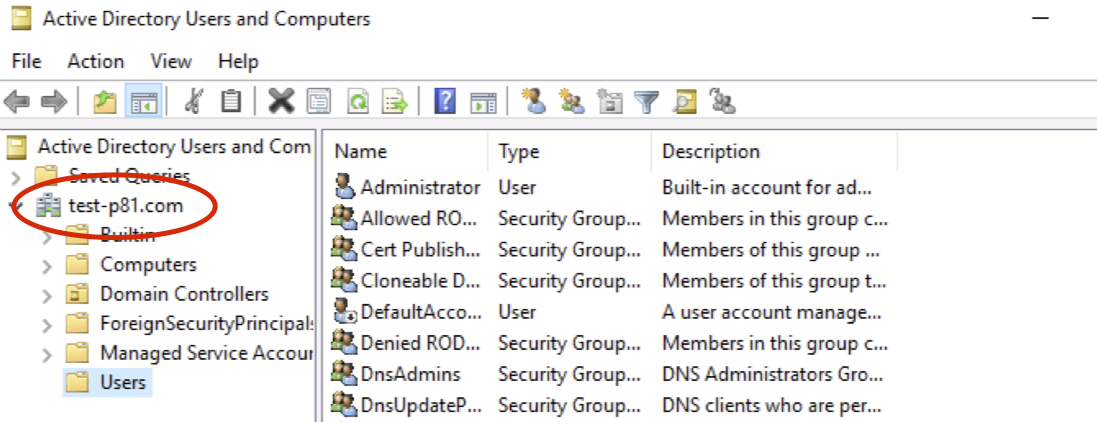
If you are not sure what is your domain name, you can find it under Active Directory Users and Computers.
5. Select Done.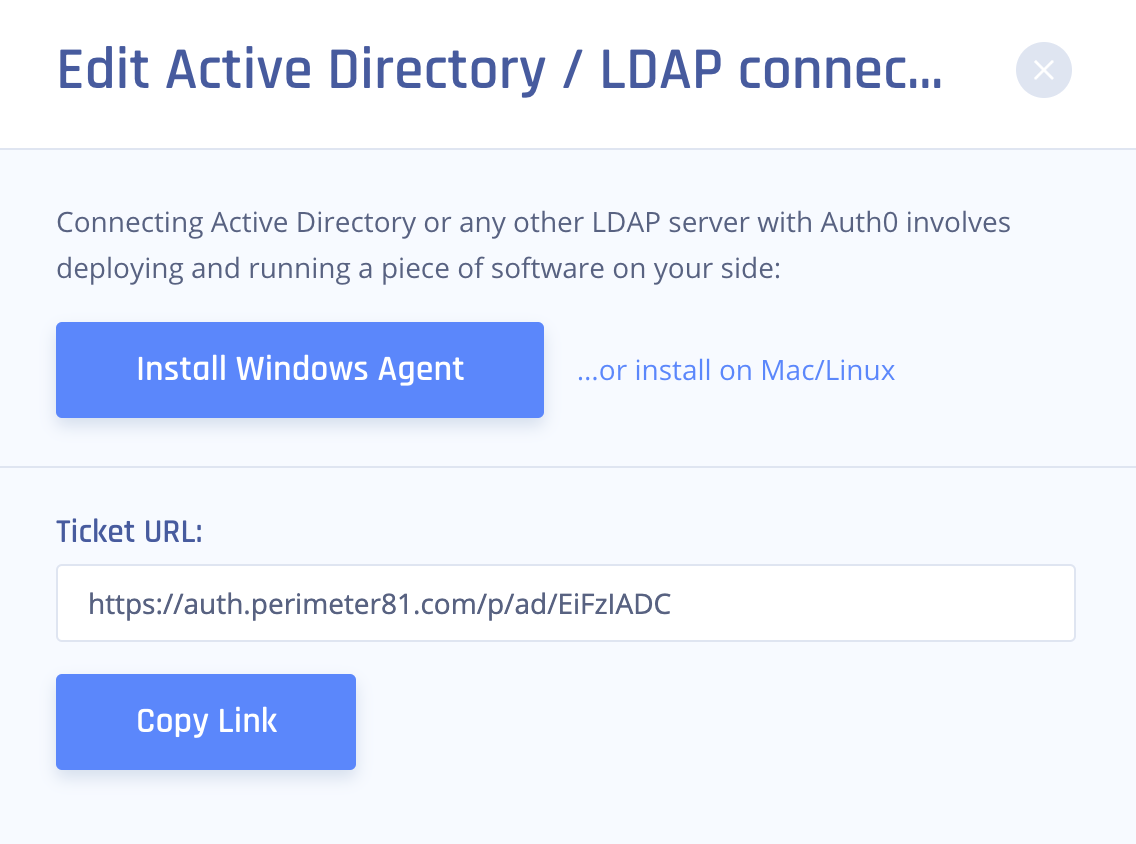
6. Add a DenyUnauthenticatedBind=1 condition in Active Directory configuration.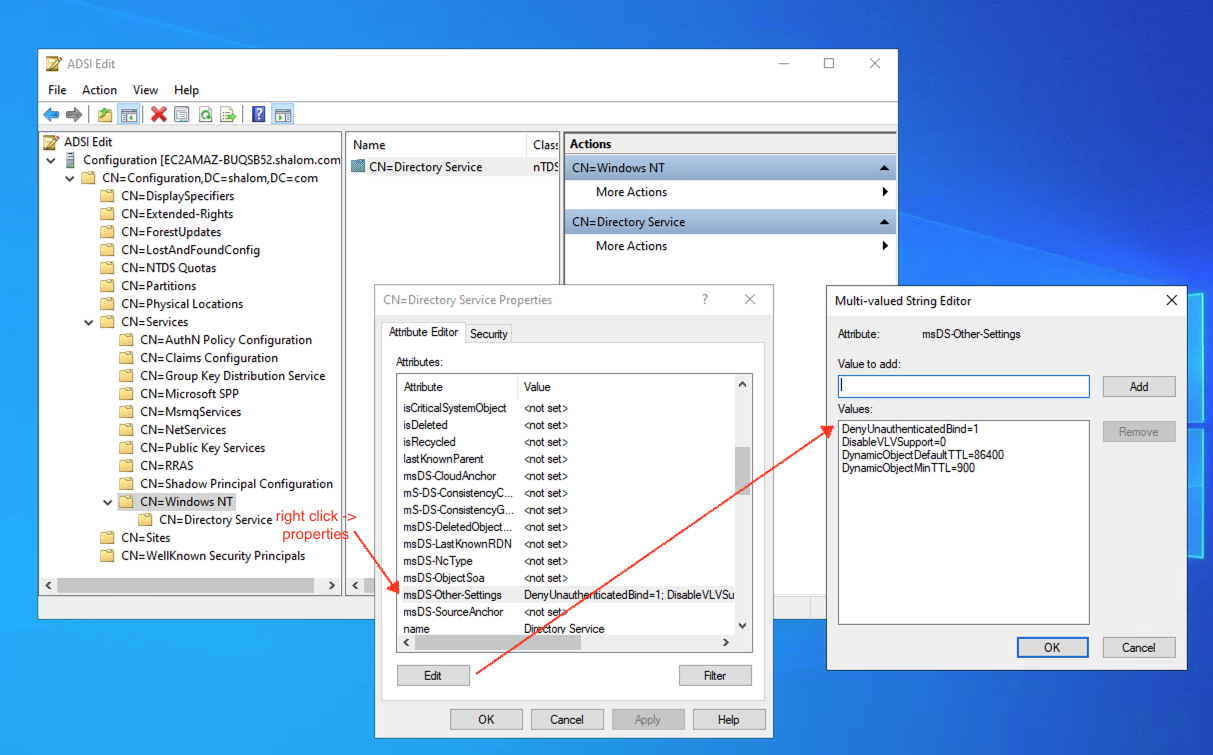
7. Download the Install Windows Agent on the next page to your machine.
Make sure to keep the TICKET URL on hand as you will need it later.
Installing the connector on your network
The Connector is packaged as a standard Microsoft Installer file (MSI).
Run the installer
- The Connector can be installed on an existing server, even a Domain Controller. However, more often it's installed on virtual machines provisioned just for the Connector.
- Run the installer and follow the instructions:
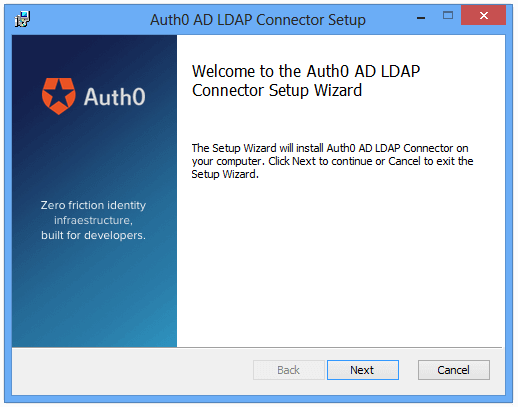
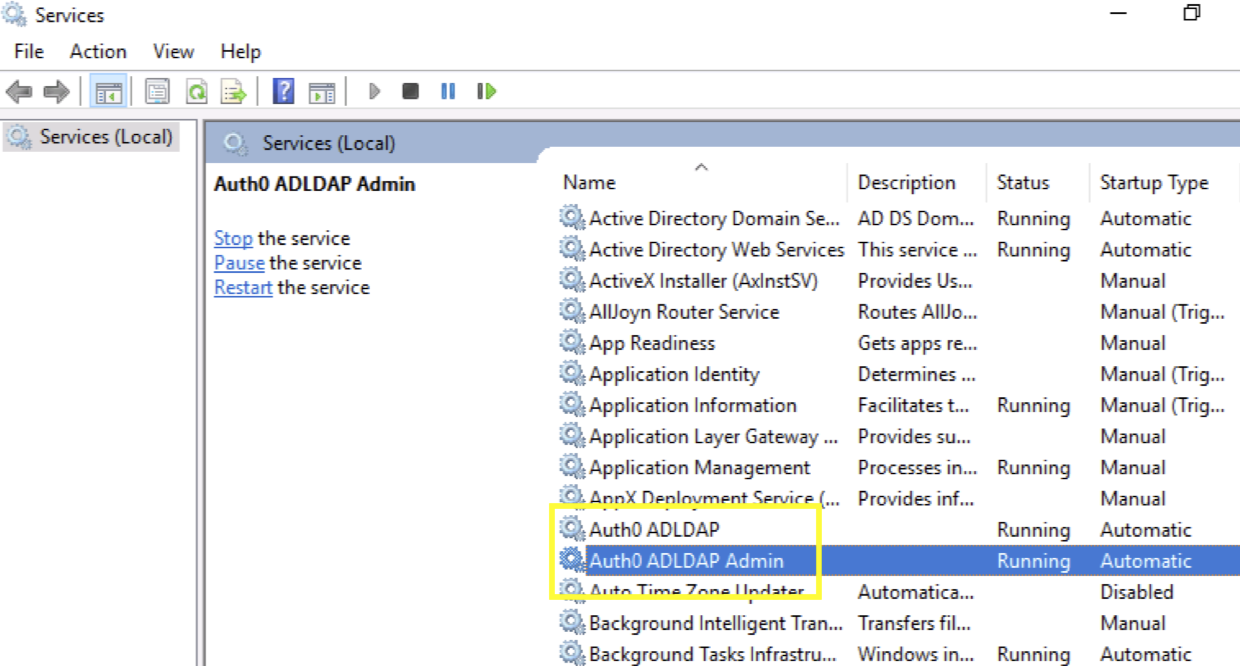
The AD/LDAP Connector in Windows is installed as a Windows Service: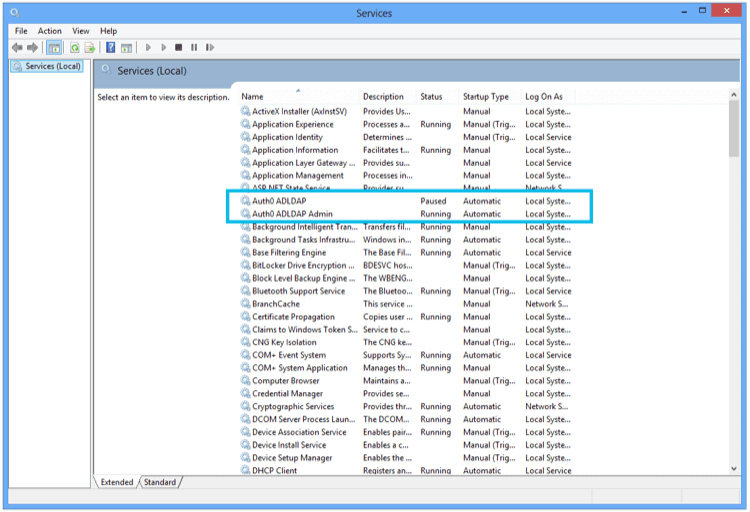
Link to Harmony SASE
Once the installation is complete, you will see the following screen in a browser pointing to localhost: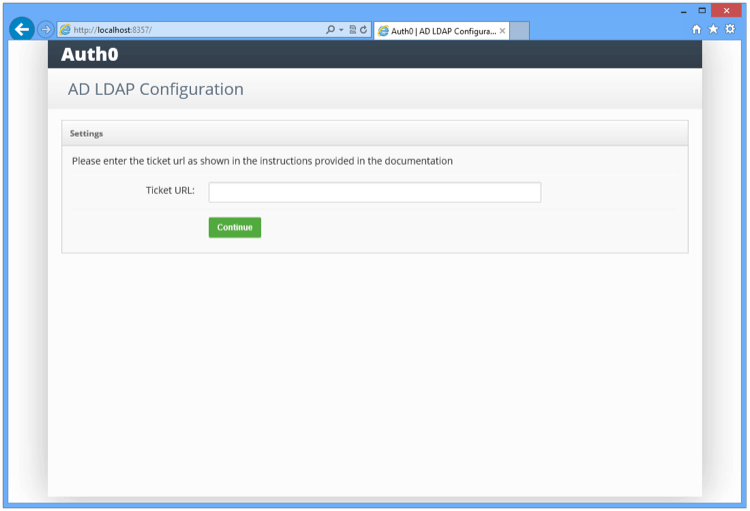
- Enter the TICKET URL provided when provisioning the connection in the initial step above.
The TICKET URL uniquely identifies this connector in Harmony SASE. The Connector will use this to communicate with our service and automatically complete the configuration.
Link to LDAP
- Once you have entered the TICKET URL, you need to enter the LDAP settings:
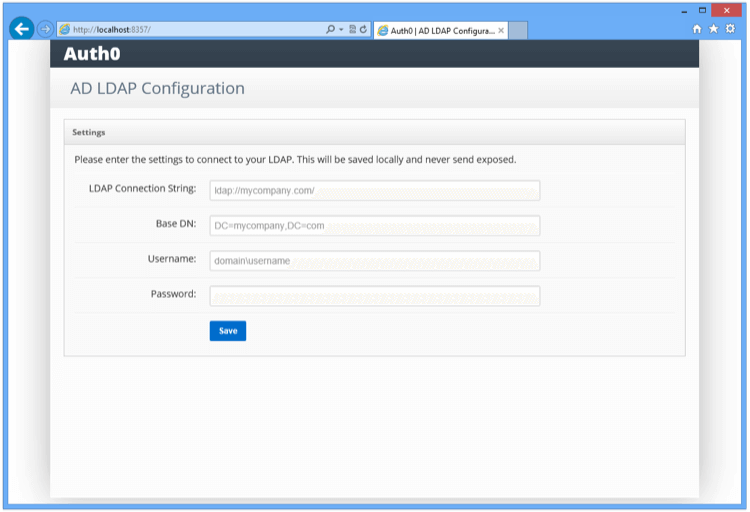
- LDAP Connection String (e.g., ldap://ldap.internal.acme.com): This is the protocol + the domain name or IP address of your LDAP server. Your LDAP server is the local domain controller where Active Directory is installed. The protocol can be either LDAP or LDAPS. If you need to use LDAPS make sure that the certificate is valid in the current server (auto-populate).
- Base DN (eg: dc=acme,dc=com): This is the base container for all the queries performed by the connector (auto-populate).
- Username (eg: cn=svcauth0,dc=services,dc=acme,dc=com): The full name of a user with administrator rights to perform queries.
- Password: The password of that user.
- No need to fill in any of the other fields.
Once you submit the above information, the connector will perform a series of tests: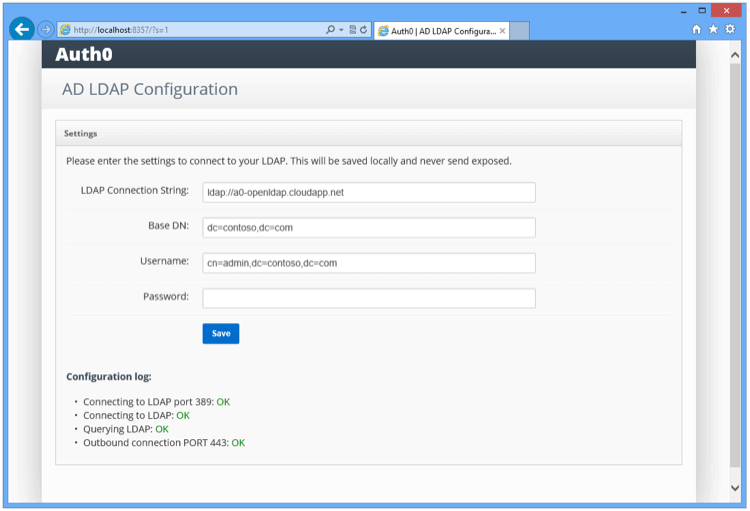
Make sure that all tests are in green.
2. Apply custom configuration to the connector config file.
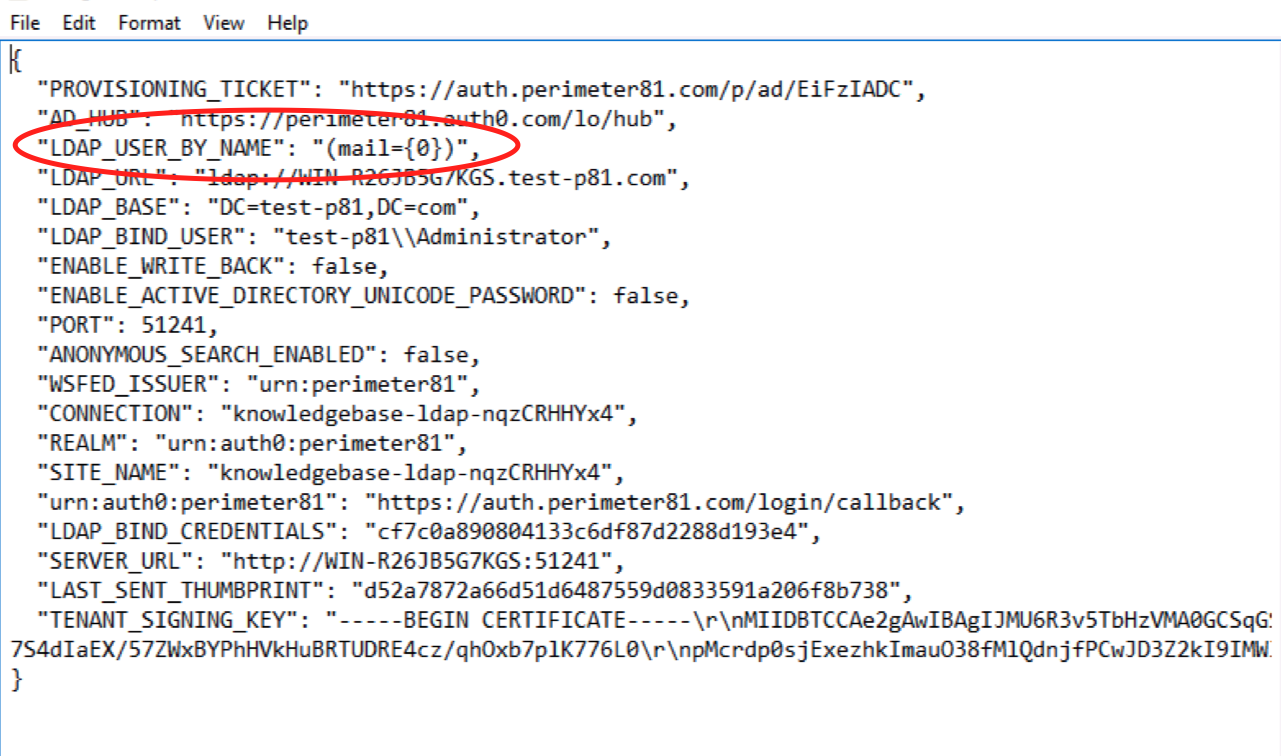
The config.json file is the AD/LDAP Connector's main configuration file. The file is located in the install directory for the AD/LDAP Connector, which (for Windows) is usually found at C:\Program Files (x86)\Auth0\AD LDAP Connector.
3. Add the following row into the json file (can be opened in any text editor) right after the second row:
`"LDAP_USER_BY_NAME": "(mail={0})",`
4. Save the config.json file.
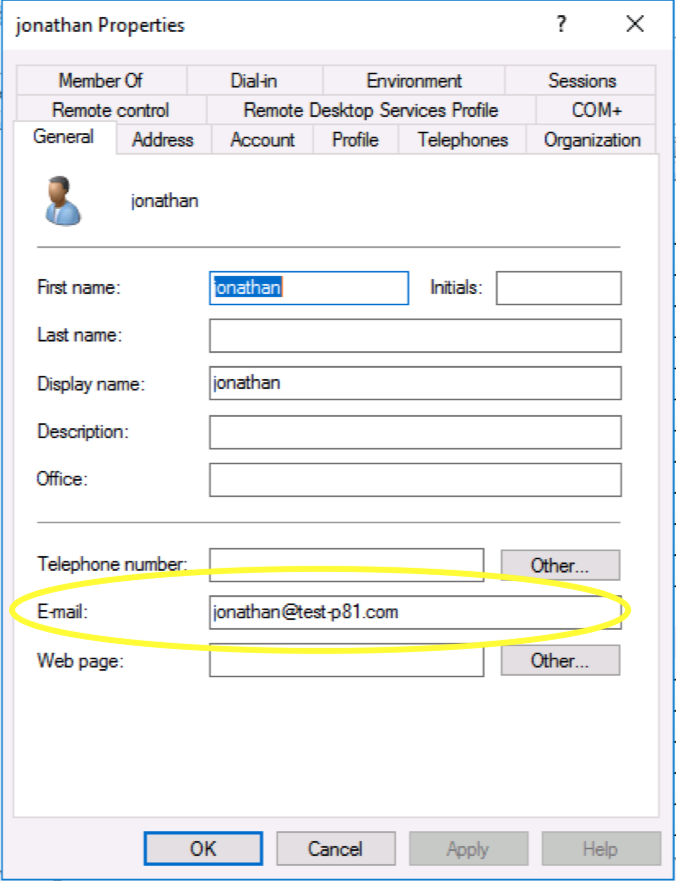
Note - The integration will not be successful unless all users have their email addresses filled in.
5. Restart the AD/LDAP Connector service (the Auth0 ADLDAP and Auth0 ADLDAP Admin services in Windows).
Congratulations, your AD/LDAP is installed, connected, and ready to use within Harmony SASE.
6. To prevent unauthenticated LDAP bind requests (unauthorized access to directory information and protecting sensitive data from potential exploitation):
- Open ADSI Edit (press Win + R, type
adsiedit.msc, and press Enter). - In ADSI Edit, right-click on ADSI Edit at the top of the left navigation pane and select Connect to.
- Connect to the Configuration Naming Context.
- In the left navigation pane, expand Configuration > Services > Windows NT.
- Right-click Directory Service and select Properties.
- In the Attributes list, find
msDS-Other-Settings. - Select
msDS-Other-Settingsand click Edit. - In the Value to add field, enter
DenyUnauthenticatedBind=Trueand click Add. - Click OK to save your changes.
Recommendations
- Post-installation, a browser screen will prompt you to enter the TICKET URL, which identifies this connector in Harmony SASE.
- Enter LDAP settings like the LDAP Connection String, Base DN, Username, and Password.
Troubleshooting
If you face any problems during or after the setup, please review your settings carefully to ensure that everything matches the instructions. Specifically, refer to the troubleshooting page on the AD server. Double-check the IP addresses and other details you entered during setup, as they might be incorrect and cause issues. Additionally, please ensure that the local clock on the AD server is accurate to avoid any clock skew issues. If you continue to experience problems, please contact our dedicated support team for assistance.
Support Contacts
If you have any difficulties or questions, don't hesitate to contact Harmony SASE's support team. We offer 24/7 chat support on our website at sase.checkpoint.com, or you can email us at sase-support@checkpoint.com. We're here to assist you and ensure your VPN tunnel setup is a success

