
Introduction
This guide will assist you in establishing a Site-to-Site VPN tunnel between your Check Point SASE network and your DrayTek Vigor 2862 environment.
Breakdown of topics
- Pre-requisites
- Configuration Steps
- Verifying the Setup
- Troubleshooting
- Support Contacts
Pre-requisites
To successfully follow this guide, ensure that:
- An active Check Point SASE account and a configured network.
- The Check Point SASE application is installed on your designated devices.
- An up-and-running DrayTek Vigor 2862 setup with the necessary administrative credentials.
Configuration Steps
Configuring the tunnel in the Management Platform
Go to the Gateway in your network from which you want to create the tunnel to DrayTek. Select the three-dotted menu (...) and select Add Tunnel.
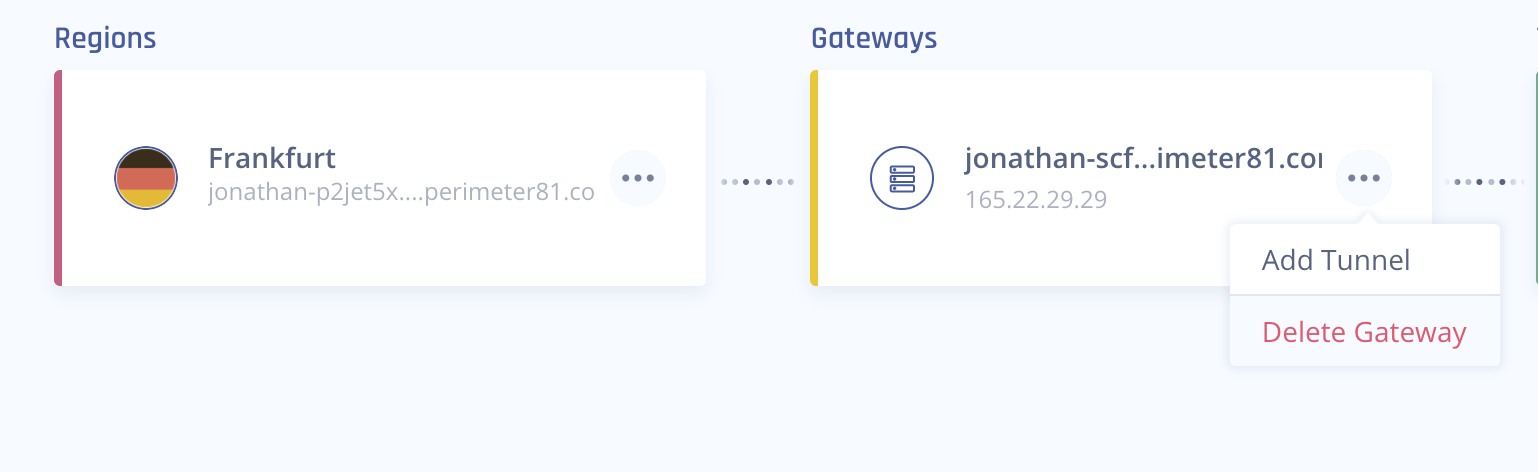
Select IPSec Site-2-Site Tunnel and select Continue.
.png)
3. In the General Settings section, specify these:
- Name: Choose whatever name you find suitable for the tunnel.
- Shared Secret: Enter a string of your own or use Generate.
- Public IP: Enter the public IP of the DrayTek device.
- Remote ID: Enter a name that will be also used as the name of the VPN profile on the DrayTek device.
- Check Point SASE Gateway Proposal Subnets: Choose the specified subnet. By default, this should be set to 10.255.0.0/16.
- Remote Gateway Proposal Subnets: Select Specified Subnets and specify according to your local LAN Subnets.
.PNG)
- In the Advanced Settings section, specify these:
- IKE Version: V2
- DPD delay: 30s
- DPD timeout: 60s
- Phase 1:
- Encryption (Phase 1): AES256
- Integrity (Phase 1): SHA1 (Set it higher if the router allows it)
- Key Exchange Method: modp1024 (Set it higher if the router allows it)
- Phase 2:
- Encryption (Phase 2): AES256
- Integrity (Phase 2): SHA1 (Set it higher if the router allows it)
- Key Exchange Method: modp1024 (Set it higher if the router allows it)
Leave the rest of the fields with the default values (as shown in the attached image) and click on Add Tunnel.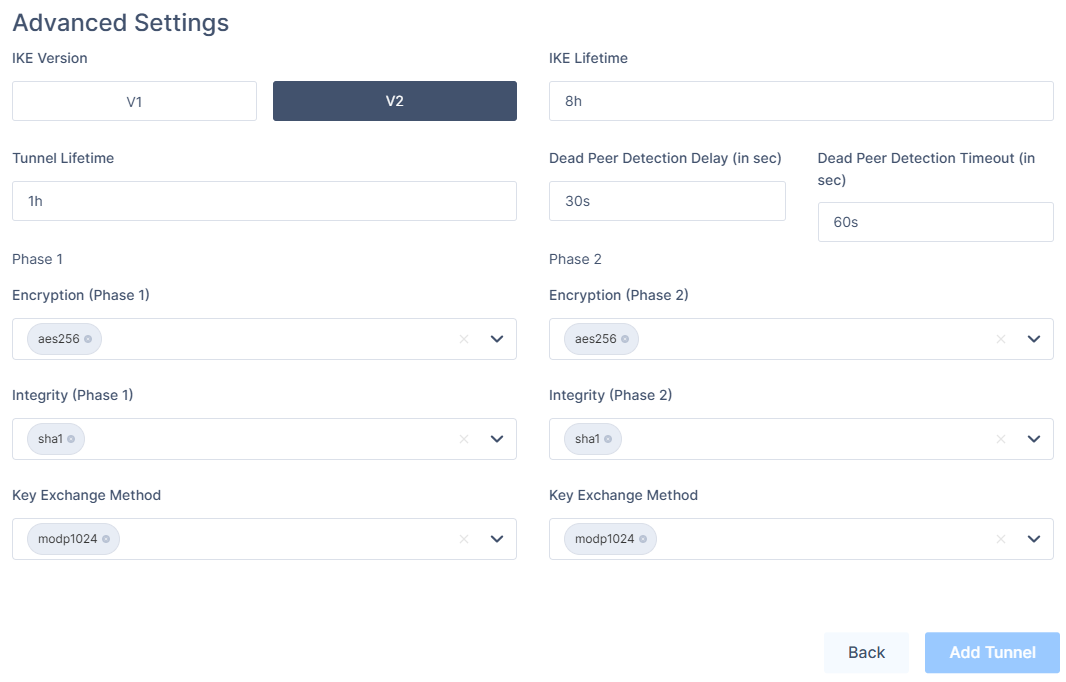
Configuring the tunnel in the DrayTek Management Interface
- Open the DrayTek management interface.
- In the left panel, select VPN and Remote Access, then select LAN to LAN, create a new VPN profile
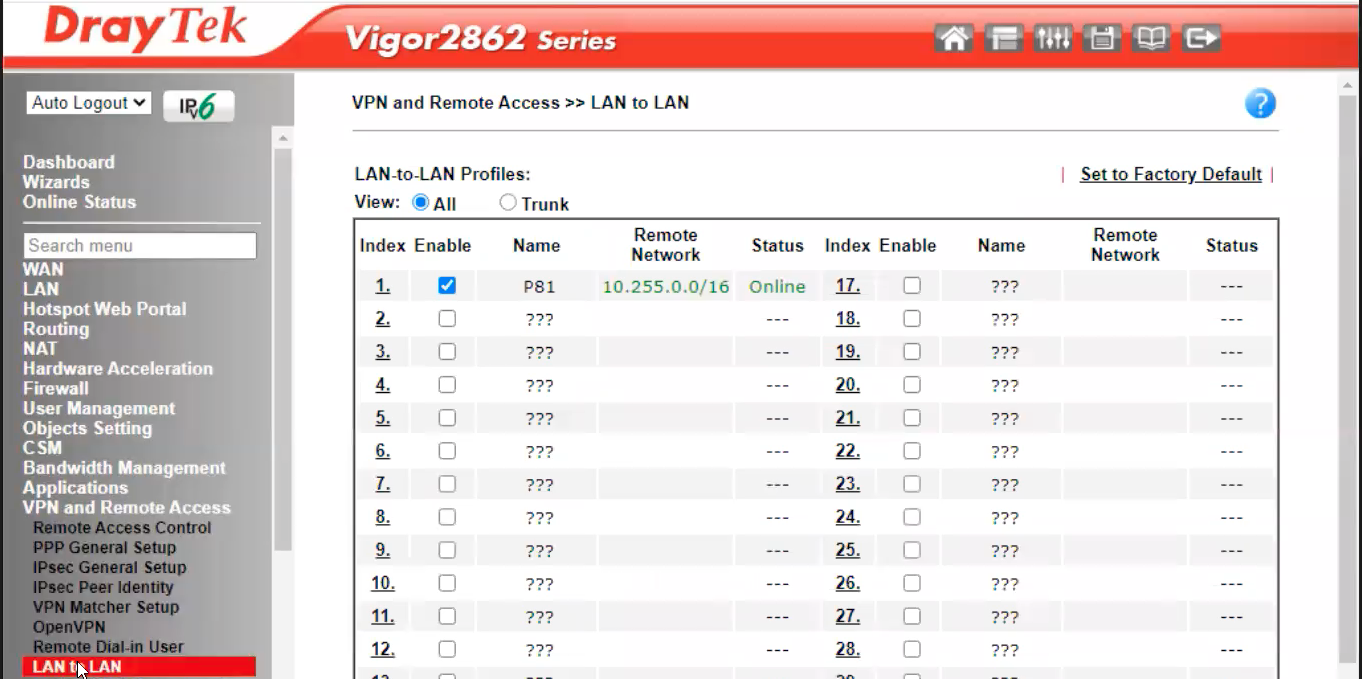
3. Under the Common Settings tab, fill in the following information:
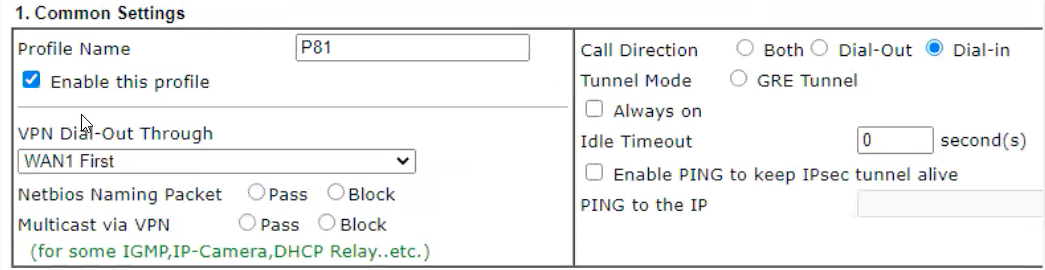
- Profile Name: Check Point SASE
- Enable this profile checkbox: Checked
- VPN Dial-Out through: Your WAN interface; Default WAN IP
- Call Direction: Dial-in
- Idle Timeout: 0 second
Leave the Dial-Out settings blank
Under Dial-In Settings, fill in the following information:
.png)
- Allowed Dial-In Type: Check "IPsec Tunnel"
- Specify Remote VPN Gateway: Enter the Check Point SASE gateway IP
- Pre-shared Key: Check the box and click on the "IKE Pre-Shared Key" button
A pop-up will appear:
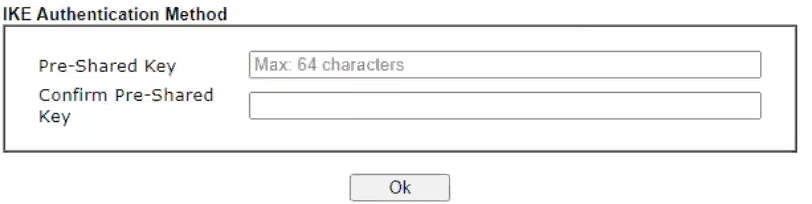
Enter the same shared secret you choose while configuring the tunnel at the Check Point SASE portal and click "OK"
Under TCP/IP Network Settings, fill in the following:
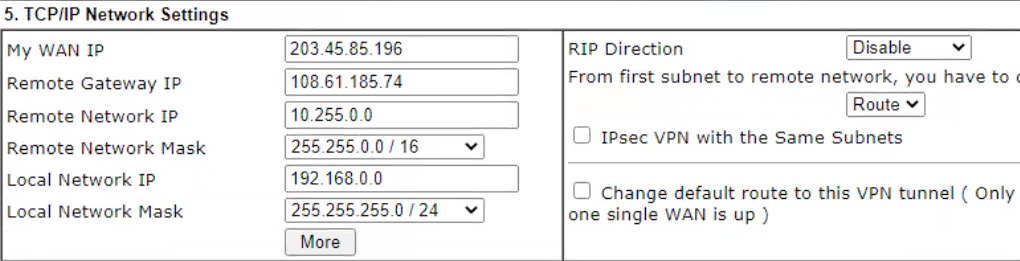
- MY WAN IP: Your WAN interface; Default WAN IP
- Remote Gateway IP: Enter the Check Point SASE gateway IP
- Remote Network IP: Enter your Check Point SASE Network subnet
- Local Network IP: Enter your LAN subnet
Verifying the Setup
After following the above steps, your tunnel should be active.
To verify, go to your Check Point SASE dashboard, locate the tunnel you just created, and check the tunnel status.
It should indicate that the tunnel is "Up", signifying a successful connection.
Next, connect to your network using the Check Point SASE agent and attempt to access one of the resources in your environment.
Troubleshooting
If you encounter issues during or after the setup, try reviewing your settings to ensure everything matches the instructions. In particular, check the IP addresses and other details you entered during setup. If issues persist, please consult our dedicated support.
Support Contacts
If you have any difficulties or questions, don't hesitate to contact Check Point SASE's support team. We offer 24/7 chat support on our website at sase.checkpoint.com, or you can email us at sase-support@checkpoint.com. We're here to assist you and ensure your VPN tunnel setup is a success.