
Welcome
Welcome aboard the MDM App Deployment section at Check Point SASE's Help Center!
This guide offers you a sneak peek into this category and the must-visit resources.
The deployment process of Check Point SASE varies depending on your MDM (Mobile Device Management) provider and is done utilizing a public app deployment process.
If you are managing the Check Point SASE client deployment using MDM you should disable the Update client functions in the Check Point SASE Web Console to prevent looping client installation issues.
Must-Visit Resources
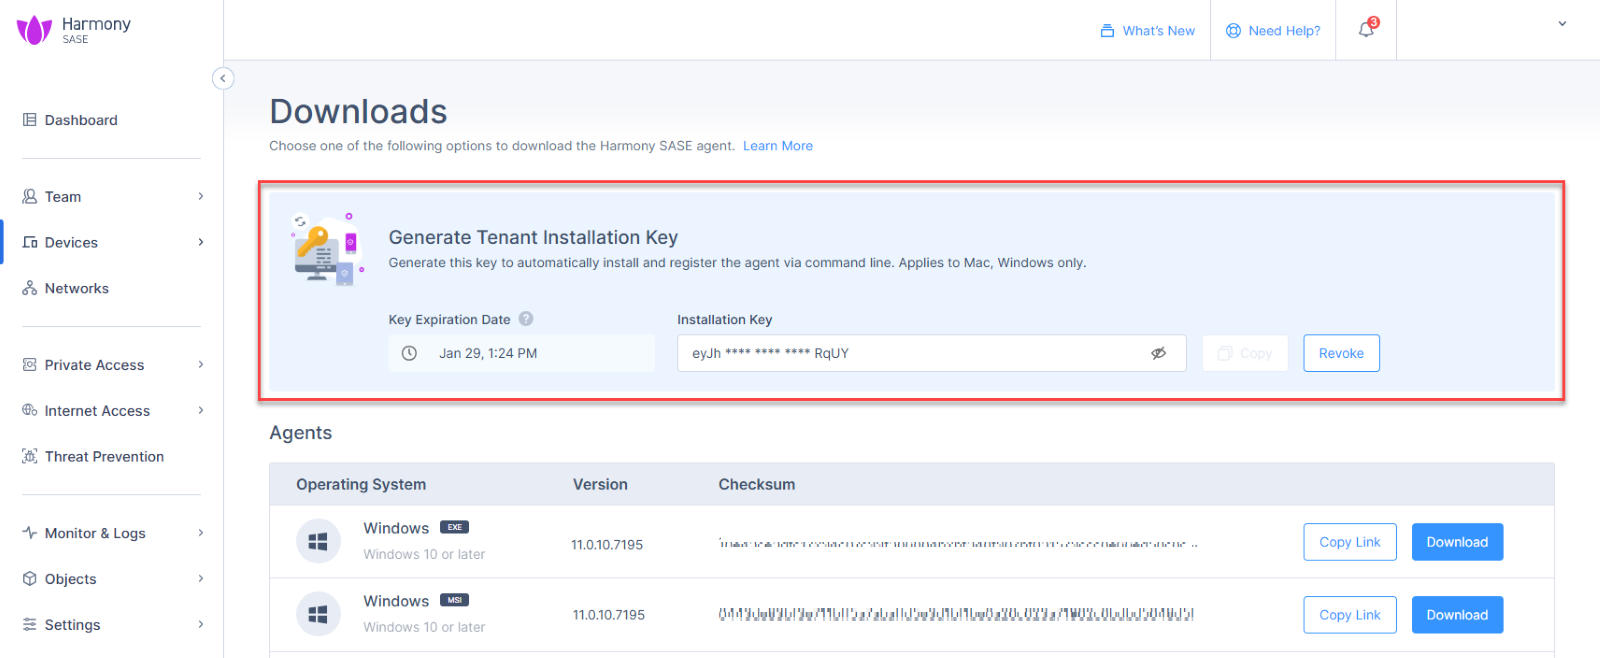
Download the Check Point SASE agent
MDM deployment with SWG
Using SCCM? See SCCM Agent Deployment
deployment guides for common MDM providers
Transparent Internet Access Installation
Note - Applies to Check Point SASE Agent version 11.5 and higher.
The Transparent Internet Access enforces internet security immediately upon agent installation, without requiring any end-user interaction.
The remote installation process bypasses both device and member registration while ensuring that users receive the latest security policies, even if they have not signed in to the agent.
You can generate a unique installation key from the platform download page. This key is visible only to Admin users. Once generated, the key validity cannot be modified.
Note - Private Access remains restricted until the user authenticates and registers on the platform.
Seamless Internet Access installation requires sending a combination of these command-line parameters during the agent installation process:
REGION
WORKSPACE*
TENANT_TOKEN
EMAIL*
*OptionalNote - EMAIL is optional for Windows and mandatory for macOS.
Common Commands
Operating System | Windows (.msi installation flags for versions 11.0 and above): | Windows (.msi installation flags for legacy versions (up to 11.0): | macOS |
Linux (installation flags): |
|---|---|---|---|---|
Command for | ||||
Silent Installation |
To know the installation status after the silent installation, run:
|
To know the installation status after the silent installation, run:
|
To change the agent permissions after the installation, run:
|
|
Pre-populating the tenant or workspace name |
|
|
To remove pre-populated workspace/tenant name, run:
This is supported only with agent version 8.0.4.116 and higher. | To pre-populae the workspace name, run:
Replace " |
Pre-populating the data residency region |
For
|
For
|
For
|
|
Pre-populating the tenant or workspace name and data residency region |
For
|
For
| To pre-populating the tenant or workspace name, run:
To pre-populating the data residency region, run:
For
|
|
Transparent user registration using tenant installation token (applies for version 11.5 and above) |
|
|
|
|
Transparent user registration, using tenant installation and user installation (applies for version 11.3 and higher) |
|
|
|
|
Uninstallation |
|
| Run the uninstall script. |
|
Jumpstart Your Journey
If you're just stepping into the world of Check Point SASE, our Getting Started Guide is the perfect starting point.
Support at Your Fingertips
Got questions or need help? Our support team is available round the clock. You can chat with us anytime on our website, or drop us an email at sase-support@checkpoint.com