An Enhanced Network offers better scalability and easier management.
Benefits
Improved scalability:
Support more users per network.
Higher throughput per tunnel
Up to eight parallel terminations for redundant IPSec tunnels. This offers better resiliency, load sharing, and overall scale compared to Standard Networks, which support only two parallel terminations.
Ability to define tunnel bandwidth for better traffic optimization and capacity planning.
Simplified management:
Each region uses a single public IP address, regardless of scale. This removes the need to manage multiple public IP addresses.
Capacity in a region can be quickly adjusted by adding or removing Scale Units, the virtual equivalent of gateways in Standard Networks.
Enhanced user interface:
Improved network management interface, making it easier to create and maintain IPSec tunnels.Early access to features:
New features and bug fixes are released first or exclusively to Enhanced Networks.
Supported Regions
Enhanced Networks are supported in these regions:
North America
| EMEA
| APAC
| LATAM
|
|---|
High Level Procedure
Creating an Enhanced Network
Access the Check Point SASE Administrator Portal and click Networks.
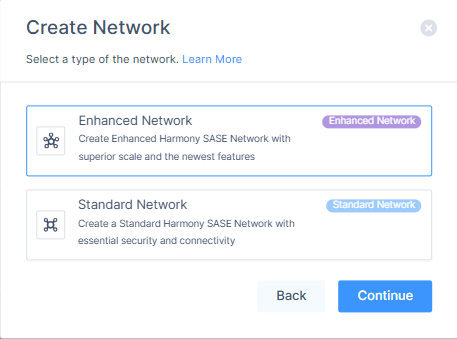
Click Create Network.
.png)
Select Enhanced Network and click Continue.
Enter the network details:
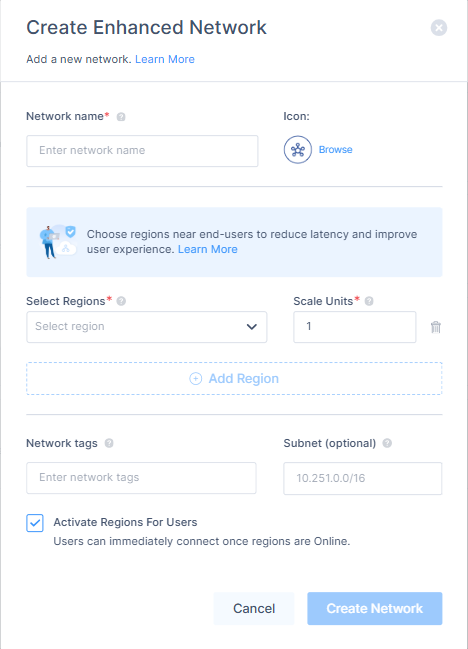
Network name: Name for your network. For example, HQ, Finance, or Staging.
Icon: By default, the network icon
 is applied. If you do not choose one, click Browse to select one.
Region: Region to deploy the Check Point SASE gateway.
Recommended to choose a region closest to your sites and members.
Scale Units: The number of gateways you want to deploy in the region.
Scale Unit is a virtual network component that allows defining the expected capacity in each network region. One Scale Unit's expected capacity is similar to the capacity of a single Standard Network Gateway.
Each Scale Unit consumes one Gateway License.
(Optional) Add Region: To add more regions, click Add Region and repeat steps c and d.
(Optional) Network Tags: Add tags to identify the purpose or team.
(Optional) Subnet: By default the network subnet IP address is 10.255.0.0/16. For information on possible subnets and bit masks, see sk182225.
You cannot change the subnet after creation. Ensure it does not overlap with SD-WAN device subnets.
By default the Activate Regions For Users checkbox is selected. If you want to deactivate the region, disable it.
Click Create Network.
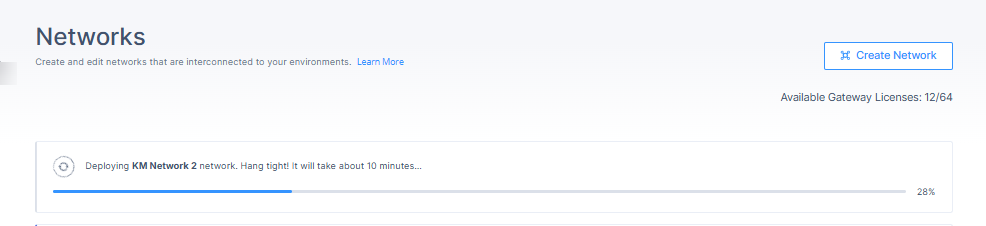
The system shows the progress of the network status on the Networks page. After the network is created, proceed with Adding a Tunnel.
Adding a Tunnel
In the Networks page, select your Enhanced Network.
For the region to which you want to add the tunnel, click
 and click Add Tunnel.
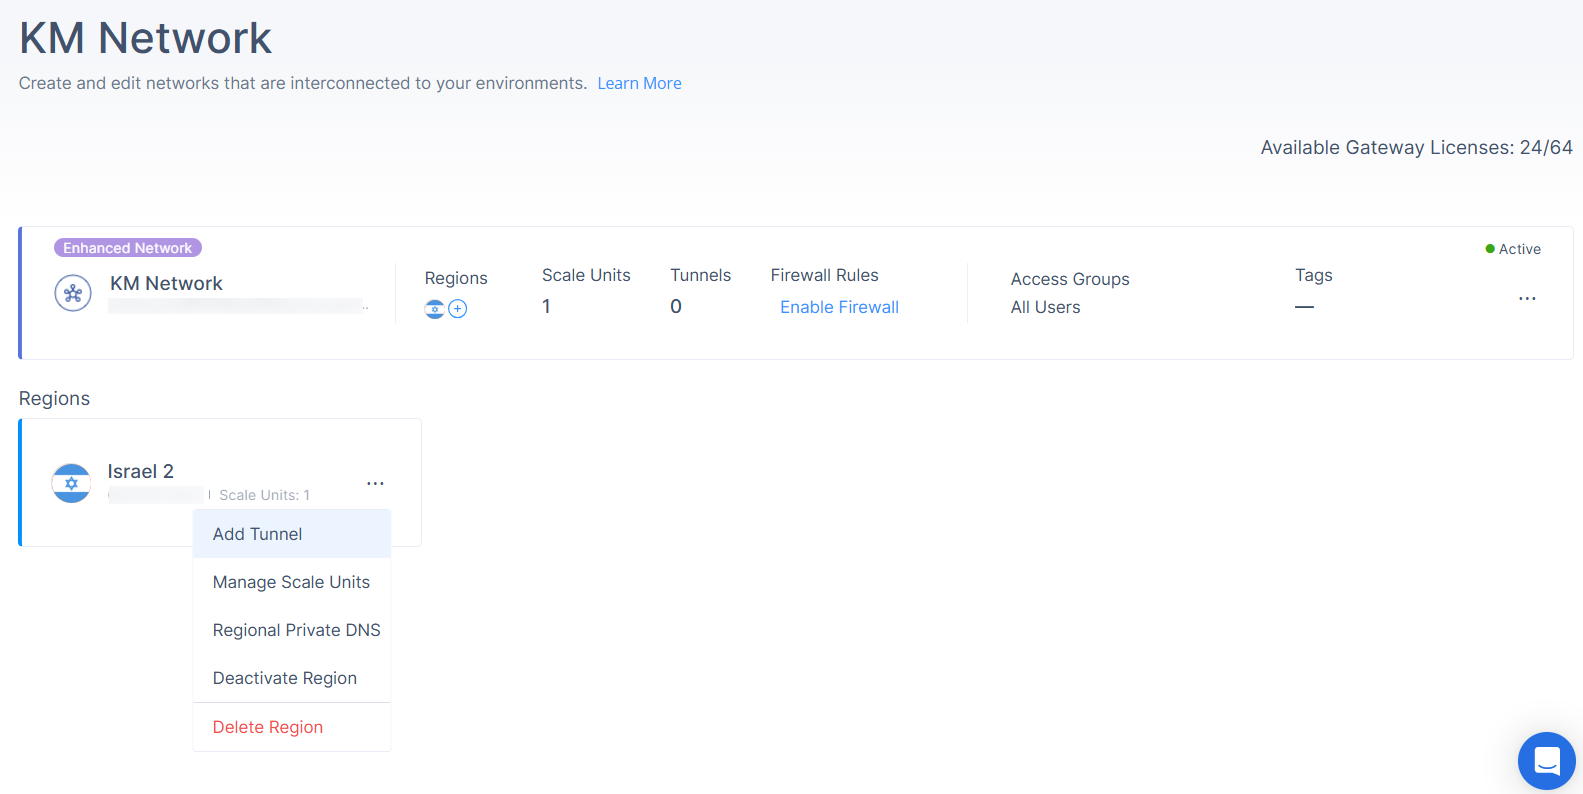
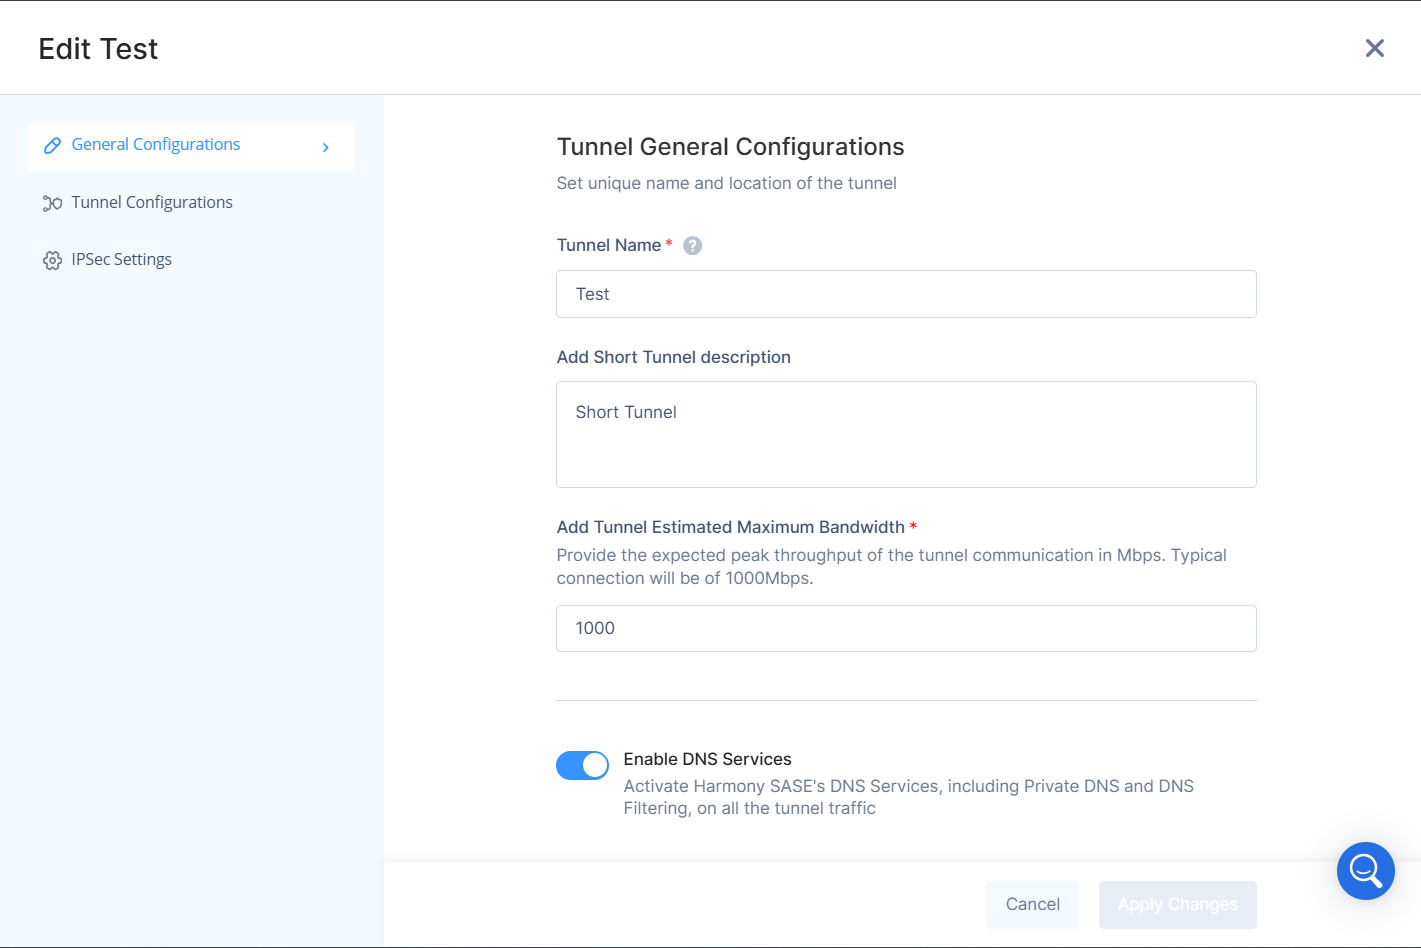
Enter these details:
Tunnel Name
Add Short Tunnel description
Add Tunnel Estimated Maximum Bandwidth
Specify the expected peak throughput of the tunnel communication in Mbps.
Range: 10–8000 Mbps
Typical connection: 1000 Mbps
By default the Enable DNS Services is enabled. Disable if you want to deactivate the DNS services.
Enable: Activates Check Point SASE’s DNS services, including Private DNS and DNS Filtering on all tunnel traffic.
Disable: No DNS services for Site to Site tunnel traffic.
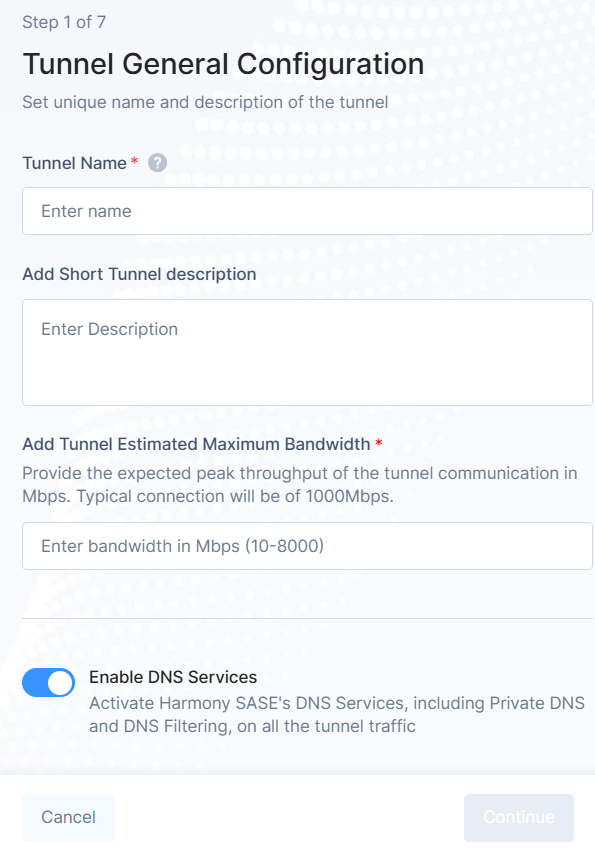
Click Continue.
The Choose Tunnel Type window appears.
Select your preferred Tunnel Type.
Choosing Tunnel Type
In the Choose Tunnel Type window, select one of these:
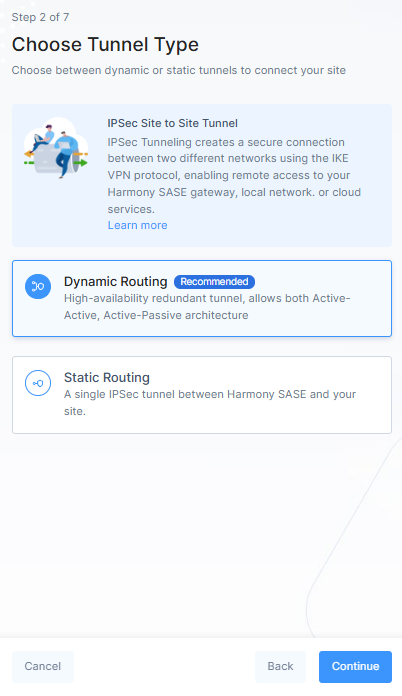
Dynamic Routing (Recommended):
High availability, active-active architecture.
Requires at least two regions.
Supports up to eight IPSec terminations for resiliency and load sharing.
Static Routing:
Single IPSec tunnel between Check Point SASE and your site.
Click Continue.
Refer:
Dynamic Routing
In Dynamic Tunnel Configuration window, Select Region section:
For the first tunnel, the Region is selected by default.
For the second tunnel, select the Region from the list.
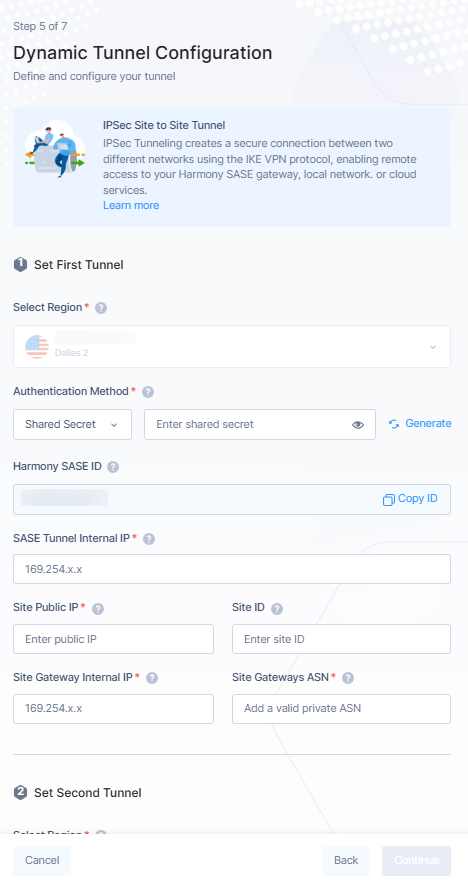 You can add up to eight parallel IPSec terminations for resiliency and load sharing.
Make sure Authentication Method is Shared Secret and enter Shared Secret key.
Enter these details:
SASE Tunnel Internal IP
Site Public IP: Public IP address of the second end of the tunnel.
Site ID: In most cases, the ID of the tunnel is its public IP. However, it must be configured to the same value on both ends.
Site Gateway Internal IP
Site Gateways ASN
Click Continue.
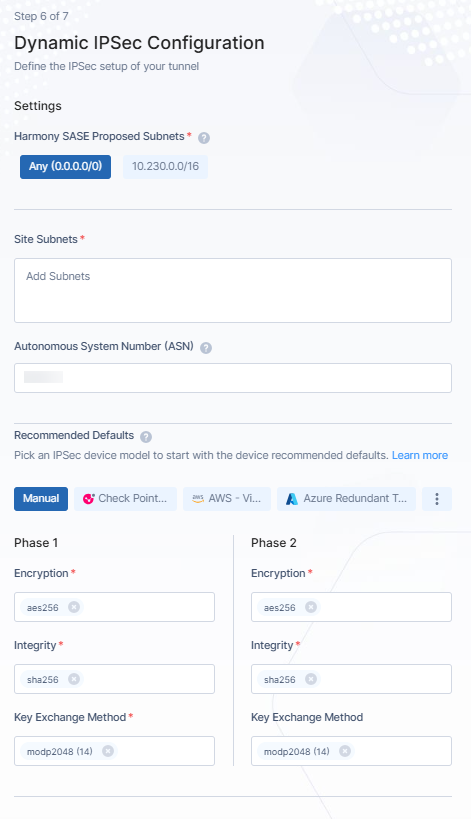
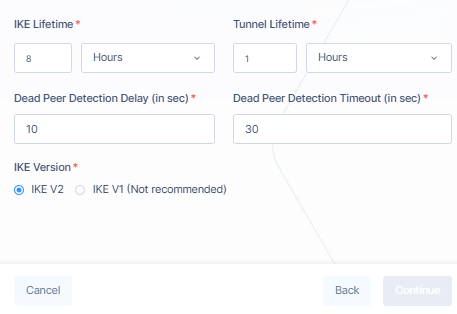
The IPSec Configuration window appears.
By default Check Point SASE Proposed Subnets is Any (0.0.0.0/0).
The IPSec network selector should be configured to the same value at both ends of the tunnel.
Enter Site Subnets.
Enter Autonomous System Number (ASN).
The Autonomous System Number (ASN) is required for the Border Gateway Protocol (BGP).
In Recommended Defaults, the values are by default based on the service provider. For more details, refer Connect Cloud Resources and Connect On-Prem Resources.
Click Continue.
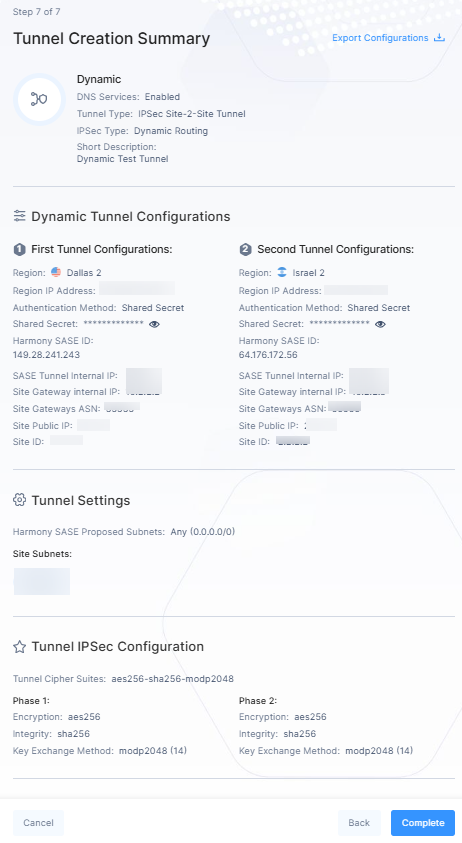
The Tunnel Creation Summary window appears. You can see all the configuration details.
(Optional) Click Export Configurations to download configuration json file.
Click Complete.
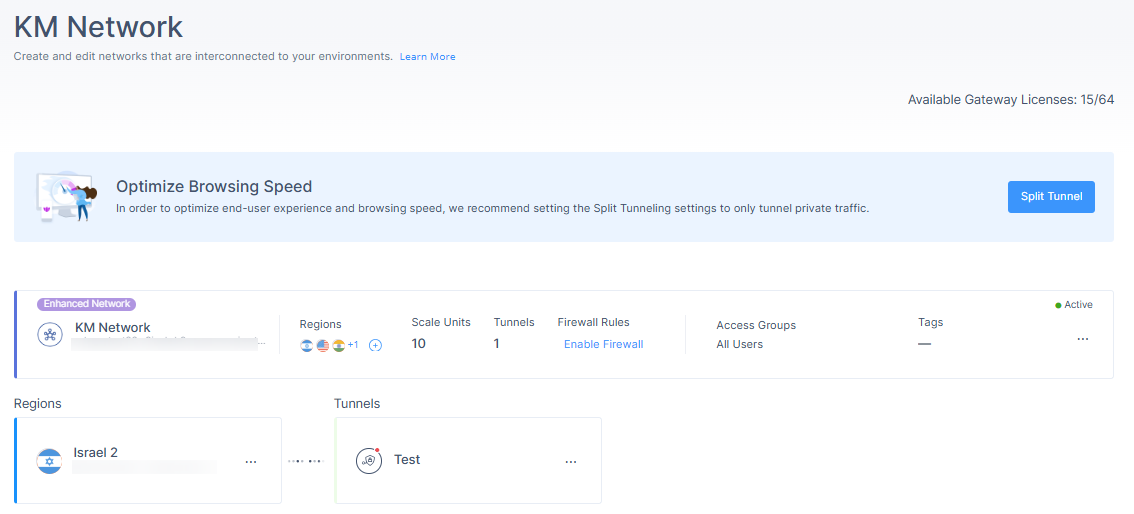
The tunnel is created and listed in your Networks page.
Static Routing
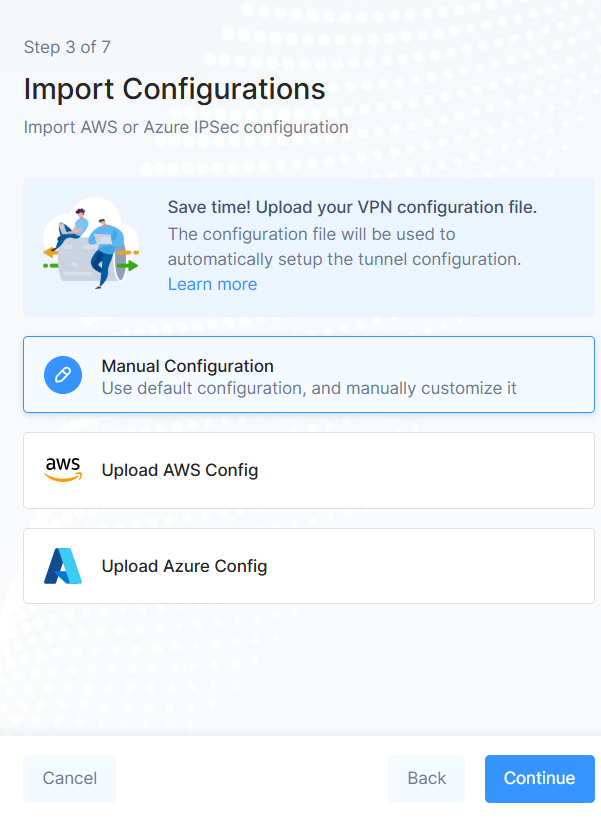
In the Import Configurations window, select Manual Configuration and click Continue.
In the Tunnel Configuration window, the Authentication Method is selected as Shared Secret by default.
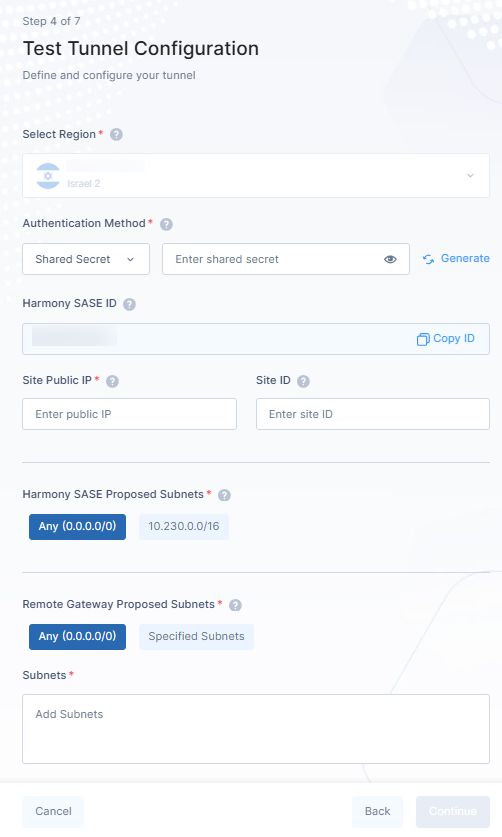
Click Generate to get the Shared Secret key.
Enter Site Public IP: It is the Public IP address of the second end of the tunnel.
(Optional) Site ID: In most cases, the ID of the tunnel is its public IP. However, it must be configured to the same value on both ends.
By default Check Point SASE Proposed Subnets is selected as Any (0.0.0.0/0).
By default Remote Gateway Proposed Subnets is Any (0.0.0.0/0).
It is not recommended to use Specified Subnets or Policy Based Routing. Consider using Any (0.0.0.0/0), Route Based instead.
Enter Subnets.
Click Continue.
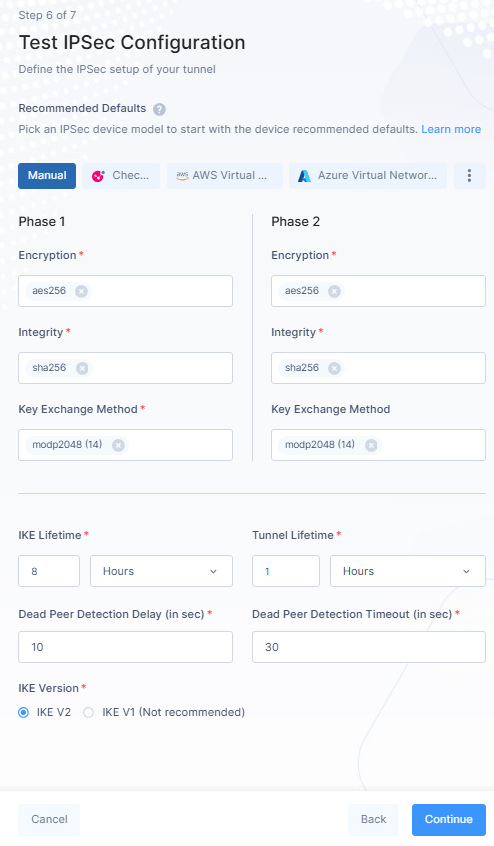
In IPSec Configuration window, the values are by default based on the service provider. For more details, refer Connect Cloud Resources and Connect On-Prem Resources.
Click Continue.
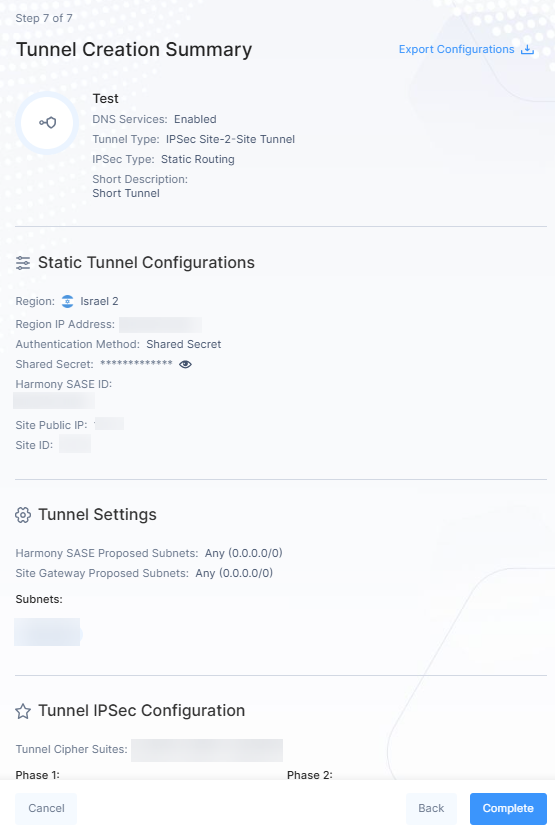
The Tunnel Creation Summary window appears. You can see all the configuration details.
(Optional) Click Export Configurations to download configuration json file.
Click Complete.
The tunnel is created and listed in your Networks page.
Managing a Network
Editing a Network
Access the Check Point SASE Administrator Portal and click Networks.
Select the network.
Click
and then click Edit Network.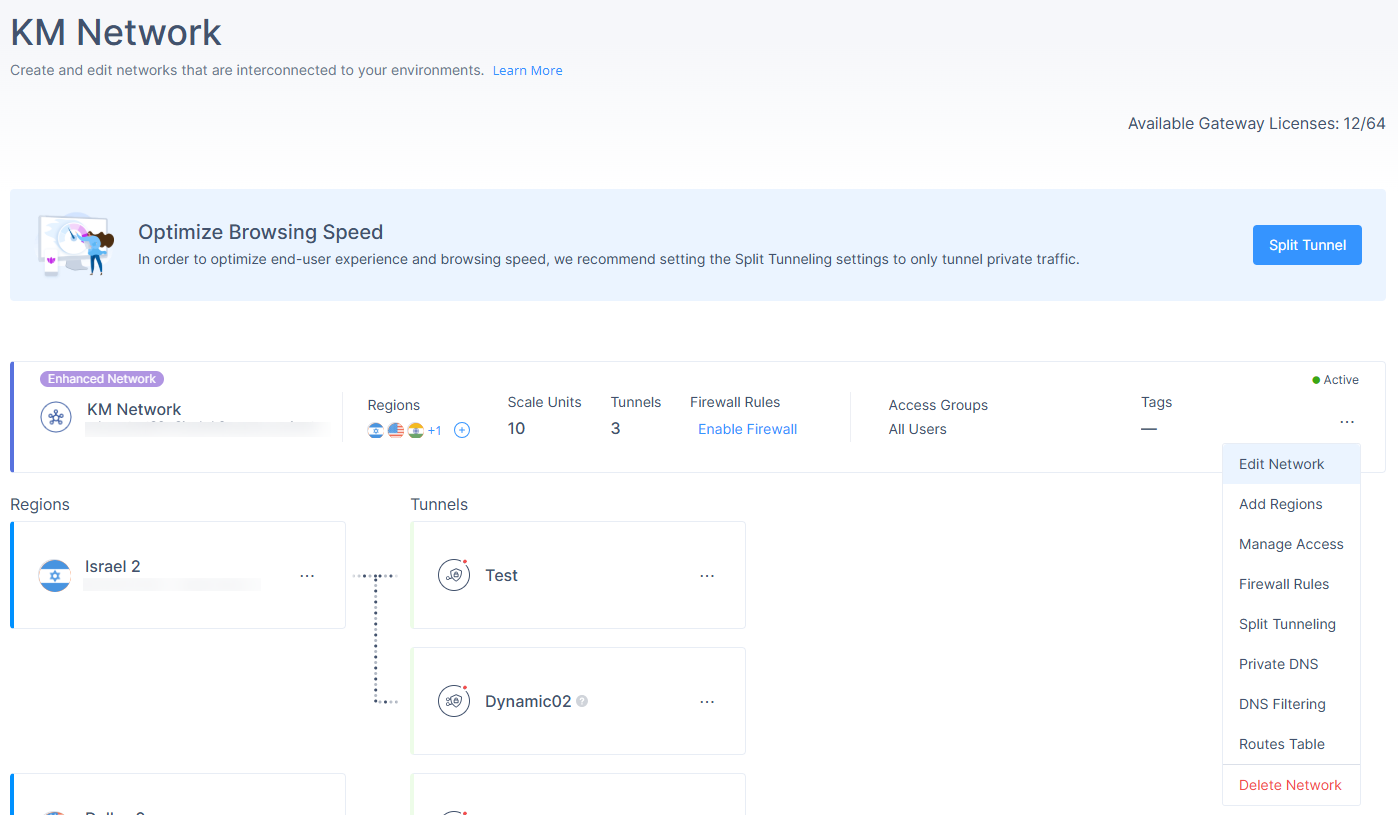
The Edit Network window appears.
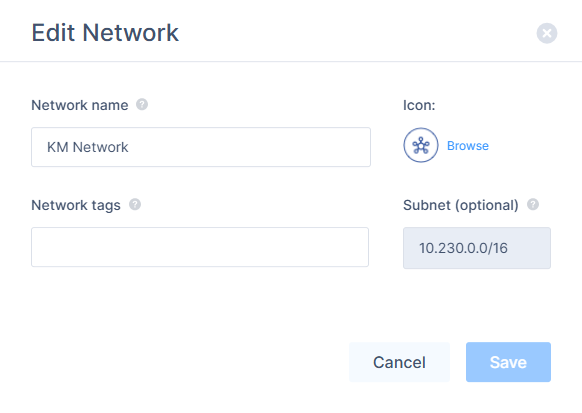
Make the required changes (Network name, Network tags, Icon) and click Save.
You cannot change the Subnet after network creation.
Adding Regions
Access the Check Point SASE Administrator Portal and click Networks.
Select the network.
Click
and then click Edit Network.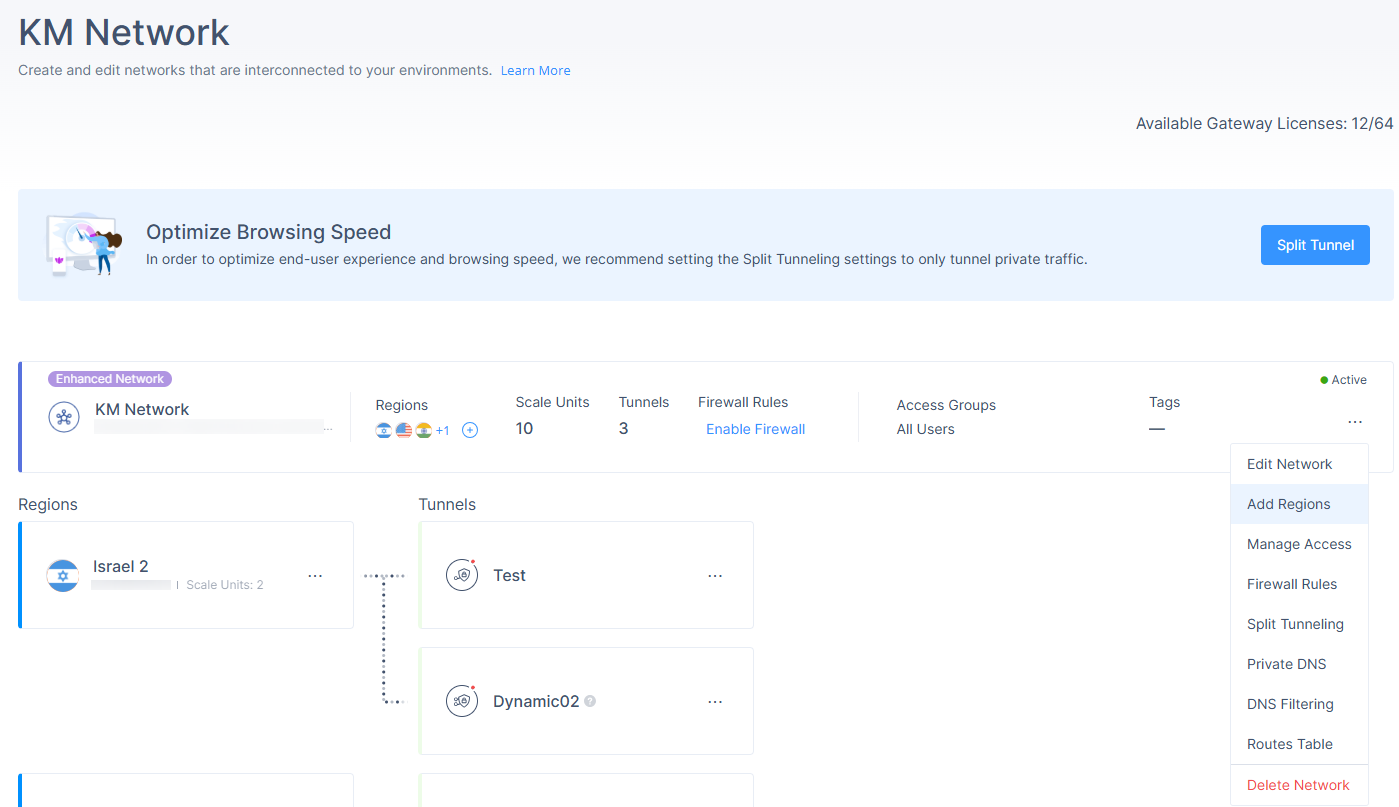
The Add Region window appears.
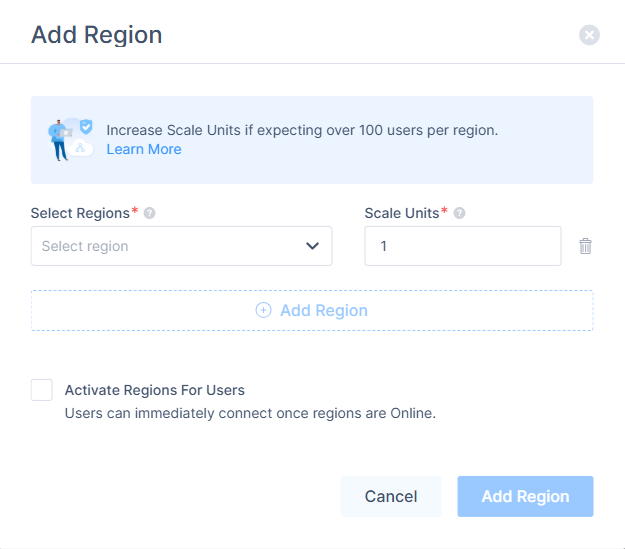
From the Region list, select the region to deploy the Check Point SASE gateway.
In the Scale Units field, enter the number of gateways you want to deploy in the region.
To add more regions, click Add Region and repeat steps 4 and 5.
To activate the region for users, select the Activate Regions For Users checkbox.
Click Add Region.
Managing Access
Manage Access allows you to select the member groups who can access the network.
To manage access to a network:
Access the Check Point SASE Administrator Portal and click Networks.
Select the network.
Click
and then click Manage Access.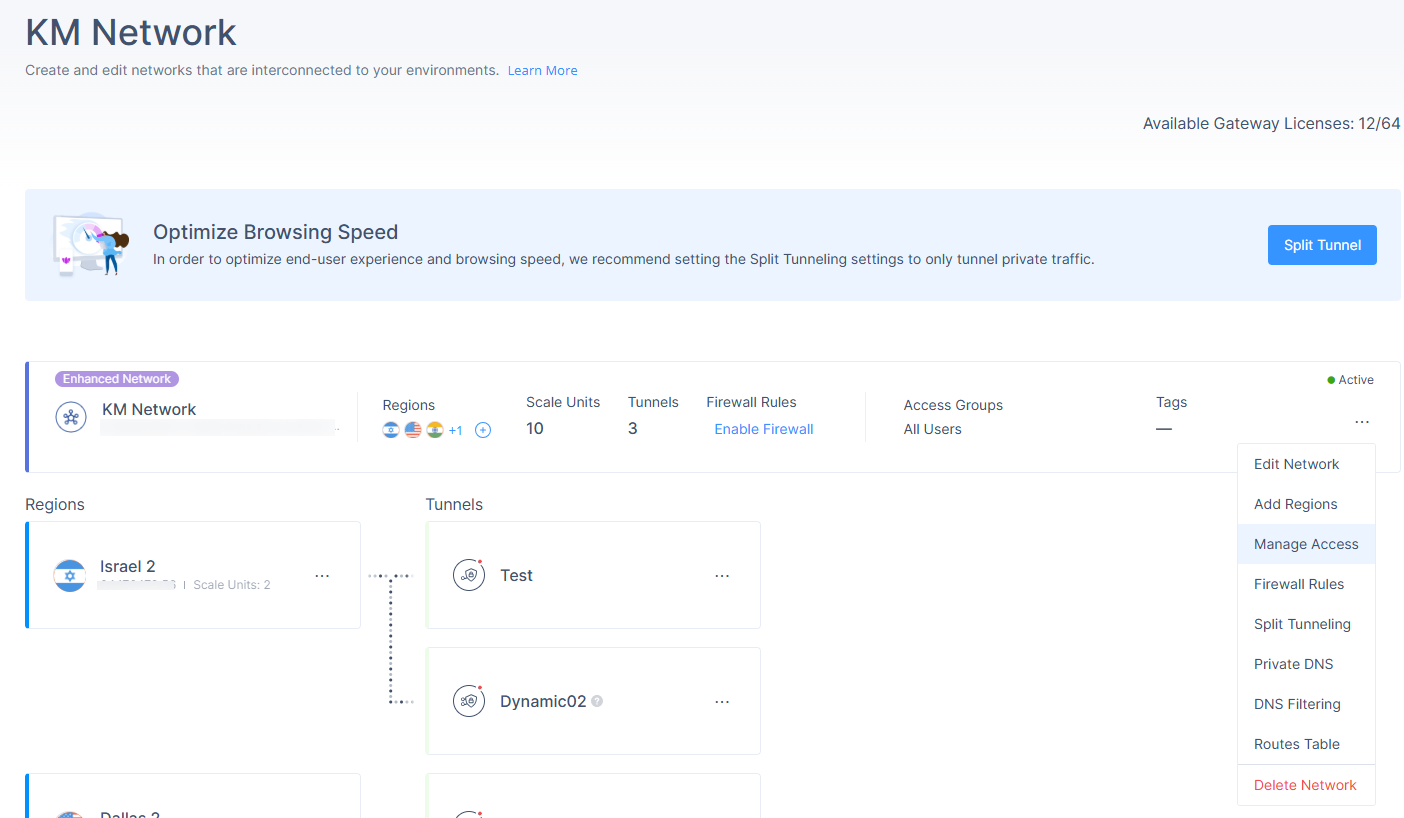
The Manage Access window appears.
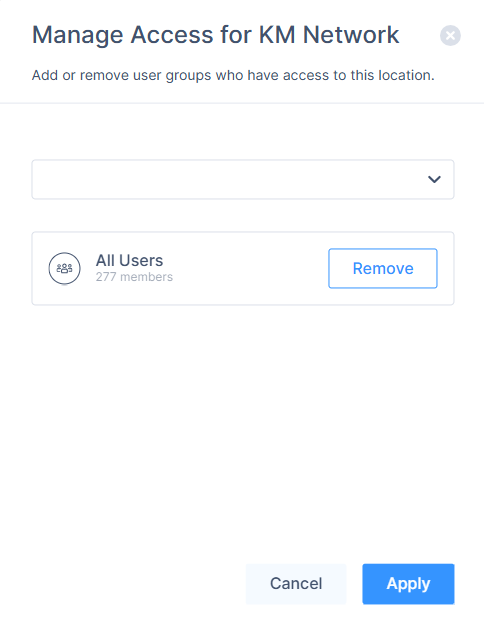
From the list, select the member groups who can access the network.
To remove a member group, click Remove.
Click Apply.
Managing Tunnels
In Enhanced Networks, all tunnel operations happen at the Region level (not on gateways).
Editing a Tunnel
In the Networks page, select your Enhanced Network.
Click
and click Edit Tunnel.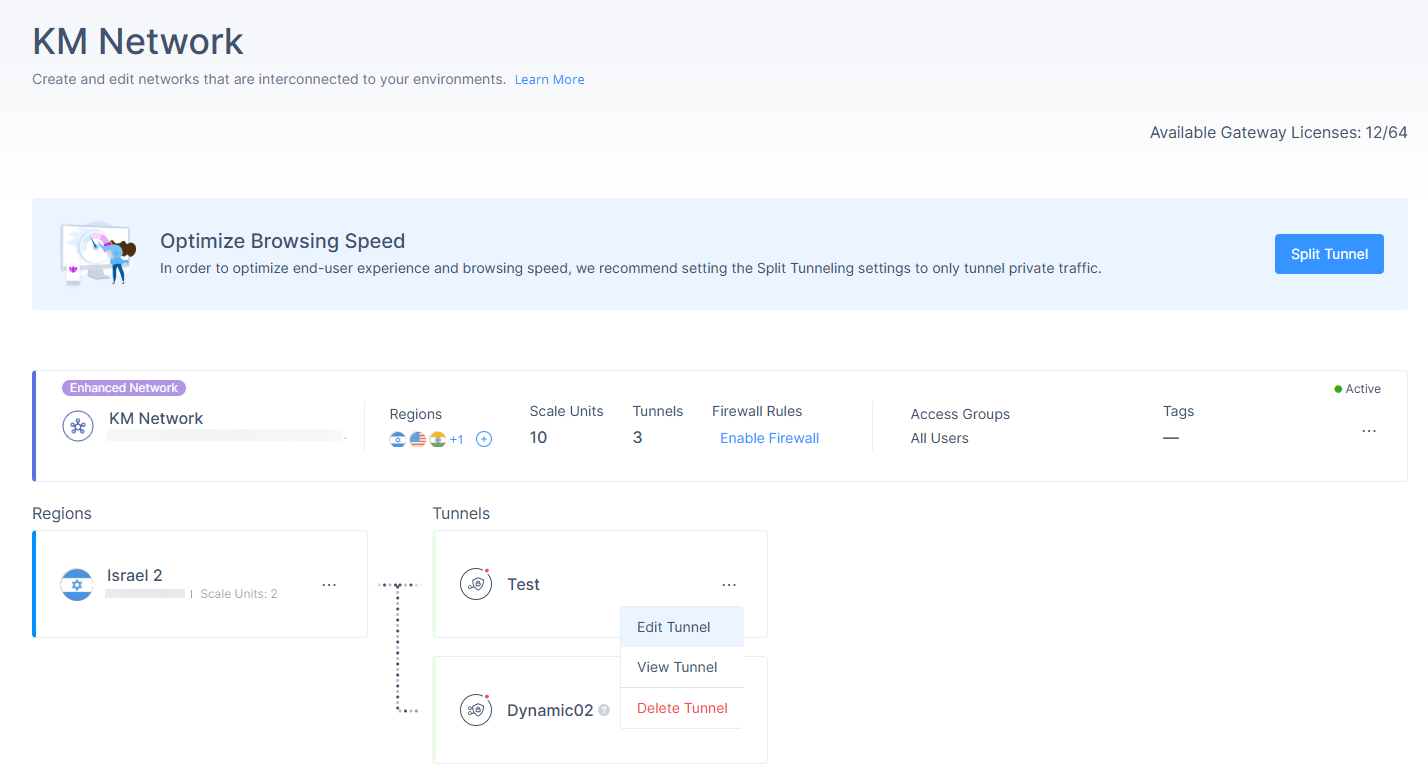
The Edit Tunnel pop up appears.
Make the required changes and click Apply Changes.
For Tunnel Configurations:
You cannot add and delete terminations in the same edit session.
You cannot move a termination to a different region, delete or re-add it.
Ensure the region has enough Scale Units before adding terminations.
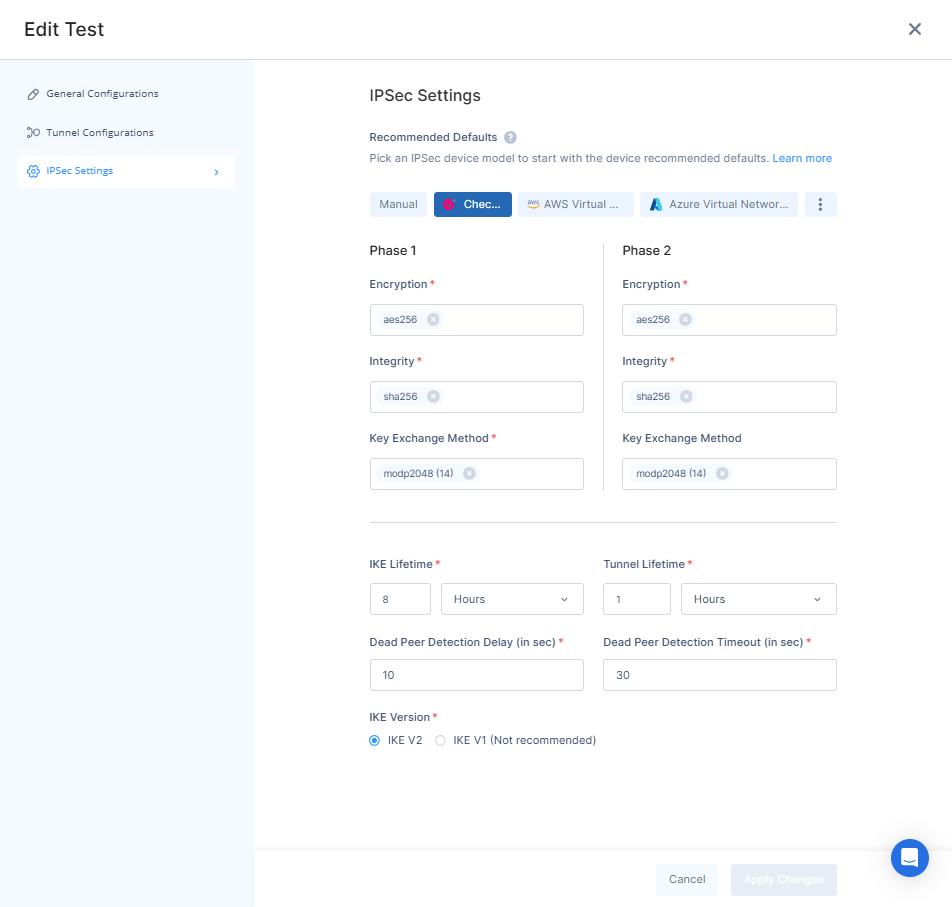
For IPSec settings:
Use vendor recommendations unless you have a specific compliance requirement.
Incorrect IPSec settings can cause tunnel failure, validate changes before applying.
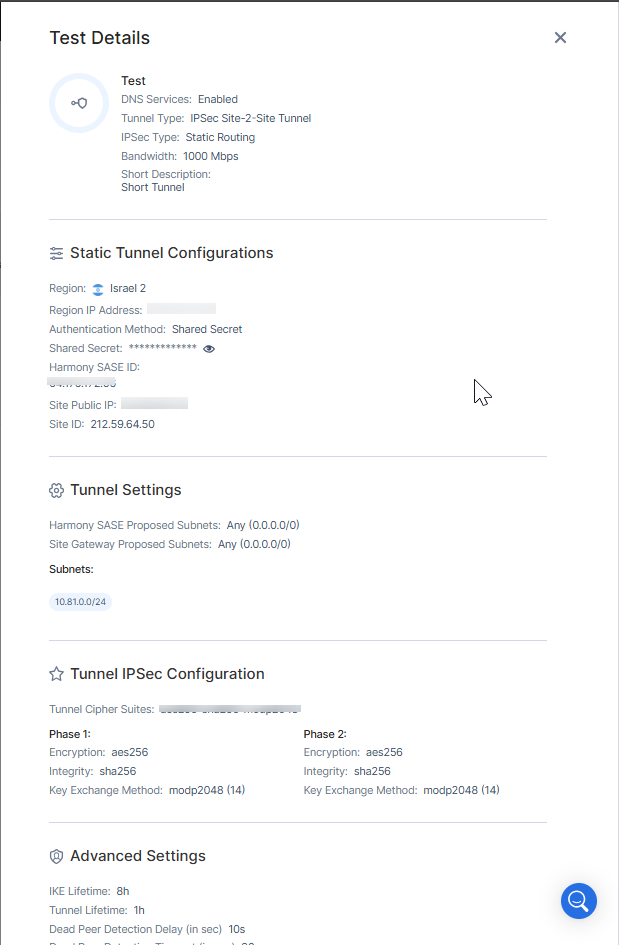
Viewing Tunnel Details
In the Networks page, select your Enhanced Network.
Click
and click View Tunnel.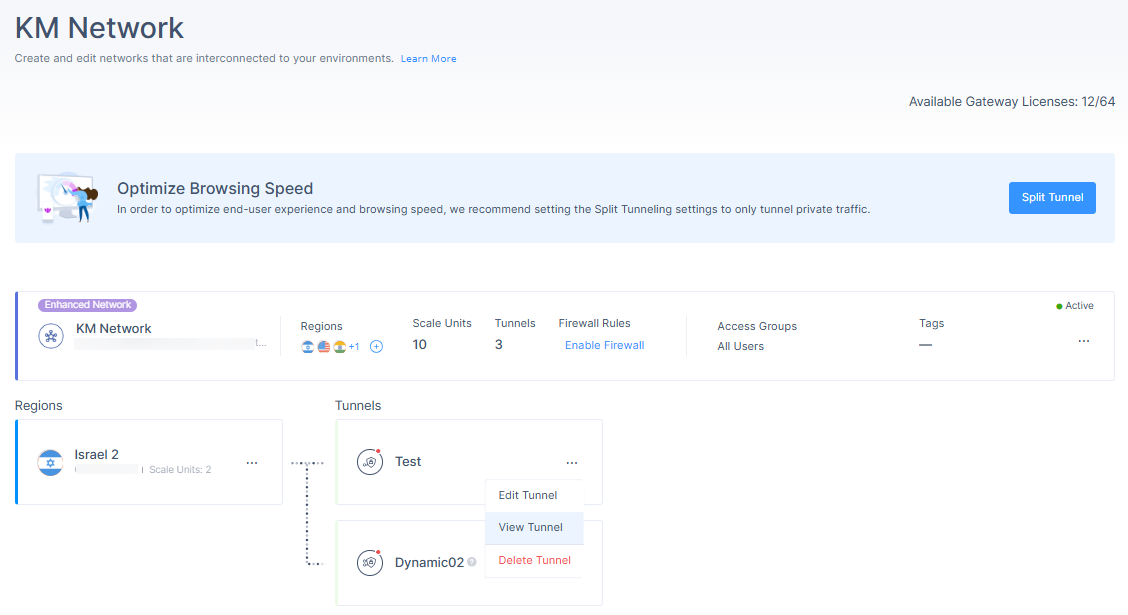
The Tunnel Details pop up appears.
Delete a Tunnel
In the Networks page, select your Enhanced Network.
Click
and click Delete Tunnel.
The Delete Dynamic Tunnel pop up appears.
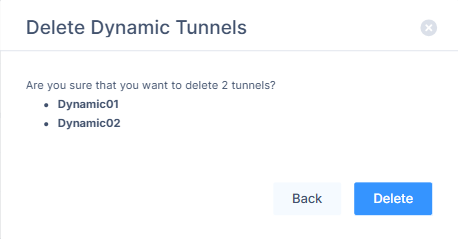
Click Delete.
Notes:
Make sure no active traffic depends on the tunnel before you delete it.
You can delete individual terminations or the entire dynamic tunnel.
Once you start a delete operation, you cannot add new terminations in the same session.
Support Contacts
If you have any difficulties or questions, don't hesitate to contact Check Point SASE's support team. We offer 24/7 chat support on our website at sase.checkpoint.com, or you can email us at sase-support@checkpoint.com. We're here to assist you and ensure your VPN tunnel setup is a success.