
Introduction
This guide will provide you with a step-by-step walkthrough for establishing a Site-to-Site VPN tunnel between your Check Point SASE network and the Palo Alto Firewall environment.
Breakdown of topics
- Pre-requisites
- Configuration Steps
- Verifying the Setup
- Troubleshooting
- Support Contacts
Pre-requisites
To successfully follow this guide, ensure that:
- Hold an active Check Point SASE account and a functioning network.
- Have the Check Point SASE application installed across your devices.
- Own an active Palo Alto Firewall account, equipped with the necessary administrative permissions.
Configuration Steps
- Open the Palo Alto WebGUI, and select the Network tab.
- Select Interfaces and open the Tunnel tab.
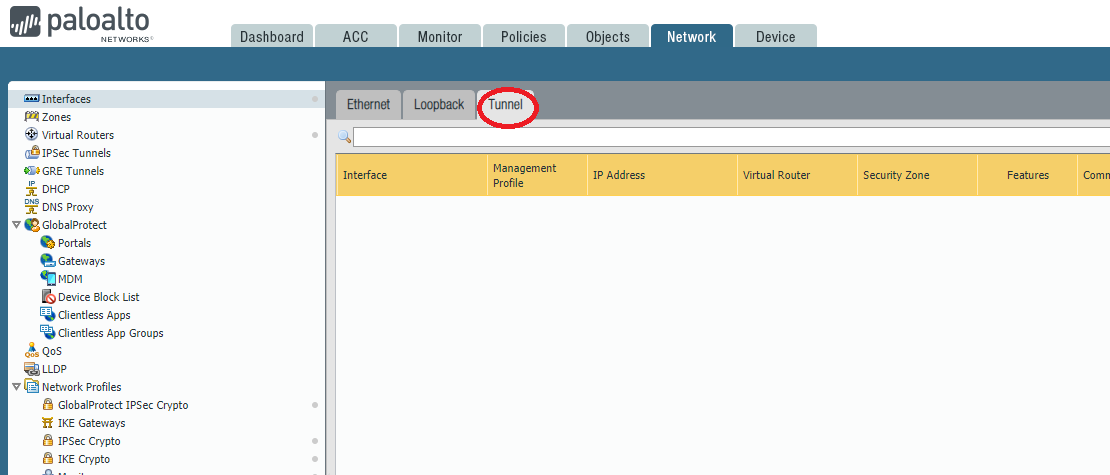
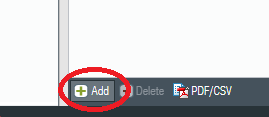
- Click Add.
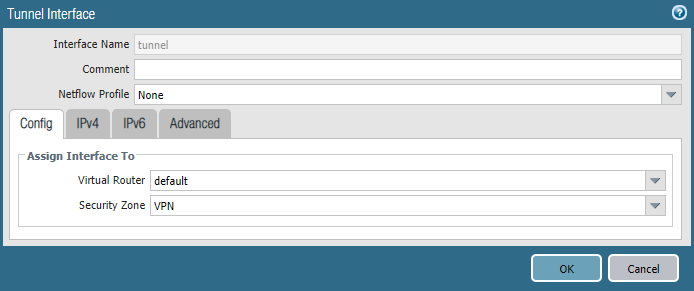
- Assign the parameters with the following information:
- Virtual Router: Select the virtual router you would like your tunnel interface to reside in.
- Security Zone: Configure a new zone for the tunnel interface for more granular control of traffic ingress/egressing the tunnel. If the tunnel interface is in a zone different from the zone where the traffic will originate or depart, then a policy is required to allow the traffic to flow from the source zone to the zone containing the tunnel interface.
- Open the Network tab.
- Select Network Profiles and go to IKE Crypto.

- Click Add (at the bottom of the page) and define the IKE Crypto profile (IKEv1 Phase-1) parameters.
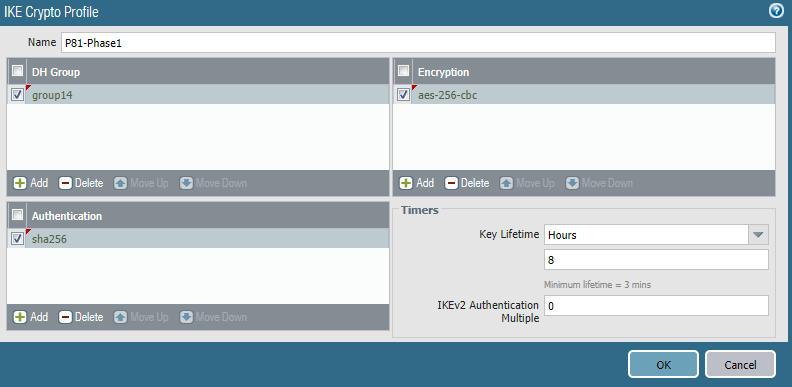
- Name: Choose the name of your own choice.
- DH Group: 14
- Encryption: aes-256-cbc
- Authentication: sha256
- Key Lifetime: 8 Hours
- IKEv2 Authentication Multiple: 0
- Open the Network tab. Select Network Profiles and go to IKE Gateway.
- Select Add and fill in the following information:
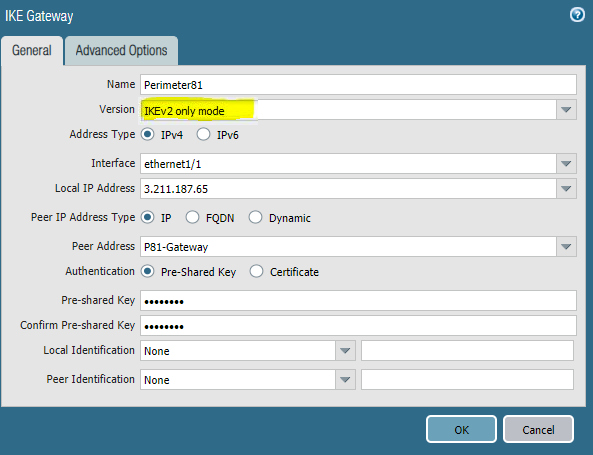
- Name: Choose the name of your own choice
- Version: IKEv2 if Firewall version supports it, IKEv1 otherwise.
- Address Type: IPv4
- Interface: The external interface connected to the internet
- Local IP Address: Choose the external IP address
- Peer IP Address Type: IP
- Peer Address: Enter your Check Point SASE gateway IP
- Authentication: Pre-Shared Key
- Pre-Shared Key: Enter a string of your own choice containing lower-case characters, upper-case characters, and a number. Please write down this value as you will use it to configure the tunnel and the Check Point SASE management console as well.
- Local Identification: None (the gateway will use the local IP as the local identification value)
- Peer Identification: None (the gateway will use the peer IP as the peer identification value)
- Open the Network tab. Select Network Profiles and go to IPSec Crypto.
- Select Add and fill in the following information:
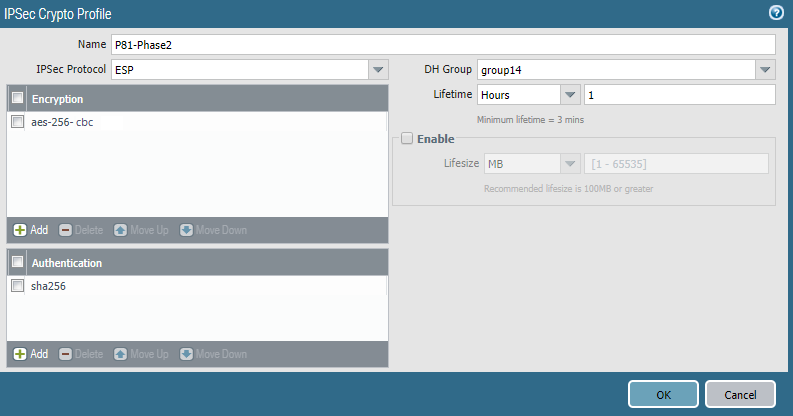
- Name: P81-Phase2
- IPSec Protocol: ESP
- DH Group: 14
- Encryption: aes-256-cbc
- Lifetime: 1 hour
- Authentication: sha256
- Open the Network tab. Select IPSec Tunnels, then Add and fill in the following information:
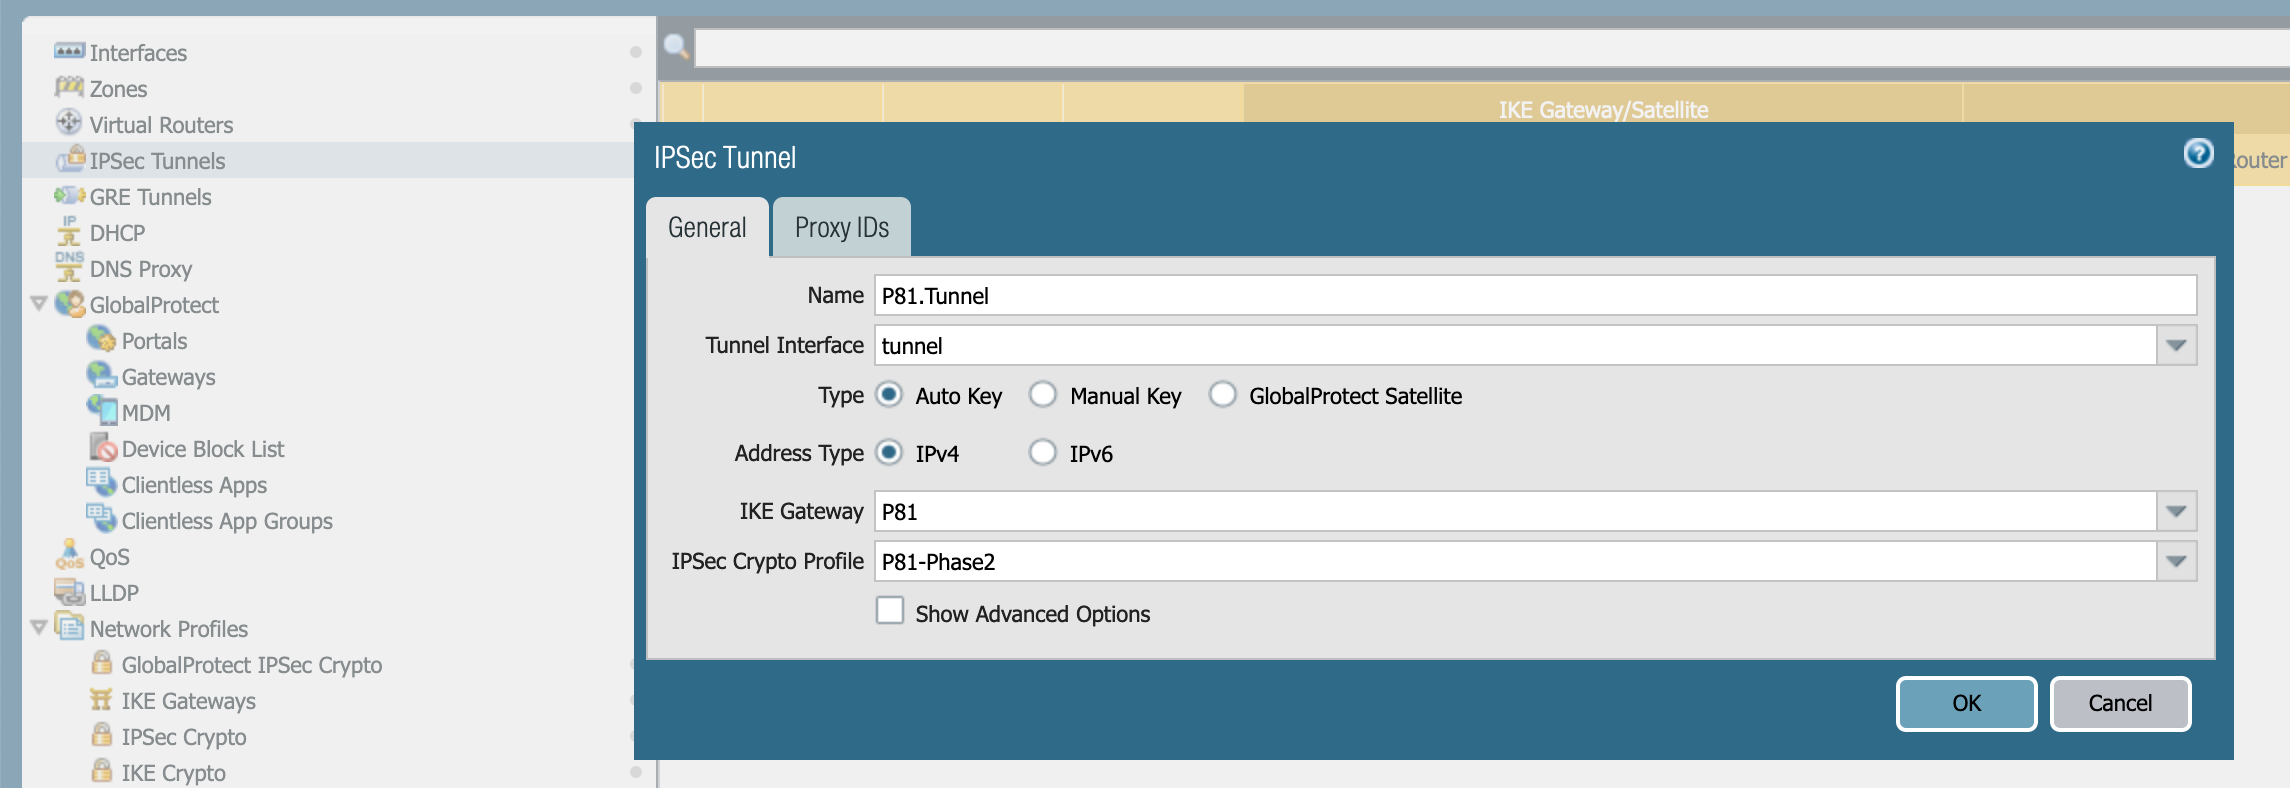
- Name: Choose the name of your own choice
- Tunnel Interface: Choose the appropriate interface
- Type: Auto Key
- Address Type: IPv4
- IKE Gateway: Choose the gateway that was defined earlier
- IPSec Crypto Profile: Choose the profile that was defined earlier
- Open the Network tab.
- Select Virtual Routers, then select Static Routes and click Add. Fill in the following information:
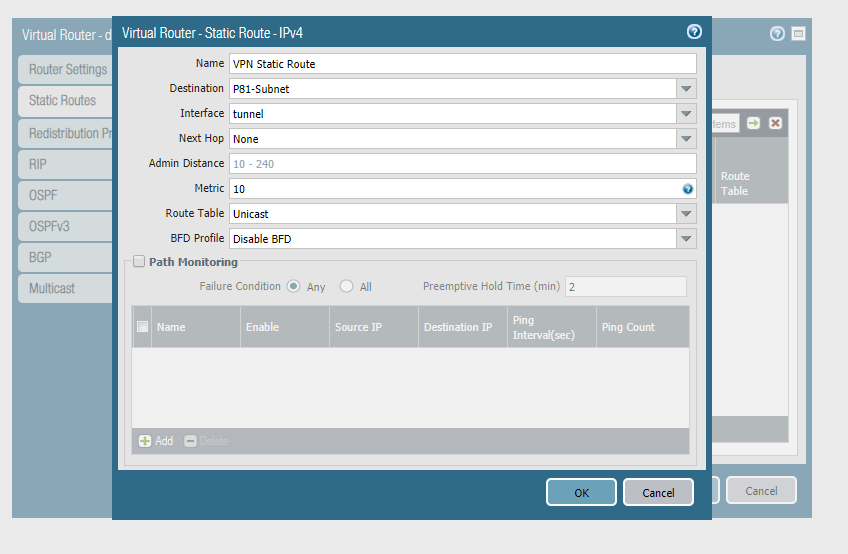
- Name: Choose the name of your own choice
- Destination: Your Check Point SASE Subnet (if such an object does not exist yet make sure to define it)
- Interface: Choose the appropriate interface
- Next Hop: None
- Metric: 10
- Route Table: Unicast
- BFD Profile: Disable BFD
- Open the Policies tab and select Security.
 By default, IKE negotiation and IPSec/ESP packets are allowed.
- If you see somewhat differently or if you wish to have more granular traffic control, select ADD, and create an appropriate rule.
Configuring the tunnel in the Management Platform
- Go to the Gateway in your network from which you want to create the tunnel to the Palo Alto Firewall.
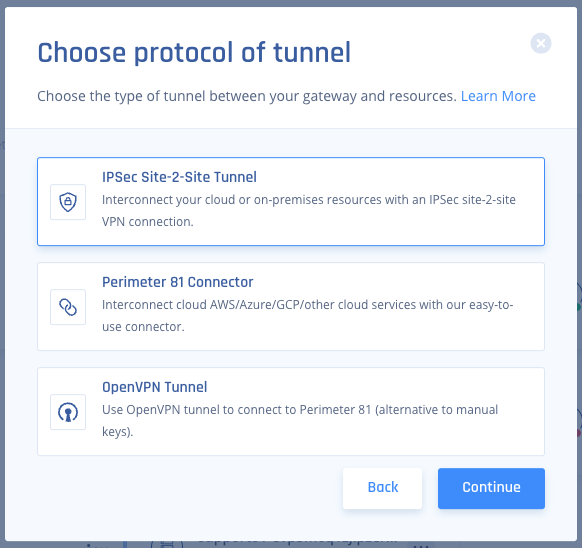
- Select the three-dotted menu (...) and select Add Tunnel.

- Select IPSec Site-2-Site Tunnel and select Continue.
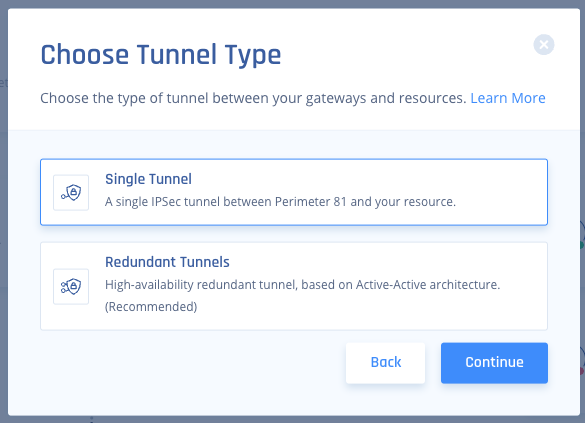
- Select Single Tunnel, and Click Continue.
- In the General Settings section, specify these:
- Name - Set the name for the Tunnel.
- Shared Secret - Enter the same Pre-Shared Key that you entered in Palo Alto WebGUI.
- Public IP: Enter the FW's external Interface IP. This can be found in Palo Alto WebGUI under Network /Interfaces /Ethernet.

- Public ID: Enter the same value as you did Public IP. If behind NAT, enter the internal LAN IP of the Palo Alto Device (example 192.168.1.1).
- Check Point SASE Gateway Proposal Subnets: Leave Any (0.0.0.0/0) selected here.
- Remote Gateway Proposal Subnets: Leave Any (0.0.0.0/0) selected here.
.PNG)
- In the Advanced Settings section, specify these:
- IKE Version: V2 (if the Firewall version supports it, V1 otherwise.)
- IKE Lifetime: 8h
- Tunnel Lifetime: 1h
- Dead Peer Detection Delay: 10s
- Dead Peer Detection Timeout: 30s
- Phase 1:
- Encryption (Phase 1): aes256
- Integrity (Phase 1): sha256
- Key Exchange Method: modp2048
- Phase 2:
- Encryption (Phase 2): aes256
- Integrity (Phase 2): sha256
- Key Exchange Method: modp2048
.PNG)
- Click Add Tunnel.
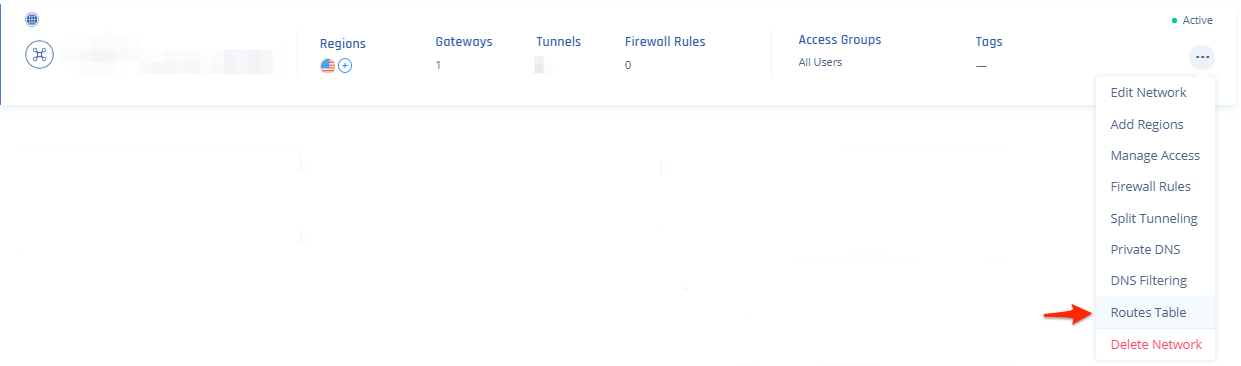
- On your network select your three dots and click on Routes Table:
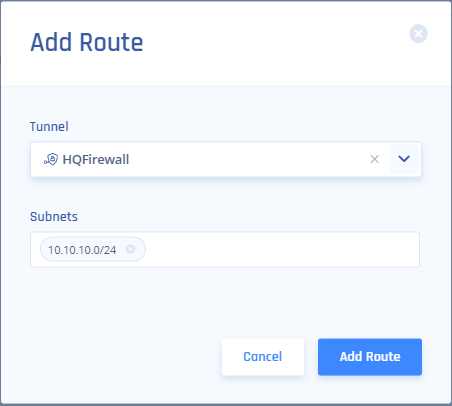
- Click the Add Route button on the top right, then on this popup fill out accordingly (Tunnel will match the name above, and Subnets will be the subnets you want to reach on the AWS side of the tunnel) and click the Add Route button:
- Be sure to click Apply Configuration when done.

Verifying the Setup
After following the above steps, your tunnel should be active.
To verify, go to your Check Point SASE dashboard, locate the tunnel you just created, and check the tunnel status.
It should indicate that the tunnel is "Up", signifying a successful connection.
Next, connect to your network using the Check Point SASE agent and attempt to access one of the resources in your environment.
Troubleshooting
If you encounter issues during or after the setup, try reviewing your settings to ensure everything matches the instructions. In particular, check the IP addresses and other details you entered during setup. If issues persist, please consult our dedicated support.
Support Contacts
If you have any difficulties or questions, don't hesitate to contact Check Point SASE's support team. We offer 24/7 chat support on our website at sase.checkpoint.com, or you can email us at sase-support@checkpoint.com. We're here to assist you and ensure your VPN tunnel setup is a success