Introduction
This guide will walk you through the process of establishing a Site-to-Site VPN tunnel between your Harmony SASE network and your IBM Cloud environment.
Breakdown of topics
- Pre-requisites
- Configuration Steps
- Verifying the Setup
- Troubleshooting
- Support Contacts
Pre-requisites
To successfully follow this guide, you should have:
- An active Harmony SASE account and network.
- The Harmony SASE app is installed on your devices.
- An active IBM Cloud account with admin permissions.
Configuration Steps
Configuring a VPN gateway at the IBM Cloud Console
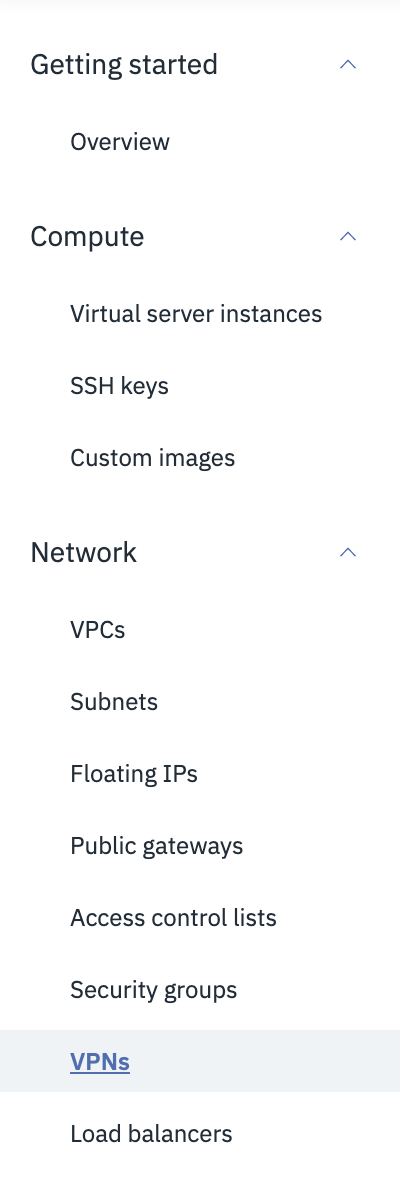
- Open to the VPC section in the IBM Cloud Console. Go to VPNs (under the Network tab).
2. Open the IKE Policies tab, then select New IKE Policy.

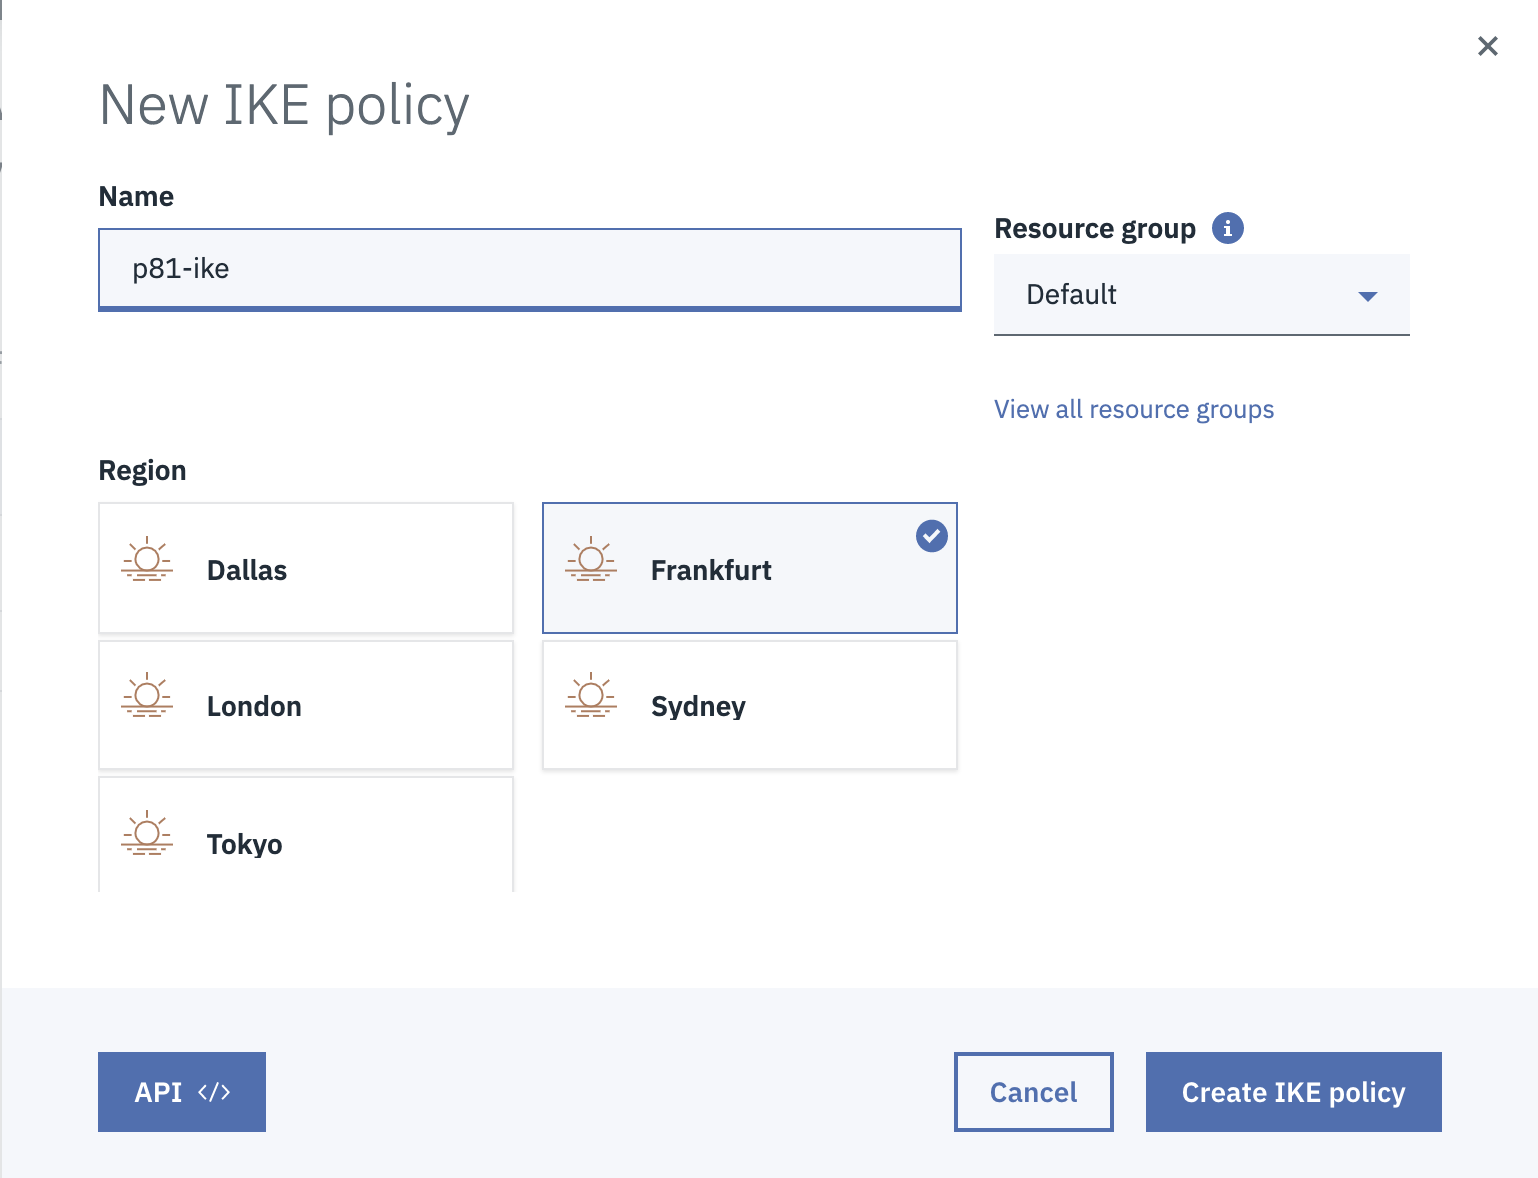
3. Choose a Name, the Region in which the appropriate VPC lies, define the Resource group, then select Create IKE policy.
4. Once the policy has been created, select the three-dotted menu (...) and select Edit.
5. Fill in the following information:
- IKE Version: 1
- DH Group: 2
- Authentication: sha256
- Key Lifetime: 28800
- Encryption: aes256
Select Save IKE policy.
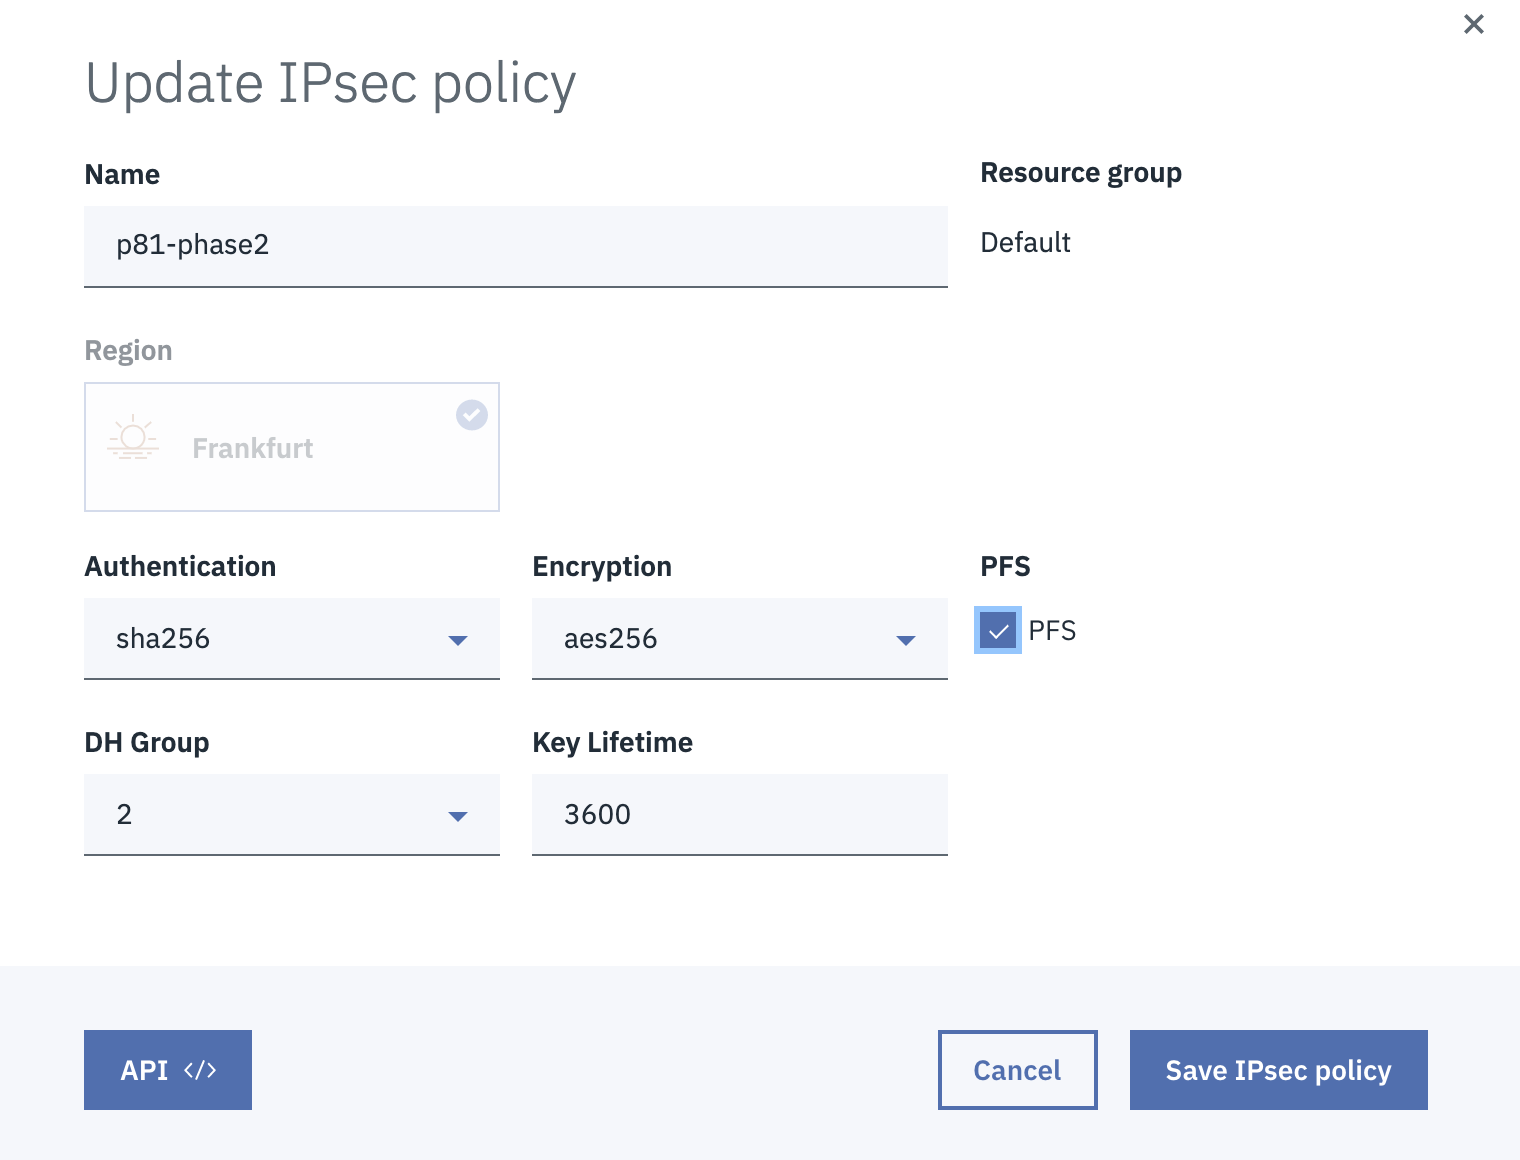
Open the IPSec Policies tab, then select New IPSec Policy.
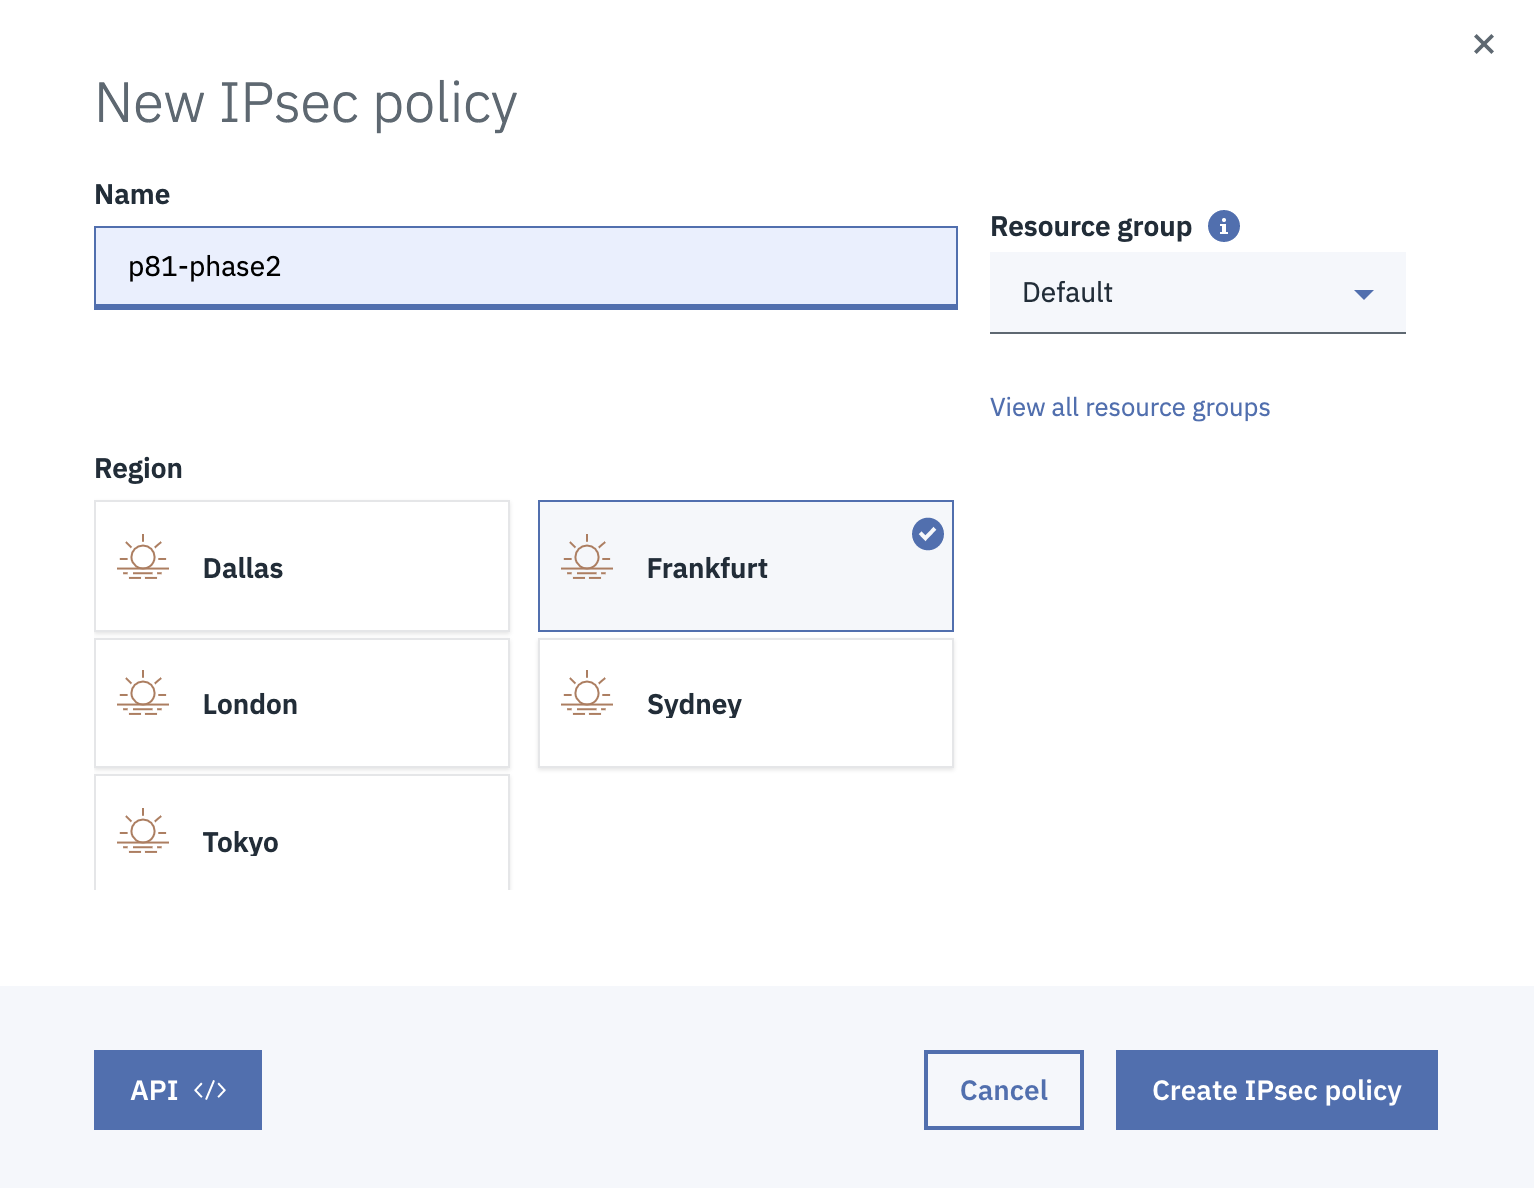
Choose a Name, the Region in which the appropriate VPC lies and define the Resource group, then select Create IPSec policy.
9. Once the policy has been created, select the three-dotted menu (...) and select Edit.
10. Fill in the following information:
- Check: PFS
- DH Group: 2
- Authentication: sha256
- Key Lifetime: 3600
- Encryption: aes256
- Select Save IPSec policy.
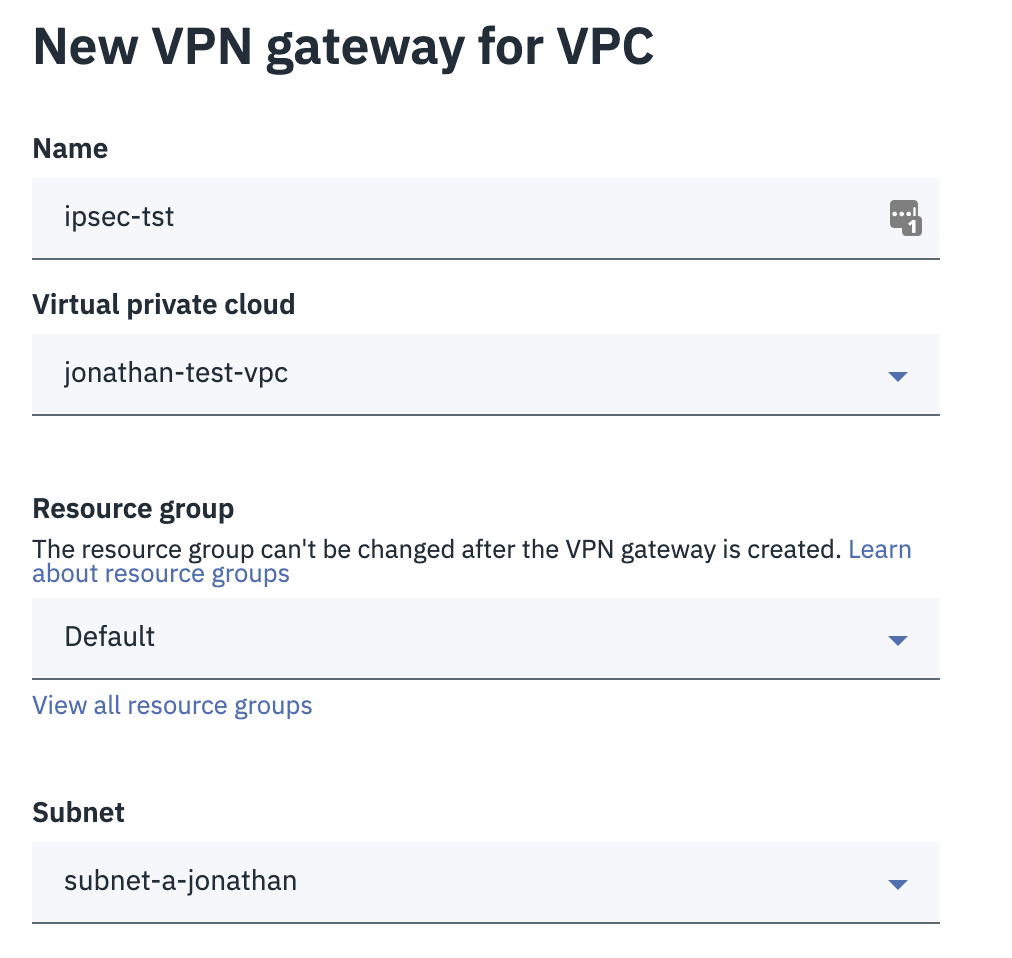
12. Open the VPN gateways tab, then select New VPN gateway.
13. Fill in the following information:
- Name: Enter a name of your choice.
- Virtual private cloud: Choose the desired cloud.
- Resource group: Choose the resource group.
- Subnet: Choose the appropriate subnet.
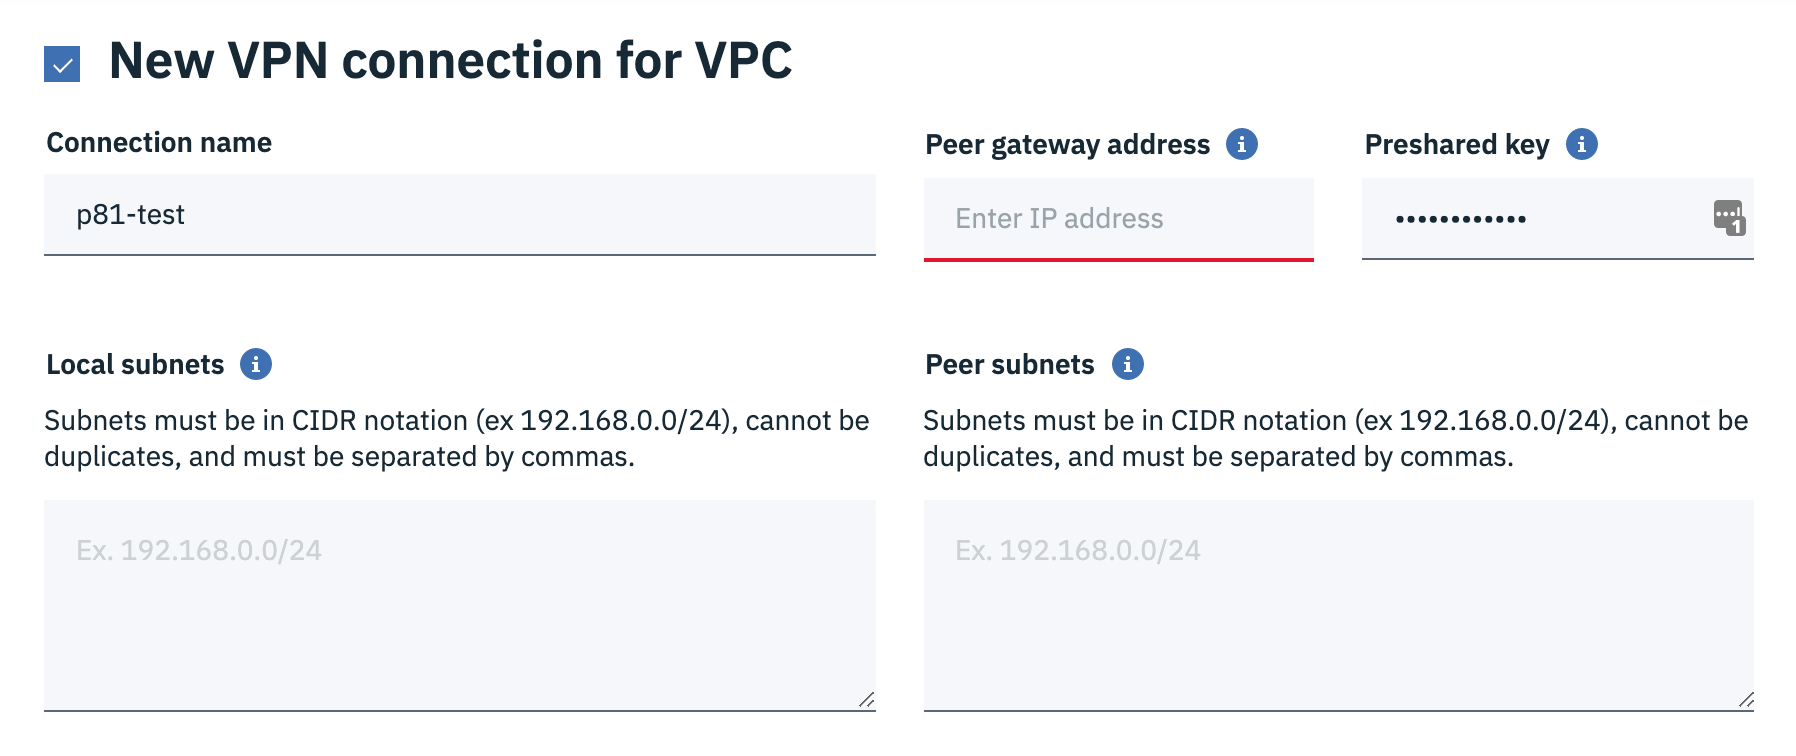
14. Check New VPN Connection for VPC.
15. Fill in the following information:
- Connection name: Set a name
- Peer gateway address: Insert your Harmony SASE gateway IP
- Preshared key: Insert an 8 character (at least) string containing upper-case letters, upper-case letters, and numbers
- Local subnet: Specify one or more subnets in the VPC you want to connect
- Peer subnet: Unless you have custom configurations or multiple tunnels to the same Harmony SASE gateway insert 10.255.0.0/16
- Dead peer detection action: Restart
- Interval: 10 seconds
- Timeout: 30 seconds
- IKE policy: Choose the policy that was earlier
- IPSec policy: Choose the policy that was earlier
Configuring the tunnel in the Management Platform
- Enter your Harmony SASE Management Platform. Under the Networks tab in the left menu, select the name of the network in which you'd like to set the tunnel.
- Locate the desired gateway, select the three-dotted menu (...), select Add Tunnel, and then IPSec Site-2-Site Tunnel.

- Fill in the General Settings:
- Name: Specify a name
- Public IP: Insert the IP of the VPN Gateway you have just defined
- Remote ID: Identical to Remote IP
- Shared Secret: Insert the same preshared key you chose before
- Harmony SASE Gateway Proposal Subnets: 10.255.0.0/16 or according to what you defined in the IBM Cloud portal
- Remote Gateway Proposal Subnets: Specify one or more subnets in the VPC you want to connect
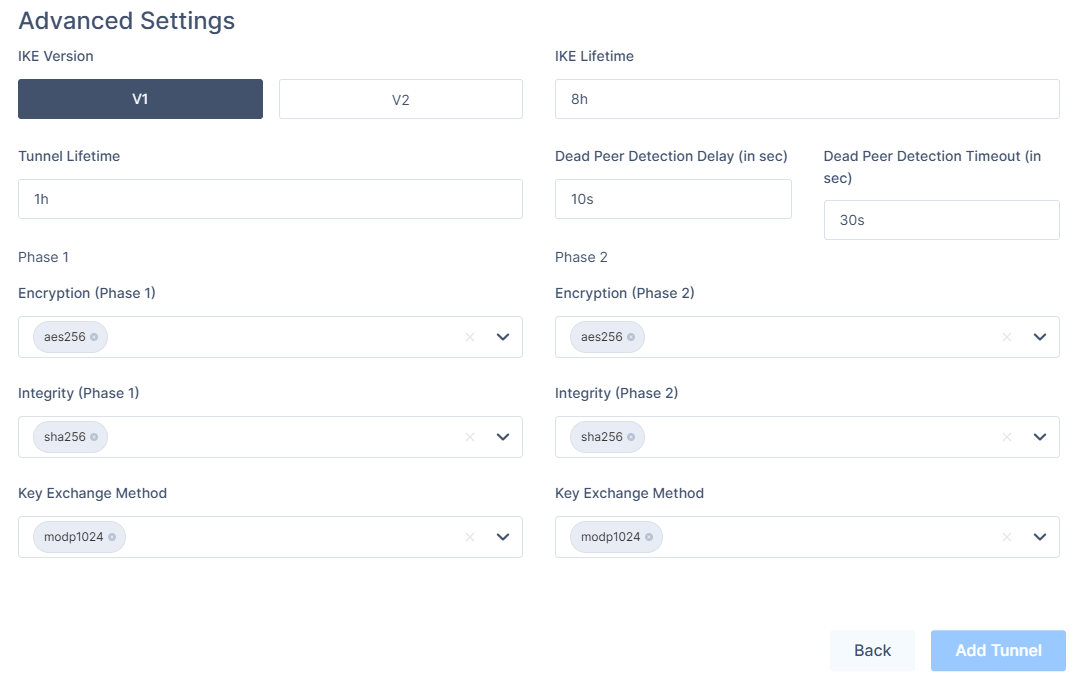
.PNG)
- IKE Version: 1
- IKE Lifetime: 8h
- Tunnel Lifetime: 1h
- Dead Peer Detection Delay: 10s
- Dead Peer Detection Timeout: 30s
- Phase 1:
- Encryption (Phase 1): aes256
- Integrity (Phase 1): sha256
- Key Exchange Method: modp1024
- Phase 2:
- Encryption (Phase 2): aes256
- Integrity (Phase 2): sha256
- Key Exchange Method: modp1024
Verifying the Setup
- Under the VPN gateways tab select the name of the VPN Gateway that is associated with the tunnel.

2. Scroll down and select View all connections.
3. You'll be able to see the status of the tunnel. If for some reason the tunnel is down please make sure you configured all the fields according to this article. At any point, our support team will be happy to assist or troubleshoot.

After following the above steps, your tunnel should be active.
To verify, go to your Harmony SASE dashboard, locate the tunnel you just created, and check the tunnel status.
It should indicate that the tunnel is "Up", signifying a successful connection.
Next, connect to your network using the Harmony SASE agent and attempt to access one of the resources in your environment.
Troubleshooting
If you encounter issues during or after the setup, try reviewing your settings to ensure everything matches the instructions. In particular, check the IP addresses and other details you entered during setup. If issues persist, please consult our dedicated support.
Support Contacts
If you have any difficulties or questions, don't hesitate to contact Harmony SASE's support team. We offer 24/7 chat support on our website at sase.checkpoint.com, or you can email us at sase-support@checkpoint.com. We're here to assist you and ensure your VPN tunnel setup is a success
