
Introduction
This guide will assist you in setting up redundant tunnels between your Check Point SASE network and Azure Virtual WAN. By leveraging redundant tunnels, you ensure network continuity even if one of the tunnels experiences disruptions.
Breakdown of topics
- Pre-requisites
- Configuration Steps
- Verifying the Setup
- Troubleshooting
- Support Contacts
Pre-requisites
To successfully follow this guide, you should have:
- An active Check Point SASE account and network.
- The Check Point SASE app is installed on your devices.
- An active Azure account with admin permissions.
Configuration Steps
Create Check Point SASE Gateways
- Your Check Point SASE Network will need to have at least two different gateways in the same network, as listed below.
- Write down the Public IPs for both GWs. Those IPs will be used for the local network gateways on Azure.
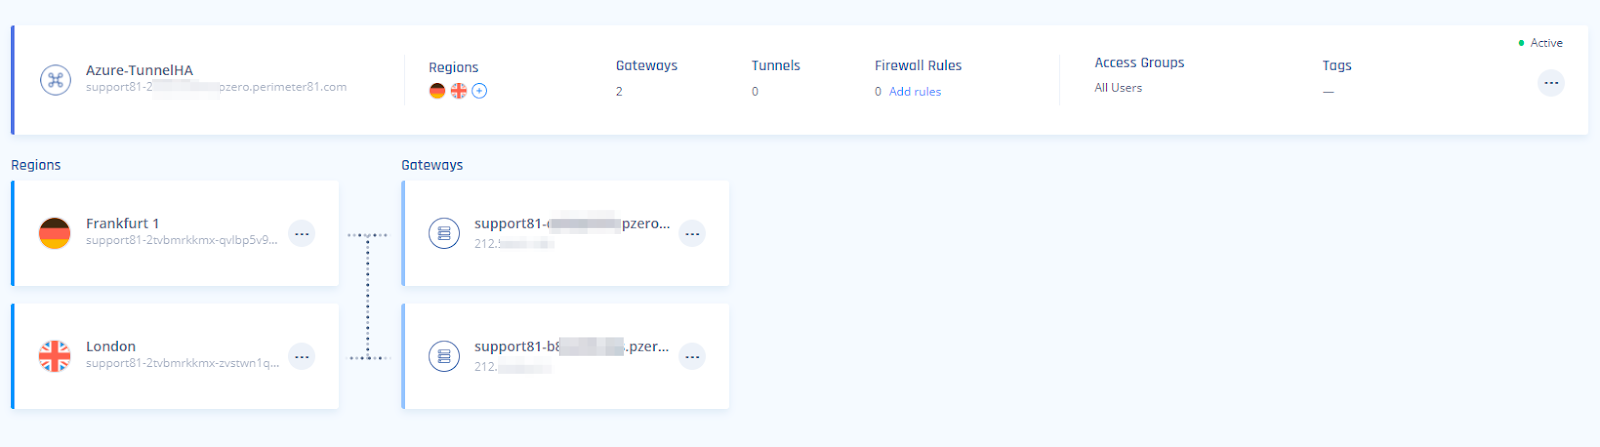
- The gateways can be deployed in two separate Regions for comprehensive ISP redundancy.
- The network can be scaled up and adding another region should not affect the connection.
Create a Virtual WAN on Azure
Note
- You can skip this step if you already have a Virtual WAN in your Azure region
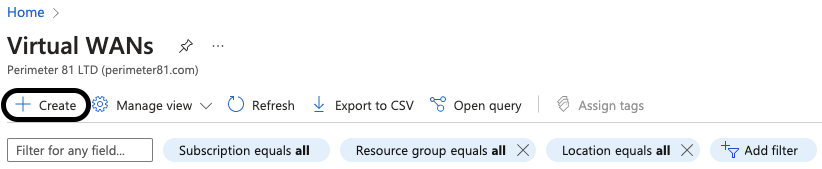
- In your Azure Portal under Virtual WANs, click on +Create
- Provide the Virtual WAN with a meaningful name.
- Select the relevant Subscription, Resource group, and Region.
- Type - Standard
- Click on Review+create
- Click on Create

Create virtual hub
Note
- You can skip this step if you already have a Virtual hub in your Azure region
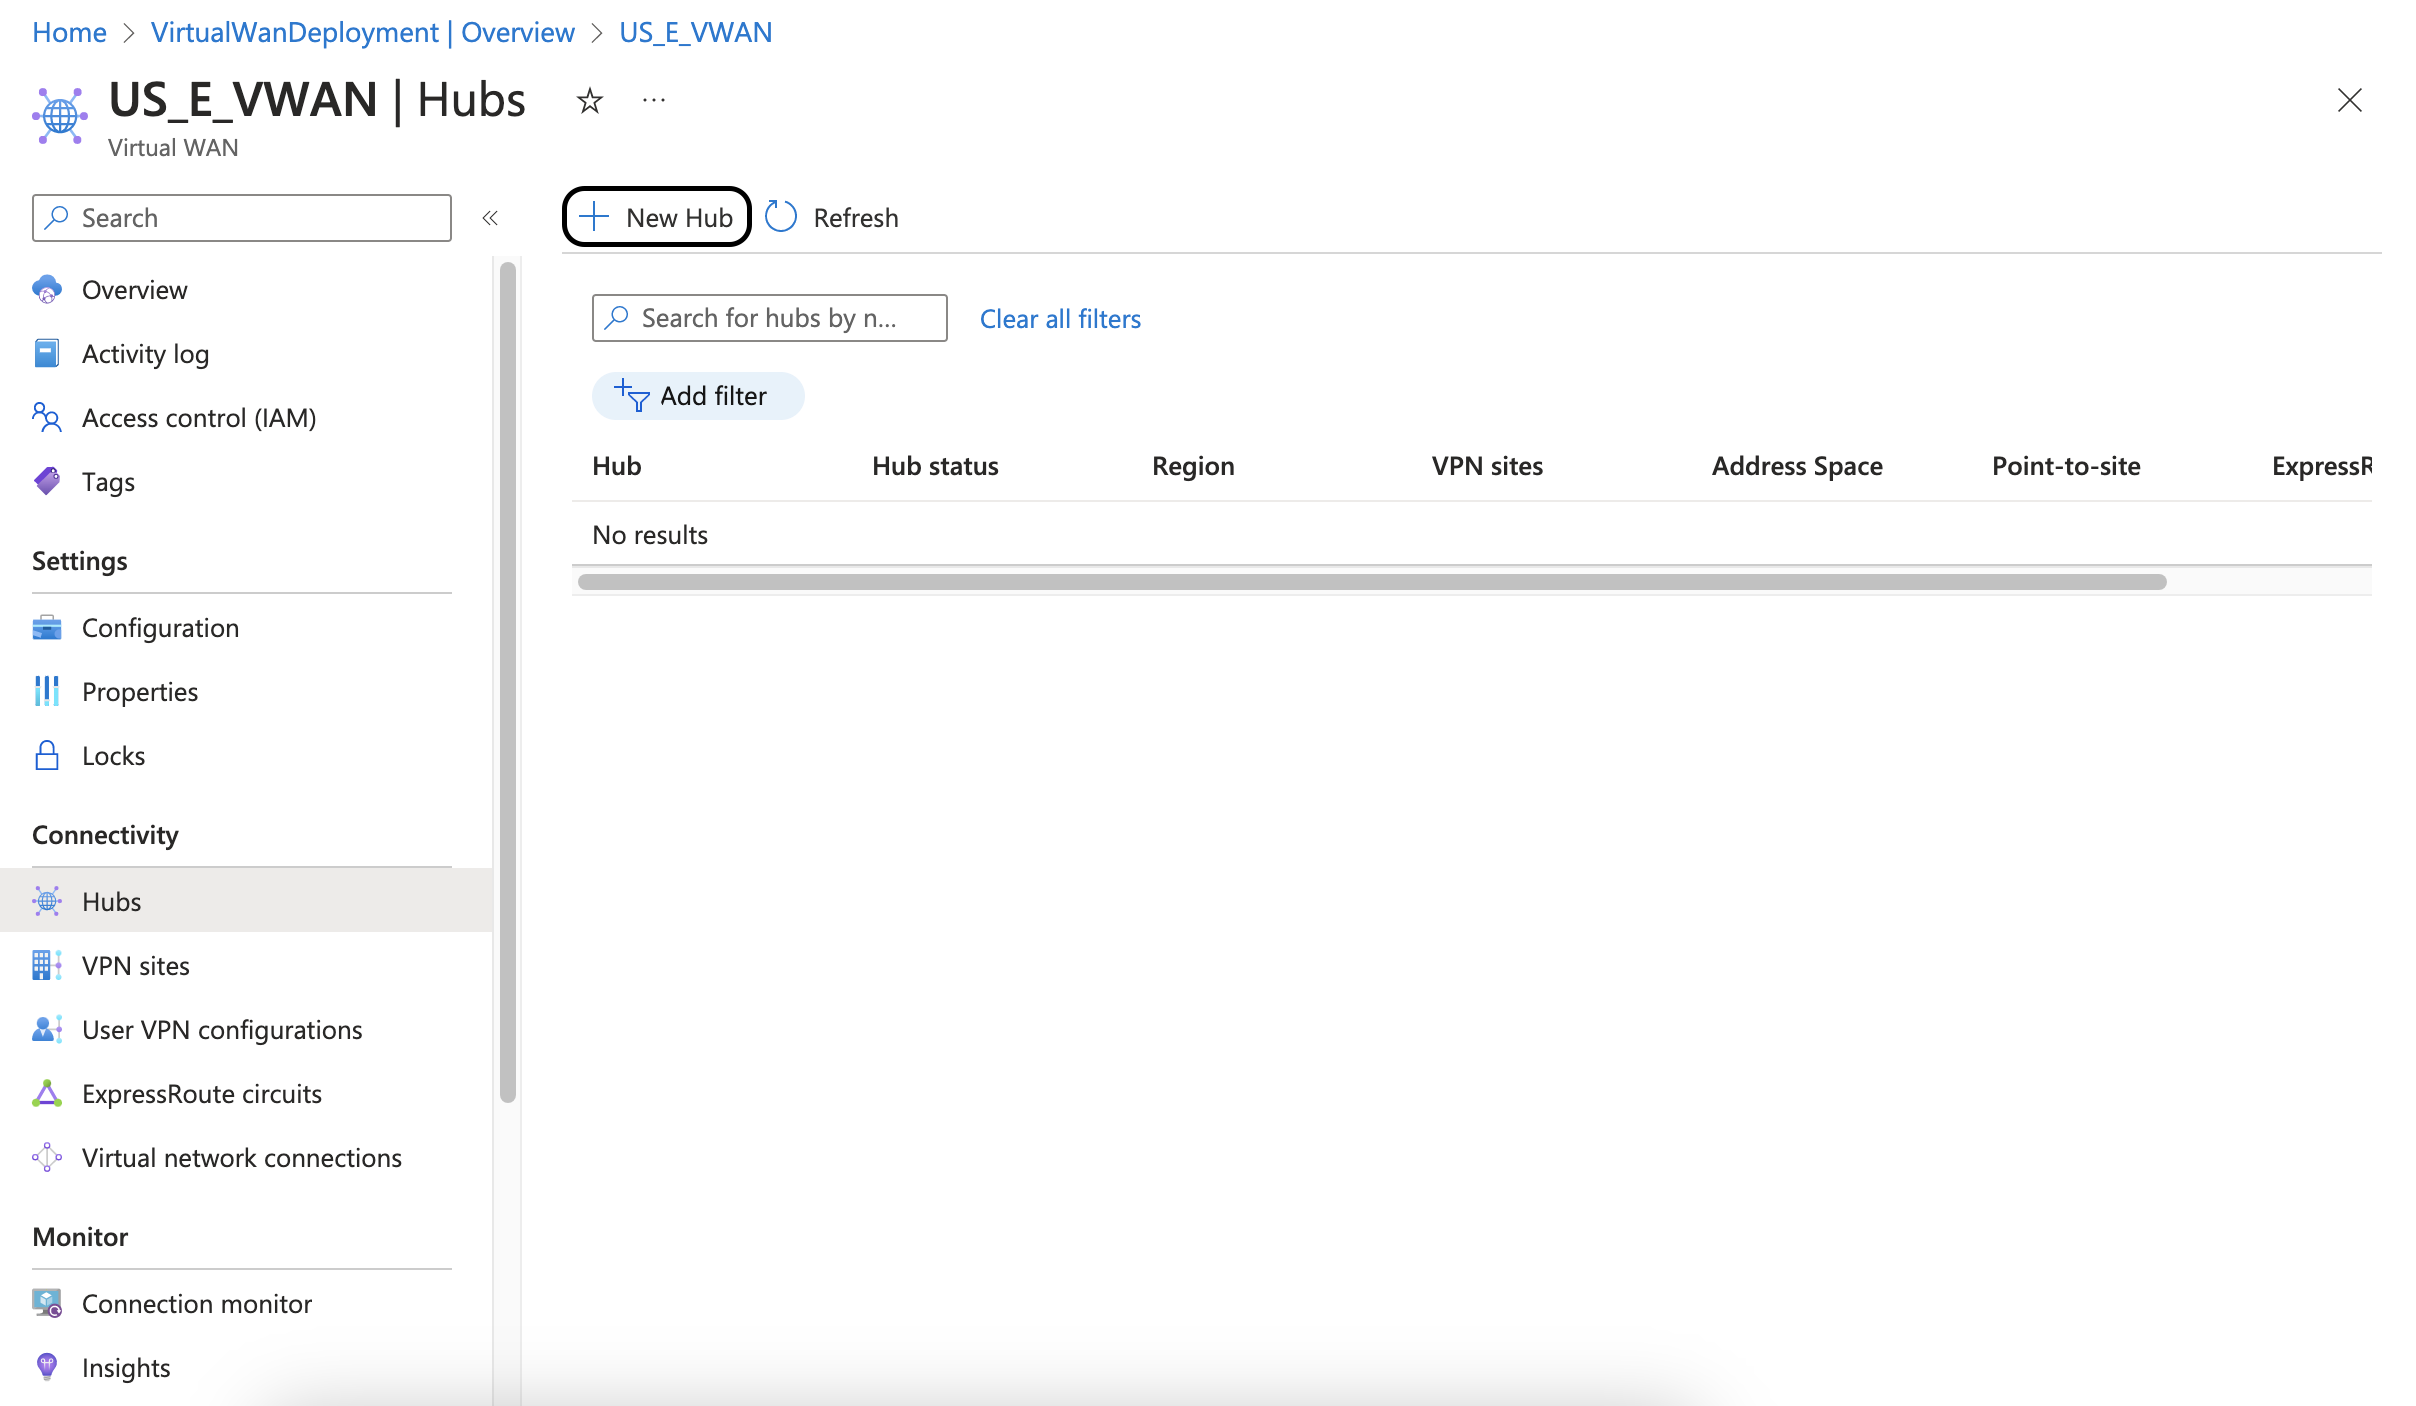
Next, you will need to create a virtual hub:
- In your Azure Portal under the created Virtual WAN, select Hubs from the left pane and click on +New Hub.
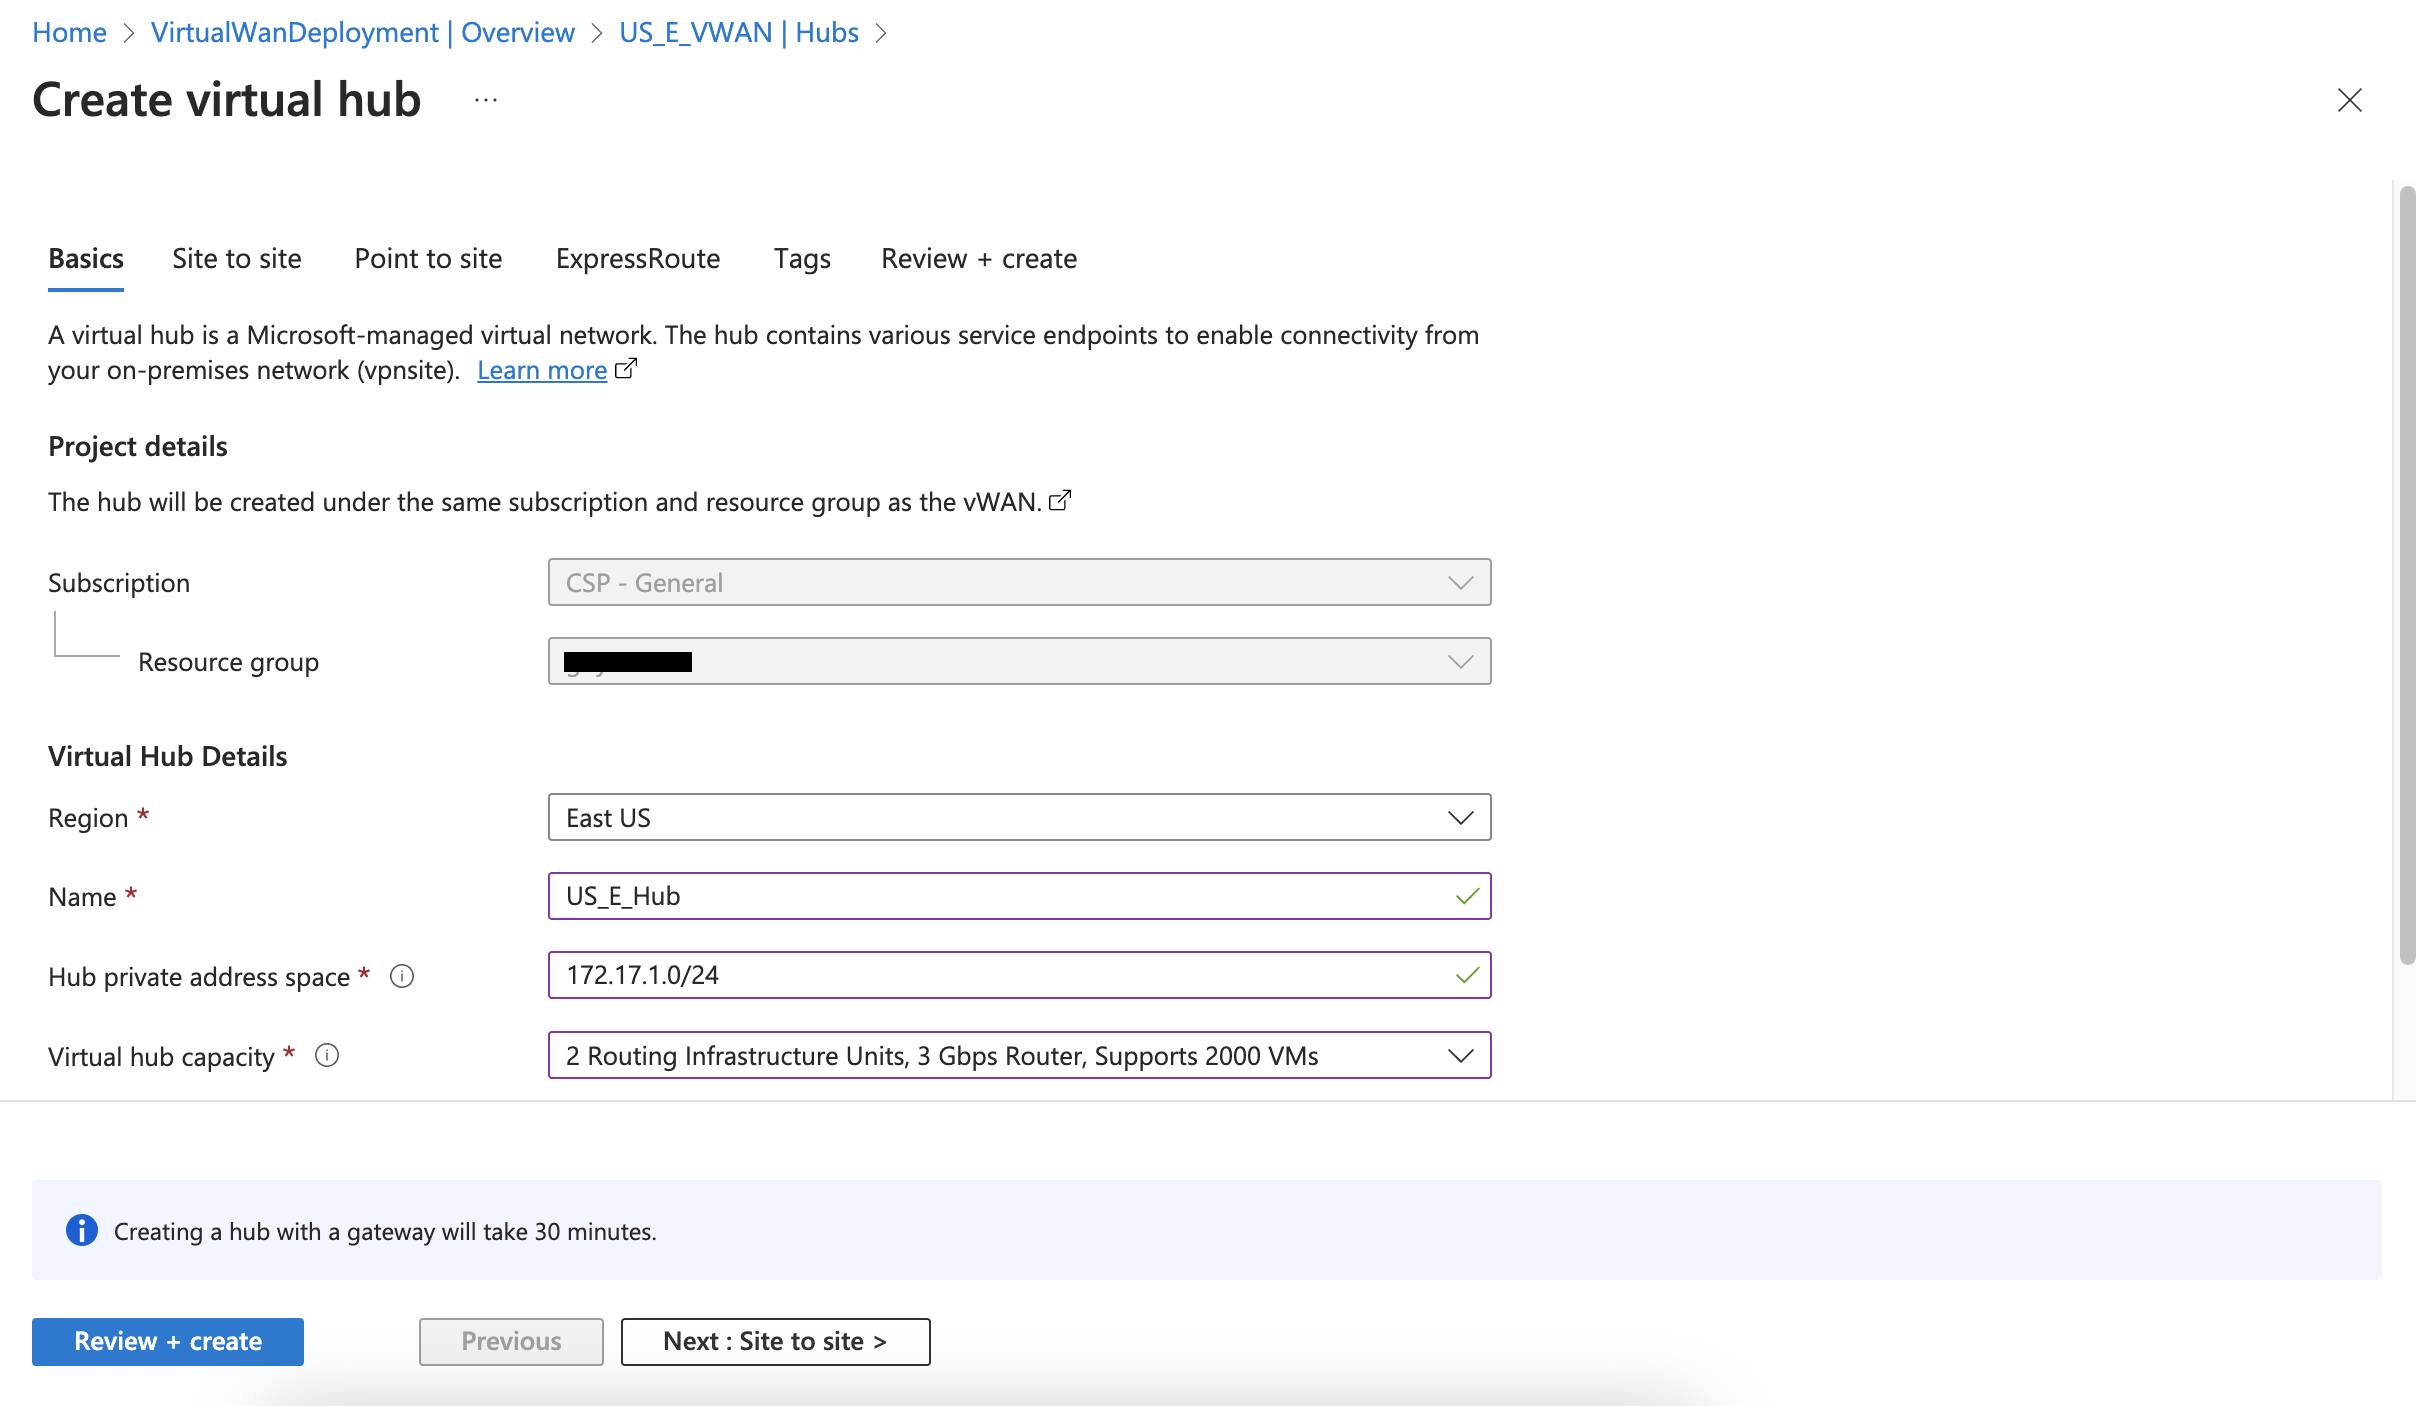
- Fill in the following information on the Basics tab.
- Select the relevant Region.
- Provide the Hub with a meaningful name.
- Endpoint - IP Address.
- Hub private address space - select a CIDR range that isn't overlapping with any existing CIDR (/24 range is the minimal one).
- Address Space - Fill in your Permieter81 Address space.
- Virtual hub capacity - select the relevant option according to the maximum number of VMs to be connected through this hub.
- Fill in the following information in the Site to site tab:
- Create a Site to site - Yes
- Gateway scale units - select the appropriate option from the list
- Routing preference - Microsoft network
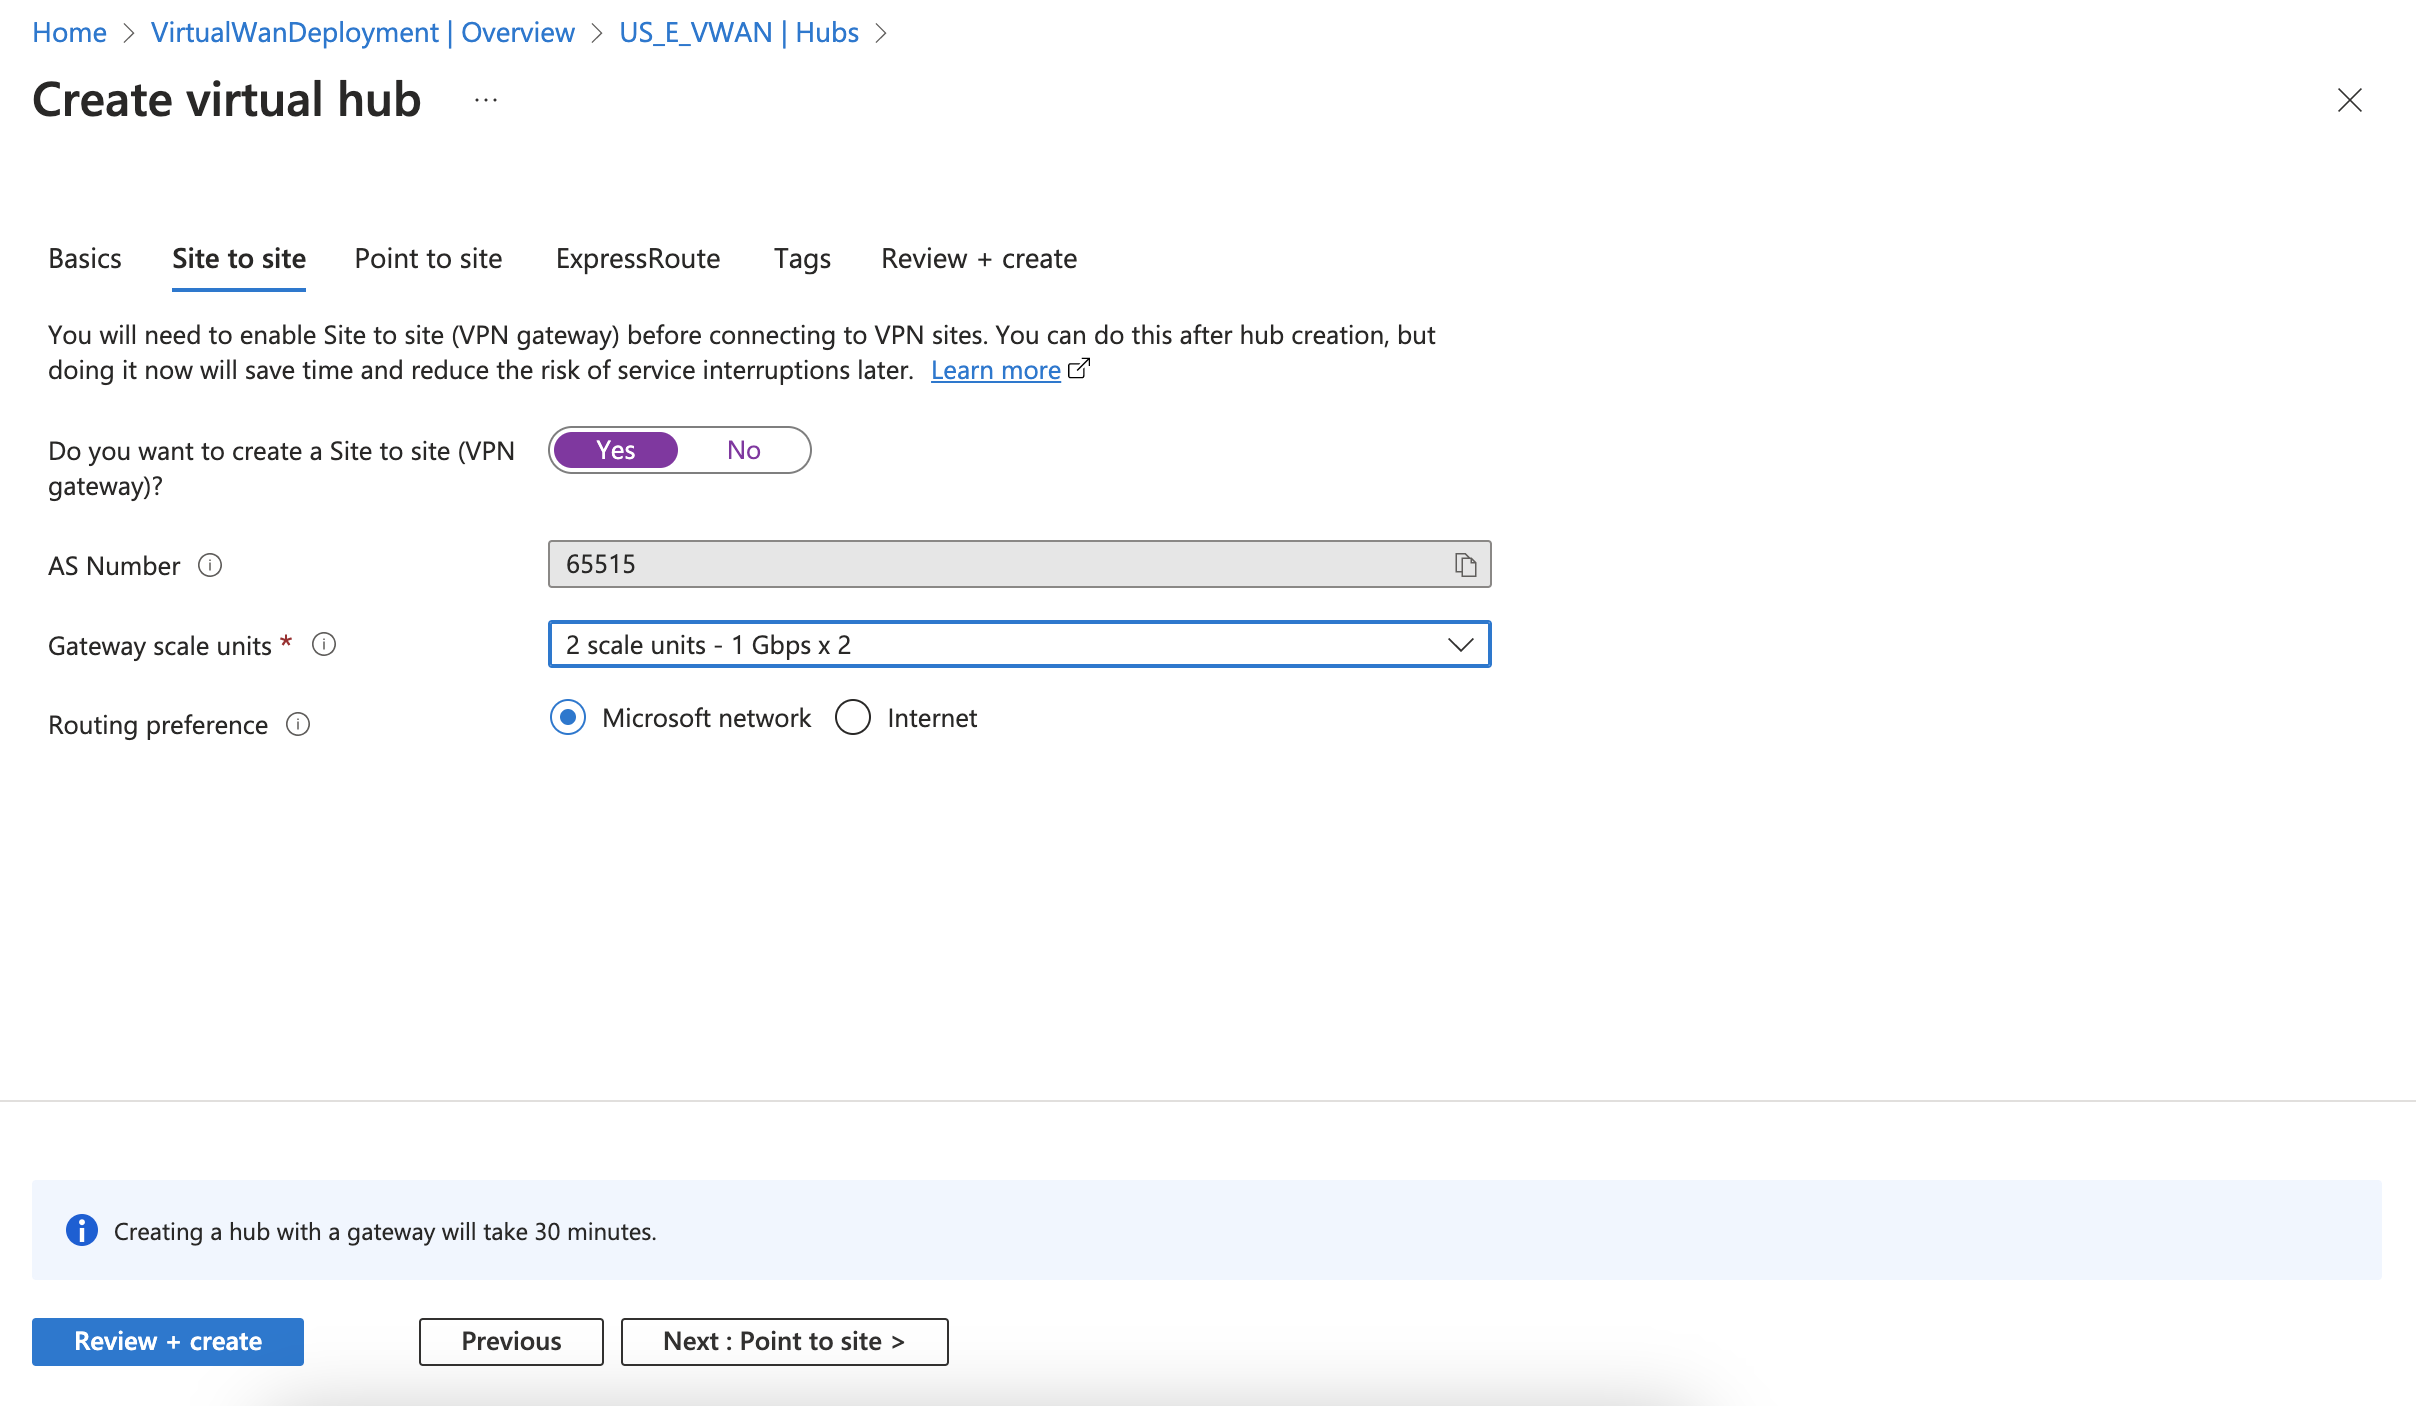
- Click on Review+create.
- Click on Create.
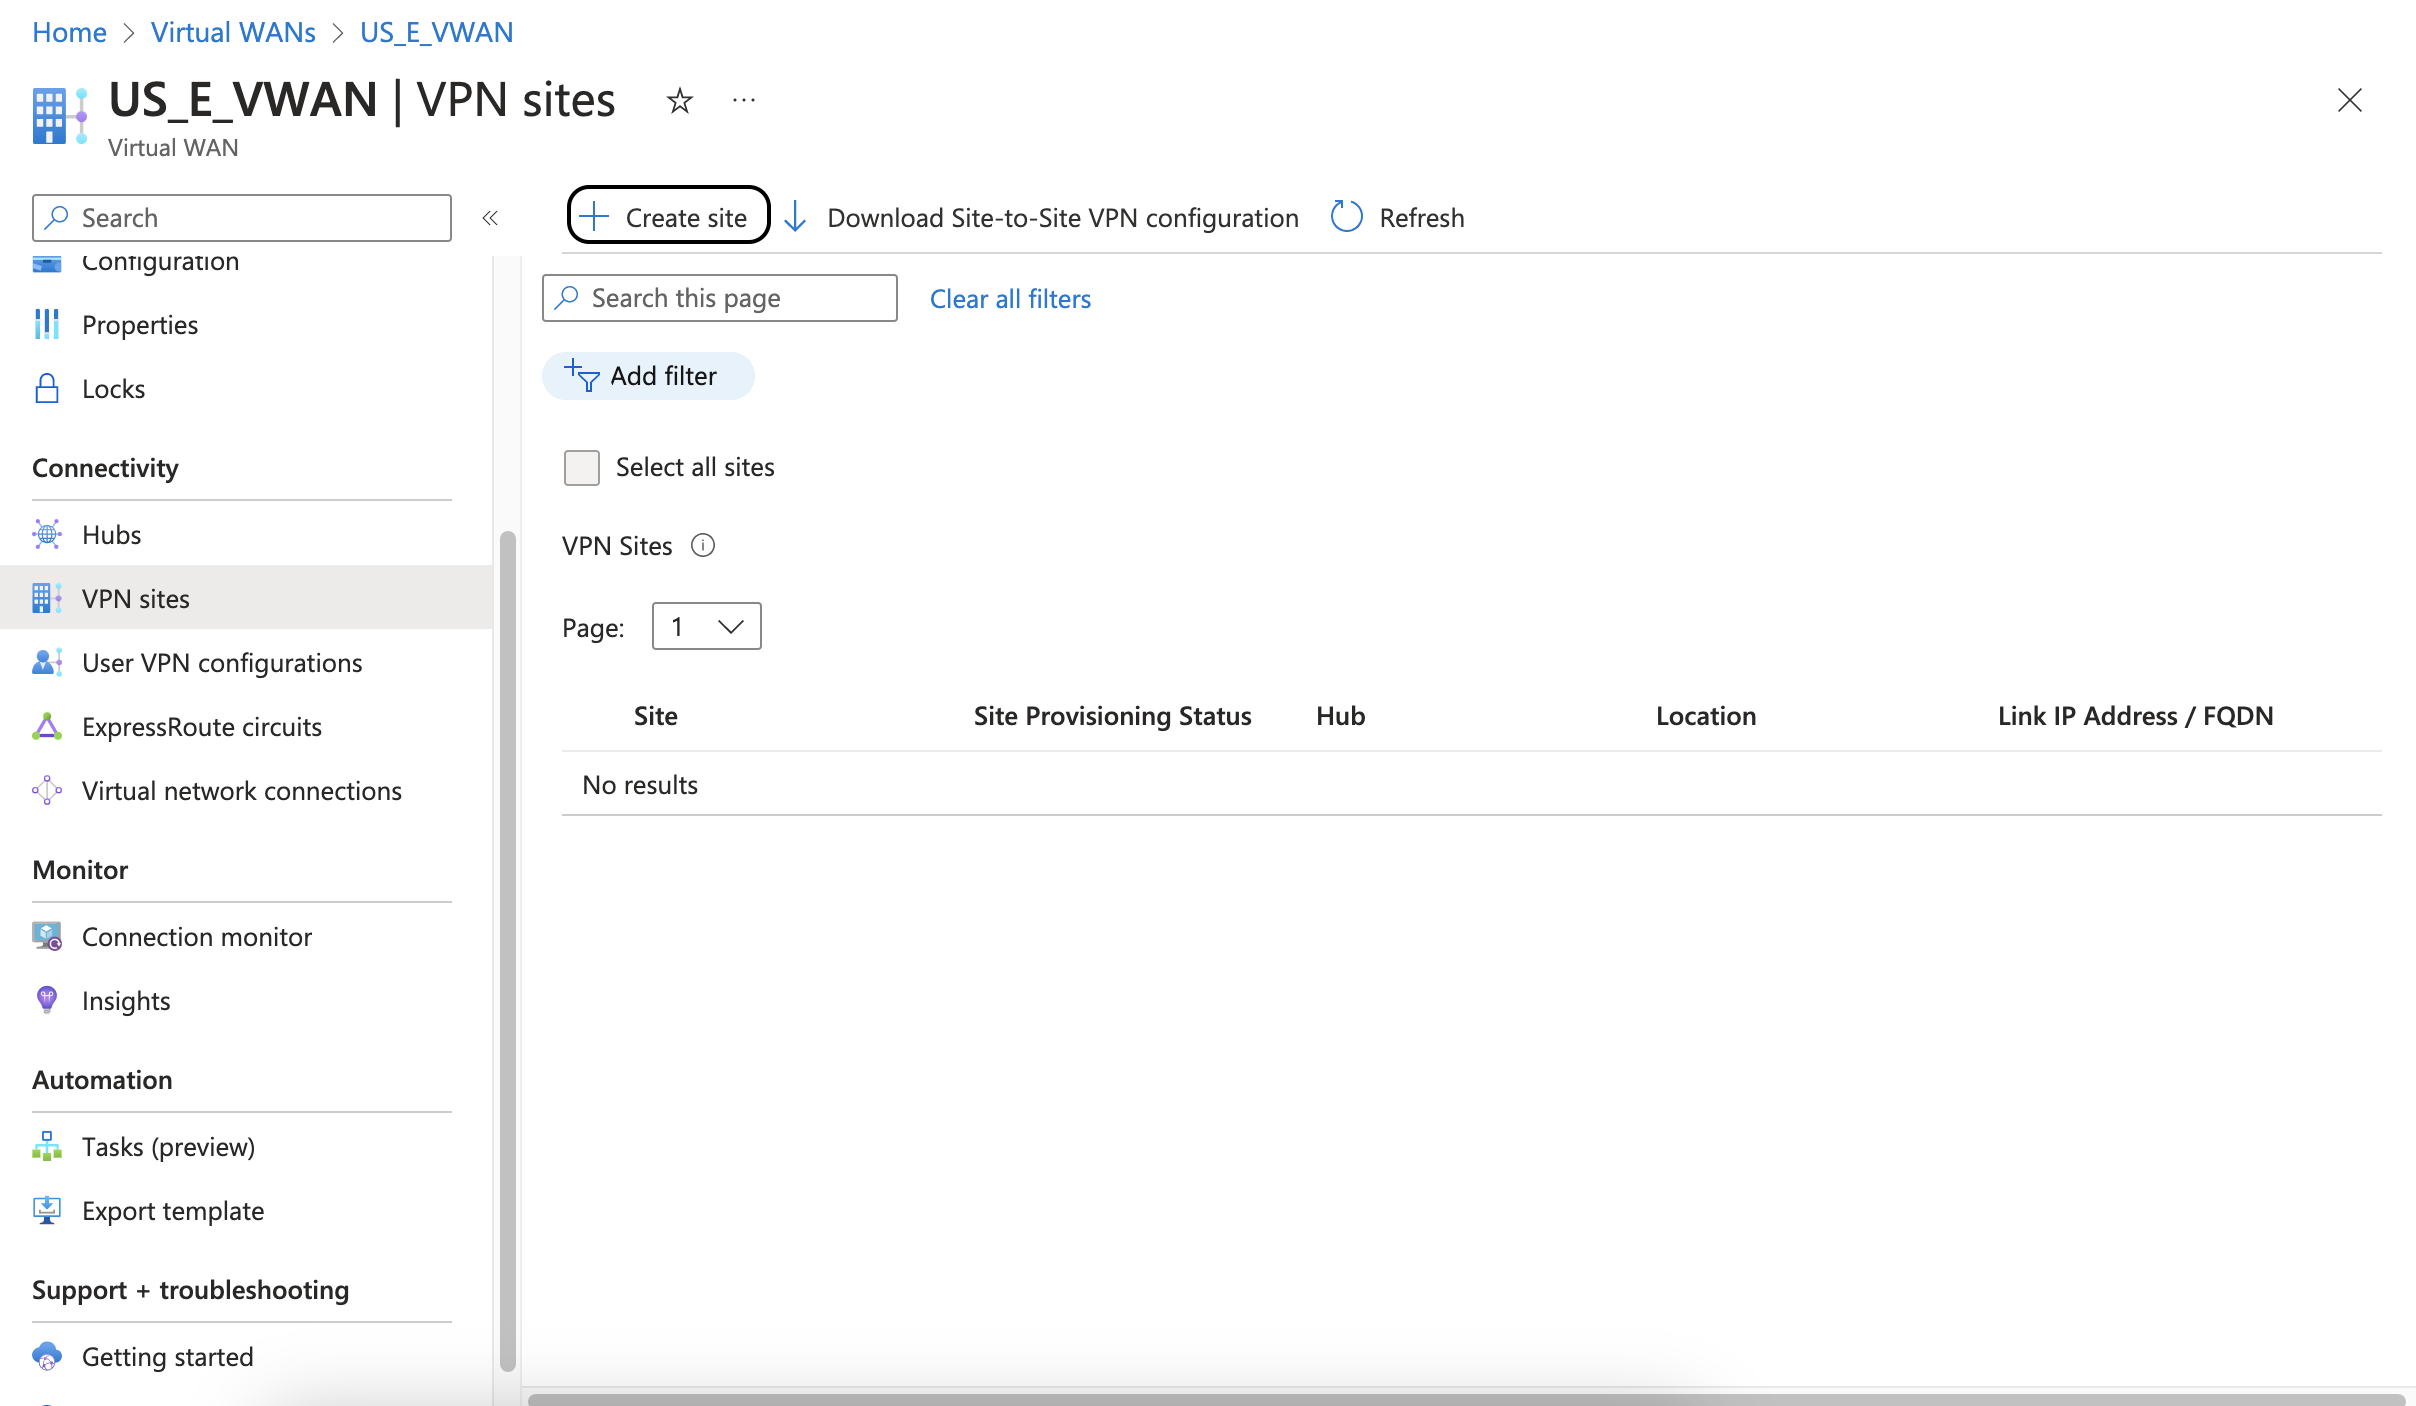
Create a site
- In your Azure Portal under the created Virtual WAN, select VPN sites from the left pane and click on +Create site.
- Fill in the following information:
- Name: Enter a meaningful name
- Region: Select the appropriate region
- Device vendor: Enter "Check Point SASE" to mark this site as providing connectivity to Check Point SASE
- Private address space: Leave empty
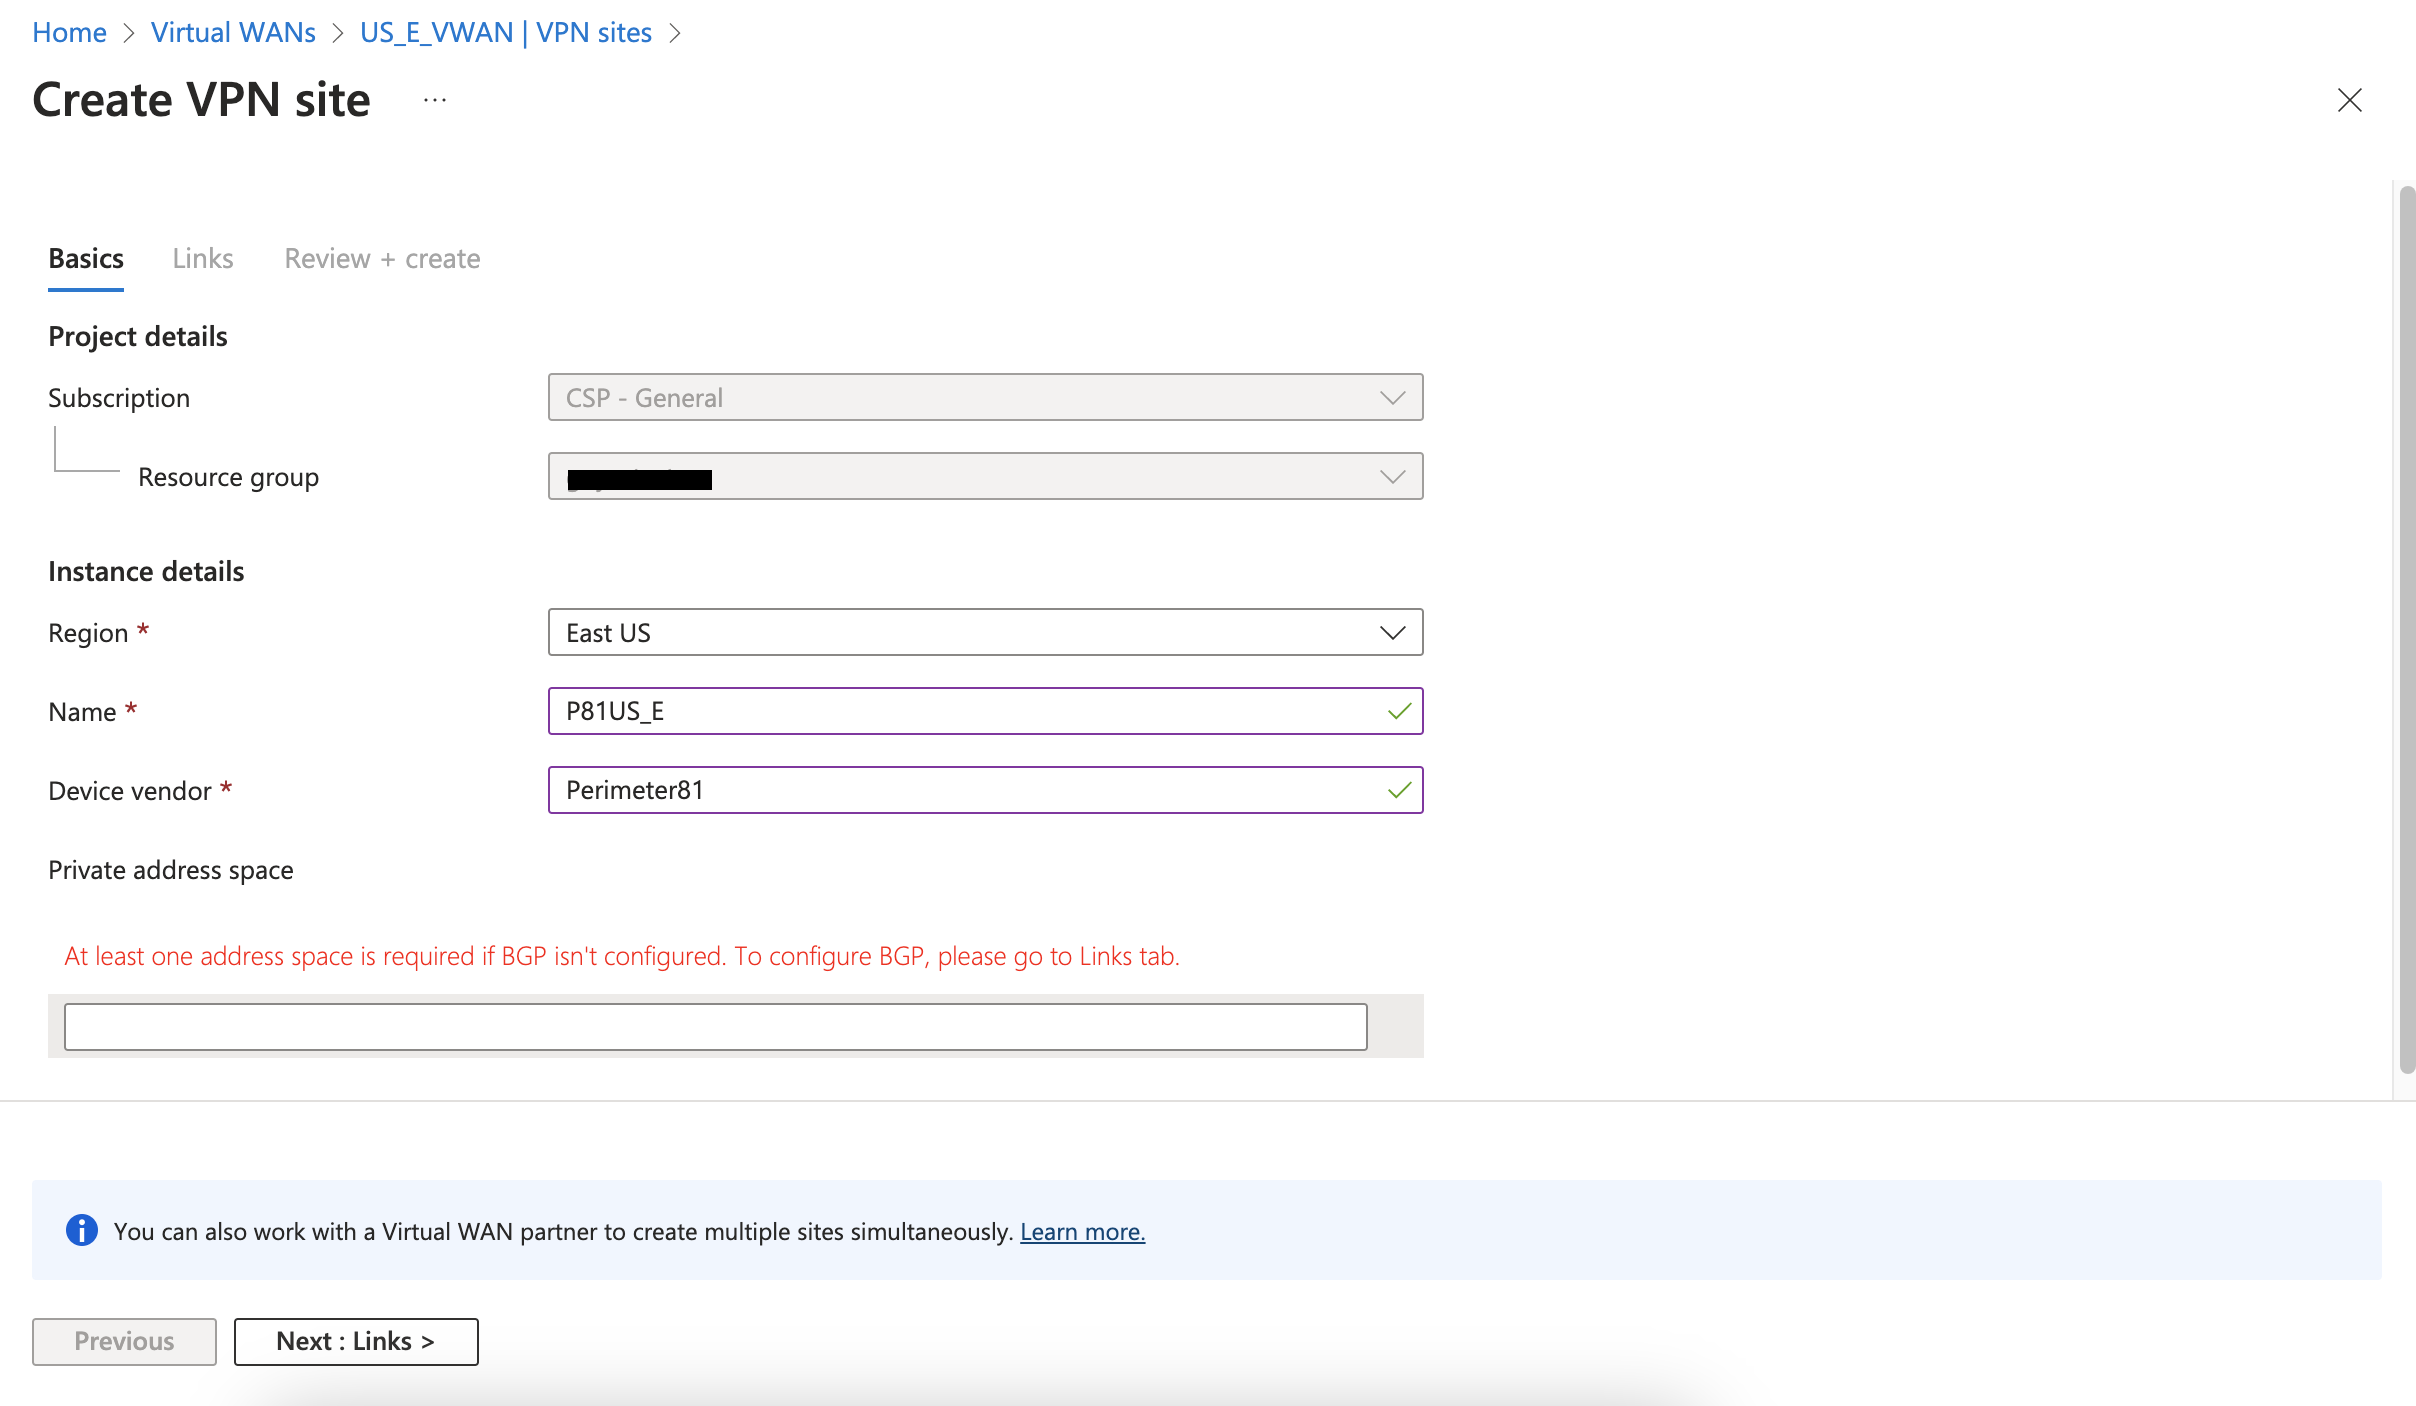
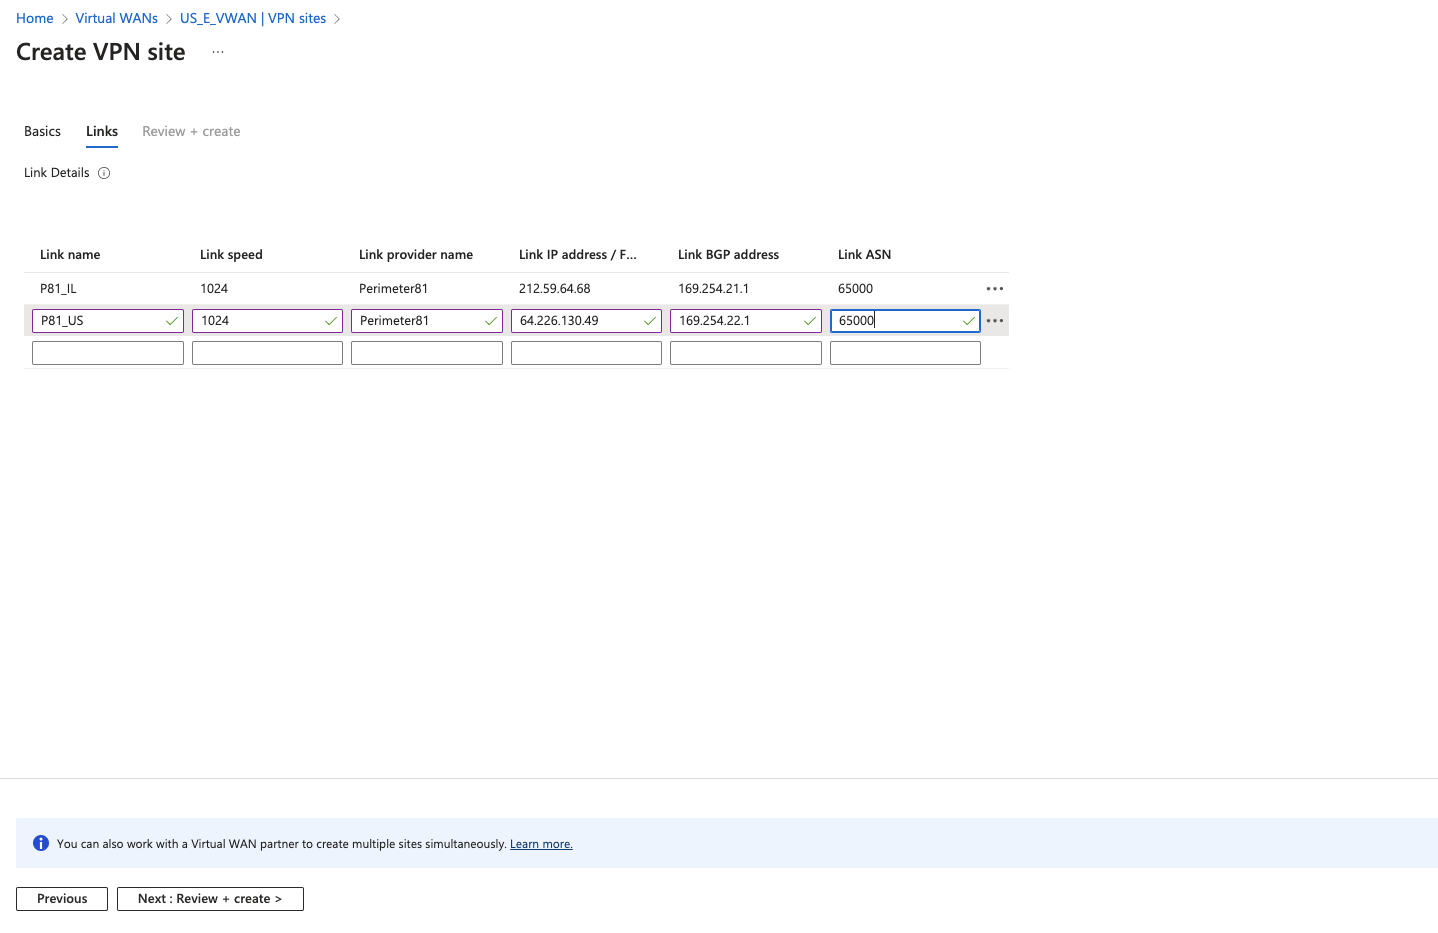
- Click on Next:Links to proceed to the link page and add the following information:
- Link name: Enter a meaningful name, pointing to the first Check Point SASE gateway to be connected
- Link speed: 1024
- Link provider name: Enter "Check Point SASE" to mark this site as providing connectivity to Check Point SASE
- Link IP address: The IP address of the first Check Point SASE gateway to be connected
- Link BGP address: Type any address from the permitted range
- Link ASN: Type the ASN for your Check Point SASE network
- Repeat the above step to add the details for the second connection (the second gateway):
- Click on Review+create and on the next screen click on Create.
Connect the site to your virtual hub
- In your Azure Portal under the created Virtual WAN, select Hubs from the left pane and select your hub.
- On the hub page click on VPN (Site to site) from the left pane under Connectivity.
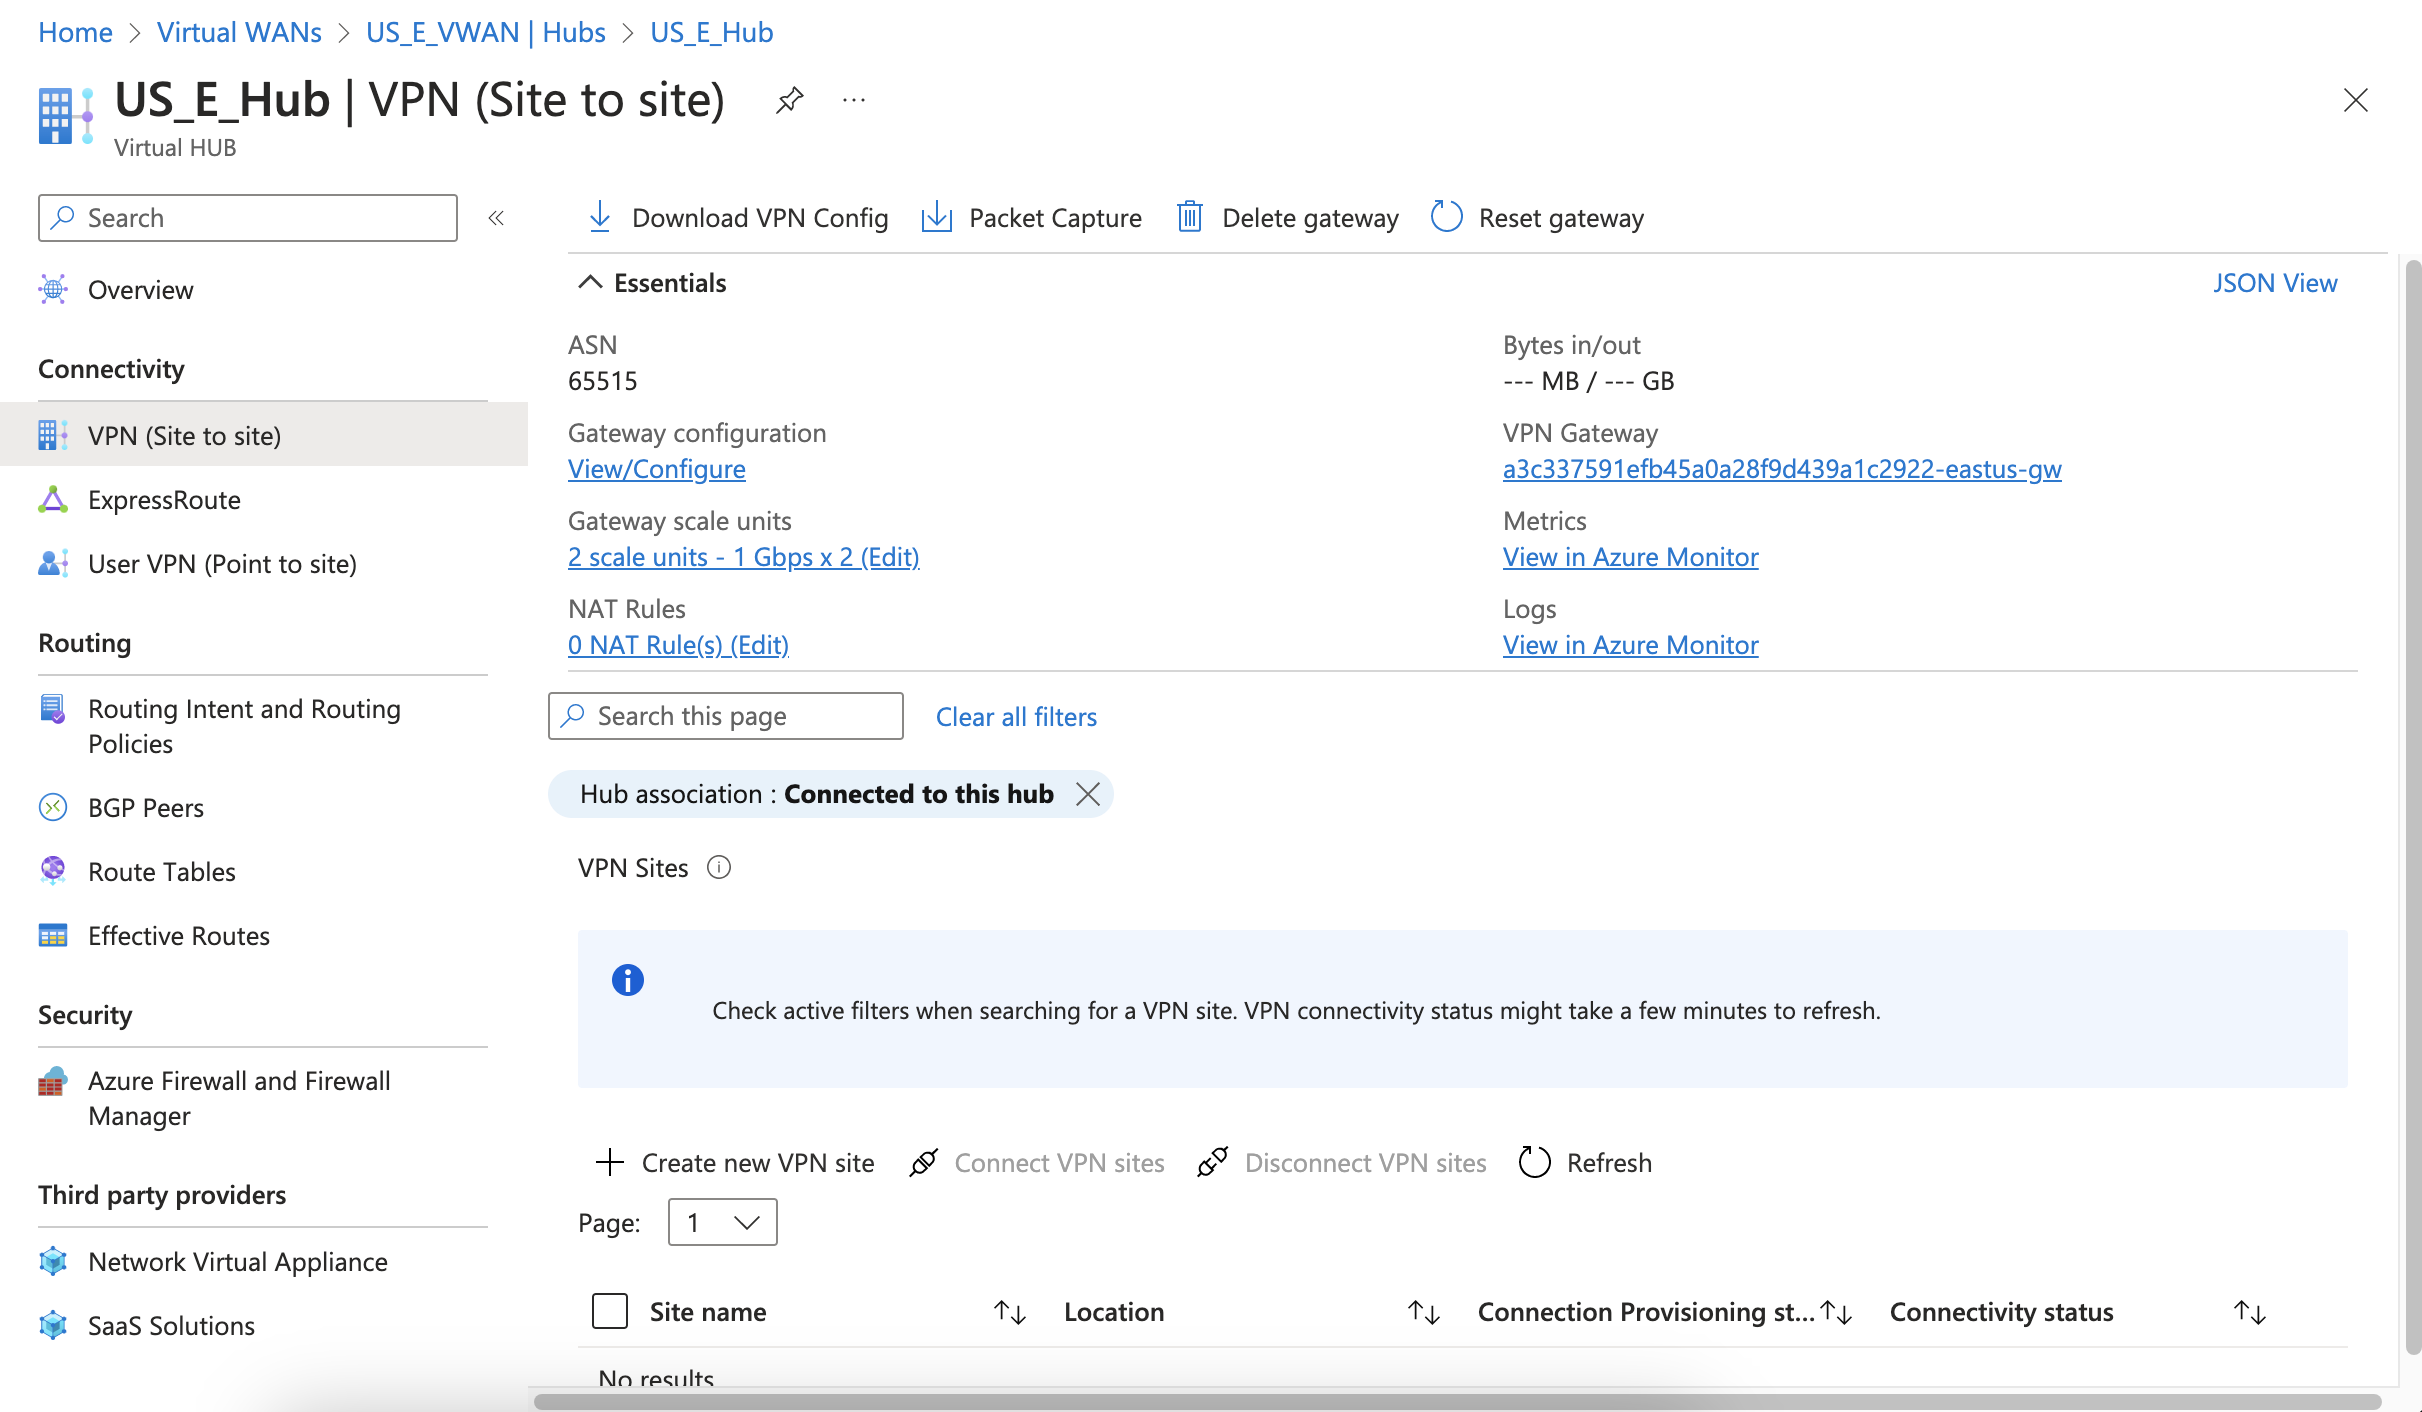
- On the VPN (Site to site) page clear the filter to view your site in the list.
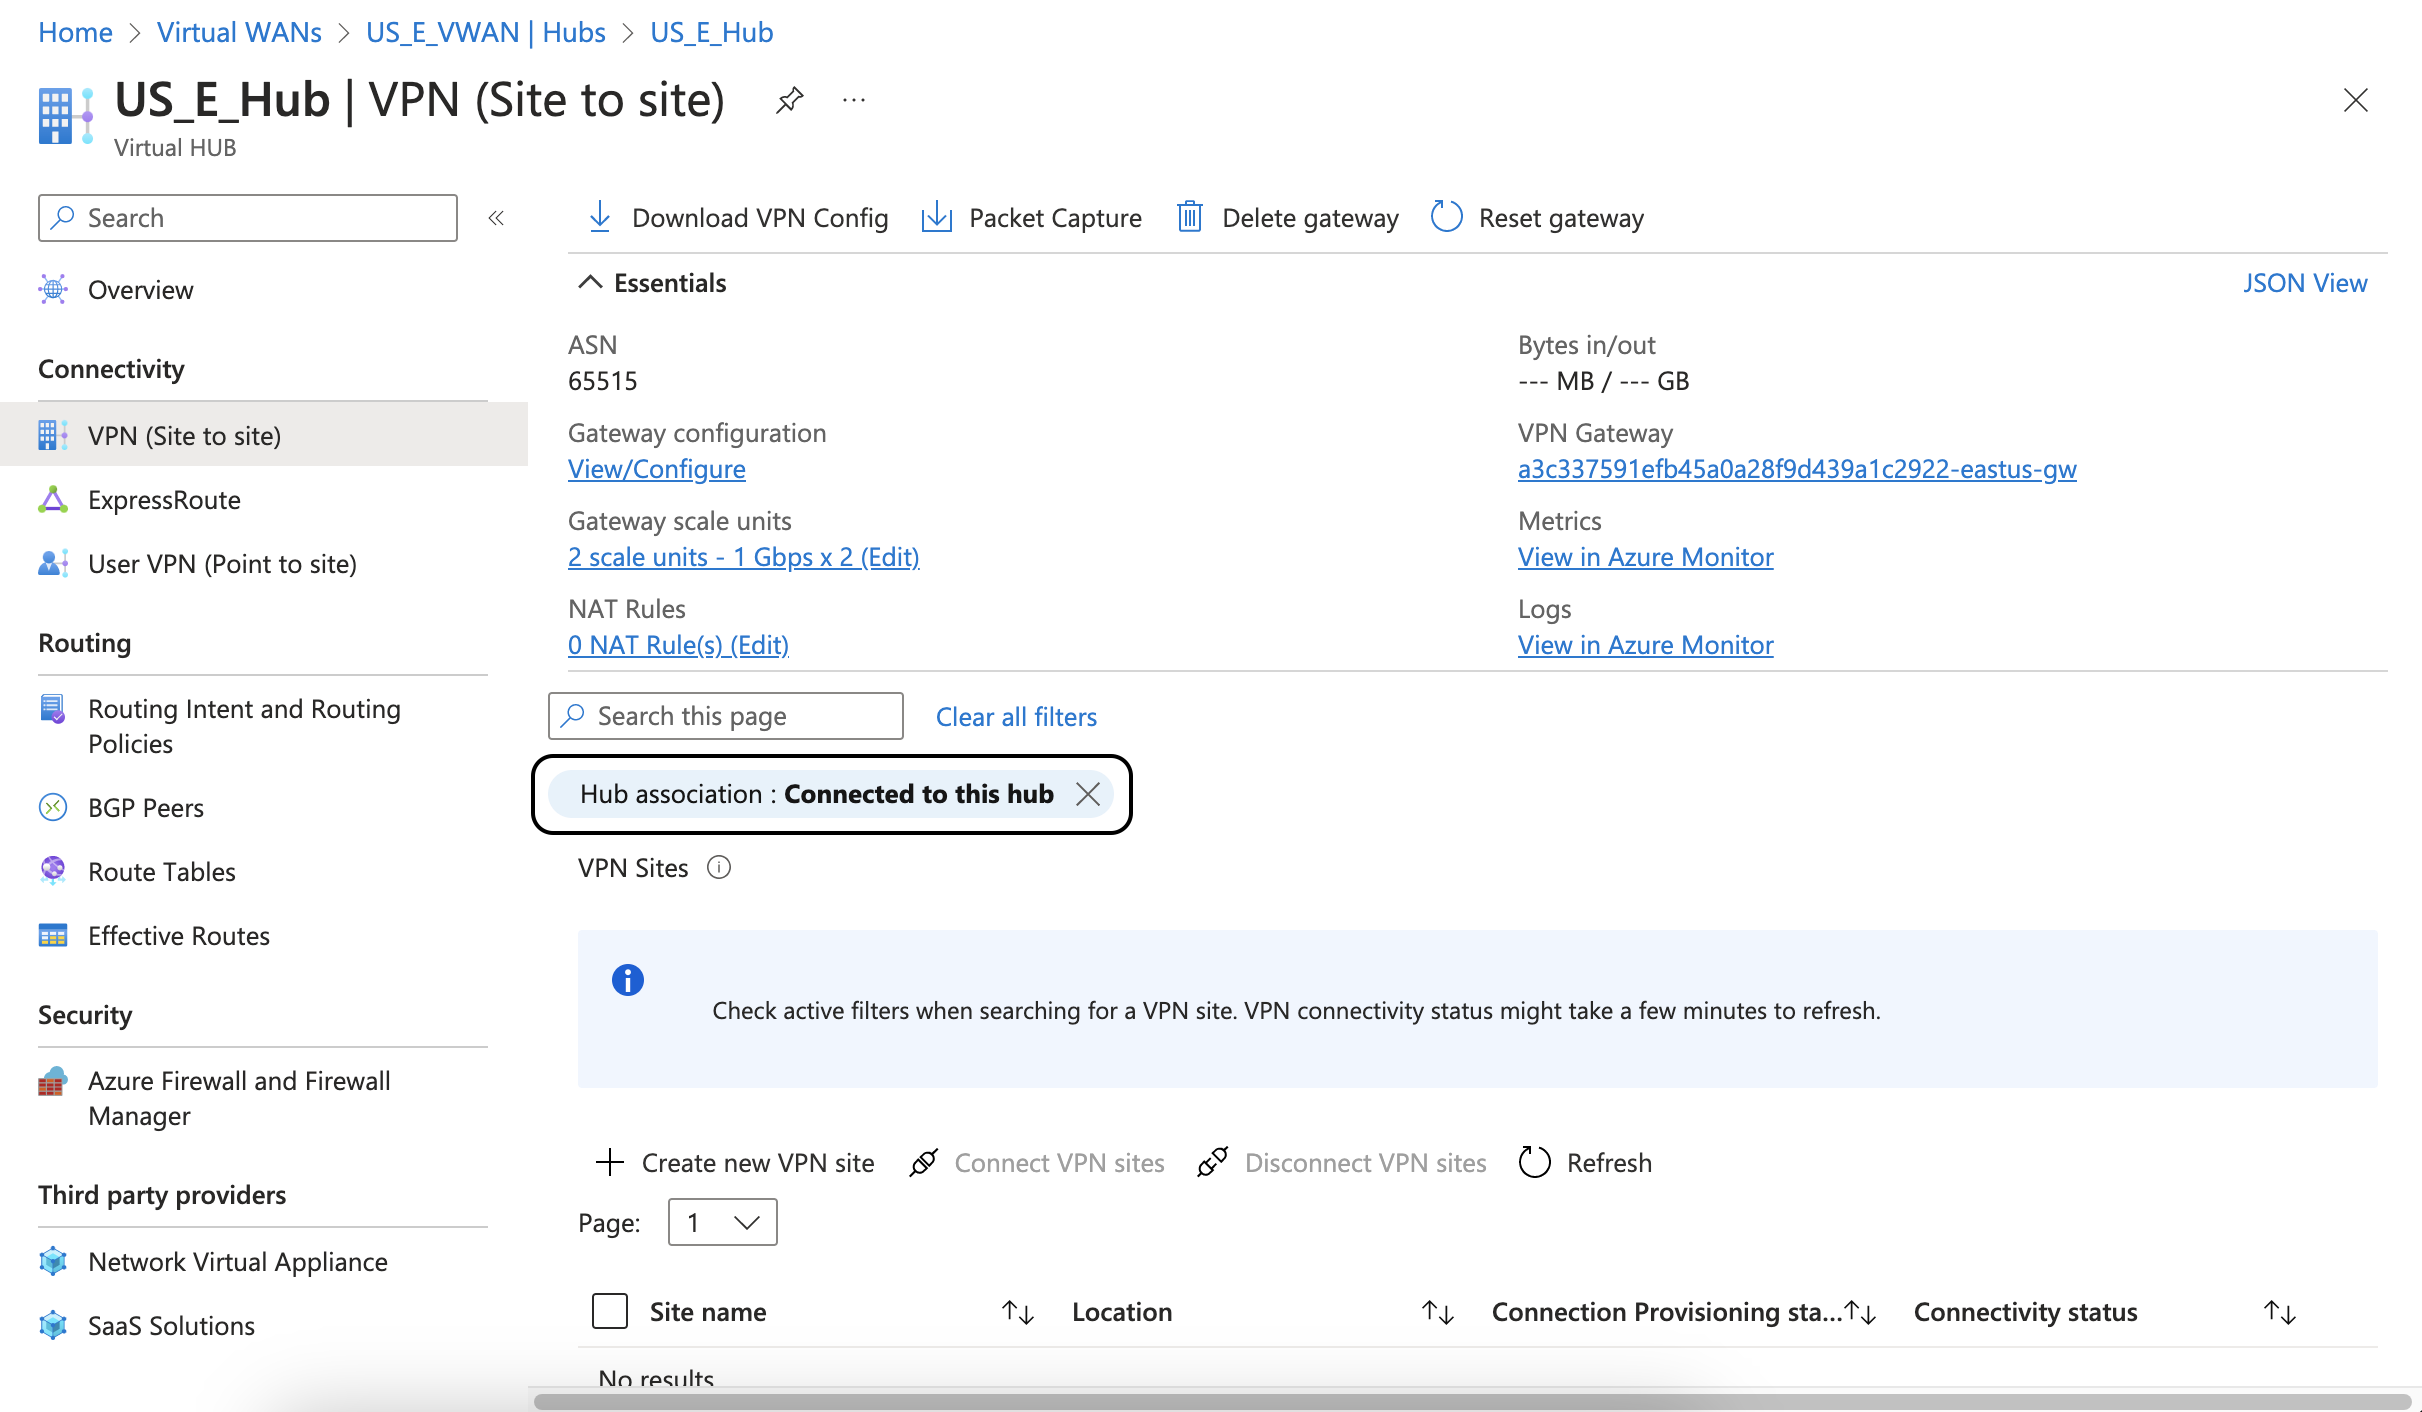
- Select the checkbox next to the created site and click on Connect VPN Sites.

- On the Connect sites screen add the following information:
- Pre-shared key: Enter a PSK to be used for this connection
- Protocol: IKEv2
- IPsec: Custom
- SA Lifetime in seconds: 28800
- IKE Phase 1:
Encryption - AES256
Integrity/PRF - SHA256
DH Group - DHGroup14 - IKE Phase 2(ipsec):
IPsecEncryption - AES256
IPsec Integrity - SHA256
PFS Group - PFS14 - Propogate Default Route: Disable
- Use policy based traffic selector: Disable
- Configure traffic selector: No
- Connection Mode: Default
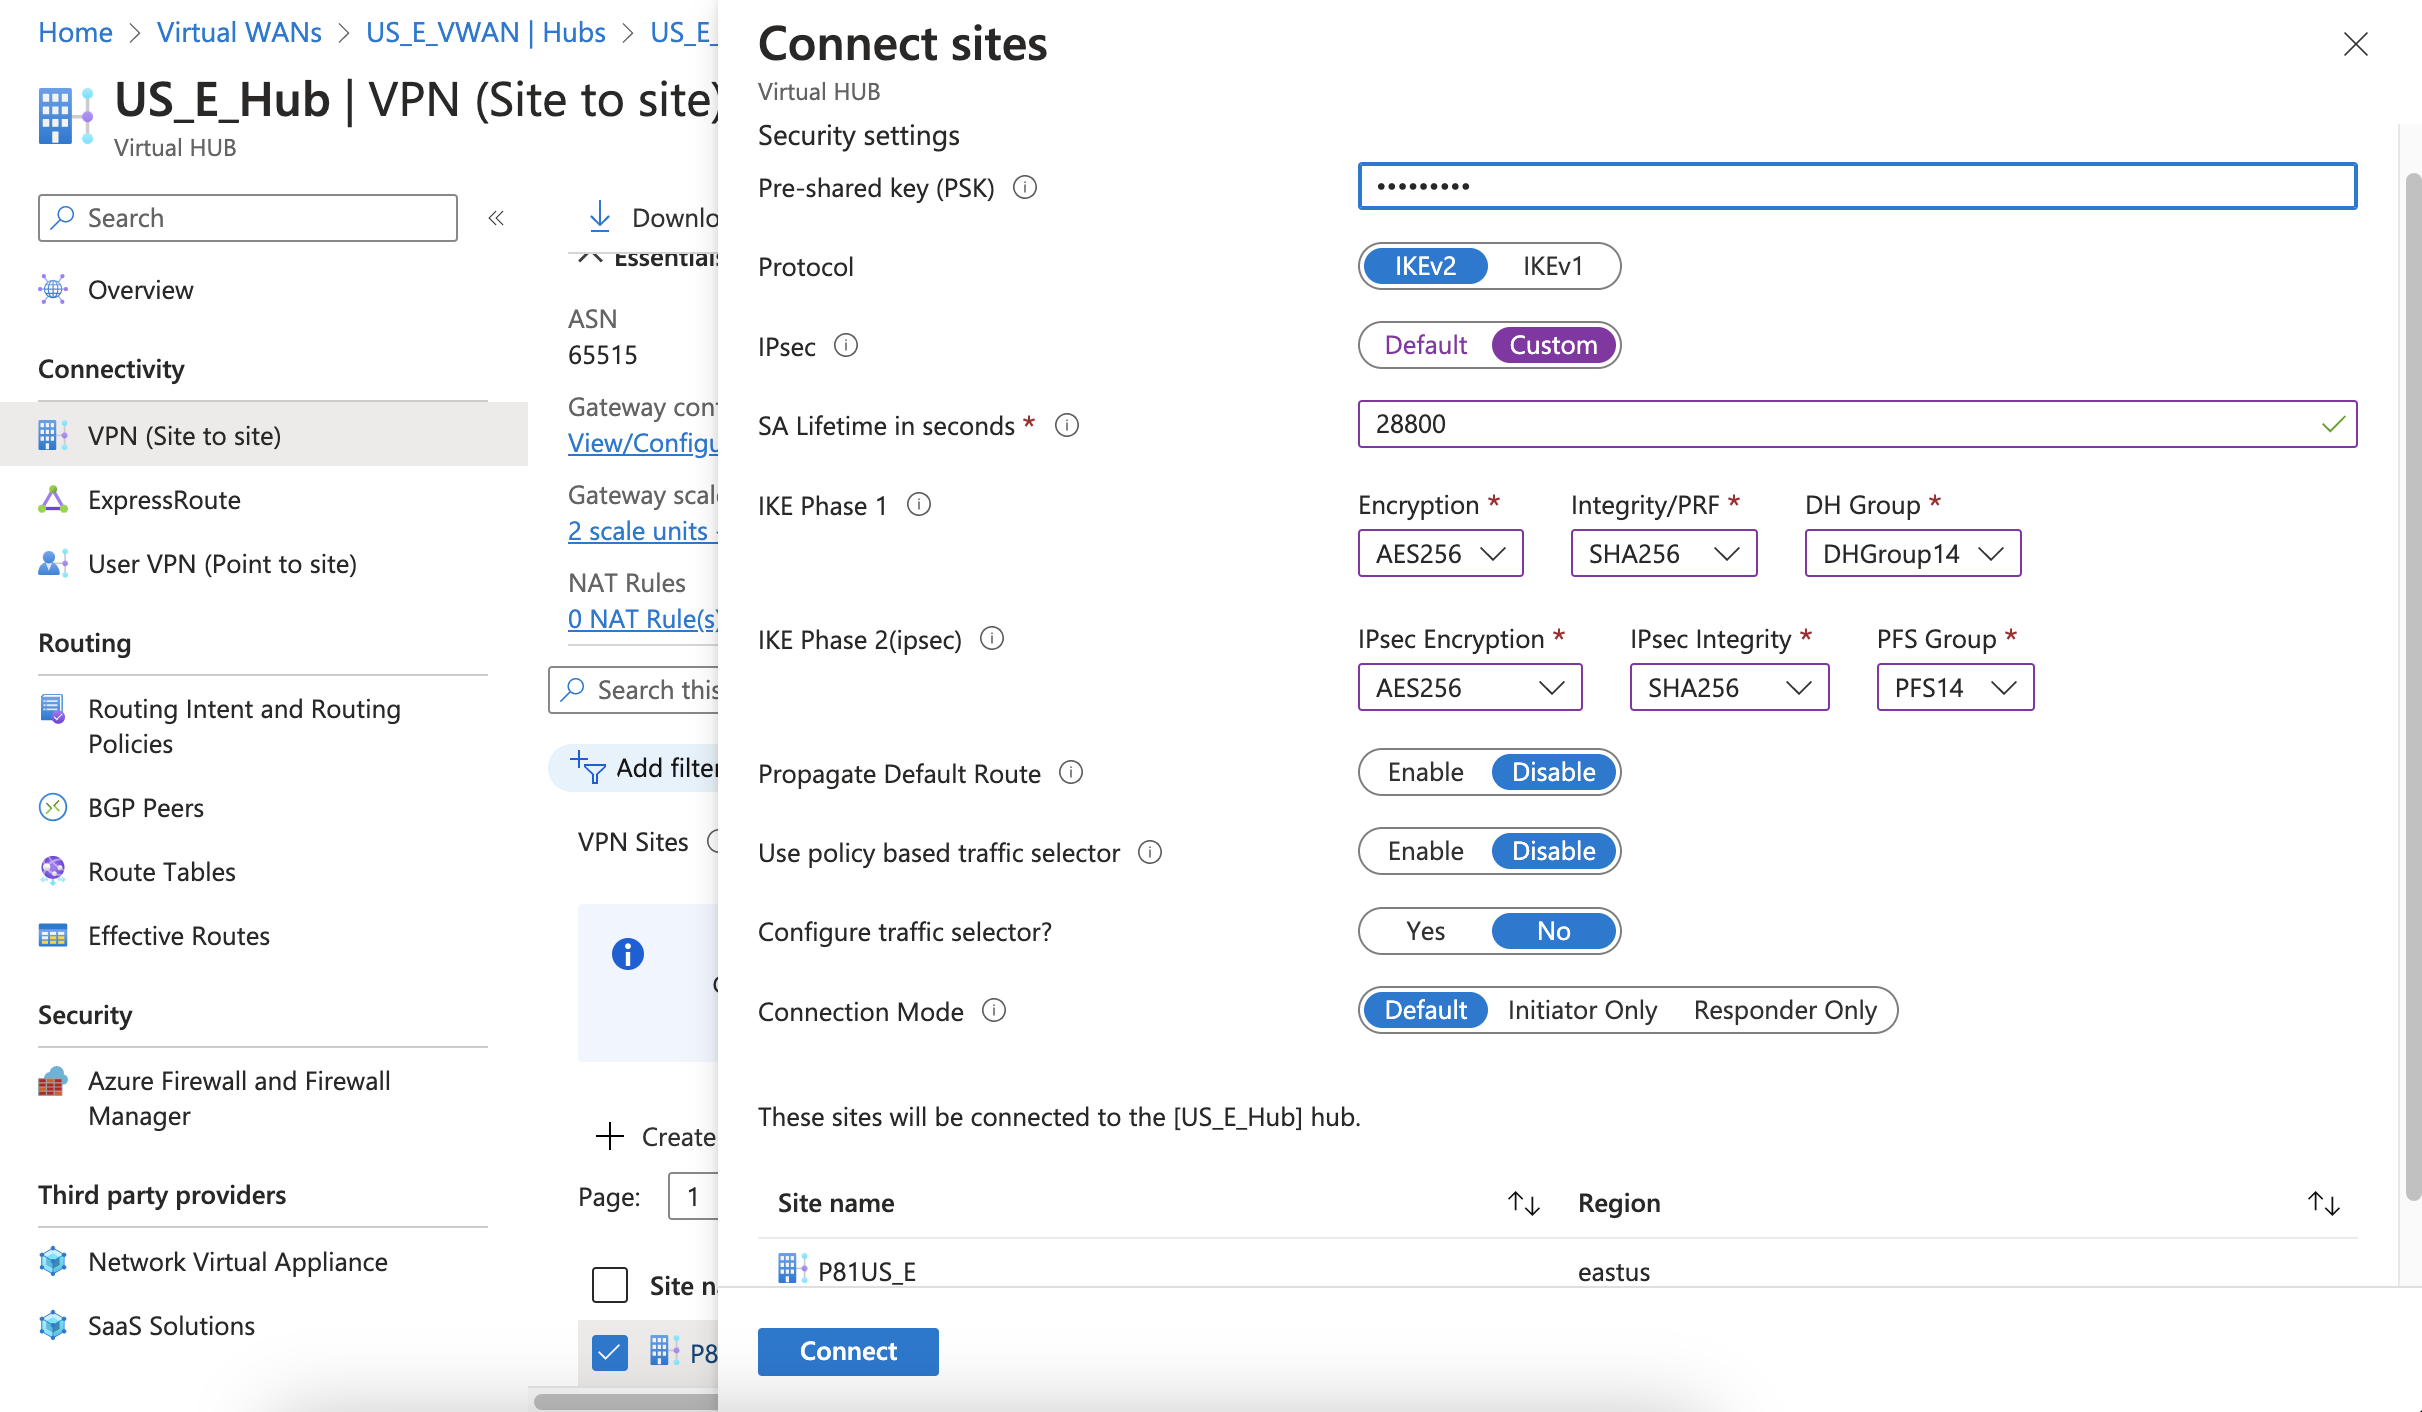
- Click on Connect.
- On the VPN (Site to site) screen Configure the gateway by clicking on View/Configure
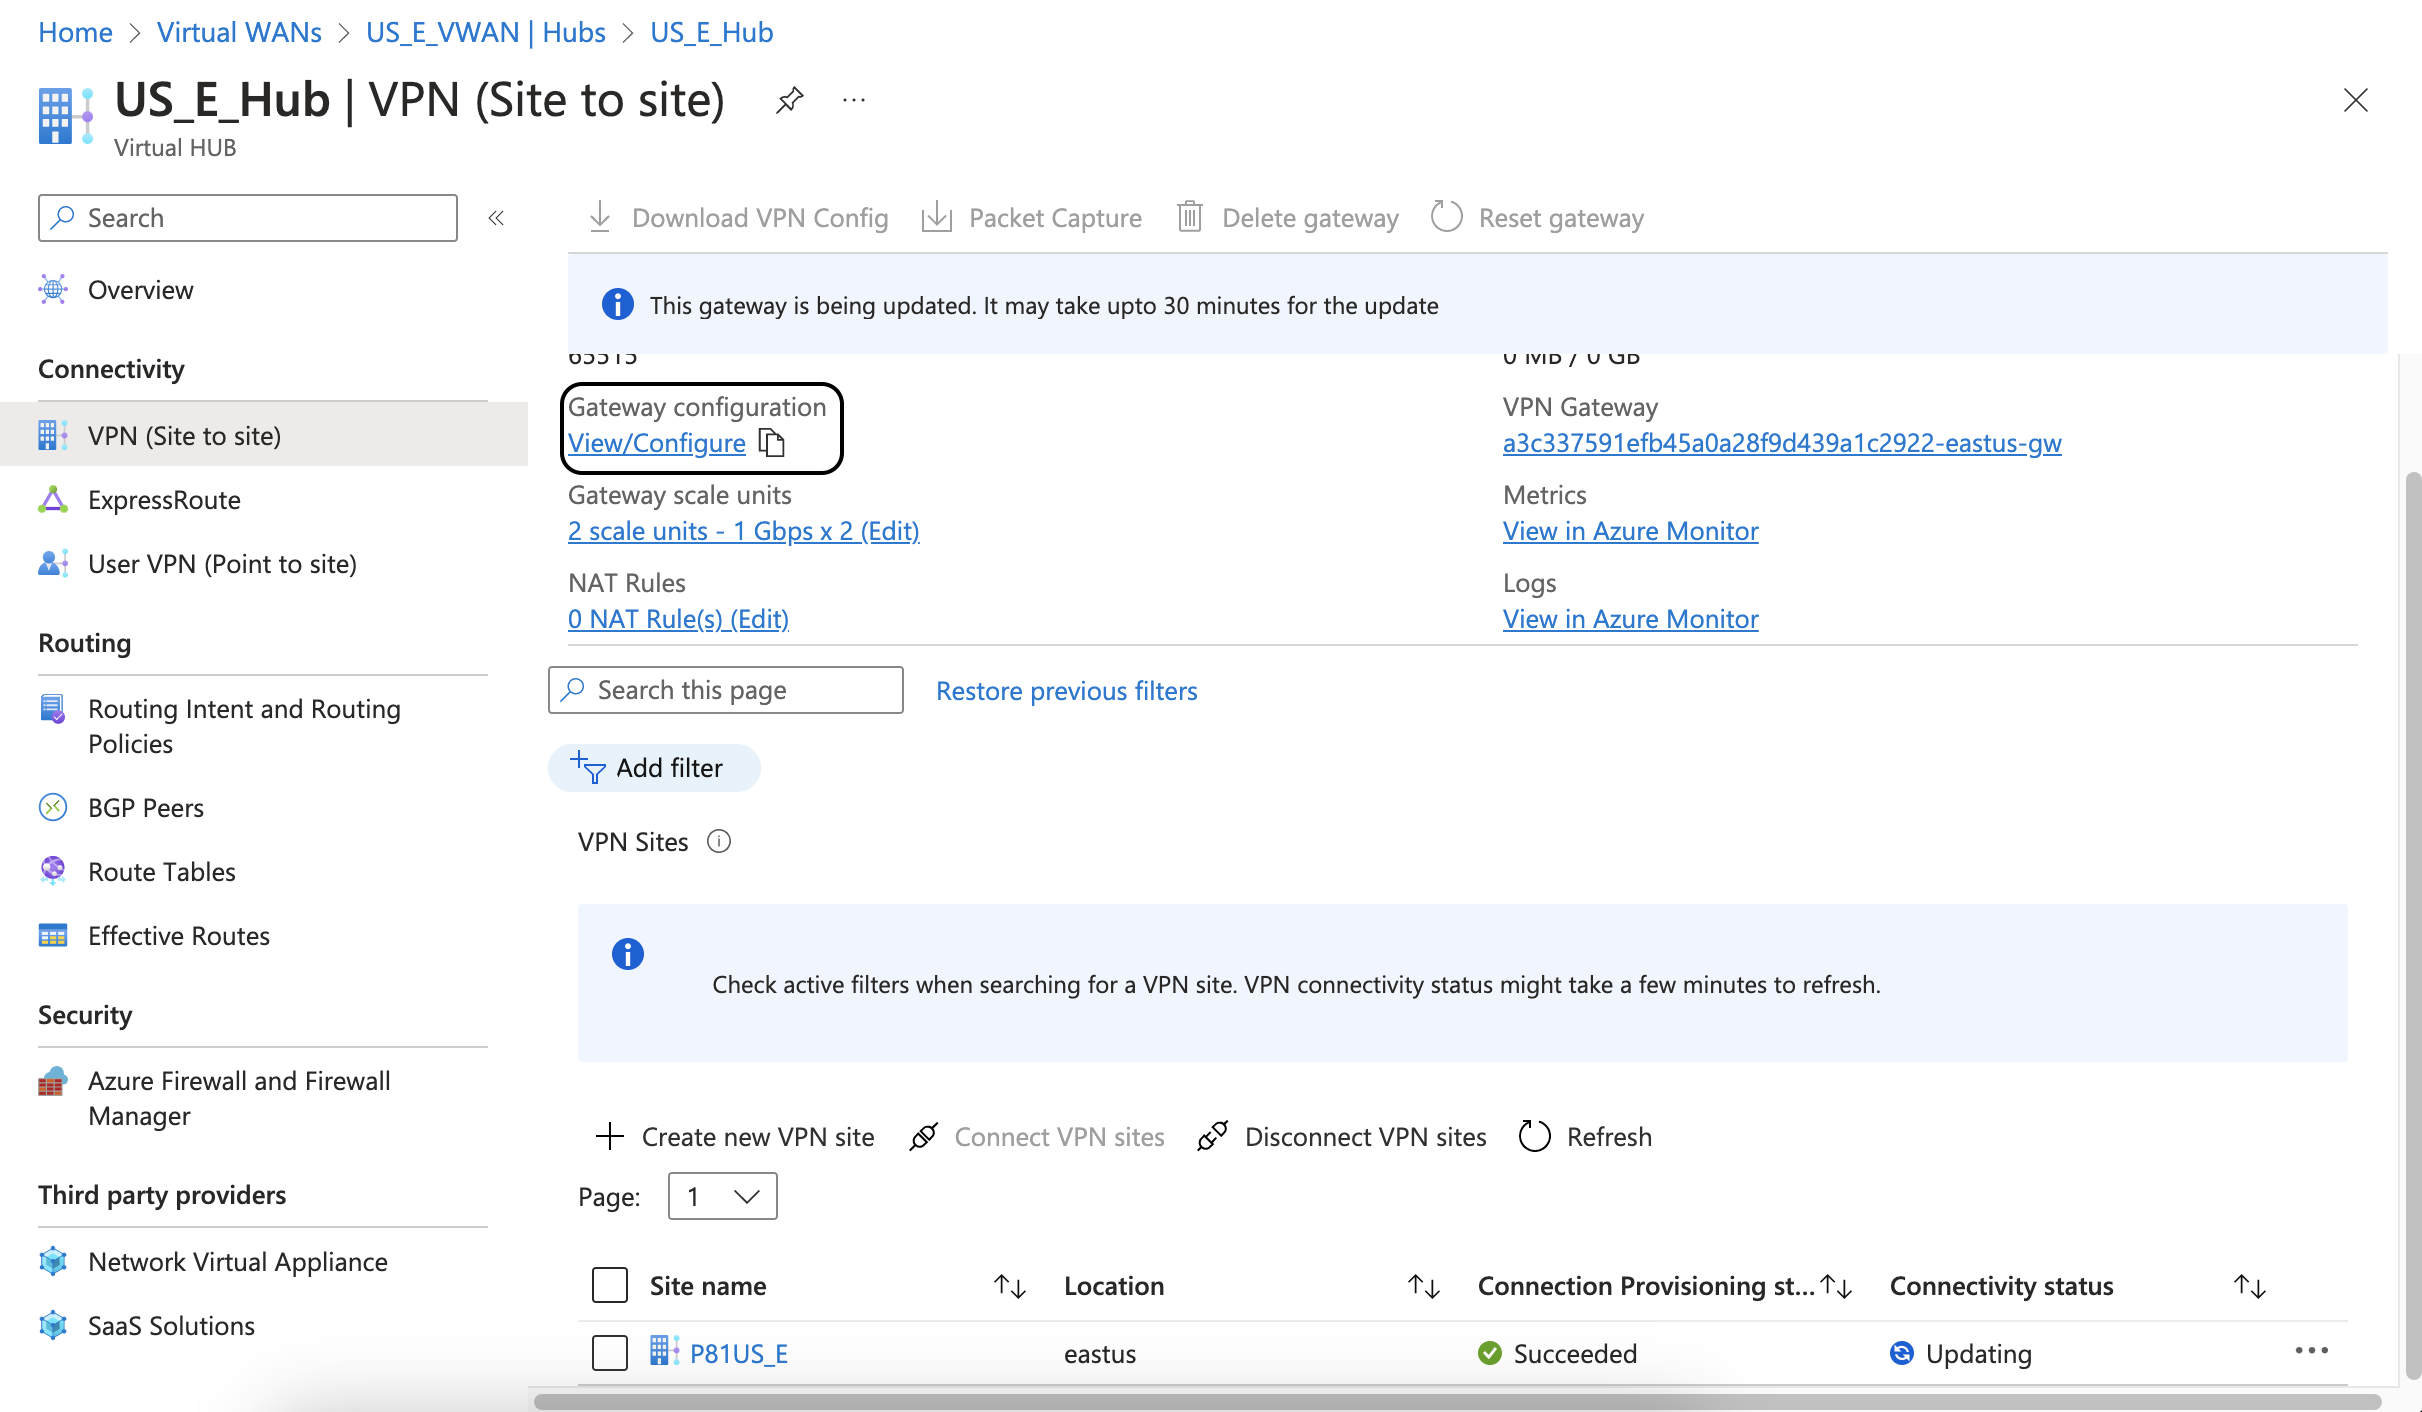
- On the Edit VPN Gateway screen add the following information:
- Under VPN Gateway Instance 0, set the Custom BGP IP Address to be from the same network range as the BGP address for the first link
- Under VPN Gateway Instance 1, set the Custom BGP IP Address to be from the same network range as the BGP address for the second link
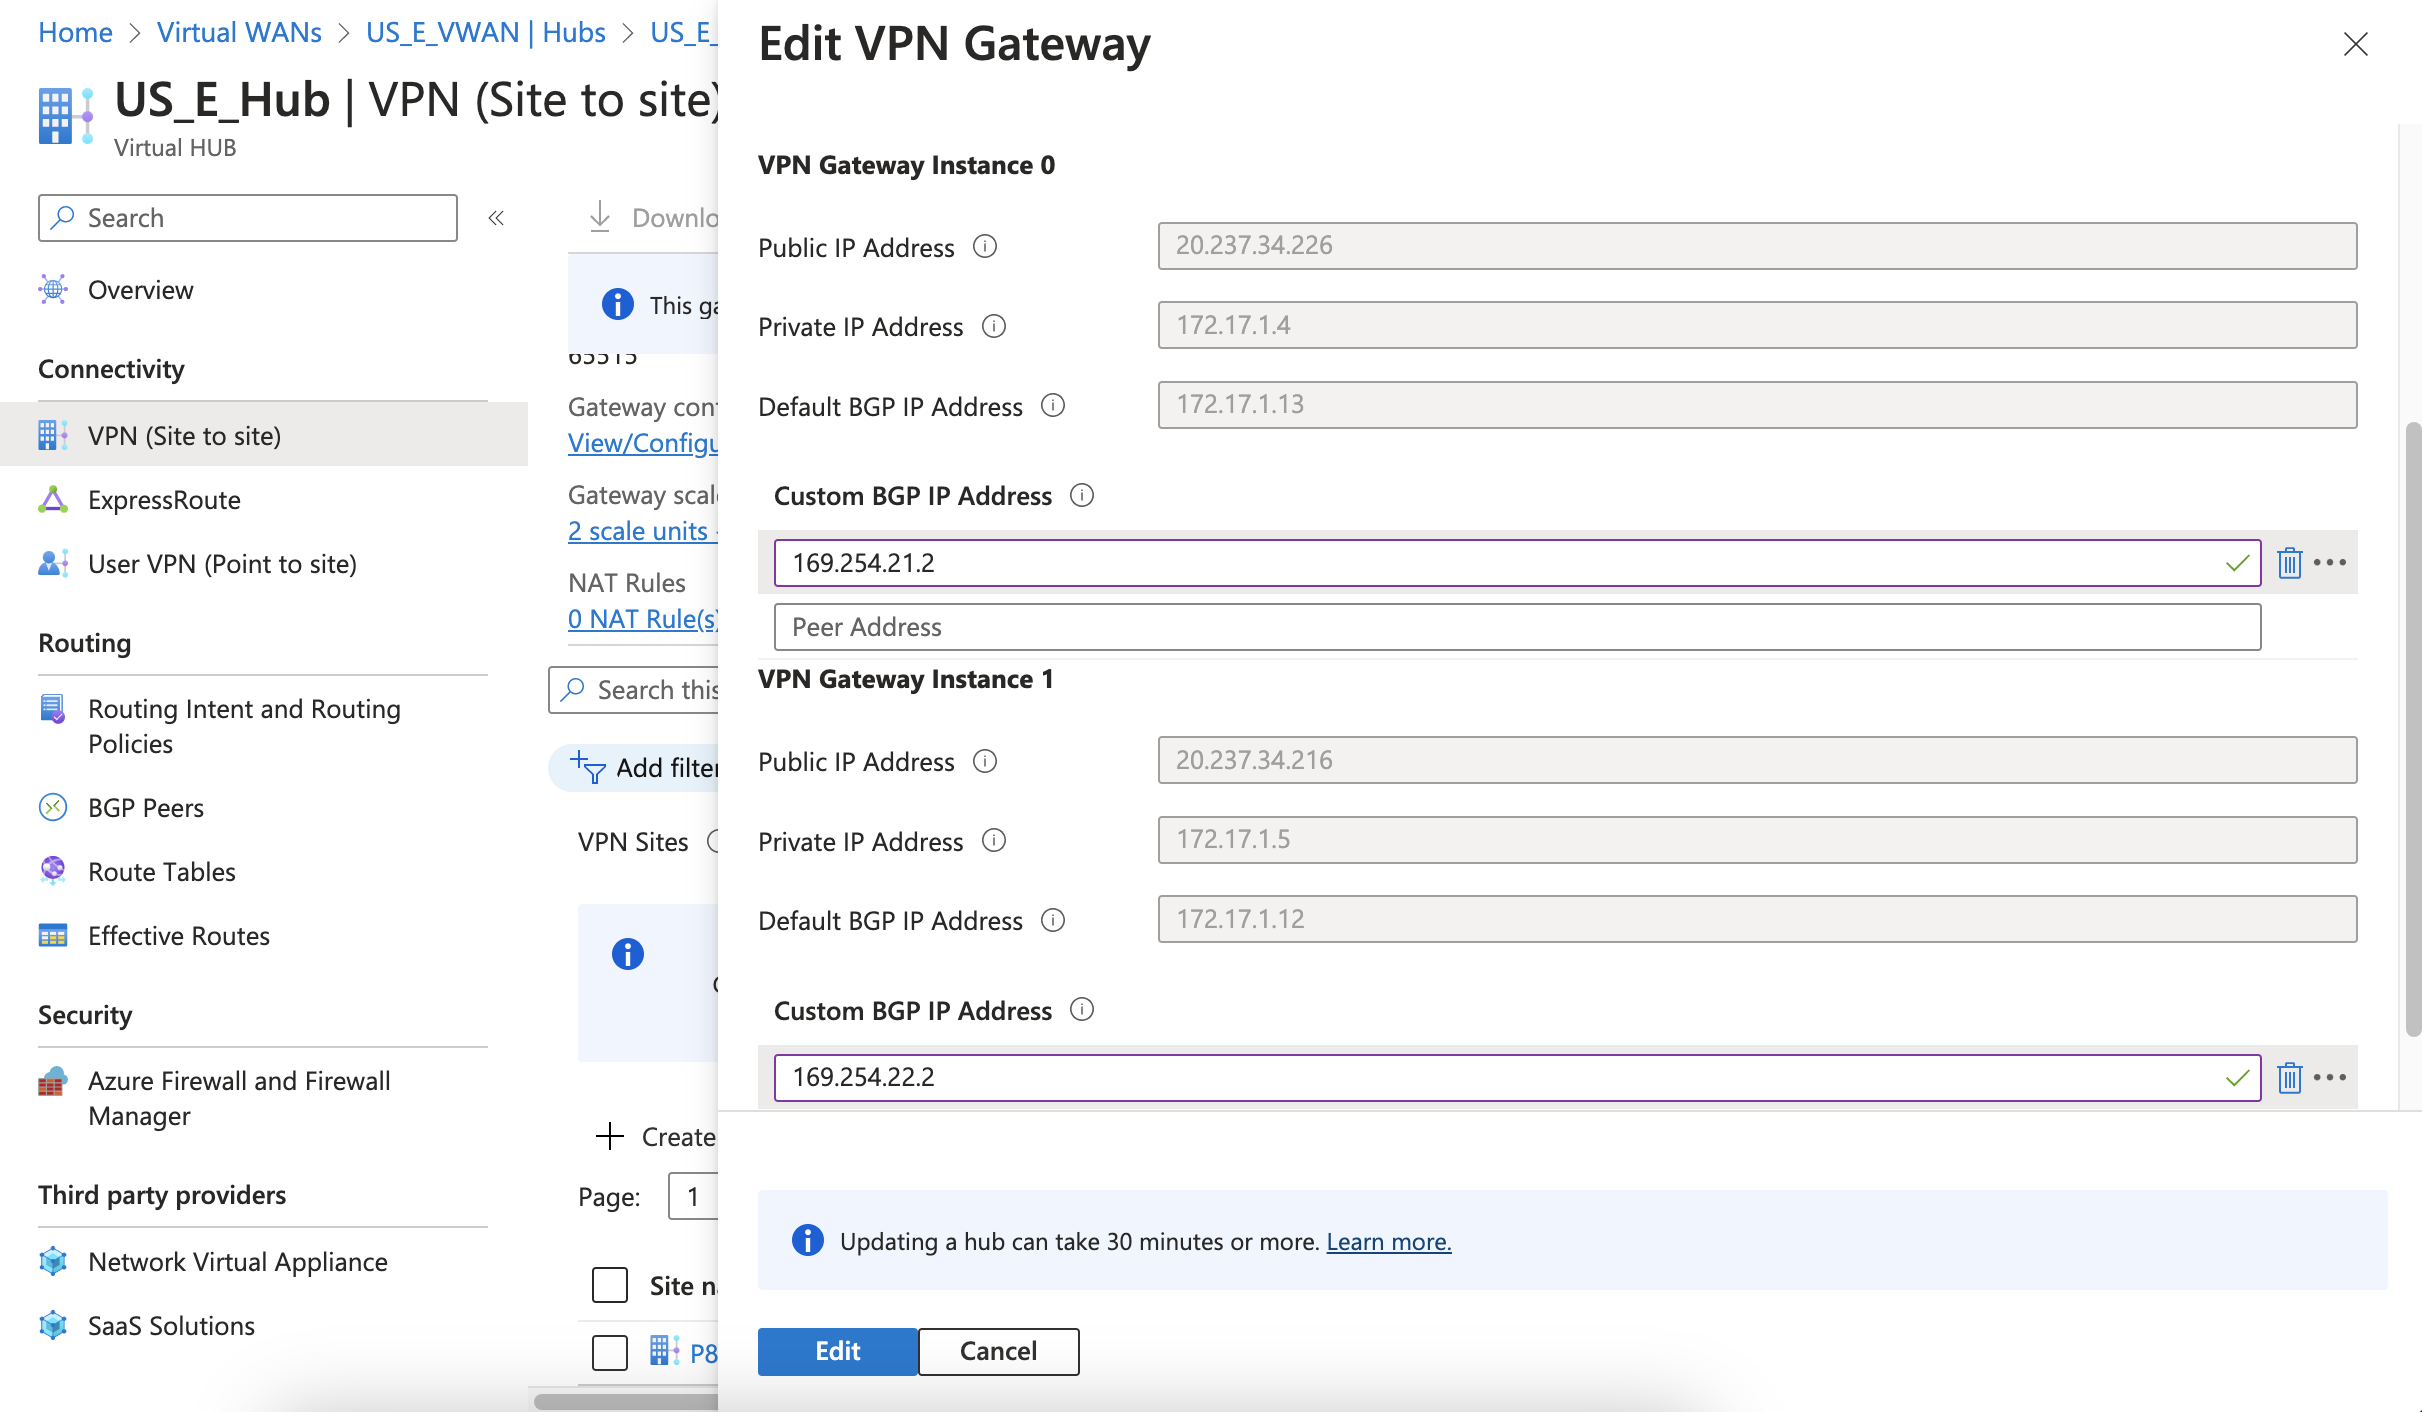
- Click on Edit and then on Confirm.
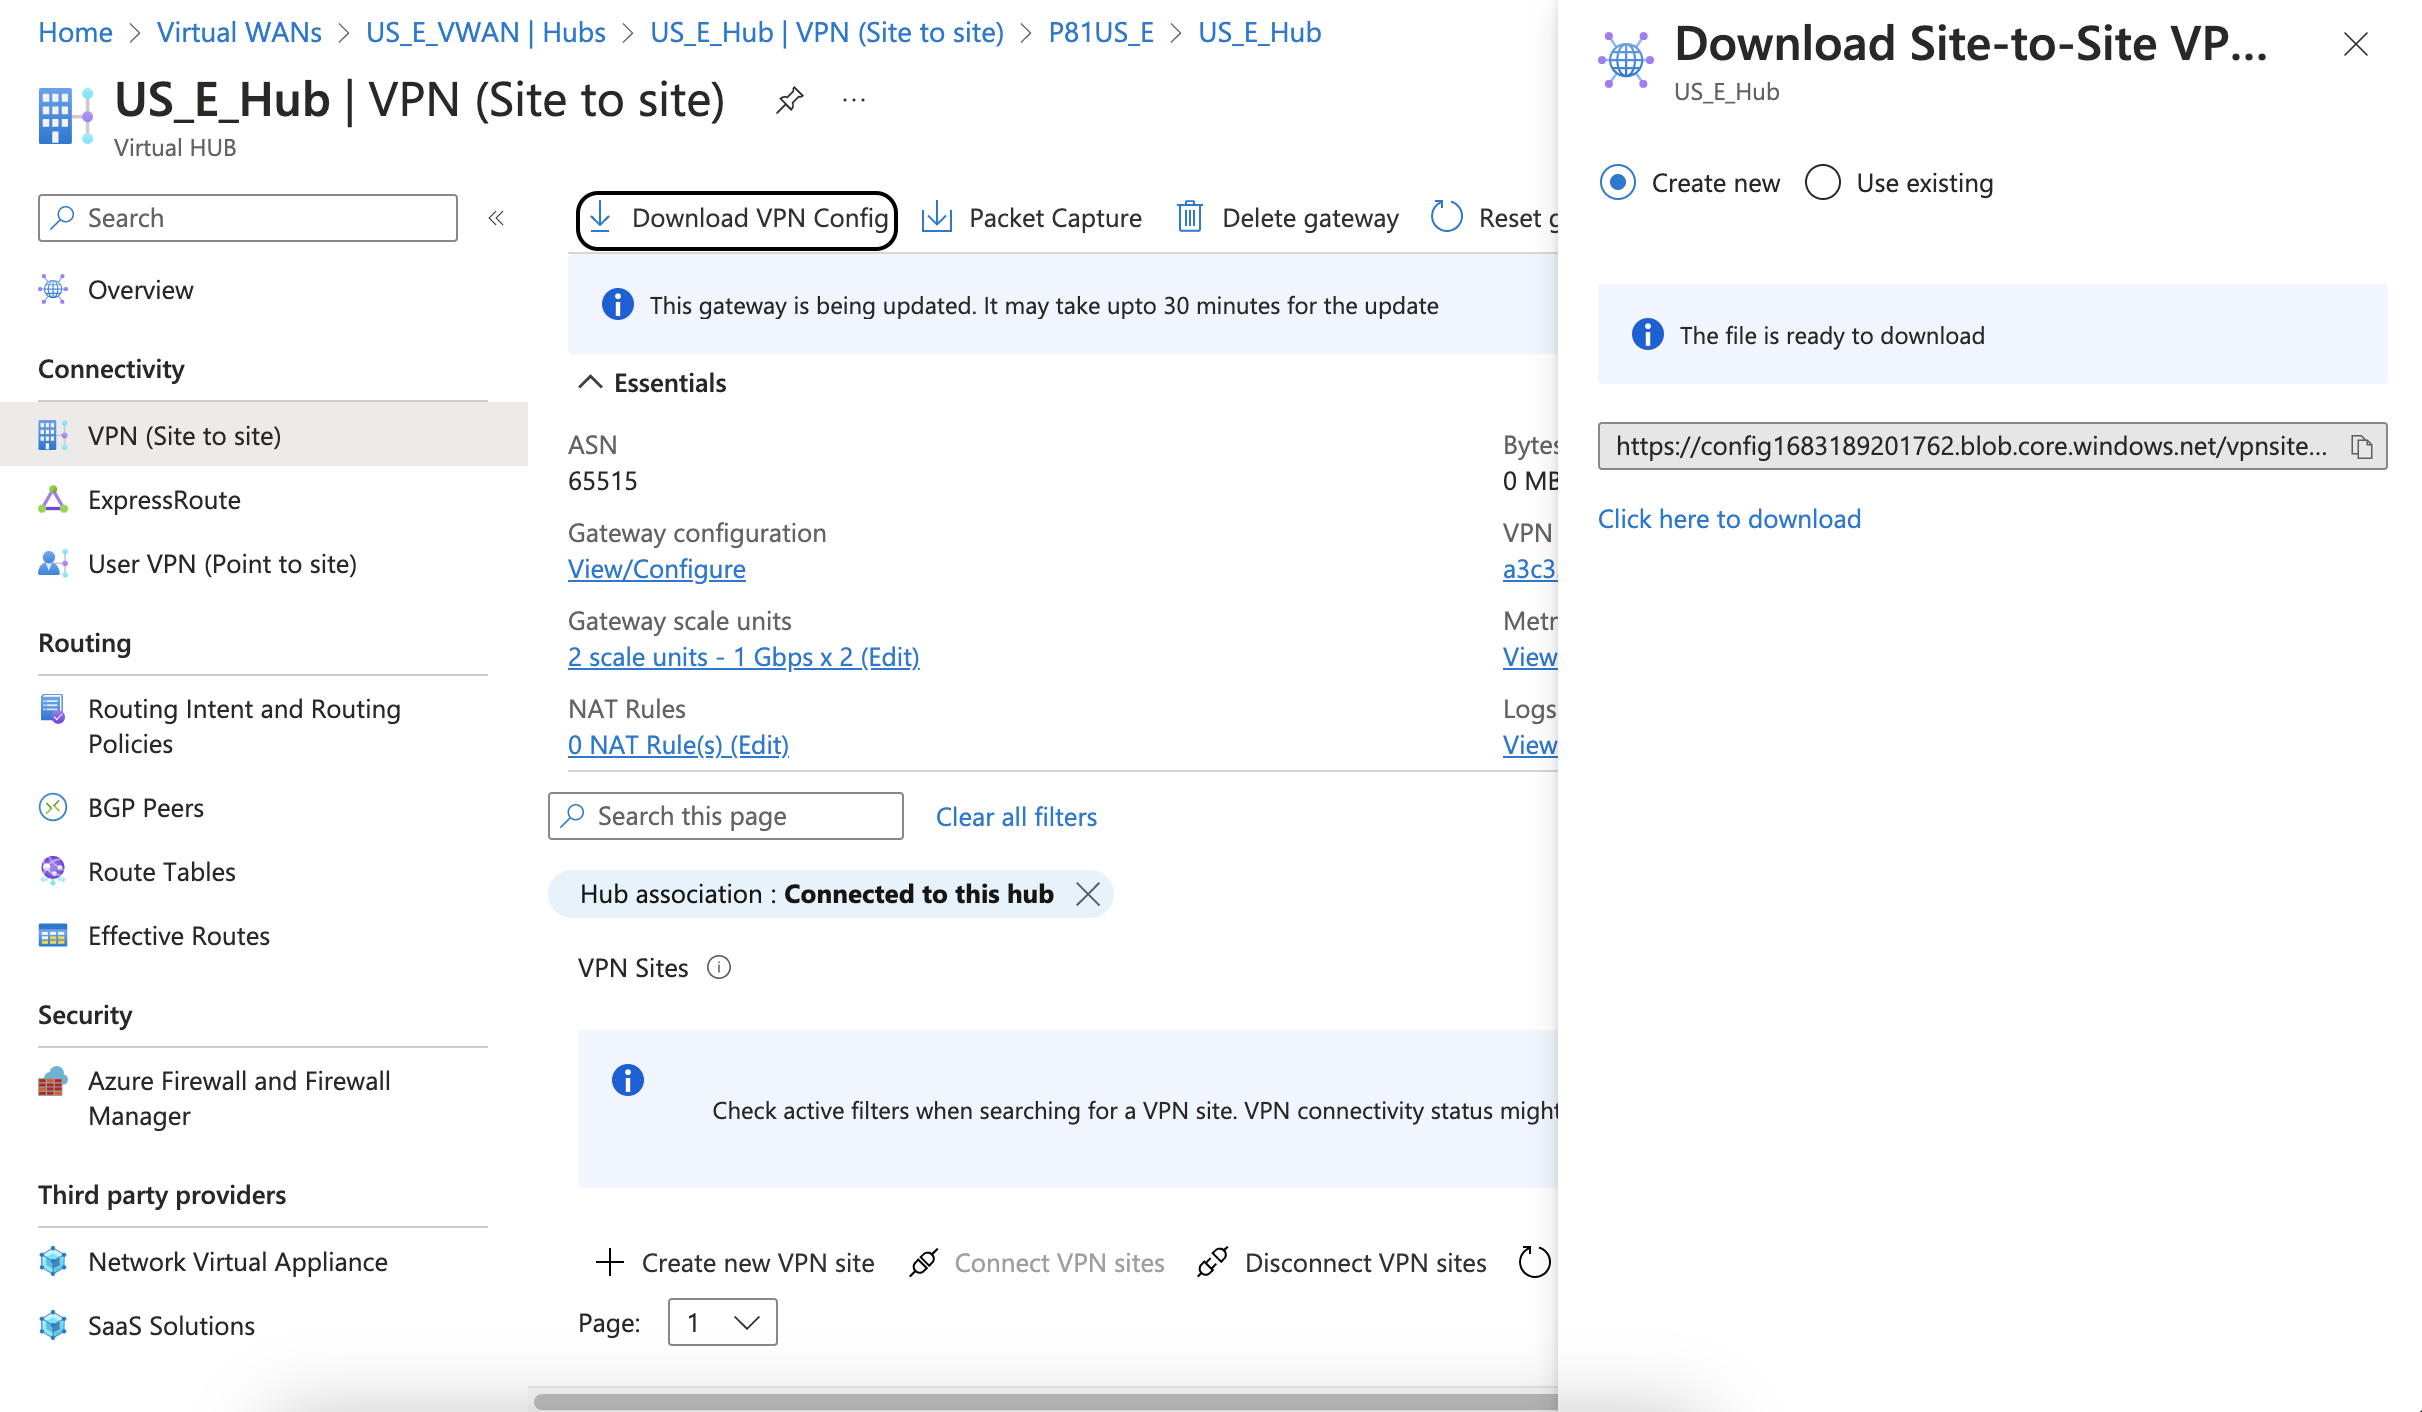
- From the VPN (site to site) screen download the configuration by clicking on Download VPN Config
Creating the High Availability Check Point SASE Tunnel
- On Your Check Point SASE Admin console, Navigate to your network.
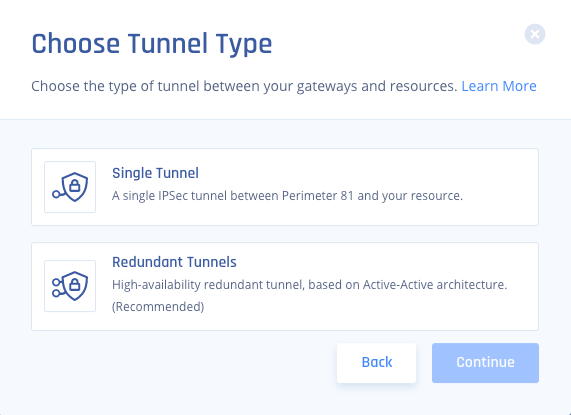
- Click "..." next to one of the gateways and select Add Tunnel.
- Select Redundant Tunnels.
- Select a logical name for your tunnel,
- For example, if your V-Net is located in the EU-West region of Azure, you could name the tunnel "EUWest".
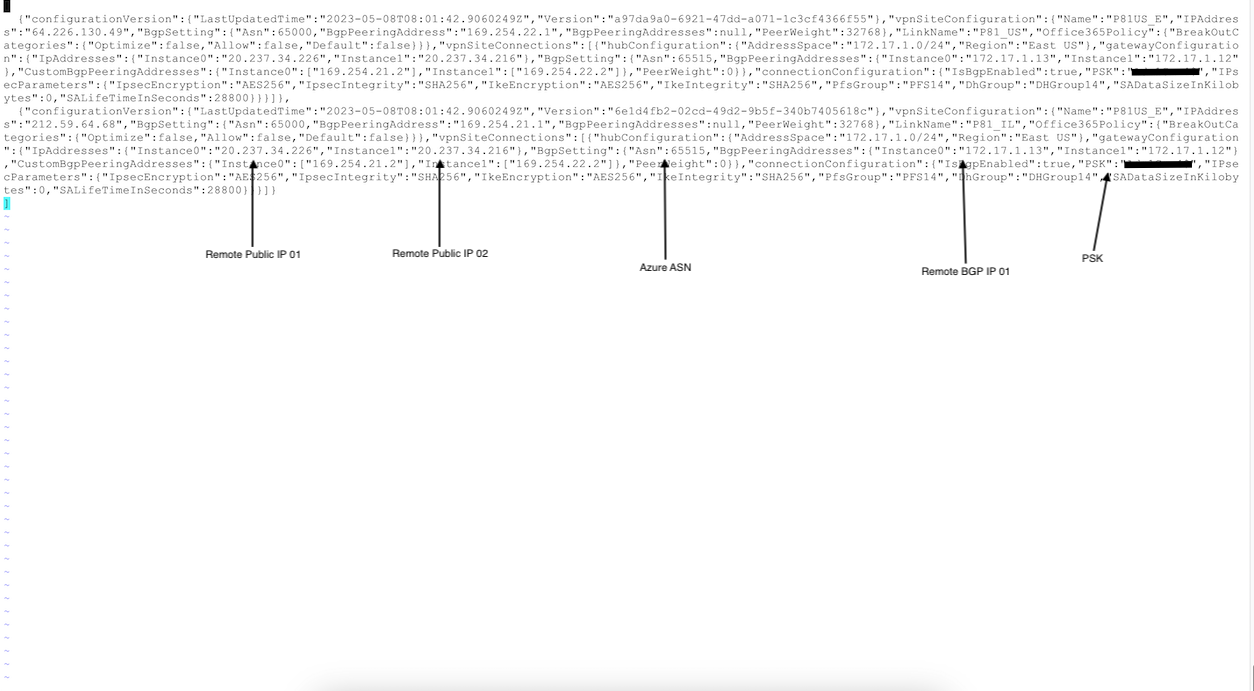
- Copy the values for the first tunnel from the downloaded configuration file:
- Shared Secret: PSK
Check Point SASE gateway Internal IP: Inside IP Addresses of Customer Gateway - Remote Public IP & Remote ID: Public IP Addresses of Instance0
Remote Gateway internal IP: BGPPeeringAddress of Instance0 - Remote Gateway ASN: Azure ASN
 In Check Point SASE, in the Tunnel 1 section, specify these:
- Gateway: Check Point SASE Gateway.
- Shared Secret: Character string of your own or click Generate.
- Check Point SASE Gateway Internal IP - Check Point SASE gateway Internal IP for tunnel 1.
- Remote Public IP - Azure tunnel 1 VIP.
- Remote Gateway Internal IP - Azure BGP peer IP1.
- Remote Gateway ASN - Azure BGP ASN.
- Site ID - ID of the remote tunnel is the public IP of the tunnel.
- Shared Secret: PSK
- Repeat step 5 for Tunnel 2.
- Under Shared Settings, make sure to select Any(0.0.0.0/0) for both sides. ASN number should remain the same for the Check Point SASE side.
- In the Advanced Settings section, specify these(unless you have configured customer settings on the Azure side):
- IKE: IKE Version 2
- IKE Lifetime: 8h
- Tunnel Lifetime: 1h
- Dead Peer Detection Delay: 10s
- Dead Peer Detection Timeout: 30s
- Phase 1
- Encryption (Phase 1): aes256
- Integrity (Phase 1): sha256
- Key Exchange Method: modp2048
- Phase 2
- Encryption (Phase 2): aes256
- Integrity (Phase 2): sha256
- Key Exchange Method: modp2048
- Click Add Tunnel.
.PNG)
.PNG)
.PNG)
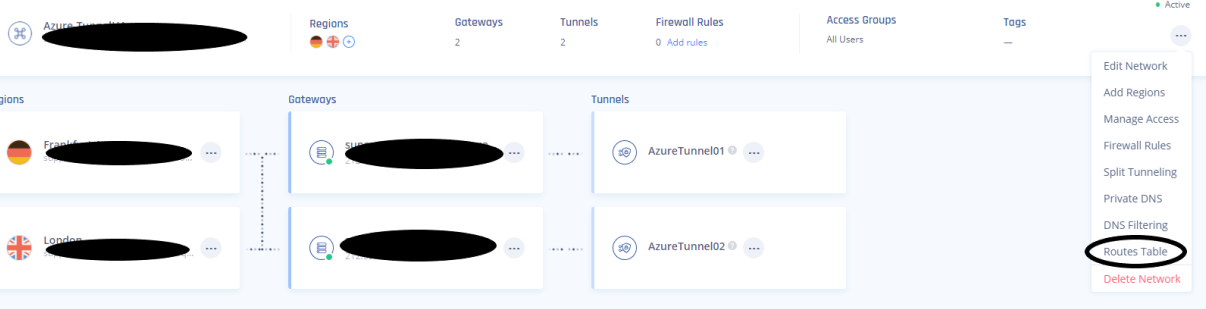
Creating Static Routes
- Navigate to your Check Point SASE network and add the route to the corresponding subnet in Azure.
- You'll want to select "..." next to your network and then Routes Table.
- Once that has been completed be sure to select "Apply Configuration" and let the route changes propagate on the Check Point SASE side.

Verifying the Setup
Once set up, your redundant tunnels should be active. To confirm, go to your Check Point SASE dashboard, find the tunnels you started, and ensure their status shows "Up". Connect to your network with the Check Point SASE agent and try accessing resources in your Azure environment.
Troubleshooting
If you encounter issues during or after the setup, try reviewing your settings to ensure everything matches the instructions. In particular, check the IP addresses and other details you entered during setup. If issues persist, please consult our dedicated support.
Support Contacts
If you have any difficulties or questions, don't hesitate to contact Check Point SASE's support team. We offer 24/7 chat support on our website at sase.checkpoint.com, or you can email us at sase-support@checkpoint.com. We're here to assist you and ensure your VPN tunnel setup is a success.