
Introduction
This article details how to use Microsoft Entra ID (formerly Azure Active Directory) with SAML 2.0 as an identity provider for Check Point SASE.
The integration ensures secure and efficient user authentication.
Includes steps to prevent duplicate user accounts by configuring SCIM attribute mappings in Microsoft Entra ID.
Steps
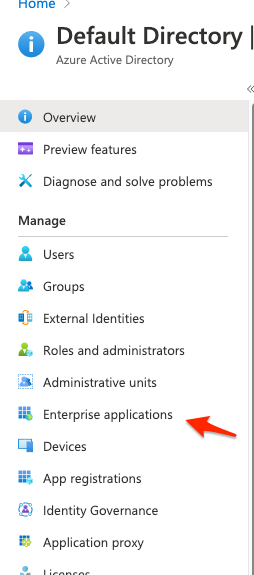
1.) Start by signing into your Azure Active Directory and selecting Enterprise Applications.
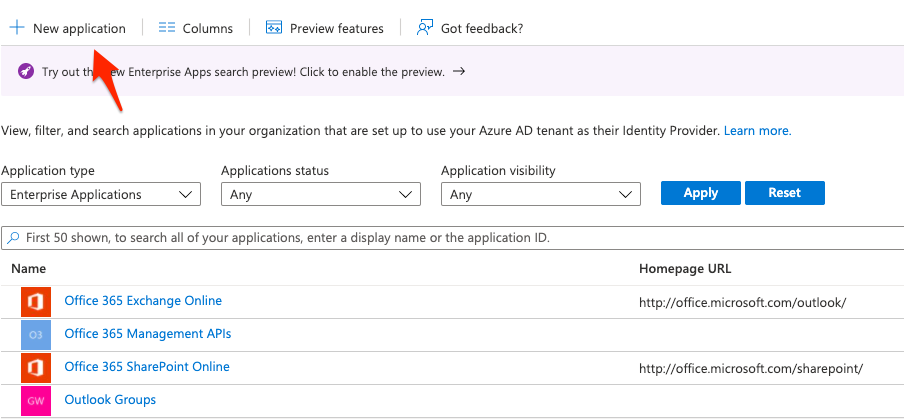
2.) Create a "+ New Application"
3.) Search for the "Perimeter 81" application and click to select it
4.) Select "Create" (This may take a few minutes)
5.) You'll have to assign access to users or groups (if you are using the Entra ID free edition you won't be able to select groups and will have to select individual users)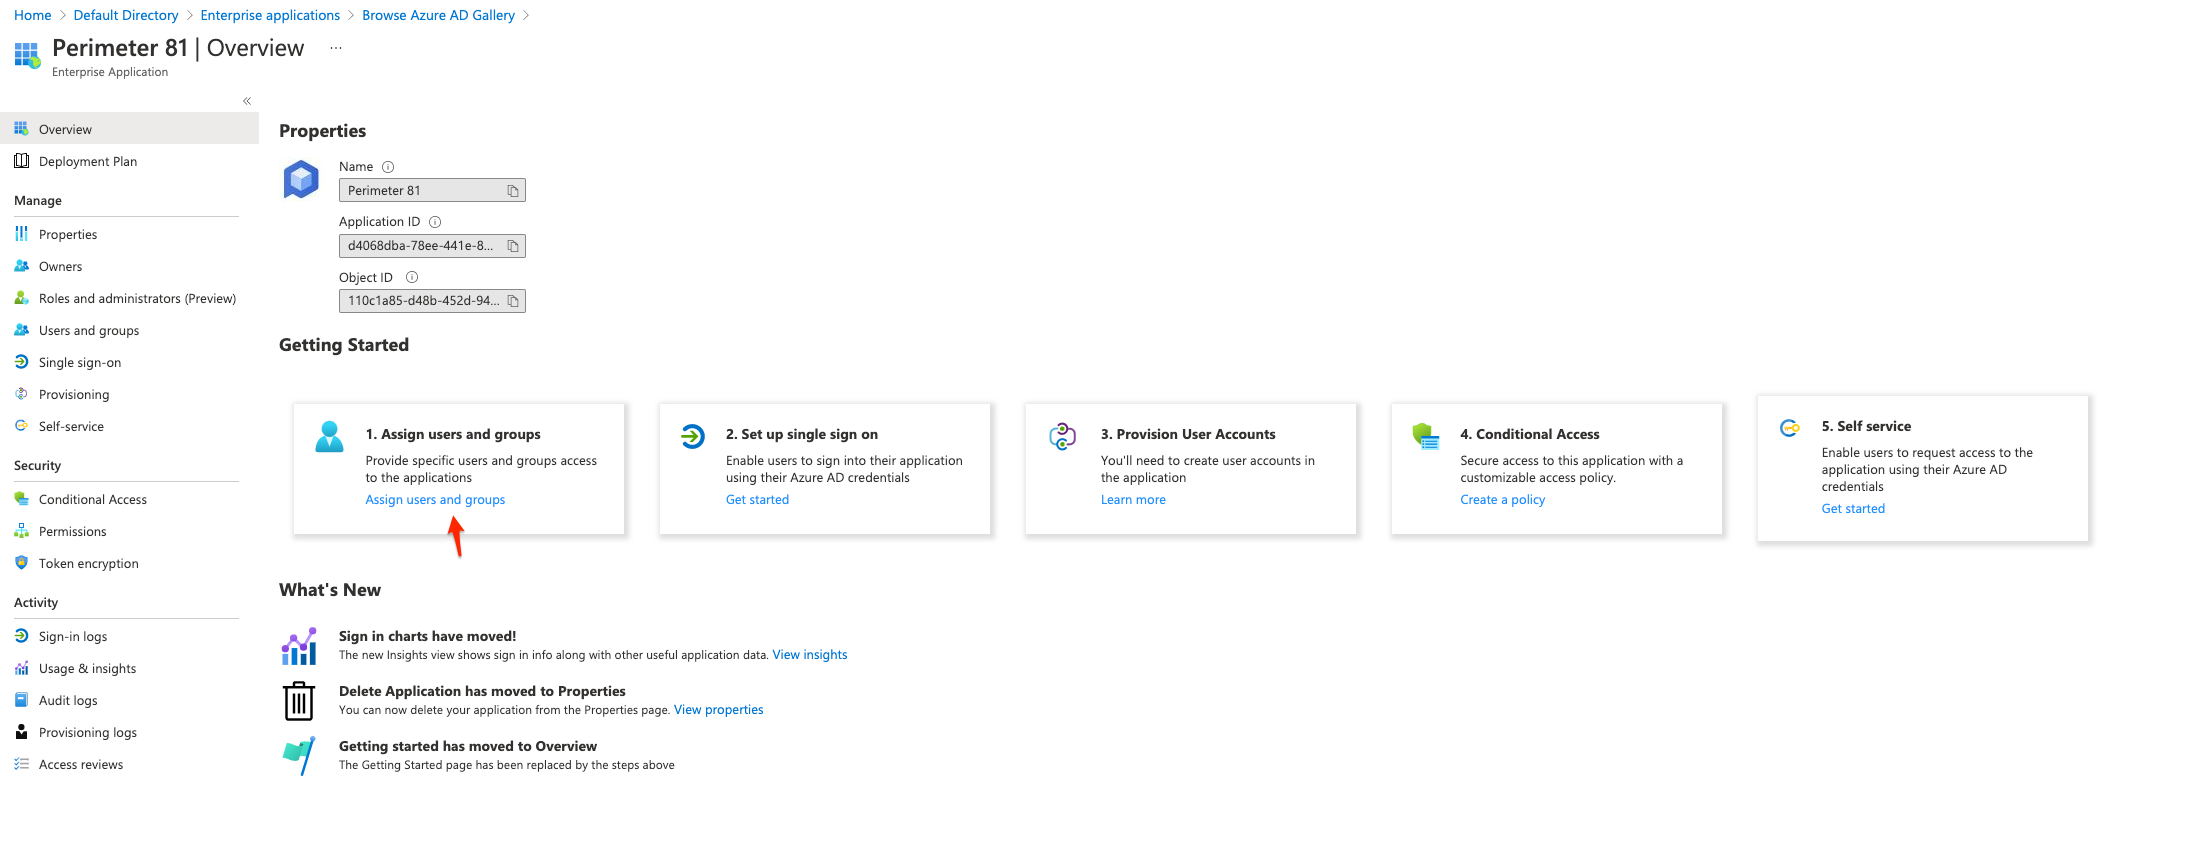
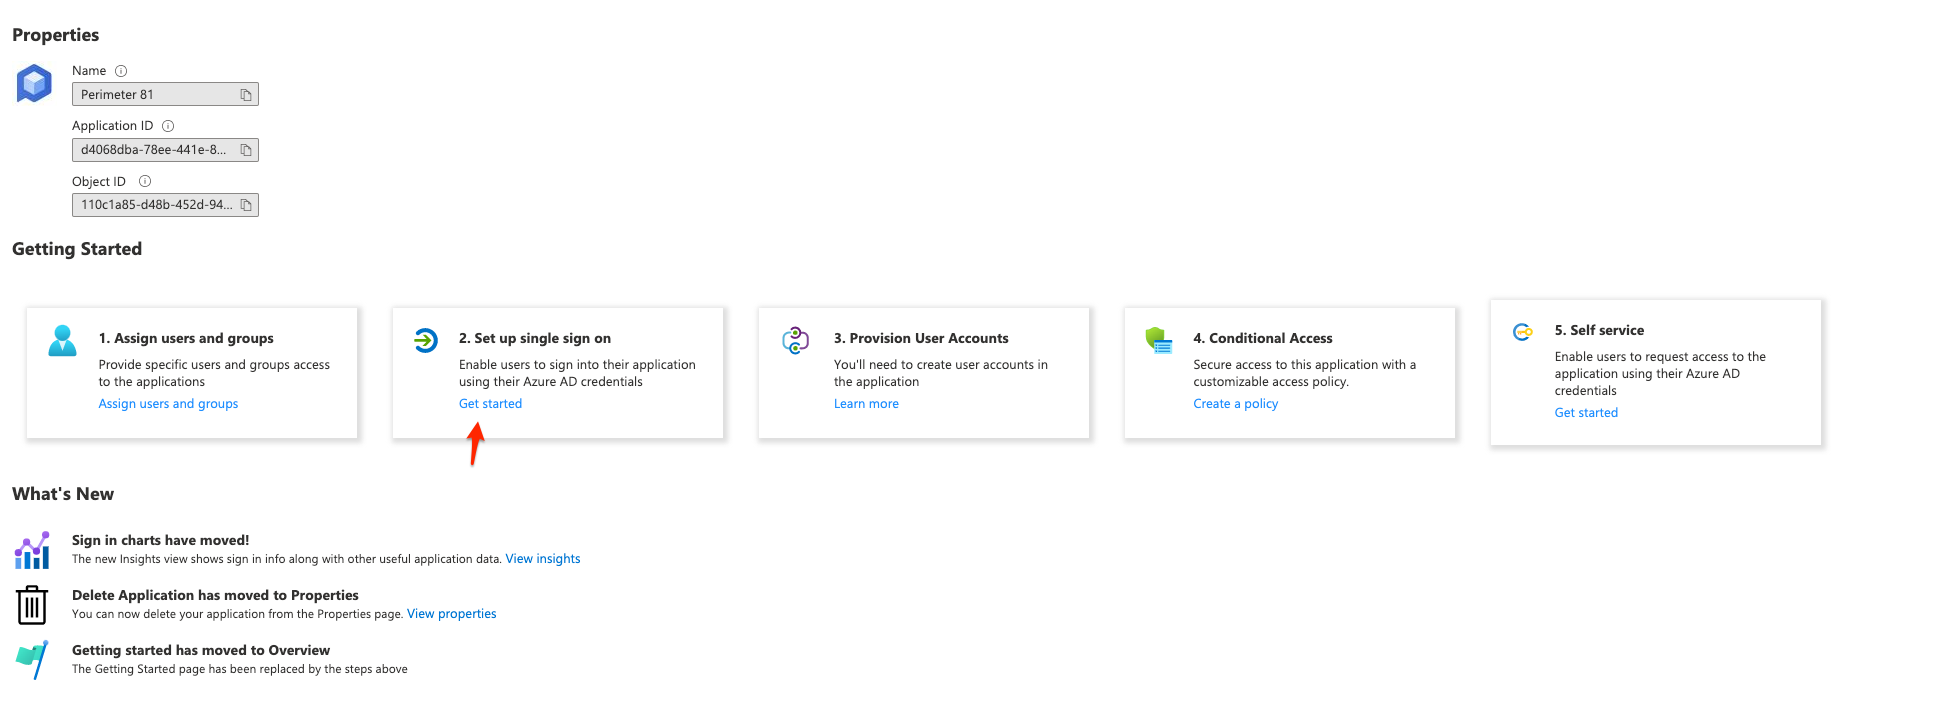
6.) Once users have been added and saved you will select the second option to "2. Set up single sign on"
7.) You will then select the "SAML" method
.png)
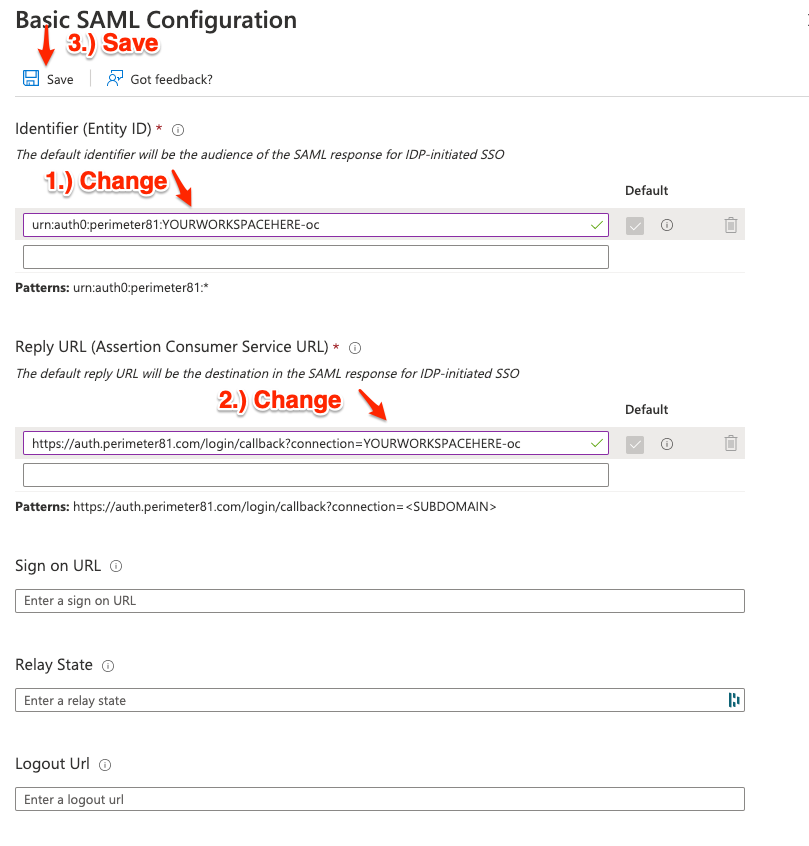
8.) We'll be editing the "Basic SAML Configuration"
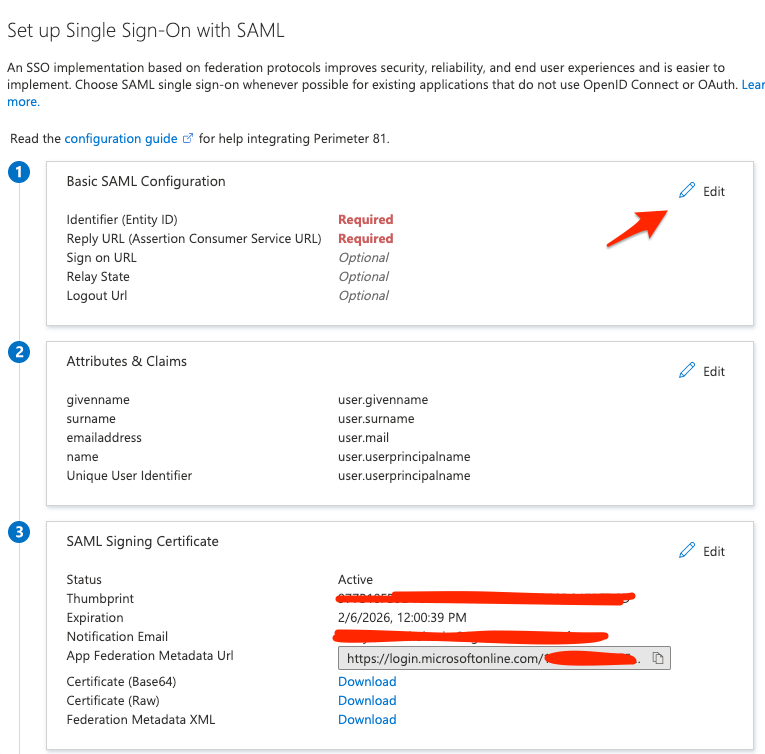
9.) On this step we'll be adding the following as our "Identifier":
US based platform: urn:auth0:perimeter81:YOURWORKSPACEHERE-oc
EU based platform: urn:auth0:eu-sase-checkpoint:YOURWORKSPACEHERE-oc
AU based platform: urn:auth0:au-sase-checkpoint:YOURWORKSPACEHERE-oc
IN based platform: urn:auth0:in-sase-checkpoint:YOURWORKSPACEHERE-oc
For our "Reply URL (Assertion Consumer Service URL)" we'll be inputting the following:
US based platform: https://auth.perimeter81.com/login/callback?connection=YOURWORKSPACEHERE-oc
EU based platform: https://auth.eu.sase.checkpoint.com/login/callback?connection=YOURWORKSPACEHERE-oc
AU based platform: https://auth.au.sase.checkpoint.com/login/callback?connection=YOURWORKSPACEHERE-oc
IN based platform: https://auth.in.sase.checkpoint.com/login/callback?connection=YOURWORKSPACEHERE-oc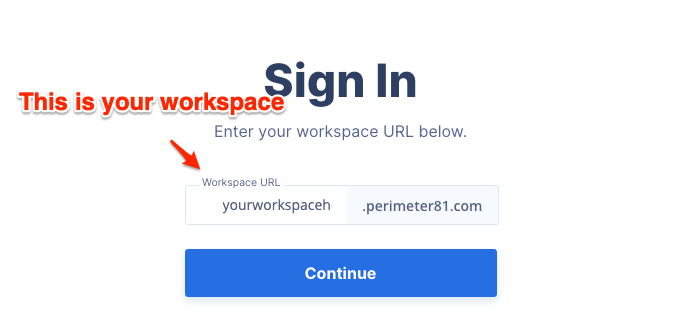
After both have been added you can select the "Save" option.
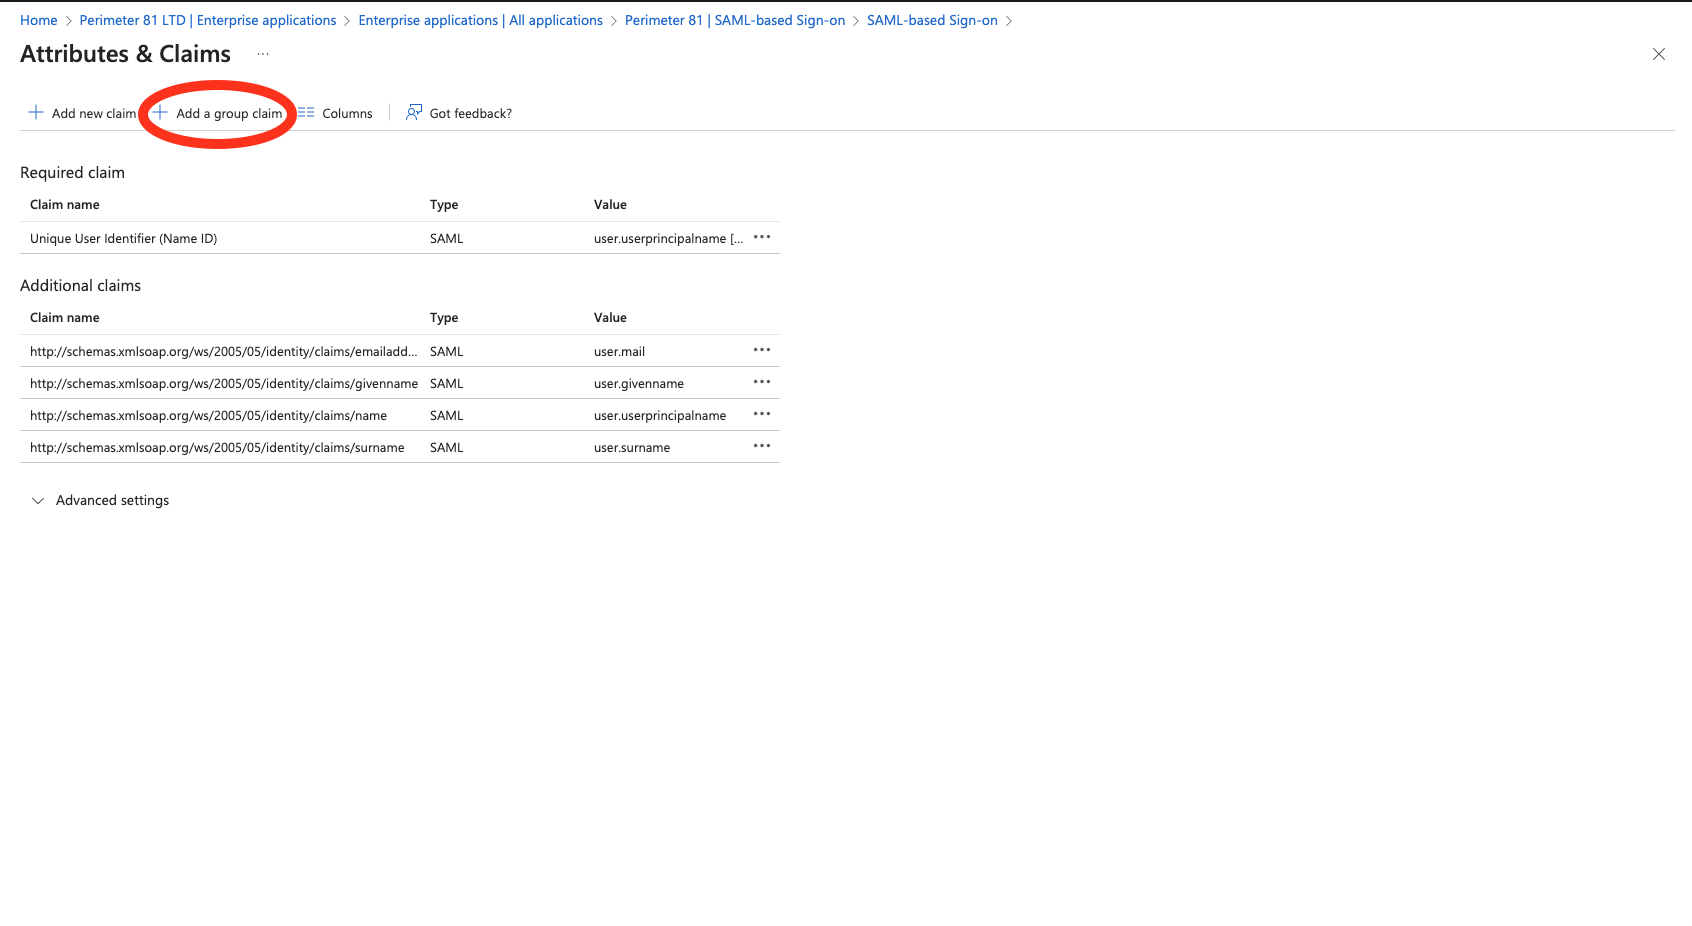
 10.) For allowing group association to be sent as part of the login process, on the Single sign-on page click to edit the Attributes and Claims section:
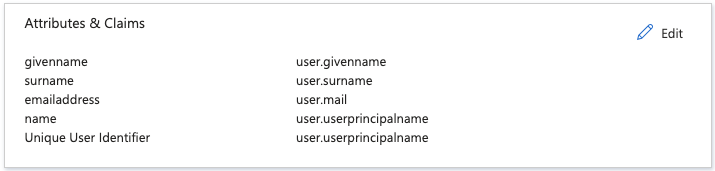
11.) In the Attributes & Claims screen click on Add a group claim.
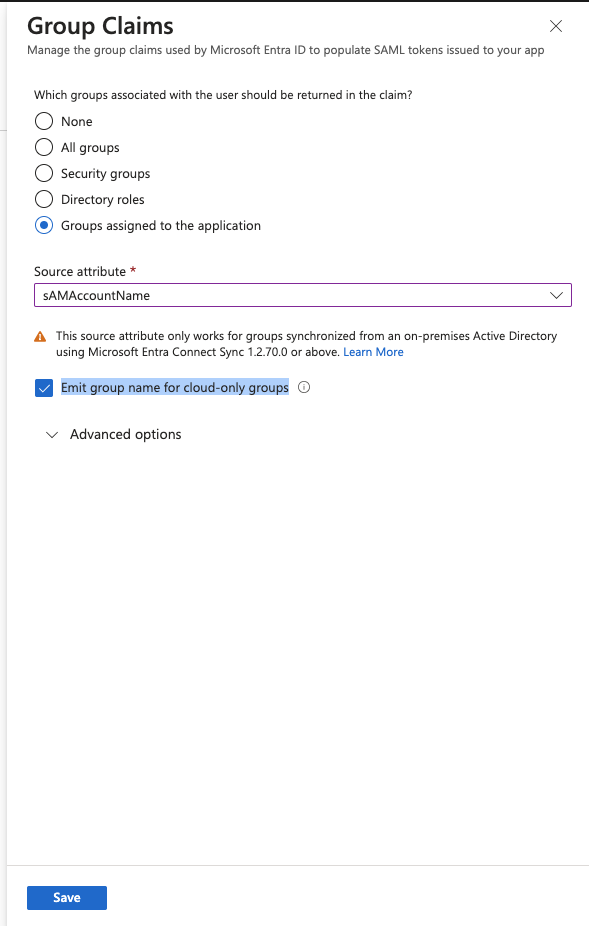
12.) In the Group Claim screen select Groups assigned to the application, Source attribute should be set to aSMAccountName and check the checkbox next to Emit group name for cloud-only groups. Click to Save the changes.
13.) Finally we'll be downloading your SAML Signing certificate in Step 3 (the Base64 version).
In step 5 we'll be expanding the "Step-by-step instructions" and copying your Login URL
.png)
Configuring the SAML 2.0 Application on Check Point SASE
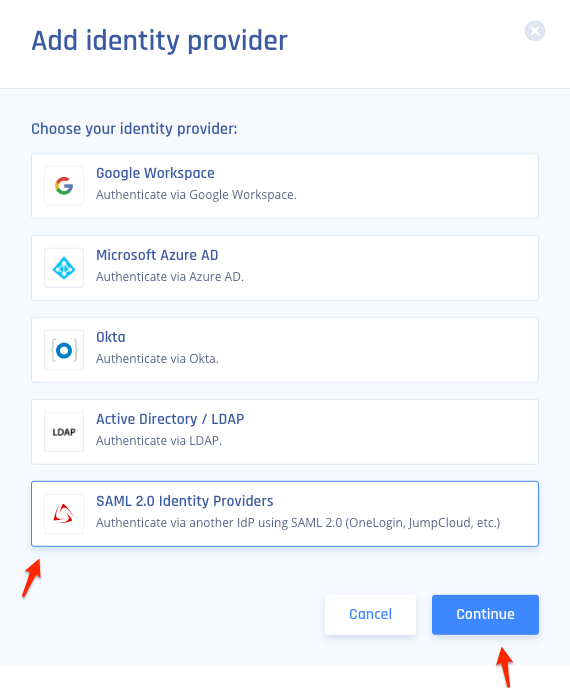
1.) Click on settings in your Check Point SASE Tenant, go to your Identity Providers and select the option to " + Add Provider"

2.) Select "SAML 2.0 Identity Providers" and then "Continue"
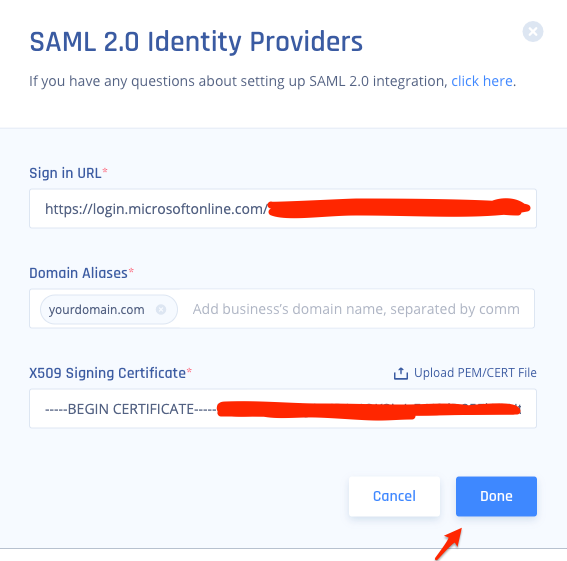
3.) Fill out the following:
- Sign in URL: This will be your "Login URL" you copied from Azure
- Domain Aliases: This will be the domain used by your users (everything after the "@" sign in their email)
- X509 Signing Certificate: This will be the certificate we downloaded from Azure.
- After everything has been added select "Done"
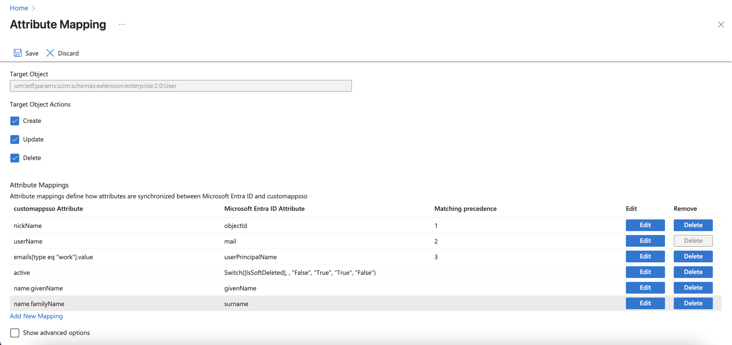
Preventing User Duplication in Microsoft Entra ID
To avoid duplicate user accounts when integrating Microsoft Entra ID with Check Point SASE, configure SCIM attribute mappings:
- Go to Entra ID > Enterprise Applications and select your Check Point SASE application.
- Select the application name to open the configuration.
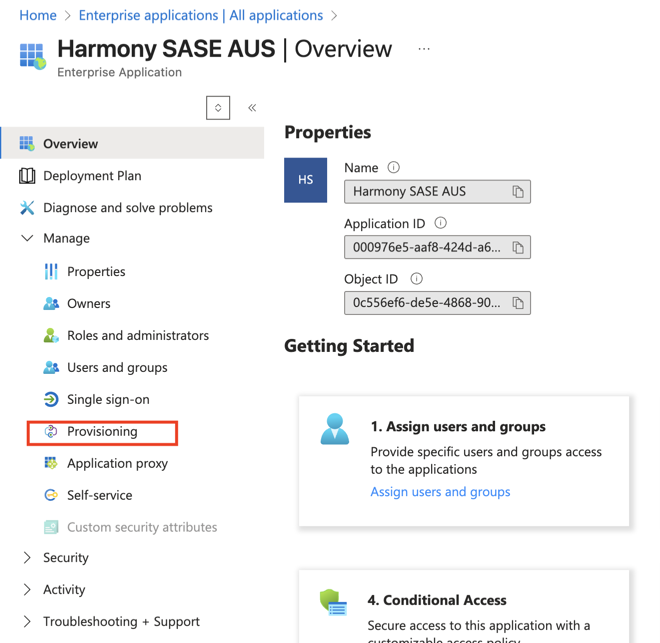
- Click Provisioning.
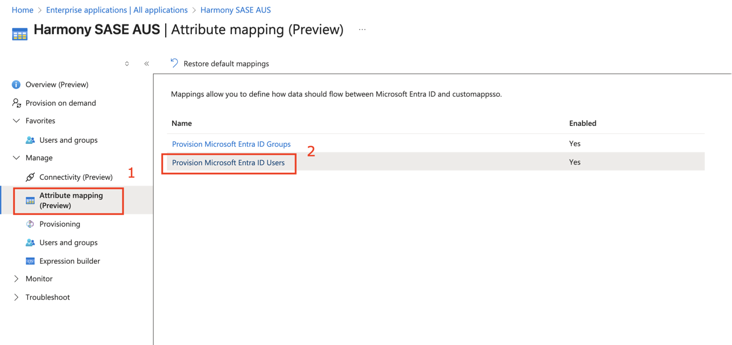
- Under Attribute mapping, select Provision Microsoft Entra ID Users.
- Locate the emails[type eq “work”].value attribute and click Edit.
- From Matching precedence list, select 3.
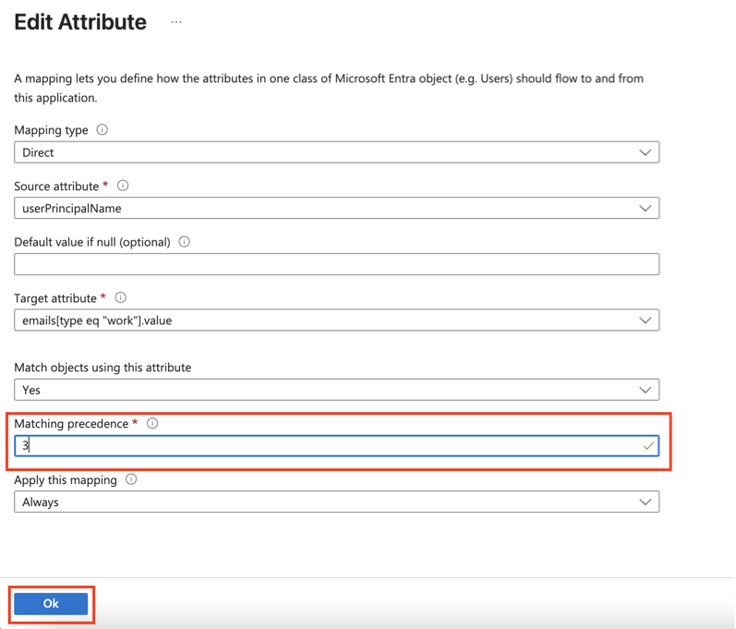
- Click OK.
- Go back to Attribute Mappings section and for userName, click Edit.
- From the Match objects using this attribute list, select Yes.
- From Matching precedence list, select 2.
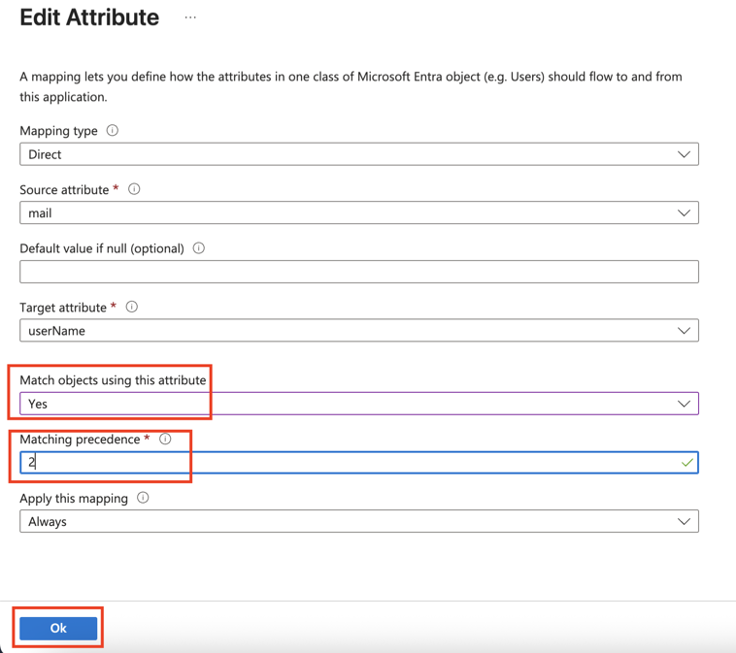
- Click OK.
- Go back to Attribute Mappings section and click Add New Mapping.
- From the Source attribute list, select objectId.
- From the Target attribute list, select nickName.
- From the Match objects using this attribute list, select Yes.
- From Matching precedence list, select 1.
- From the Apply this mapping list, select Always.
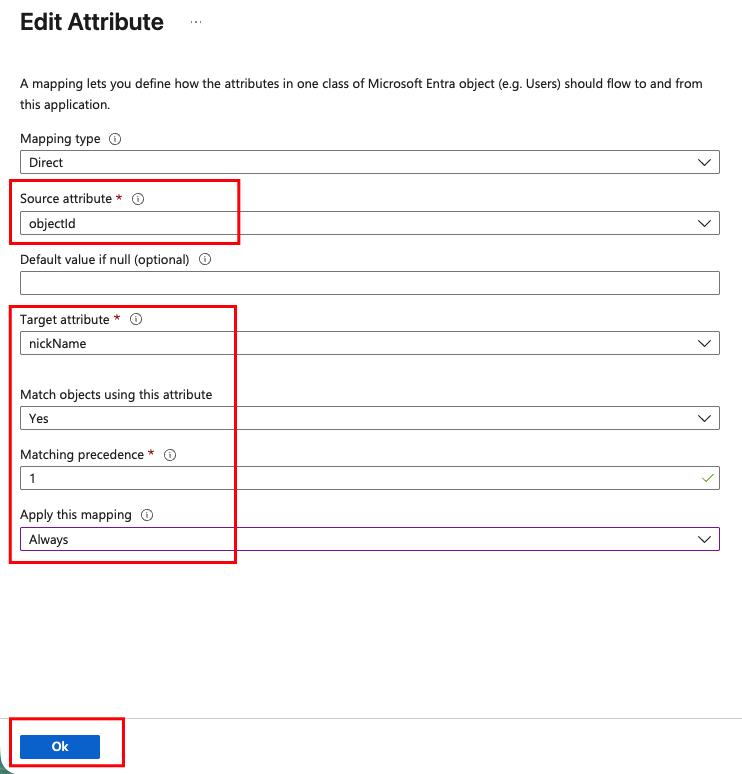
- Click Ok and then click Save.
Recommendations
- Assign access to users or groups. For the Entra ID free edition, you might need to select individual users instead of groups.
- Ensure placeholders like YOURWORKSPACEHERE are replaced with your actual workspace name.
- Periodically review your Microsoft Entra ID configuration settings to ensure alignment with any updates or changes in the Check Point SASE platform
Troubleshooting
If you encounter issues during or after the setup, try reviewing your settings to ensure everything matches the instructions. In particular, check the IP addresses and other details you entered during setup. If issues persist, please consult our dedicated support.
SAML may send group IDs instead of Group names; in some cases, a limit may be enforced on the number of groups.
When integrating with Entra ID via SAML, make sure to configure the claim value for groups as explained above.
Support Contacts
If you have any difficulties or questions, don't hesitate to contact Check Point SASE's support team. We offer 24/7 chat support on our website at sase.checkpoint.com, or you can email us at sase-support@checkpoint.com. We're here to assist you and ensure your VPN tunnel setup is a success