Important Notice : This Perimeter 81 documentation site is being deprecated and will be permanently removed on July 26, 2026 .
Please use the latest Check Point Documentation Portal for current product documentation and updates. Access the Check Point Documentation Portal
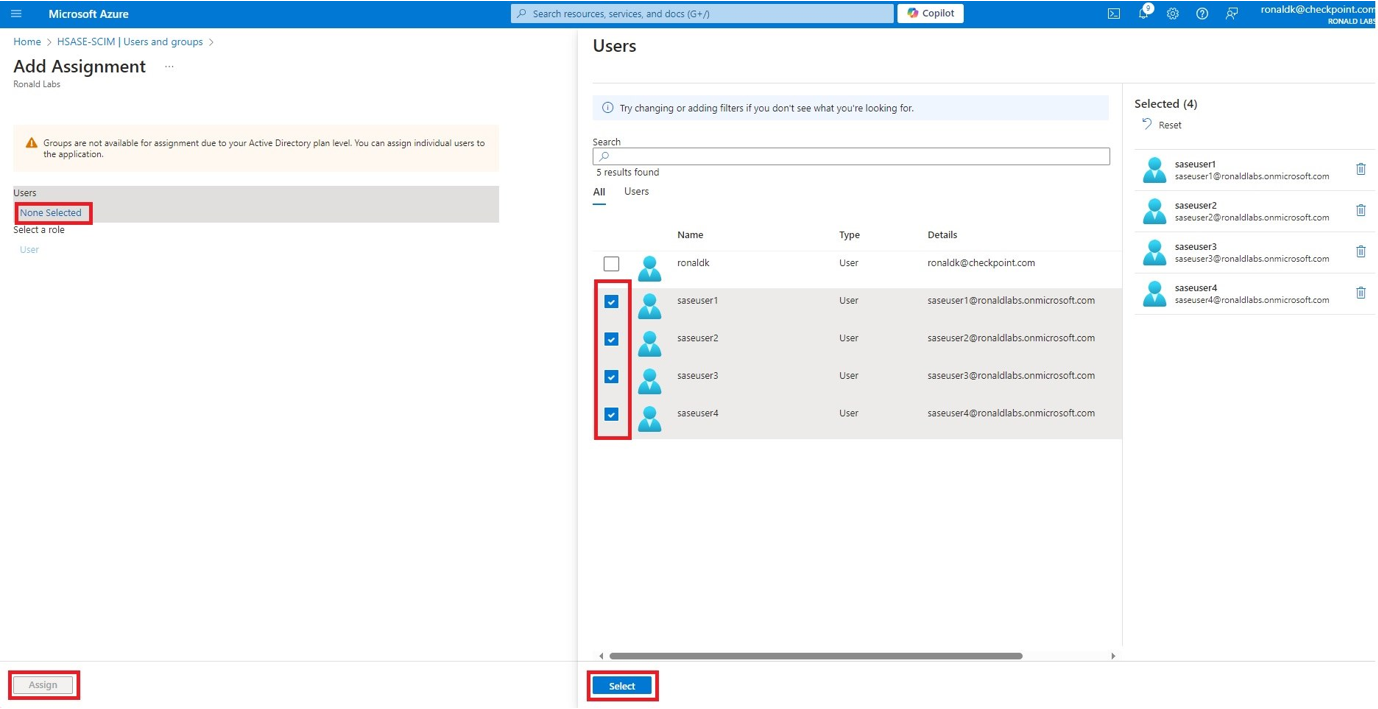
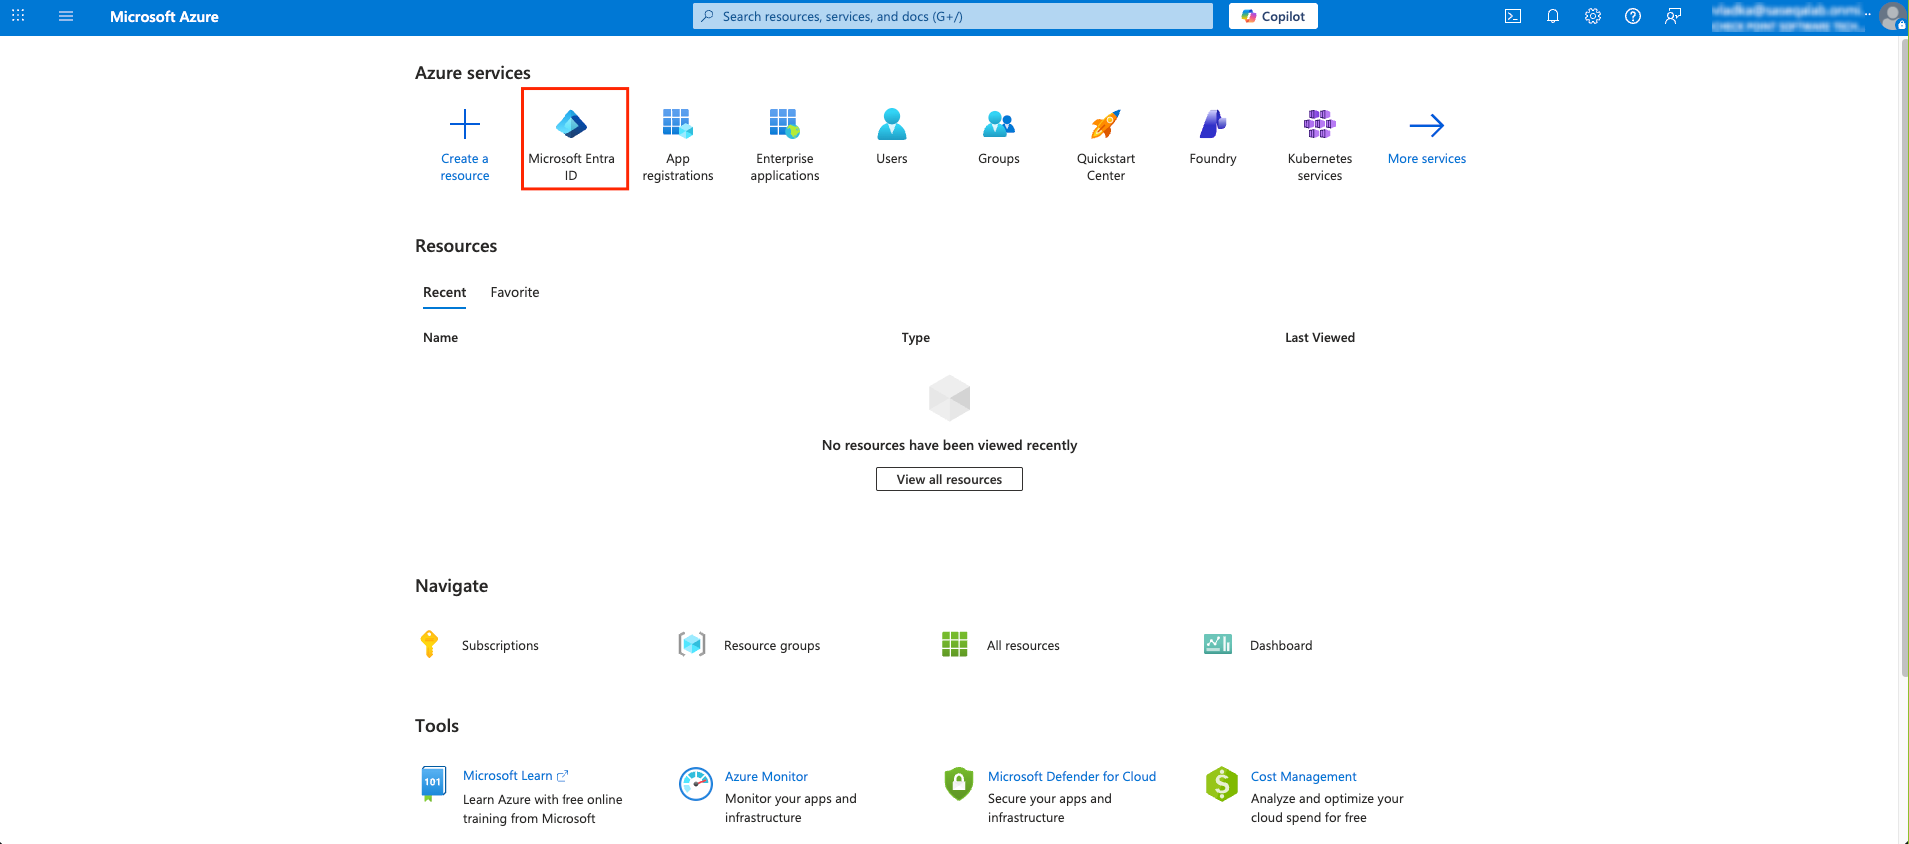
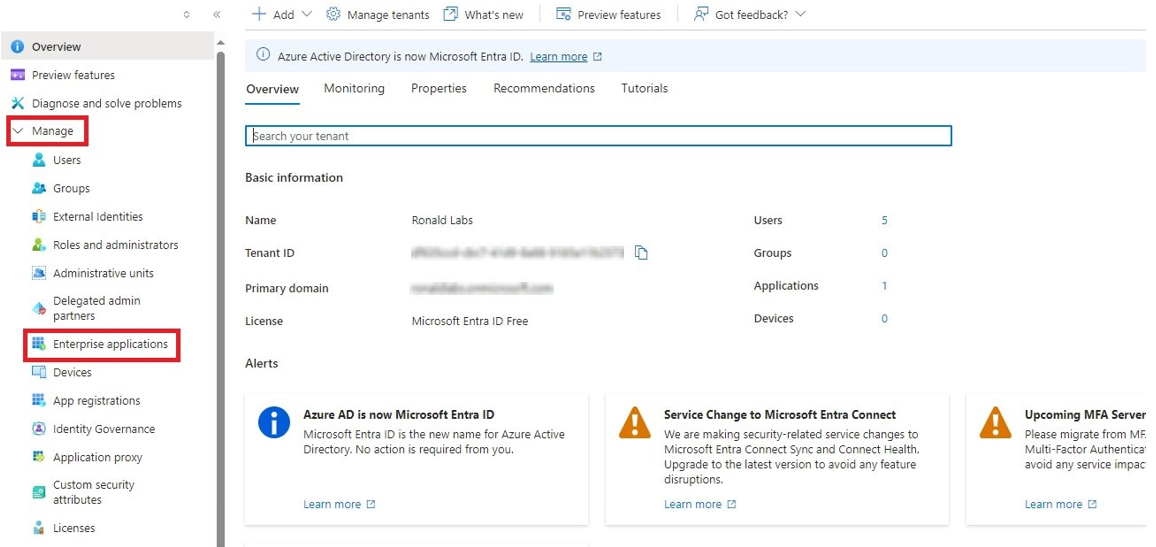
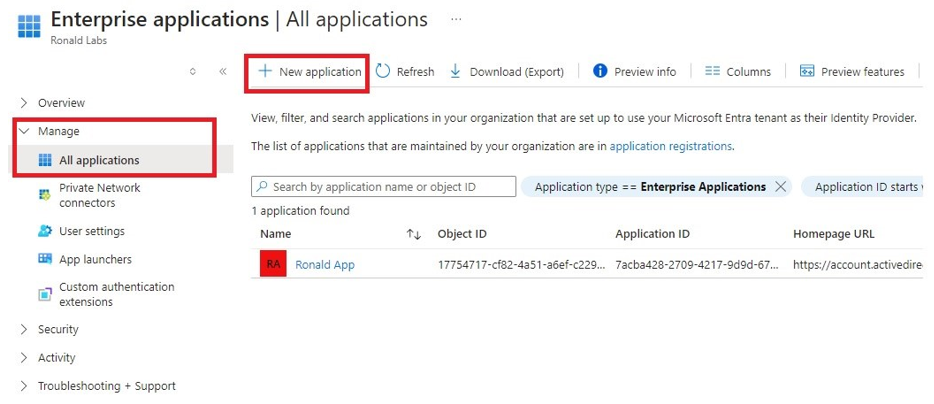
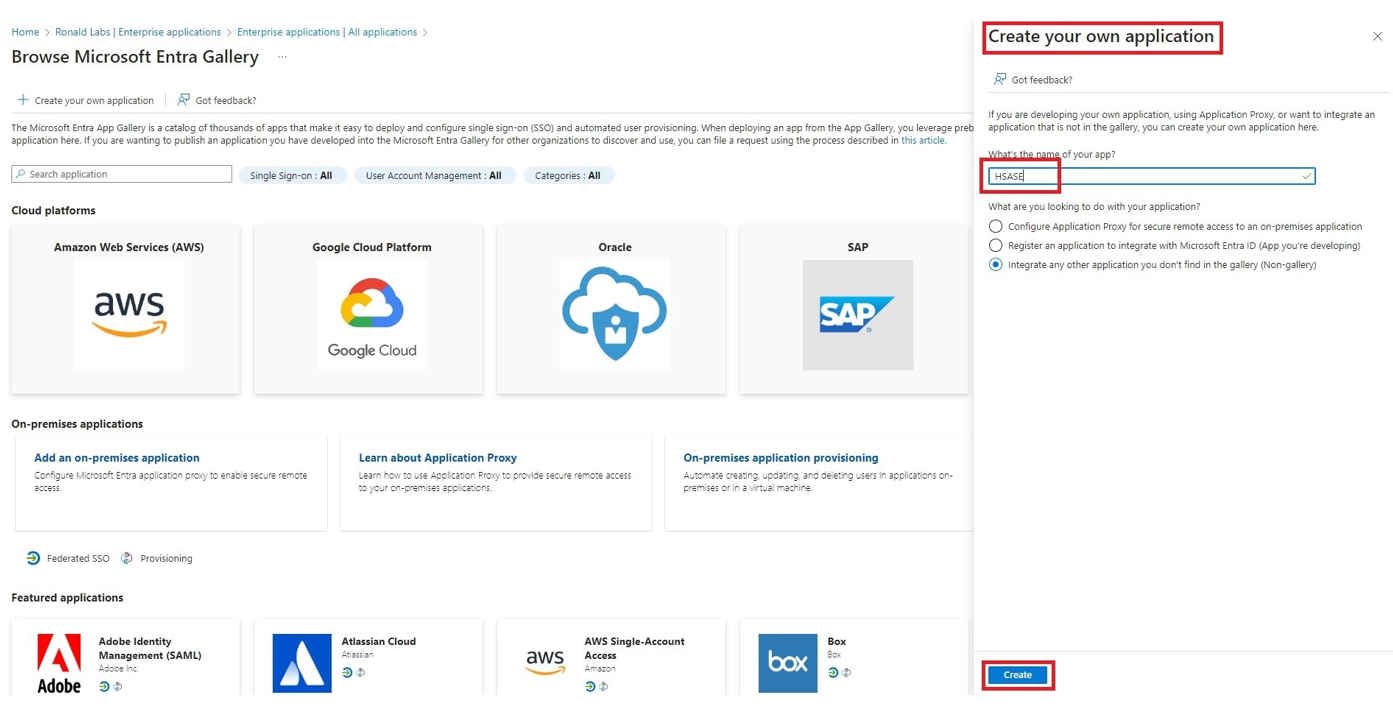
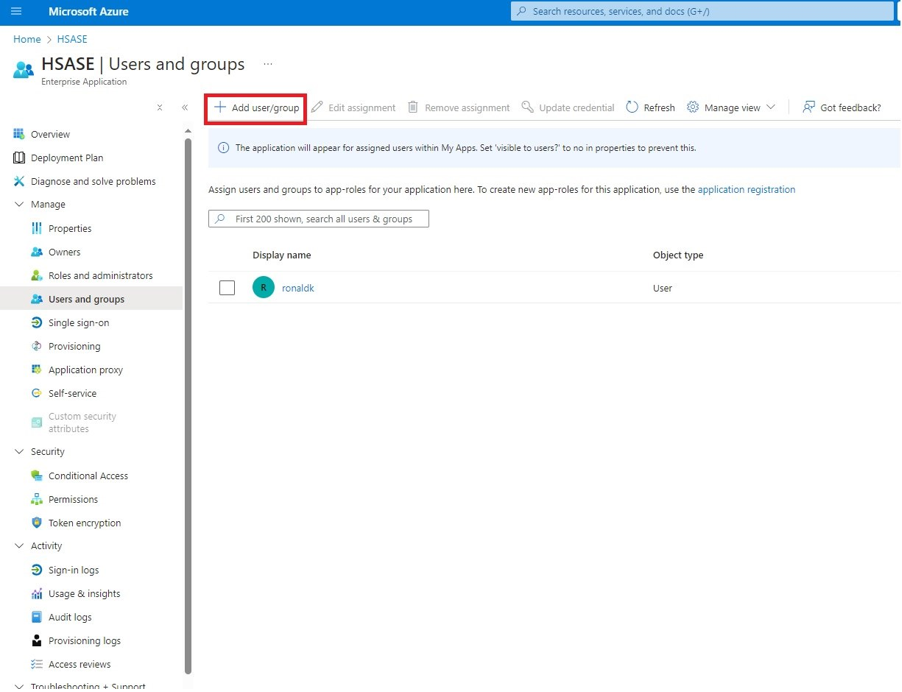
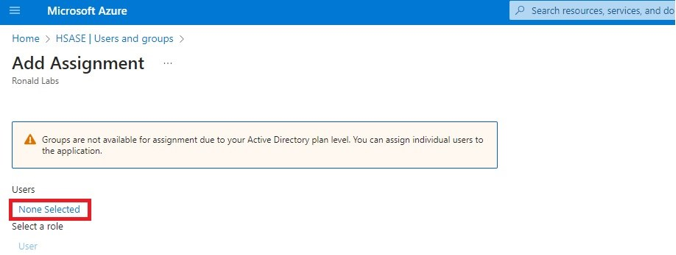
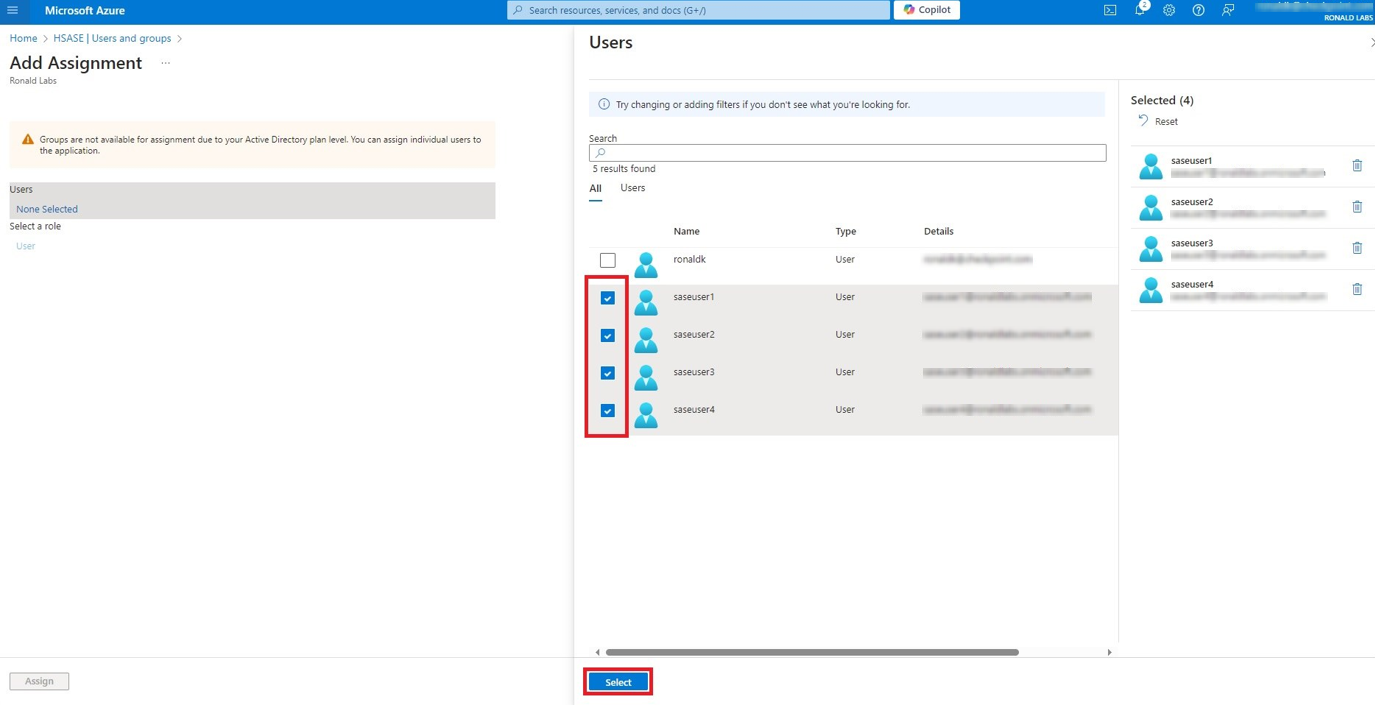
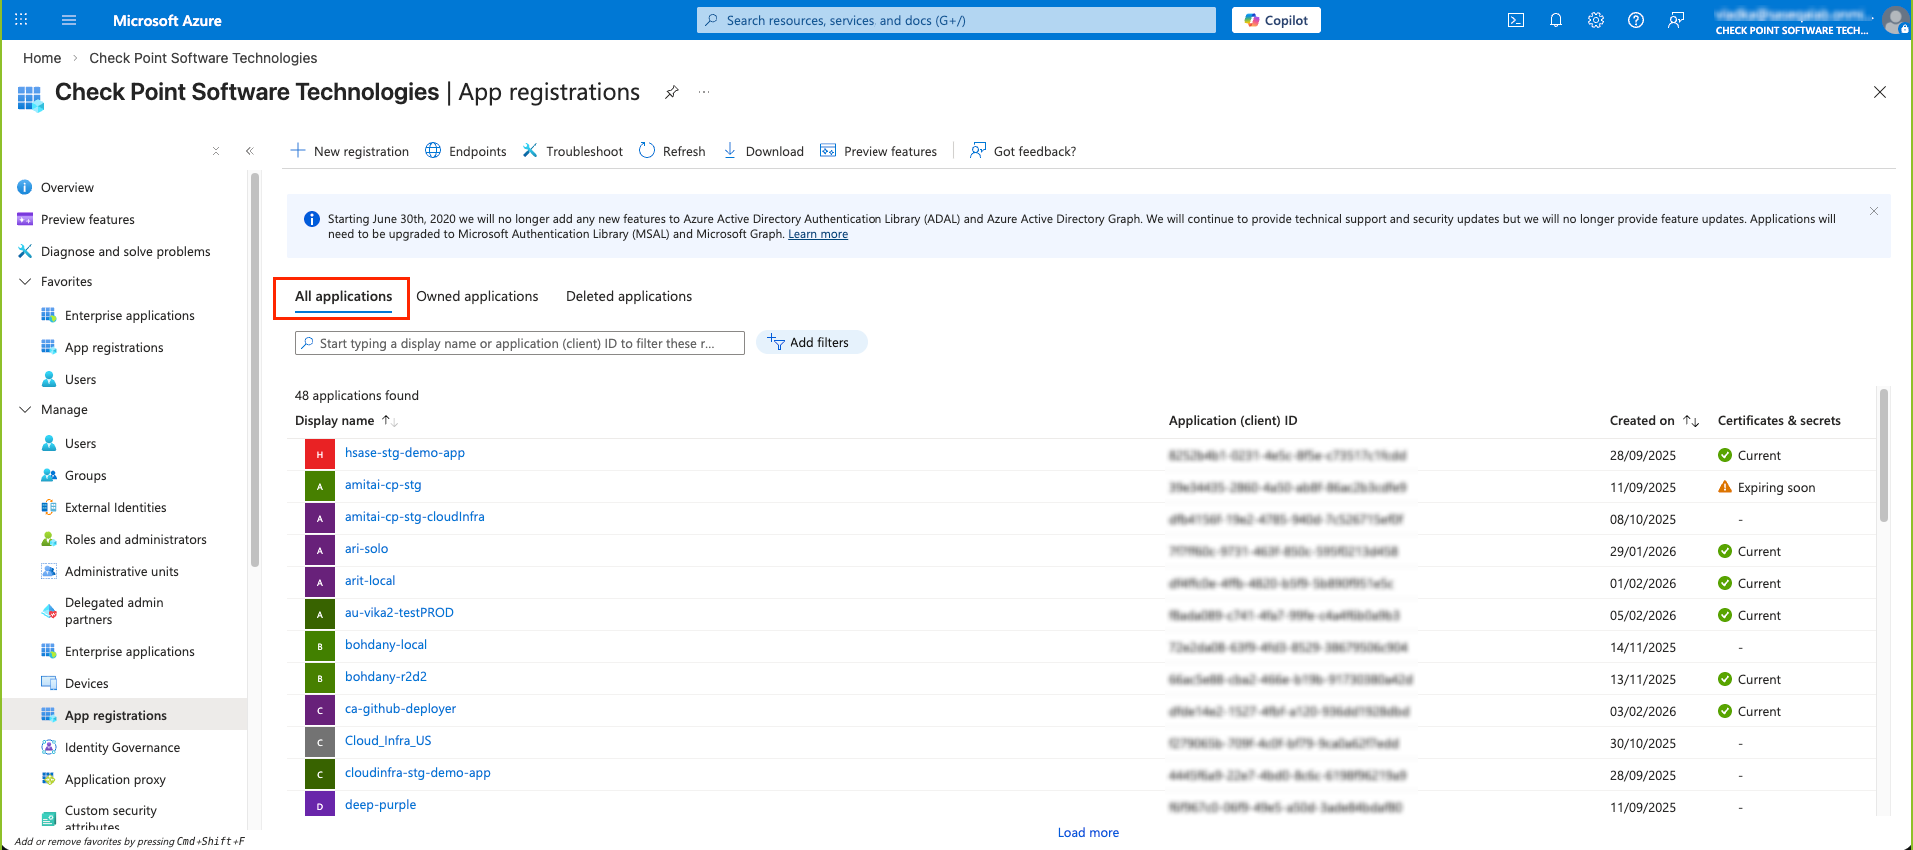
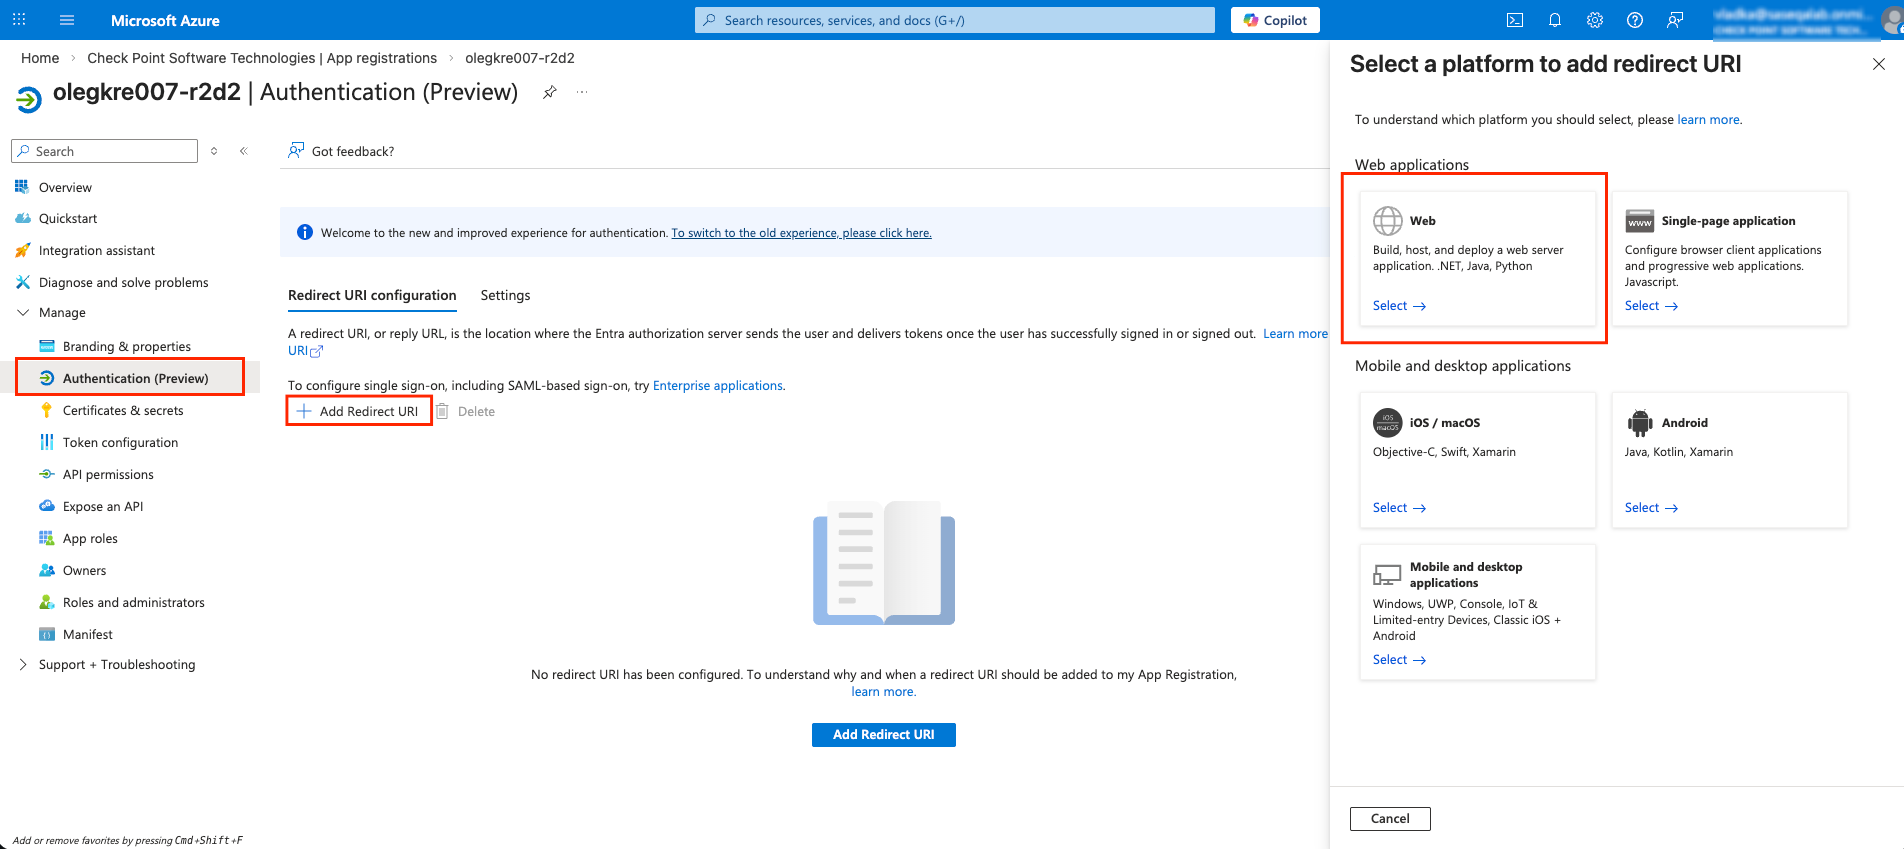
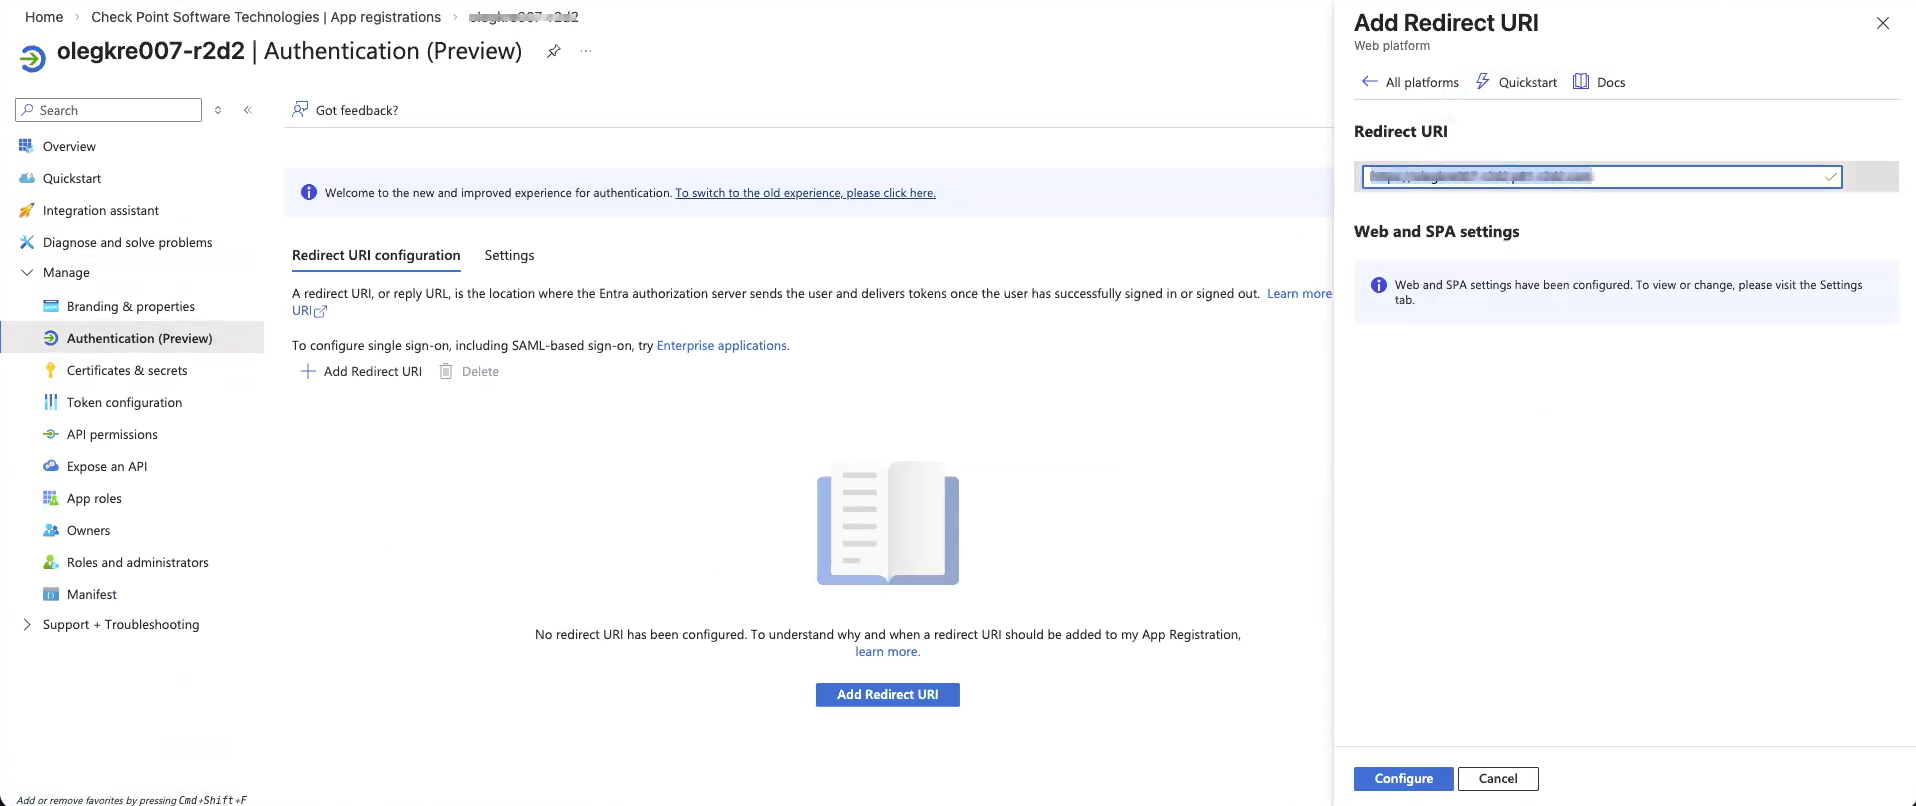
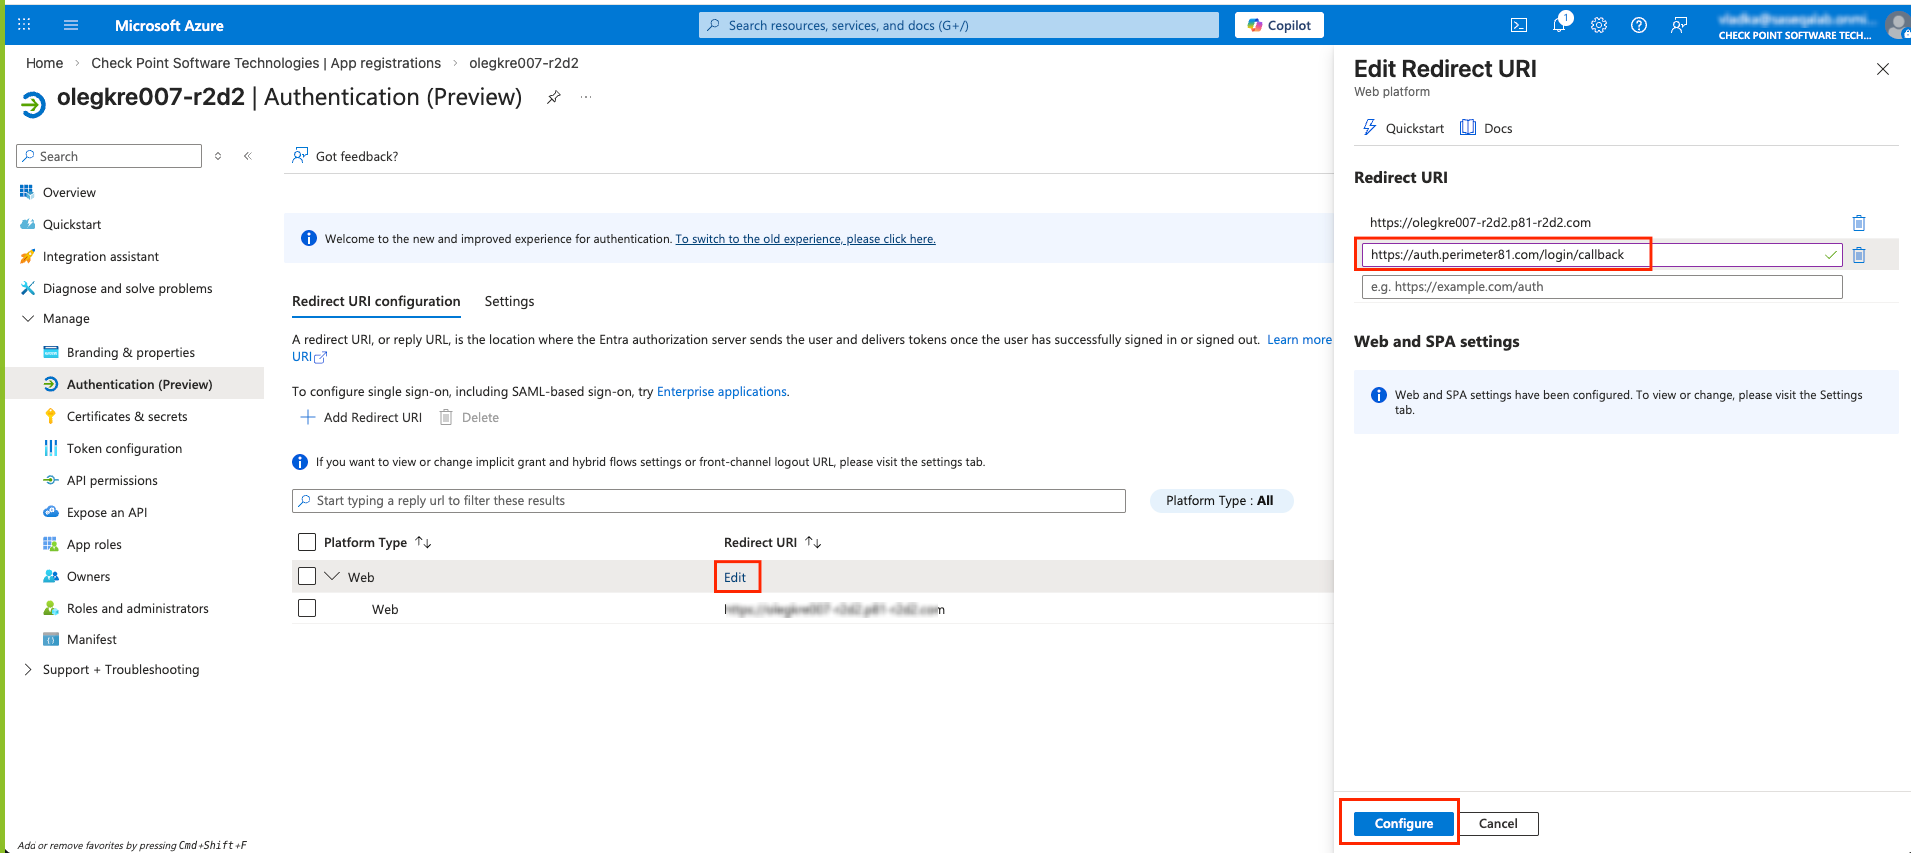
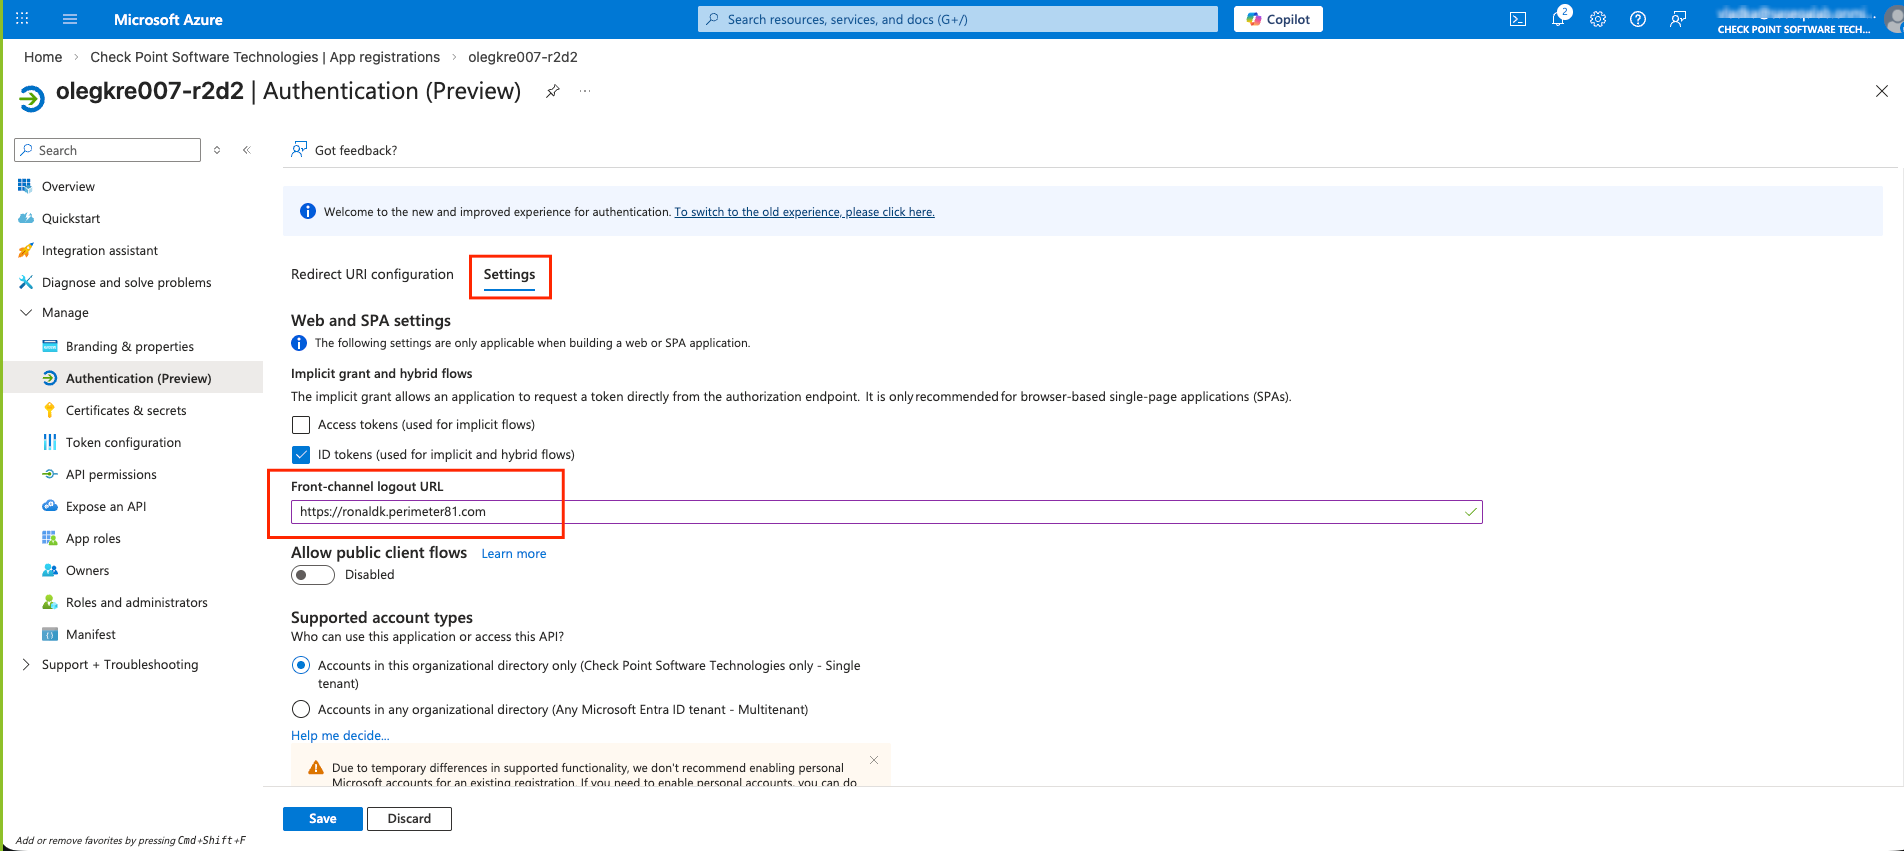
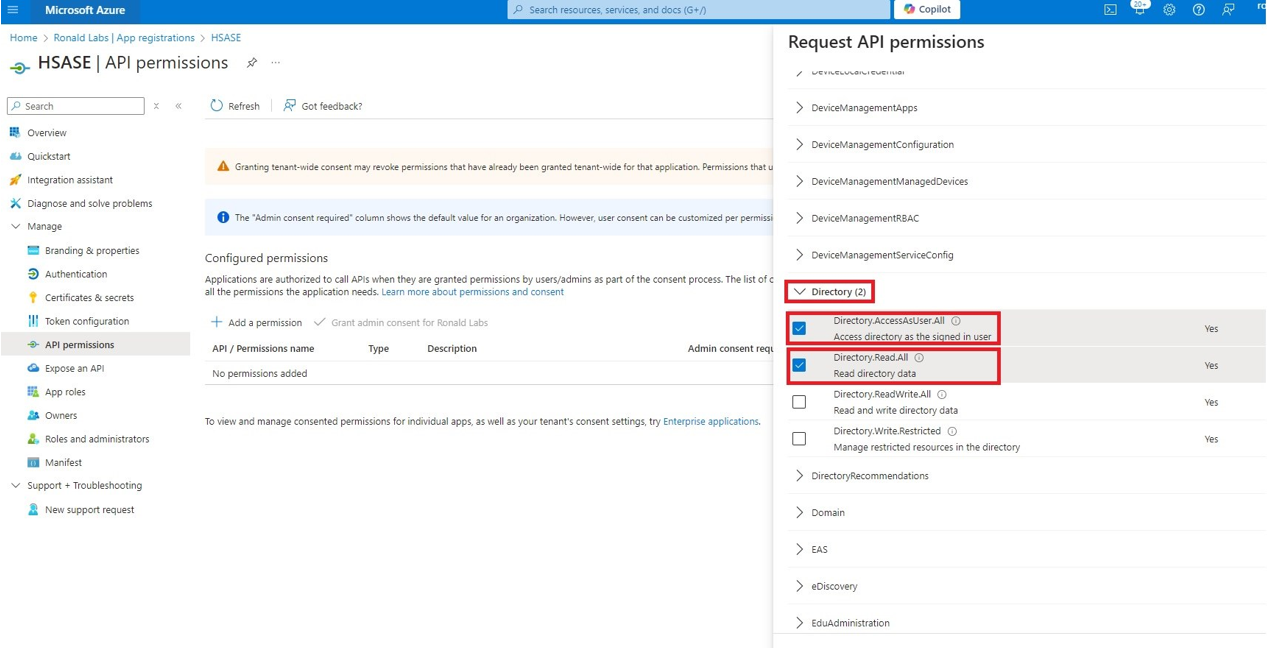
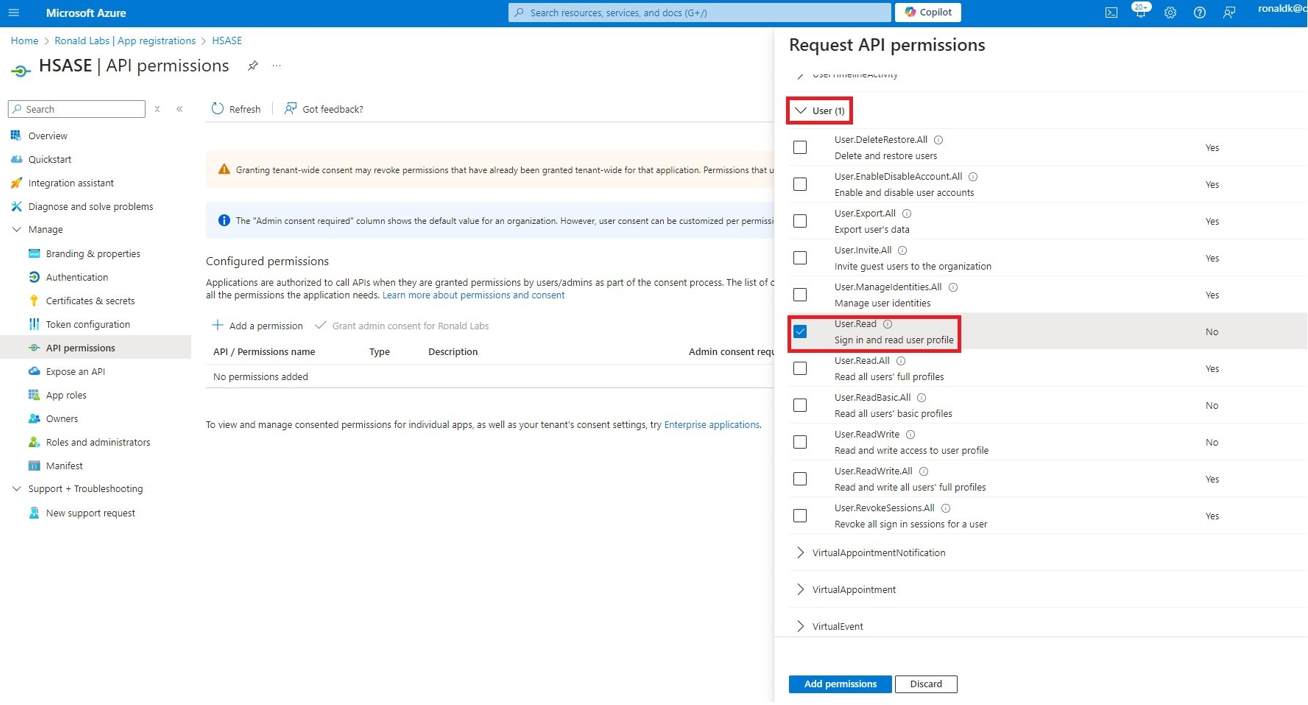
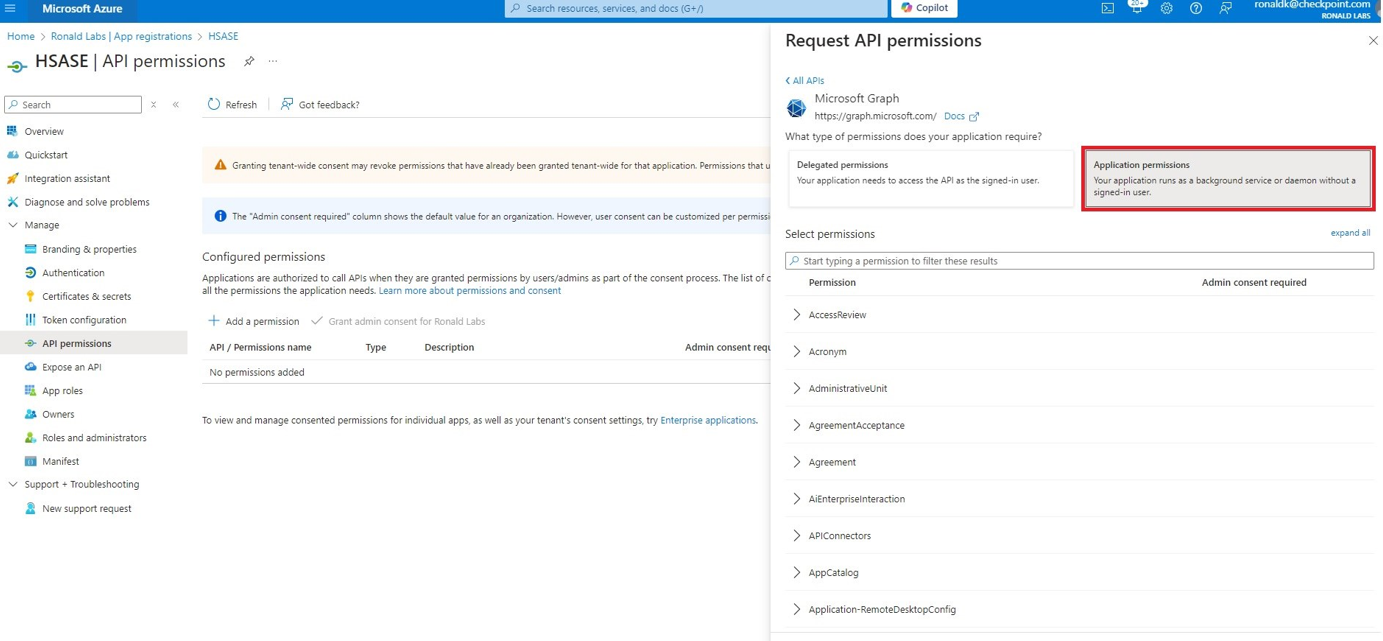
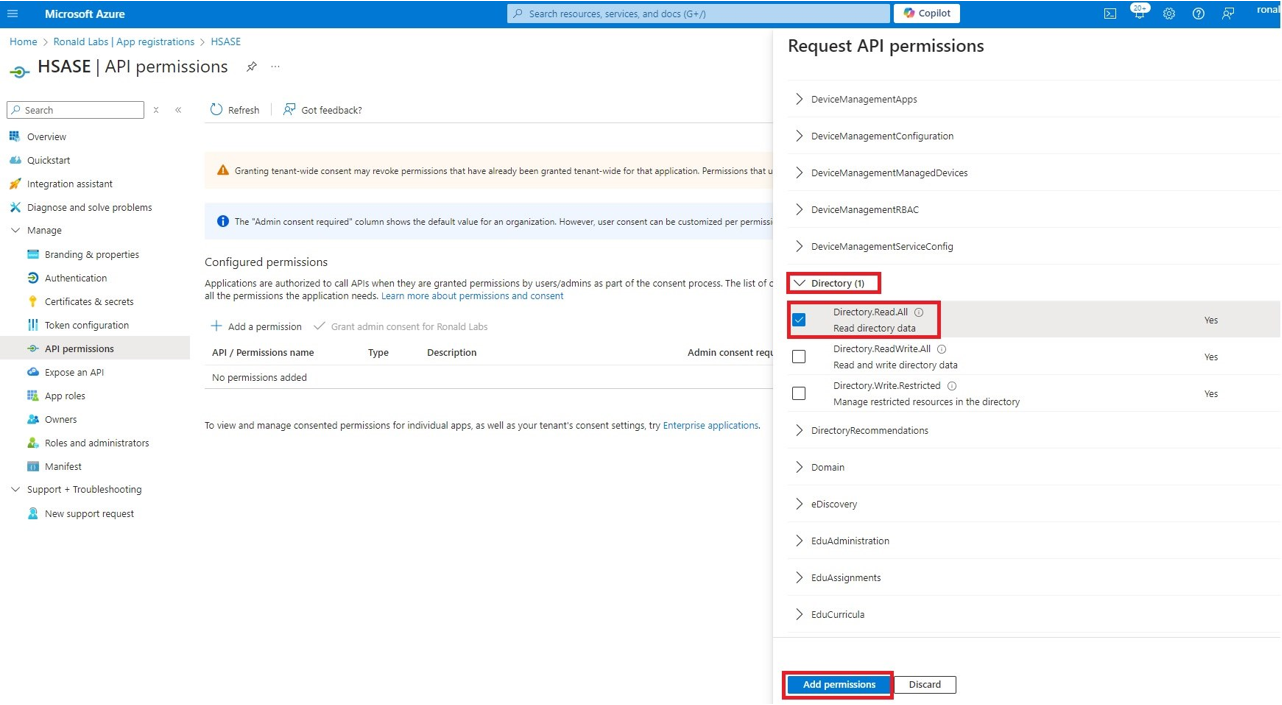
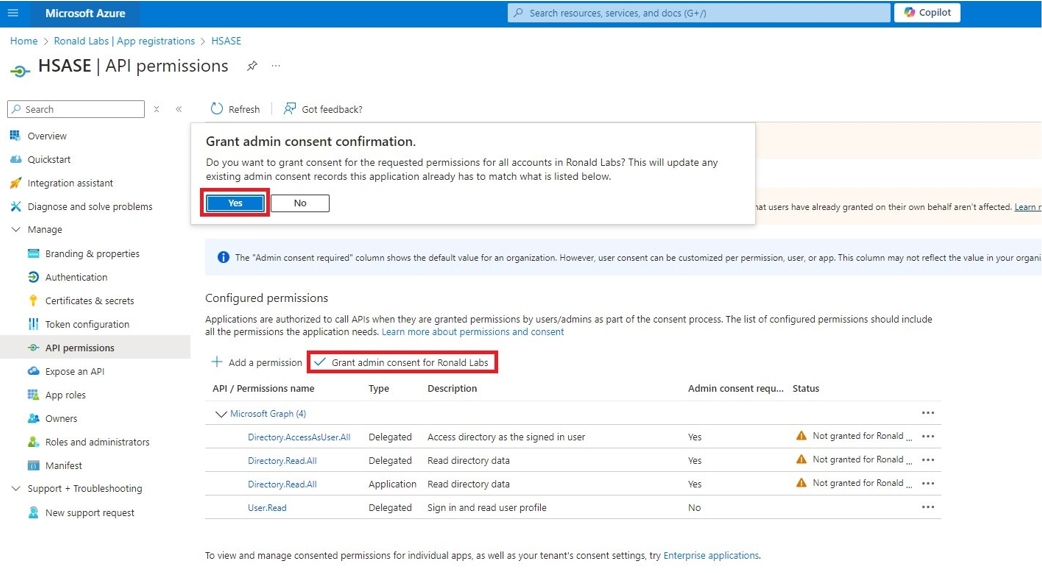
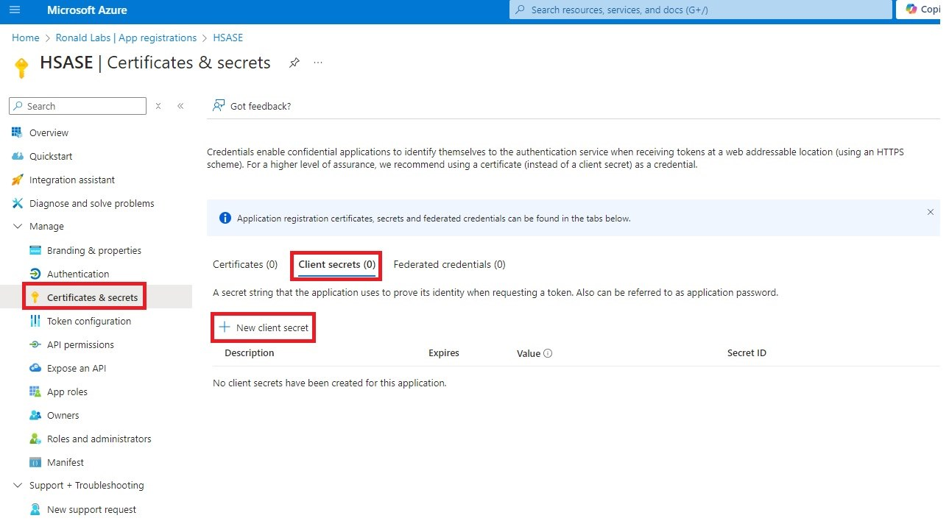
Microsoft Entra ID (formerly Azure Active Directory) (SCIM) Updated on Apr 7, 2026 Published on Nov 27, 2024 Prev Next High-Level Procedure Part 1: Configure Entra ID Step 1 - Creating an application in Entra ID Access the Microsoft Azure Portal using administrator credentials. From Azure services, click Microsoft Entra ID . Click Overview. From the Basic information section, make a note of the License . Go to Manage > Enterprise applications. Go to All applications . Click New application . In the Browse Microsoft Entra Gallery page, click Create your own application . In the Create your own application panel that appears on the right, enter the application name (for example, Check Point SASE Create .the application is created, the Overview page appears. Click the Application ID to copy it. Click Assign users and groups and then click Add user/group . In the Users section, click None Selected . Select the users and groups you want to add to the application and click Select . Click Assign .assigned, the Home page appears. Click Microsoft Entra ID . From the left panel, click App registrations. In the All applications tab, click the application you created. Go to Manage > Authentication (Preview) and click Add Redirect URI. In the Select a platform to add redirect URI panel that appears on the right, select Web . In the Redirect URIs field, enter your workspace name and click Configure : In the Redirect URI Configuration section, click Edit and add these: Click Configure . Click Settings . In the Front‑channel logout URL section, enter your workspace name: In the Supported account types section, select the applicable option for supported account types and click Save . Step 2 - Configuring API Permissions Manage > API permissions and then click Add a permission .Request API permissions panel appears to the right. Select Microsoft APIs tab and then select Microsoft Graph . Click Delegated permissions . Click Directory to view the permissions and then select Directory.Read.All . Click User to view the permissions and then select User.Read . Scroll to the top of the page and click Application permissions . Click Directory to view the permissions and then select Directory.Read.All . Click Add permissions . Click Grant admin. Grant admin consent confirmation window appears. Click Yes . Step 3 - Configuring Secret Key for the Application From the left panel, select Certificates & secrets and click the Client secrets tab. Click New client secret .Note - You must use this client secret (password) as the Client Secret when connecting with the Check Point SASE IDP.
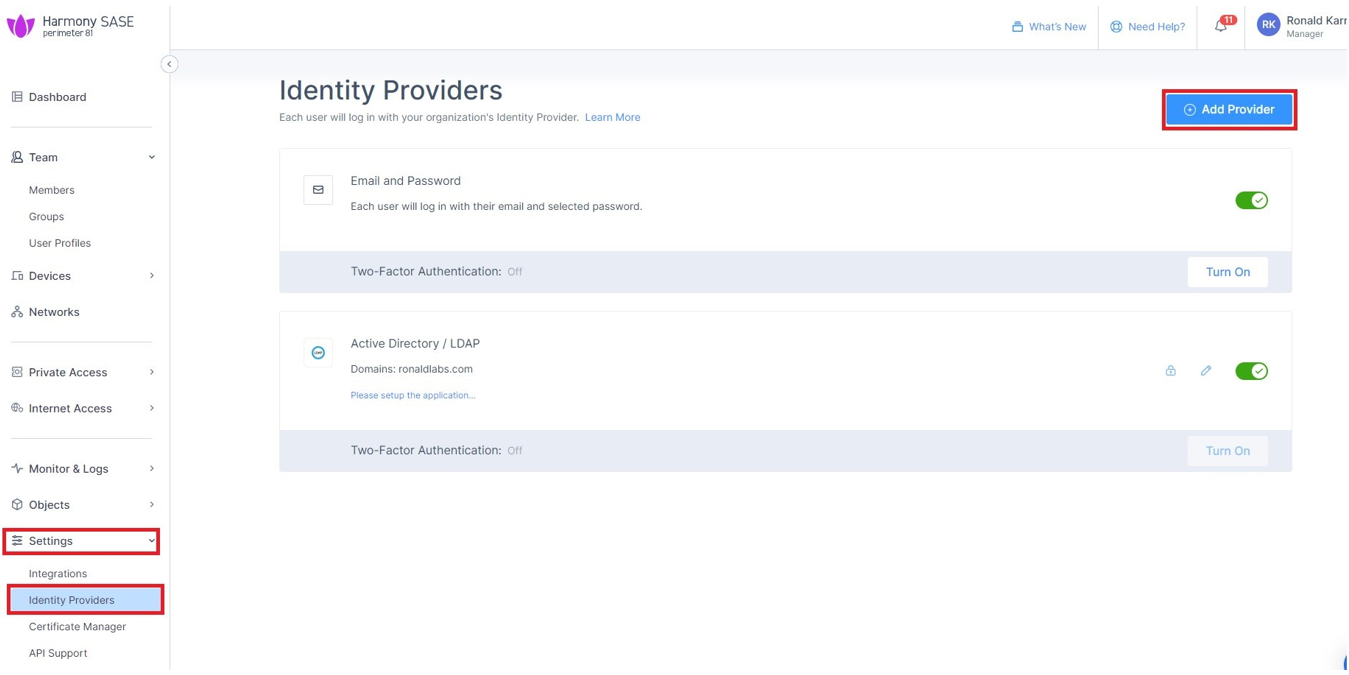
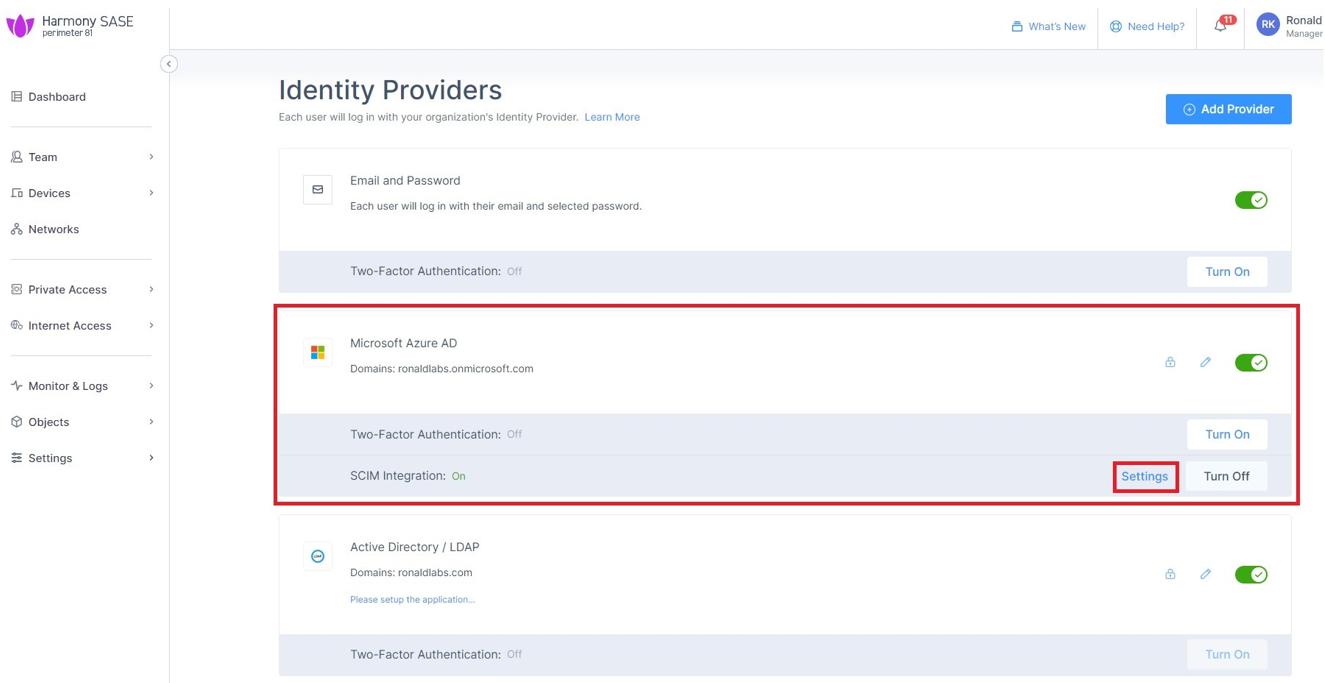
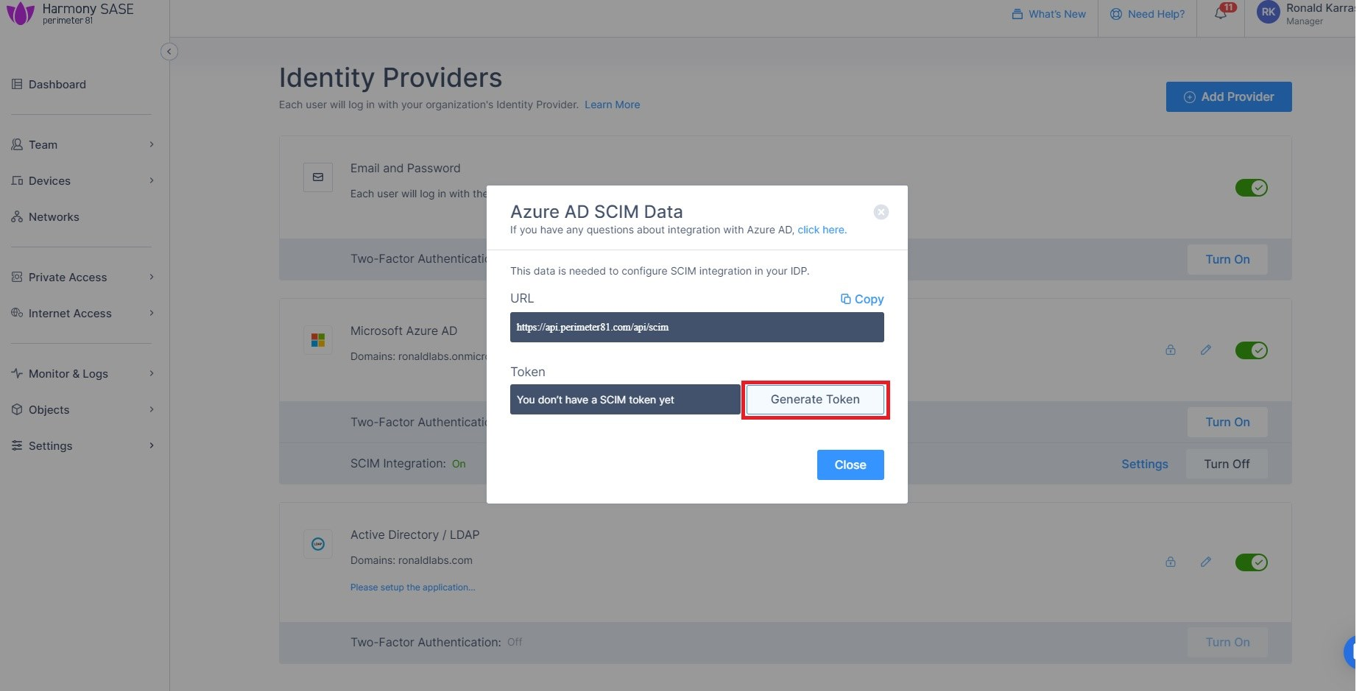
In the Add a client secret panel that appears on the right, specify these:Description - Enter a description.Expires - Select the secret expiration from the list. Click Add . To copy the secret value, in the Value field, click Part 2: Configuring Check Point SASE IDP Access the Check Point SASE Administrator Portal. Go to Settings > Identity Providers. Click Add Provider .Add identity provider window appears. Select Microsoft Azure AD and click Continue . Enter these details (available on the Microsoft Entra ID Overview page): Select the SCIM Integration checkbox. Click Done. The Azure AD gets created successfully. In the Microsoft Azure AD section, click Settings. Click Generate Token.
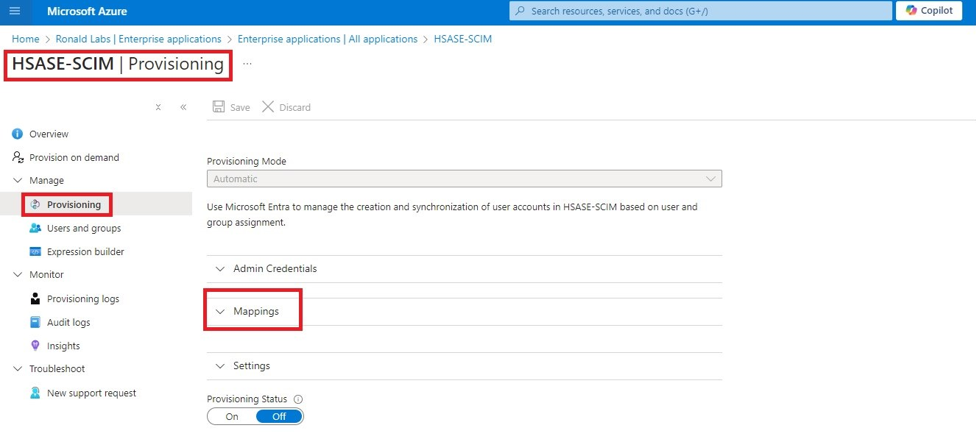
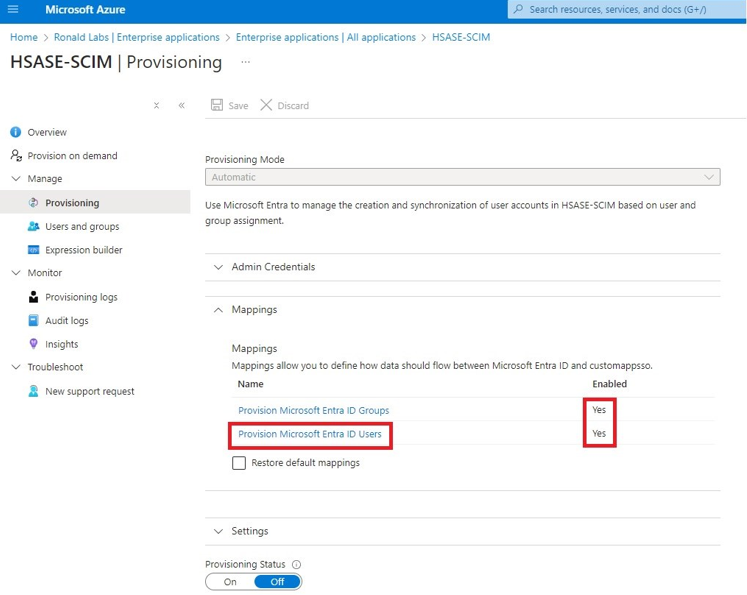
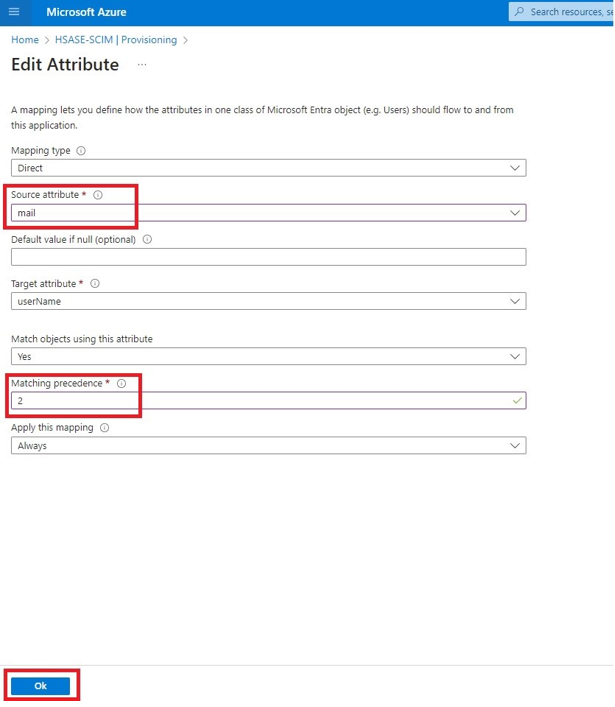
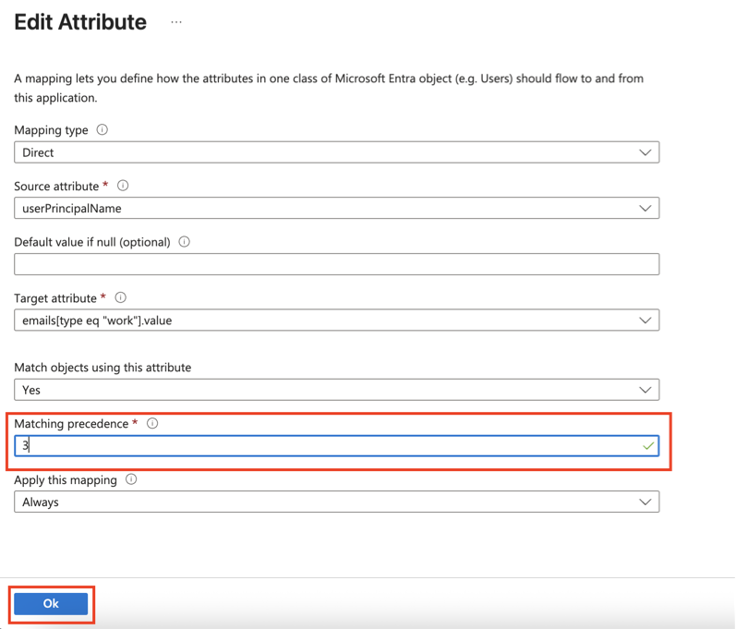
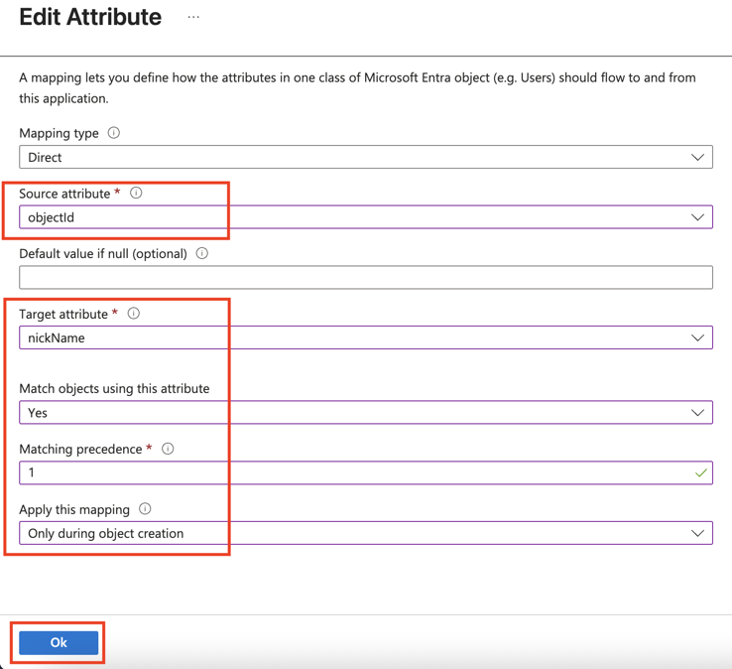
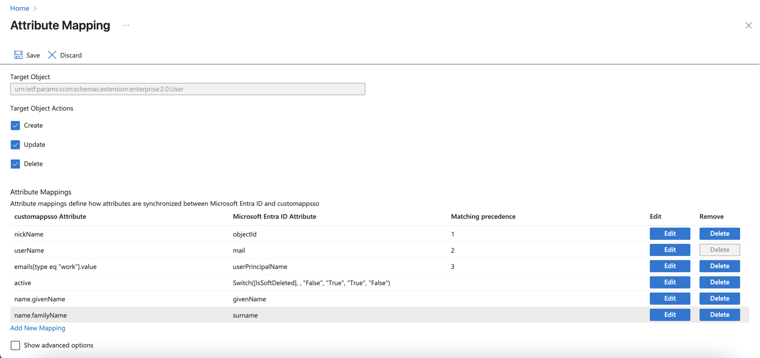
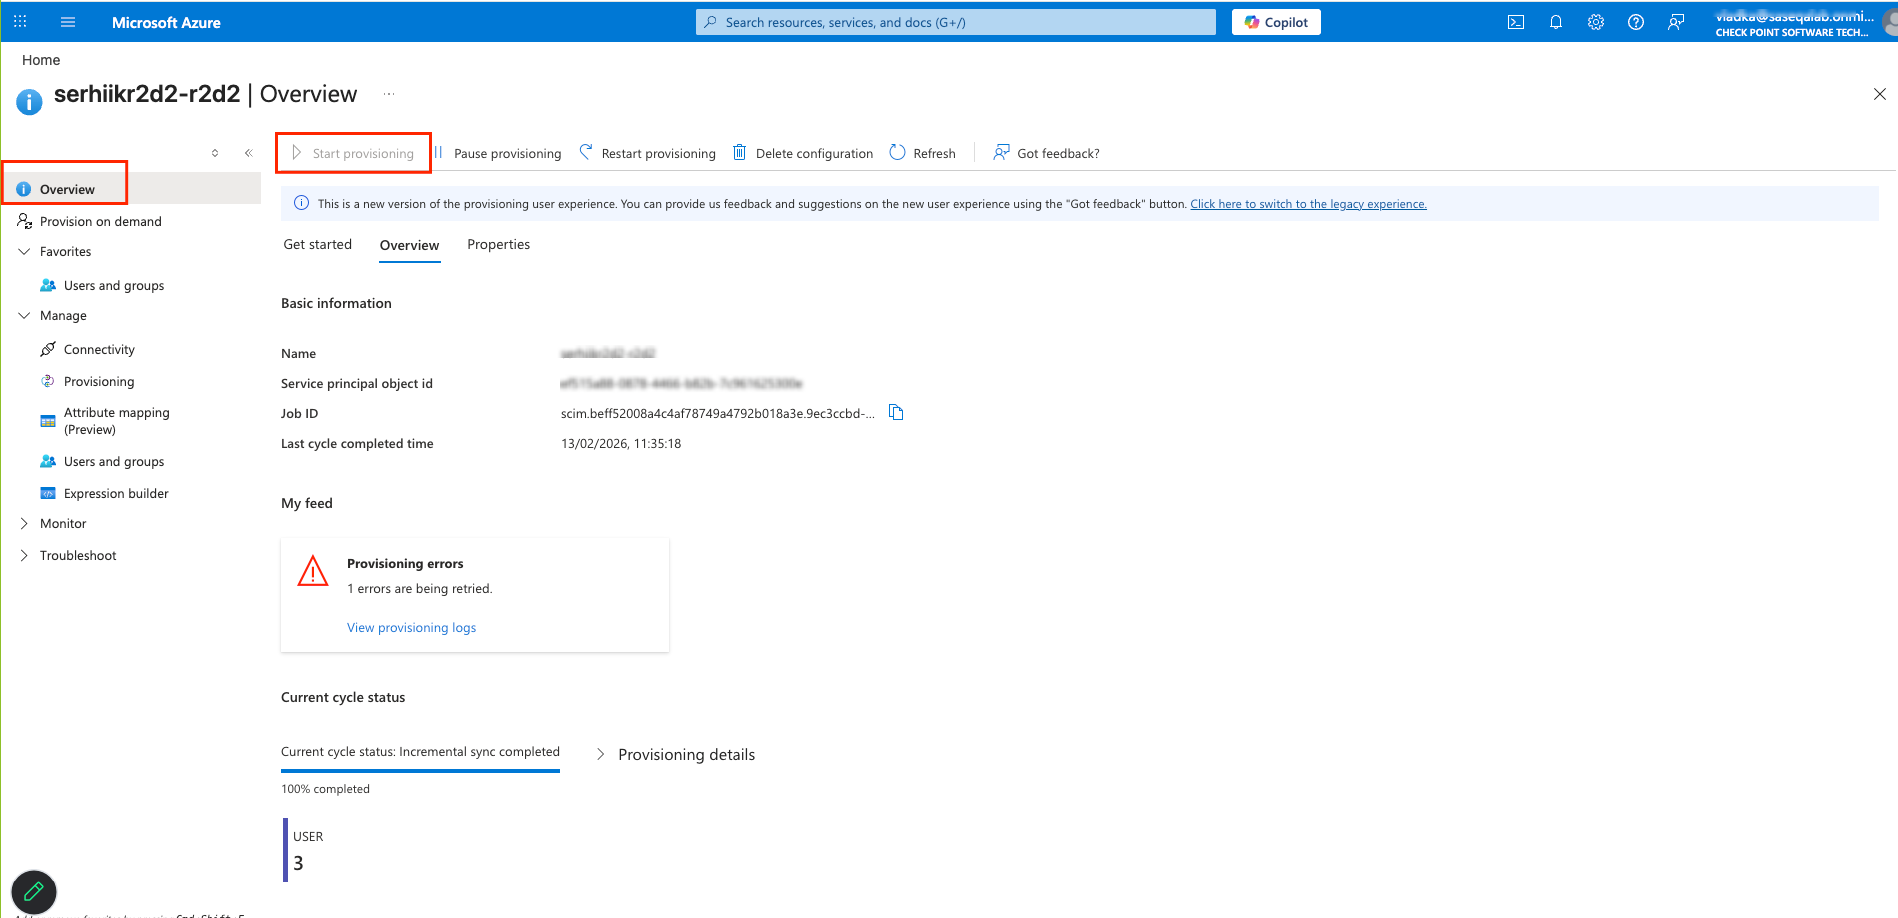
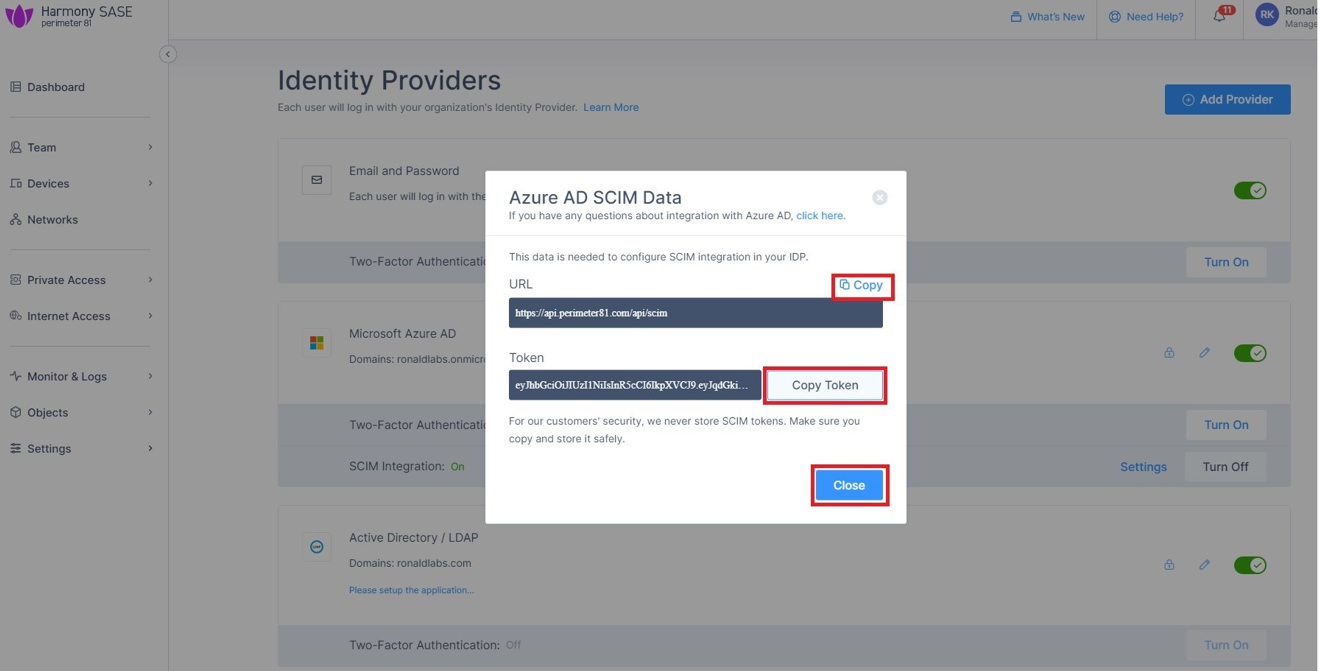
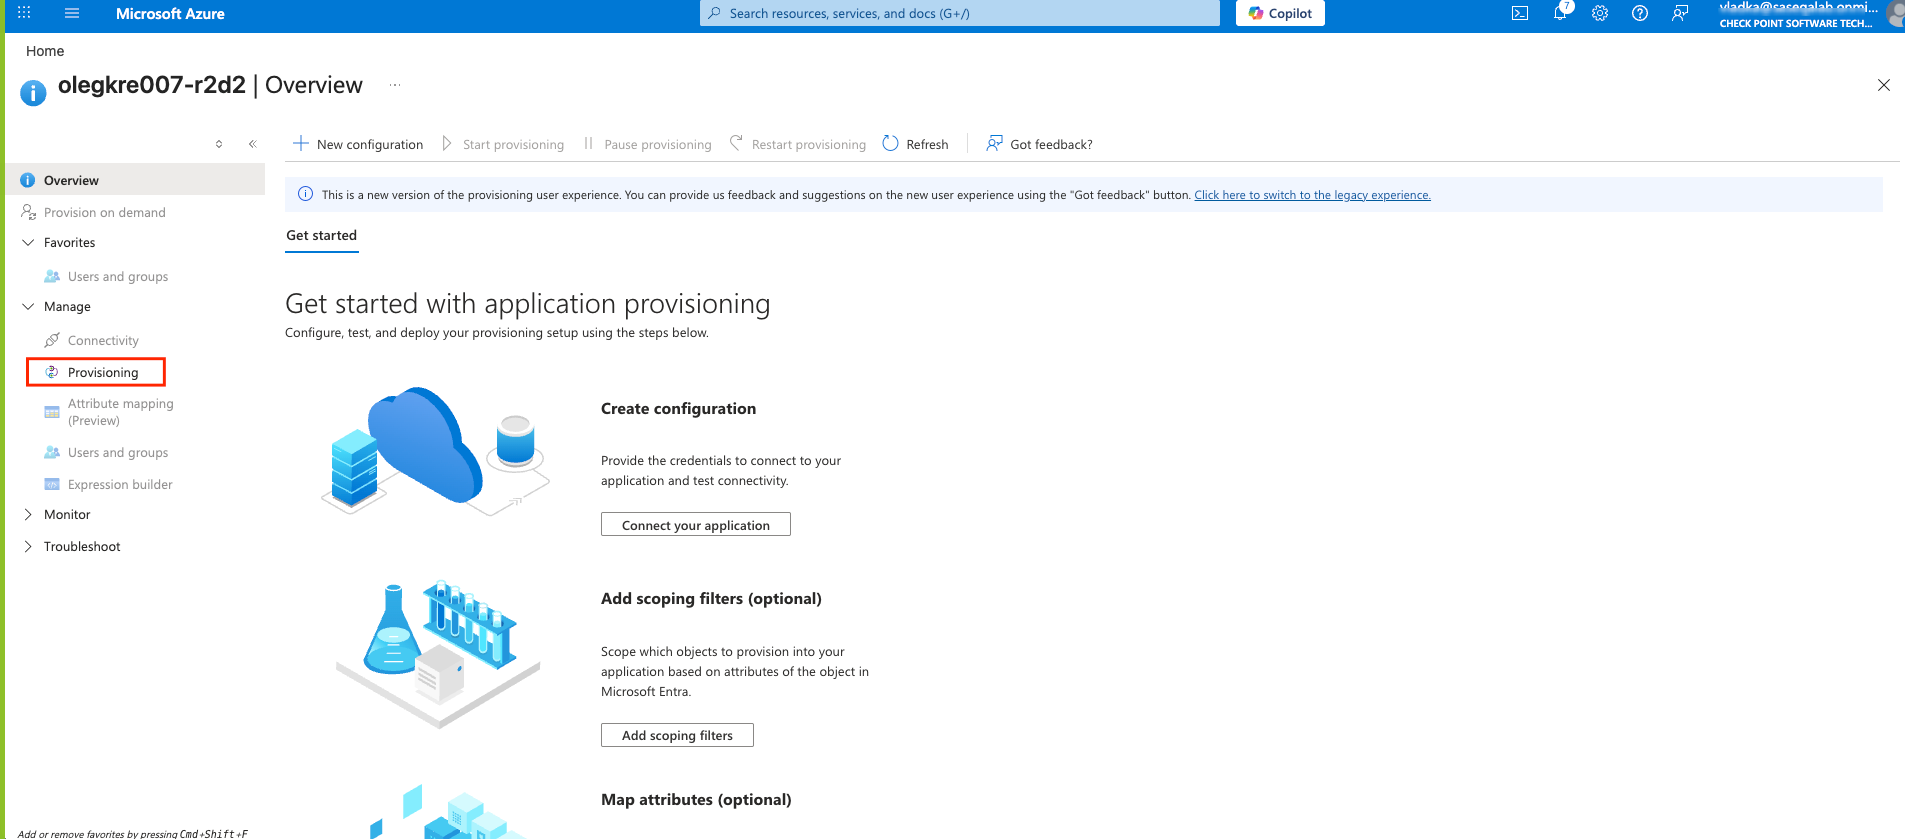
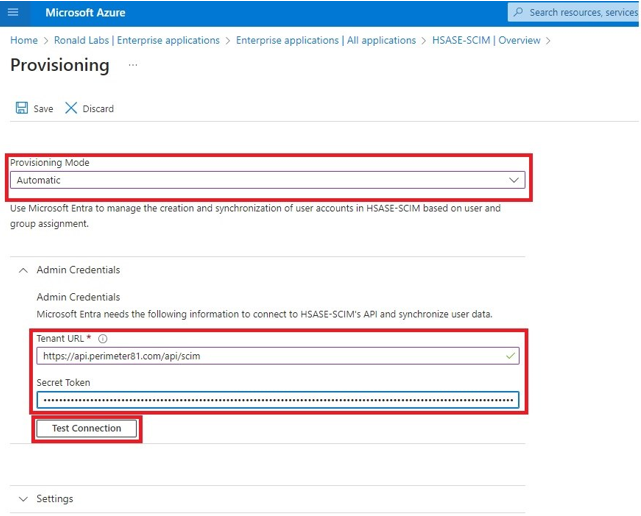
The Azure AD SCIM Data window appears. Copy the URL and Token and then click Close. Part 3: Configuring SCIM Access the Microsoft Azure Portal using administrator credentials. Go to Microsoft Entra ID > Enterprise Applications and locate the application previously created in Step 1 - Creating an application in Entra ID . Click the application name to open the configuration. Click Get Started in the Provision User Accounts tile. Click Provisioning . From the Provisioning Mode list, select Automatic . Expand Admin Credentials . In the Tenant URL field, enter the SCIM URL that corresponds to your Check Point SASE tenant region:For US based platform - For EU based platform - For AU based platform - For IN based platform - In the Secret Token field, paste the token you copied in Part 2: Configuring Check Point SASE IDP step 10 . Click Test Connection . Click Save at the top left corner. Expand Mappings . Make sure that these options are enabled:Provision Microsoft Entra ID Groups Provision Microsoft Entra ID Users Click Provision Microsoft Entra ID Users . In the Attribute Mappings section, for userName , click Edit . From the Source attribute list, select mail . From the Match precedence list, select 2 . Click OK . Locate the emails[type eq “work”].value attribute and click Edit. From the Source attribute list, select userPrincipalName . From the Match objects using this attribute list, select Yes . From the Matching precedence list, select 3 . Click OK . Go back to Attribute Mappings section and click Add New Mapping . From the Source attribute list, select objectId . From the Target attribute list , select nickName . From the Match objects using this attribute list, select Yes . From Matching precedence list, select 1 . From the Apply this mapping list, select Only during object creation . Click O k Retain these attributes and delete other attributes:nickName emails[type eq “work”].value Click Save . Go to SCIM Application and select Users and groups . Click Add users/group . In the Users section, click None Selected . Select the user(s). Click Select and then click Assign . Go to the SCIM application. Go to Overview . Click Start provisioning .
Was this article helpful?

.PNG)
.PNG)
 Once the application is created, the Overview page appears.
 icon next to Application ID to copy it.
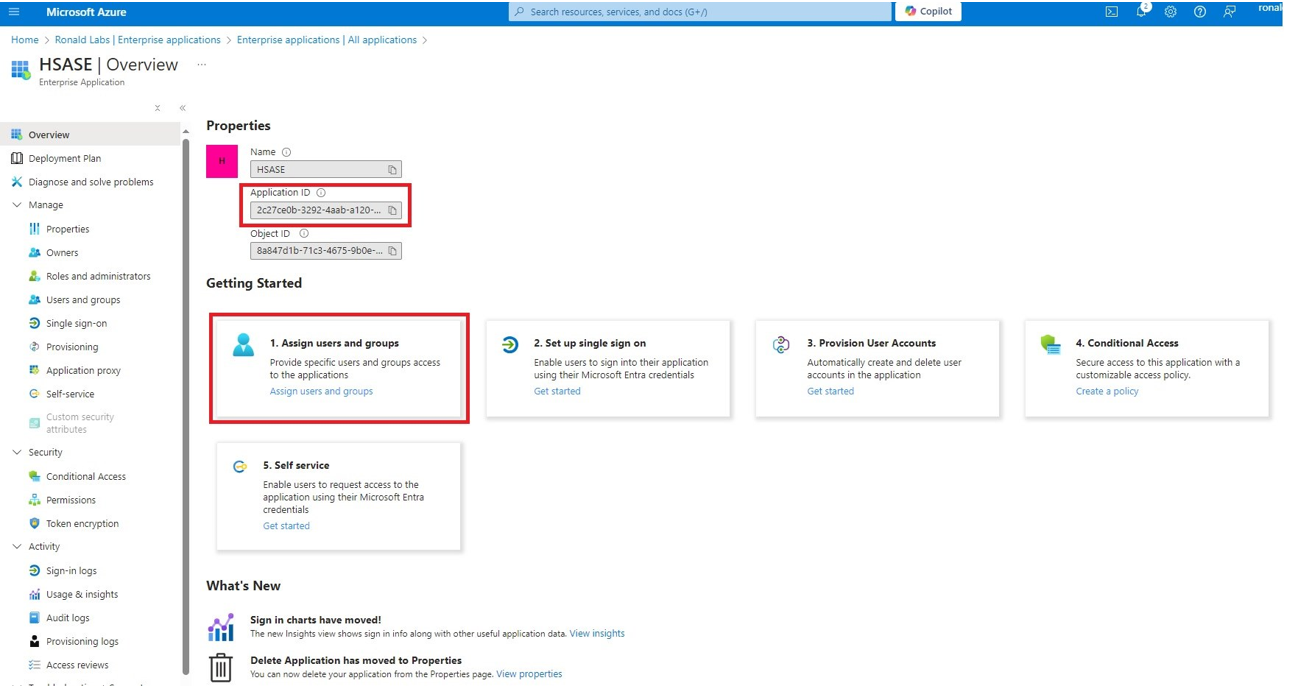
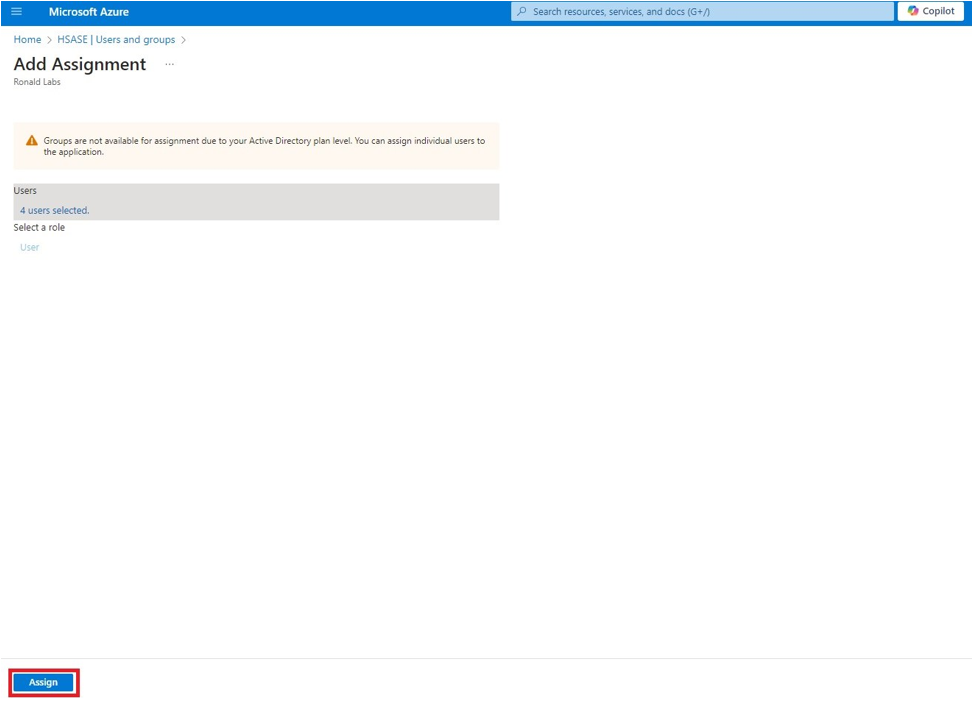 Once assigned, the Home page appears.
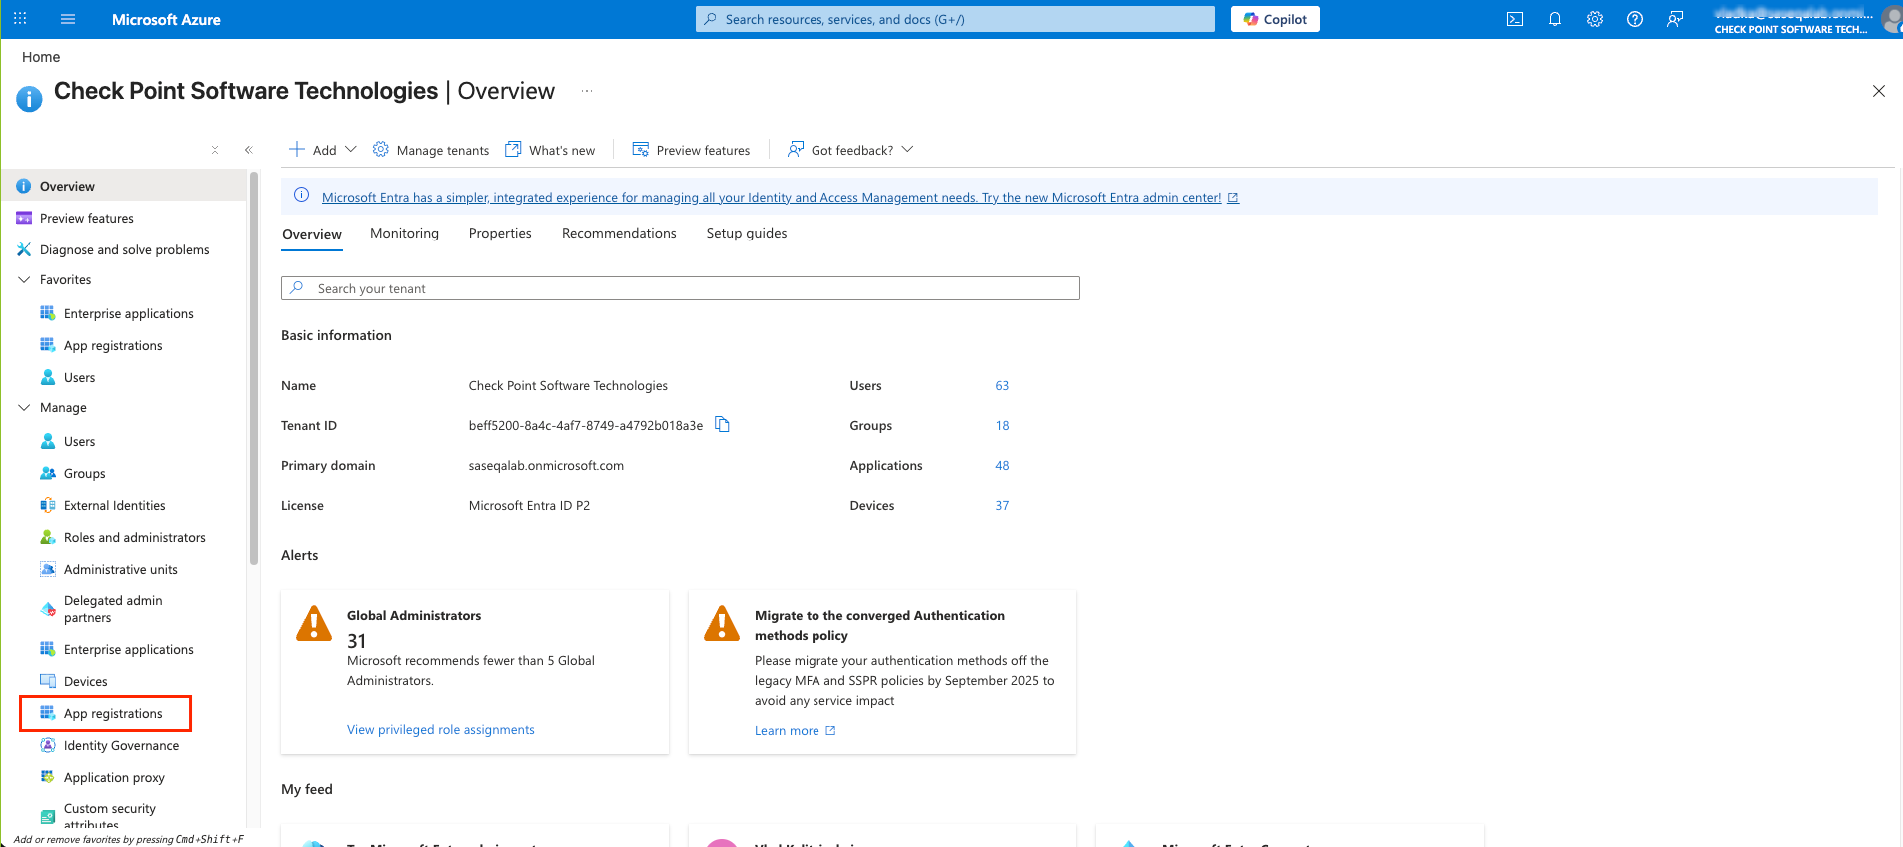
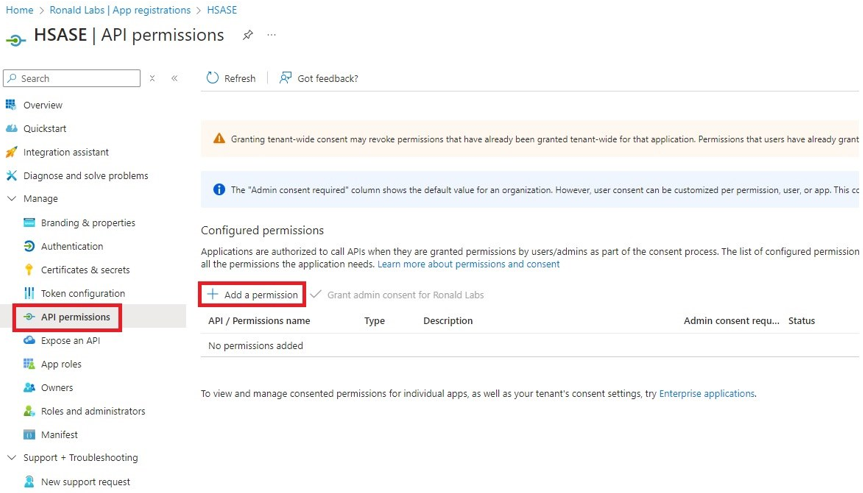 The Request API permissions panel appears to the right.
 Note - You must use this client secret (password) as the Client Secret when connecting with the Check Point SASE IDP.
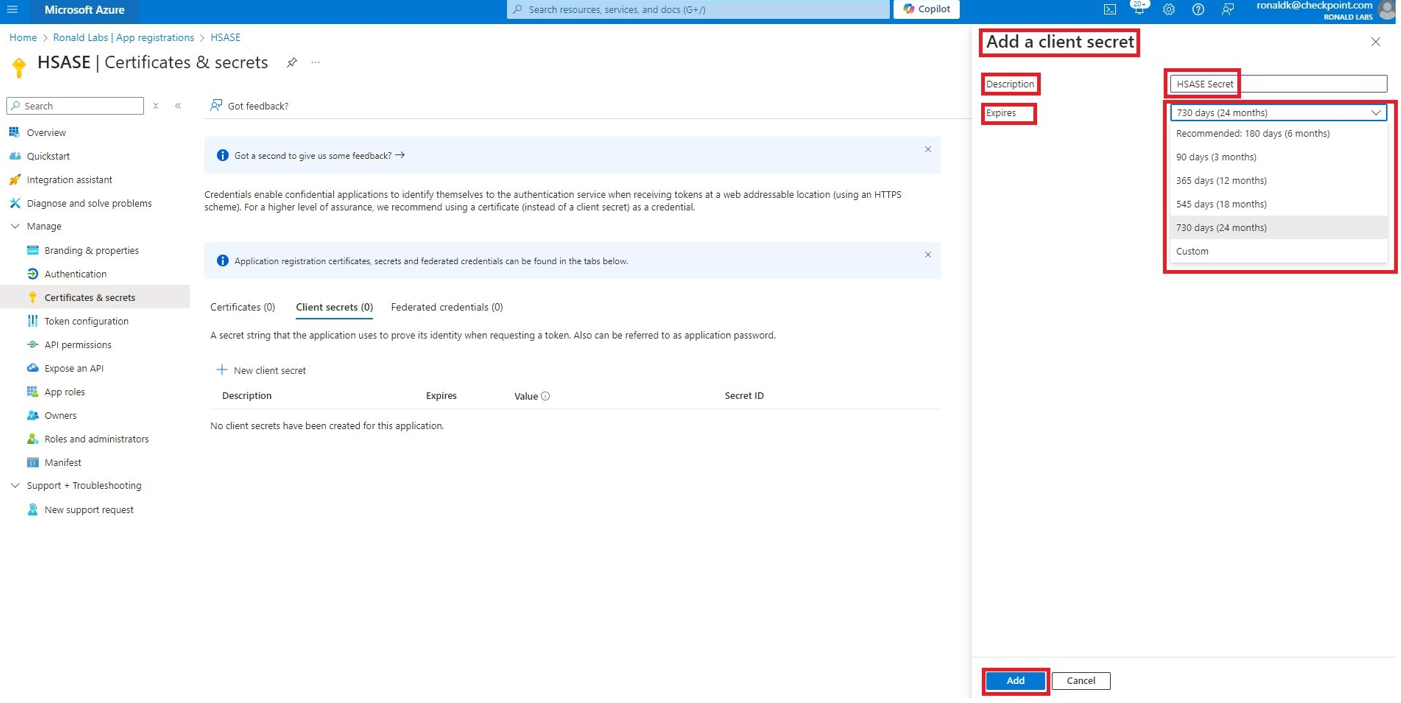
.PNG)
 The Add identity provider window appears.
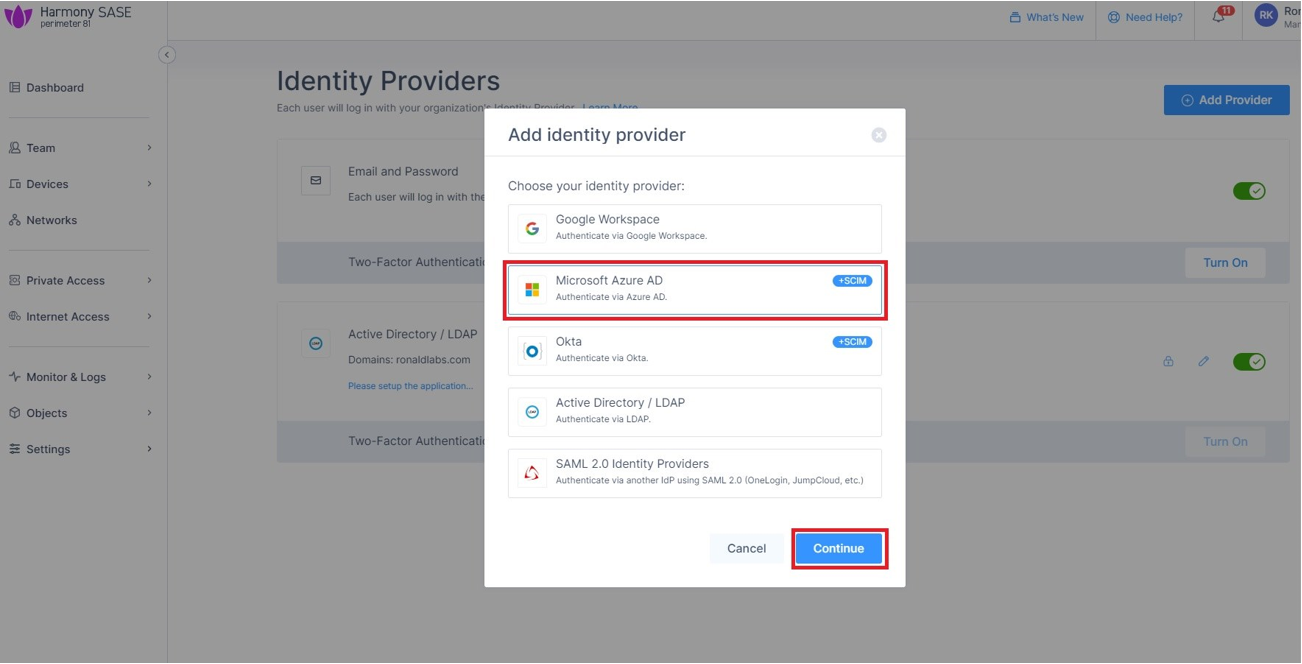
.PNG)

.PNG)