
Introduction
This guide will lead you through establishing redundant VPN tunnels between your Check Point SASE network and your AWS Transit Gateway environment. Creating multiple tunnels helps ensure a higher availability of your network connections.
Breakdown of topics
- Pre-requisites
- Configuration Steps
- Verifying the Setup
- Troubleshooting
- Support Contacts
Pre-requisites
To successfully follow this guide, you should have:
- An active Check Point SASE account and network.
- The Check Point SASE app is installed on your devices.
- An active AWS account with the necessary permissions.
Configuration Steps
Create Check Point SASE Gateways
- Your Check Point SASE Network must have at least two different gateways in the same network, as listed below.
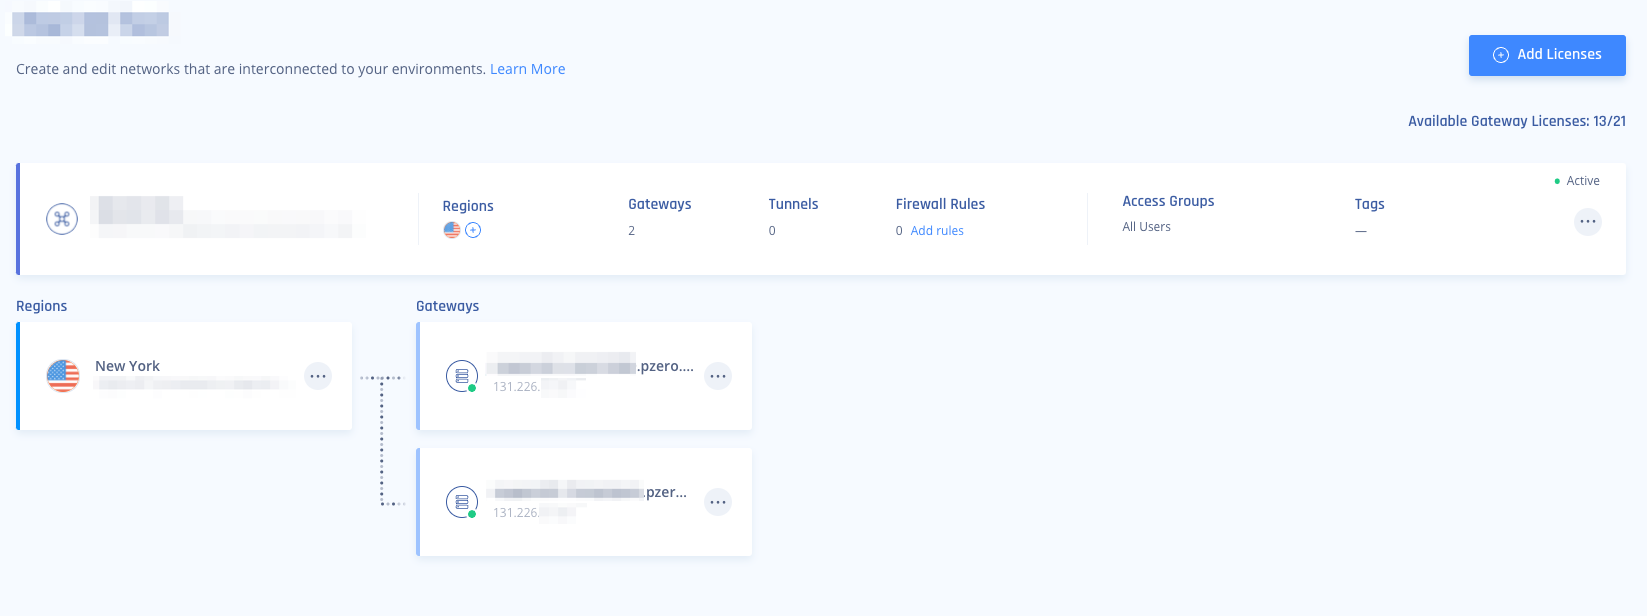
- These gateways can be deployed in two separate Regions for comprehensive ISP redundancy.
- The network can be scaled up, and adding another region should not affect the connection.
Create a Transit Gateway on AWS
- You can skip this step if you already have a Transit Gateway in your AWS region.
- Under TRANSIT GATEWAYS, click Transit Gateway and then Create a Transit Gateway.
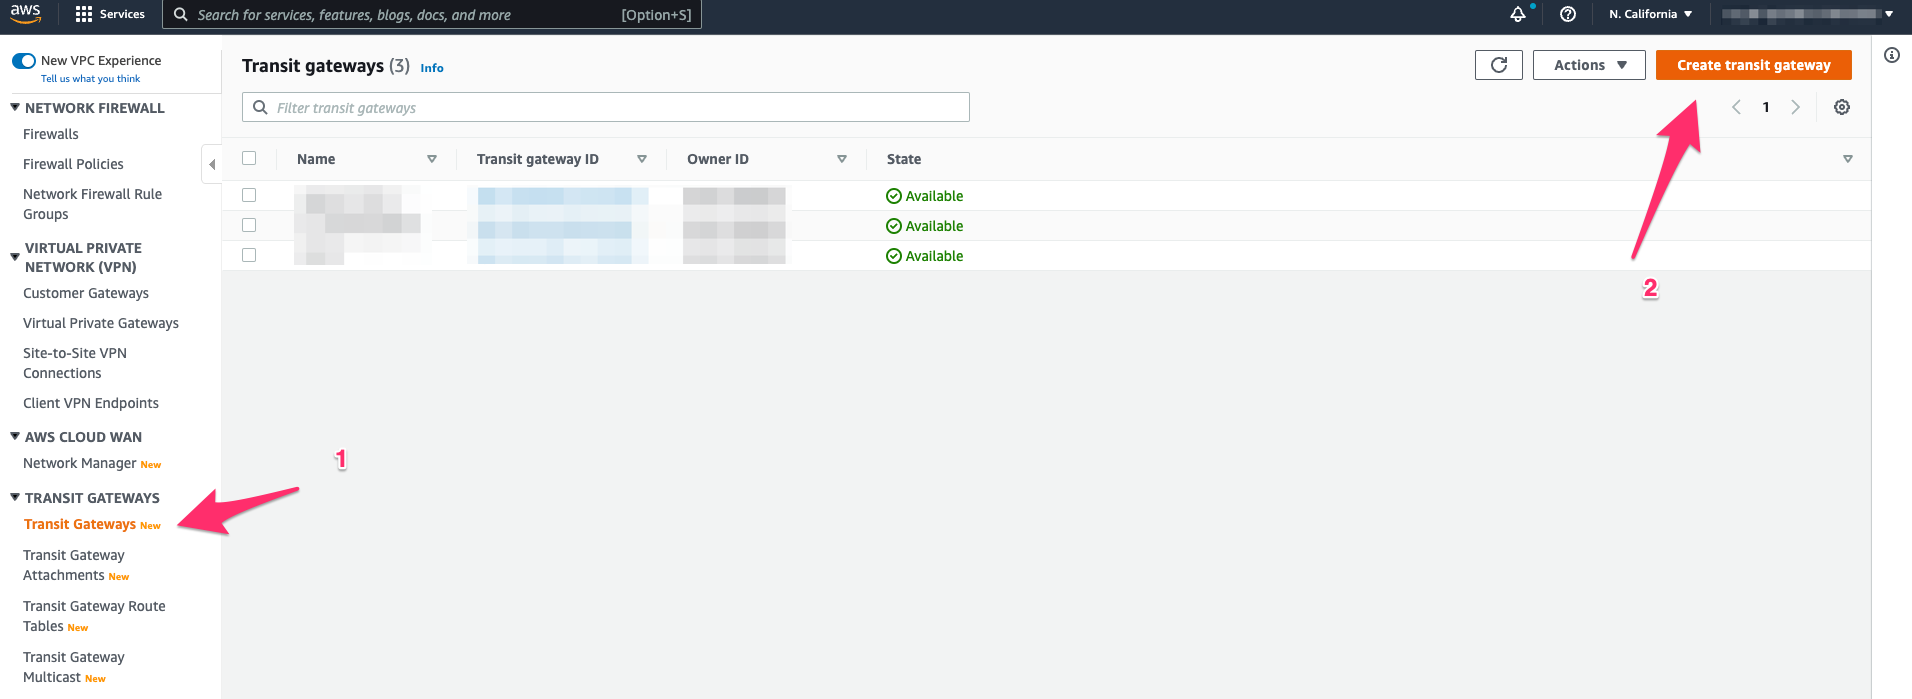
- Create a Transit Gateway with Default Settings

- Navigate to Transit Gateway Attachments under VPC, and create a Transit Gateway Attachment for your VPC.
Create two Site-to-Site VPN connections
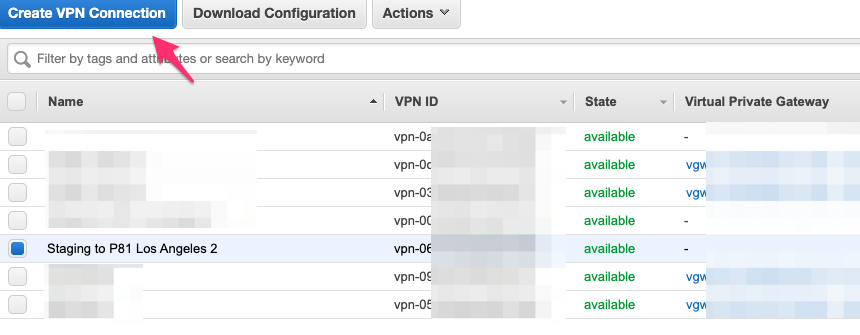
- In your AWS VPC, under VIRTUAL PRIVATE NETWORK(VPN), Click Site-to-Site VPN Connections, then Create VPN Connection.
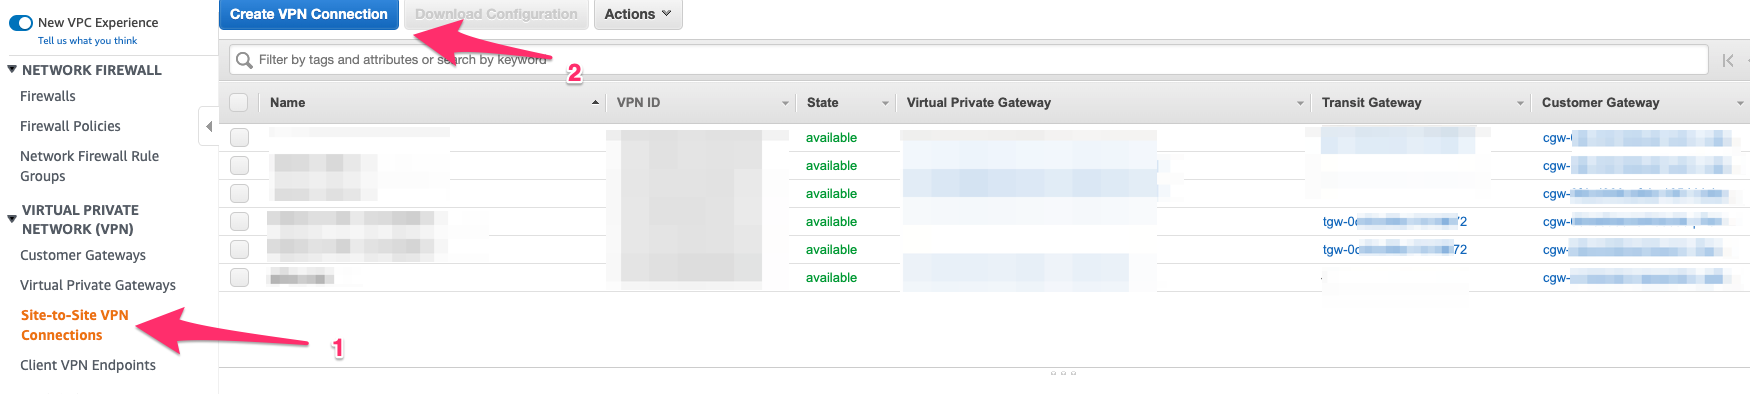
- Under Target Transit Gateway, select the Transit Gateway we created previously, and for Customer Gateway, choose New.
Under IP Address, enter the first Check Point SASE Gateway IP. Routing is Dynamic (BGP).
The BGP AS Number is the ASN you plan to use for the Check Point SASE Network; the default is 64512.
- Make sure your naming convention makes sense so you can locate and discern between the connections later.
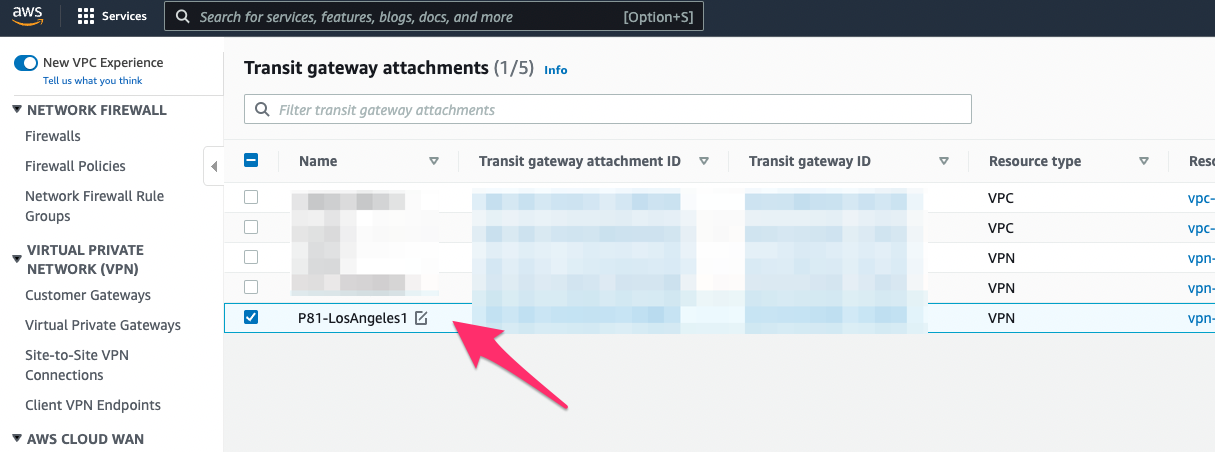
- Navigate to Transit Gateway attachments under TRANSIT GATEWAYS and find the Transit Gateway Attachment you just created- rename it to something that makes sense to you, like the screenshot below:
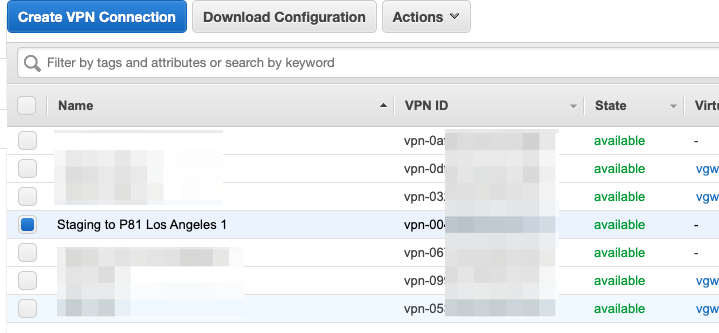
- Navigate back to Site-to-Site VPN Connections and select the VPN connection that got created, then click Download Configuration.
.png)
- Be sure to choose Generic under Vendor and Ikev2 for Ike Version.
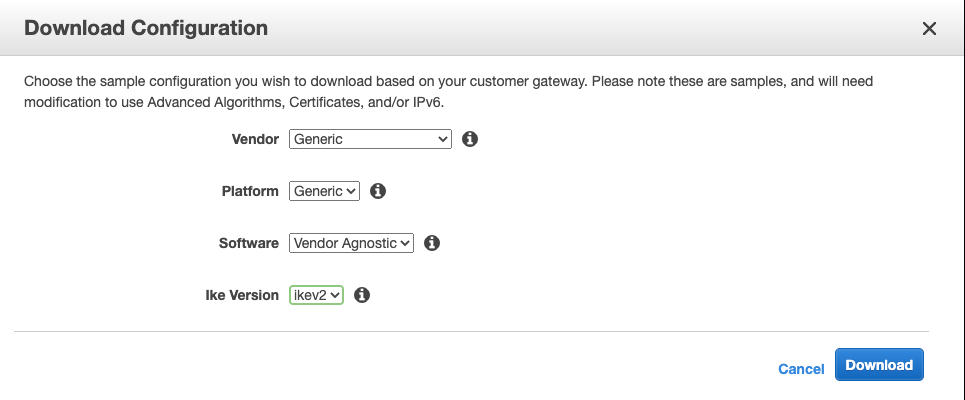
- Download and rename the file Tunnel1.txt.
- Repeat steps 1-6 for the other Site-to-Site Tunnel. This time, use the Second Check Point SASE Gateway IP.
.png)
- Rename the second file you downloaded Tunnel2.txt.
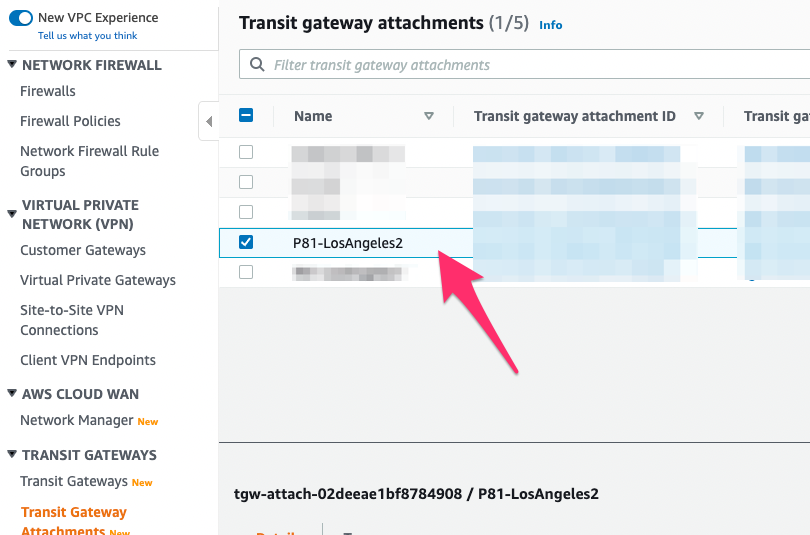
- Make sure to change the naming convention under Transit Gateway attachments for this site as well:
 VPC AttachmentTo access your VPC through the redundant connection, you must have a VPC Attachment connected to the Transit gateway.
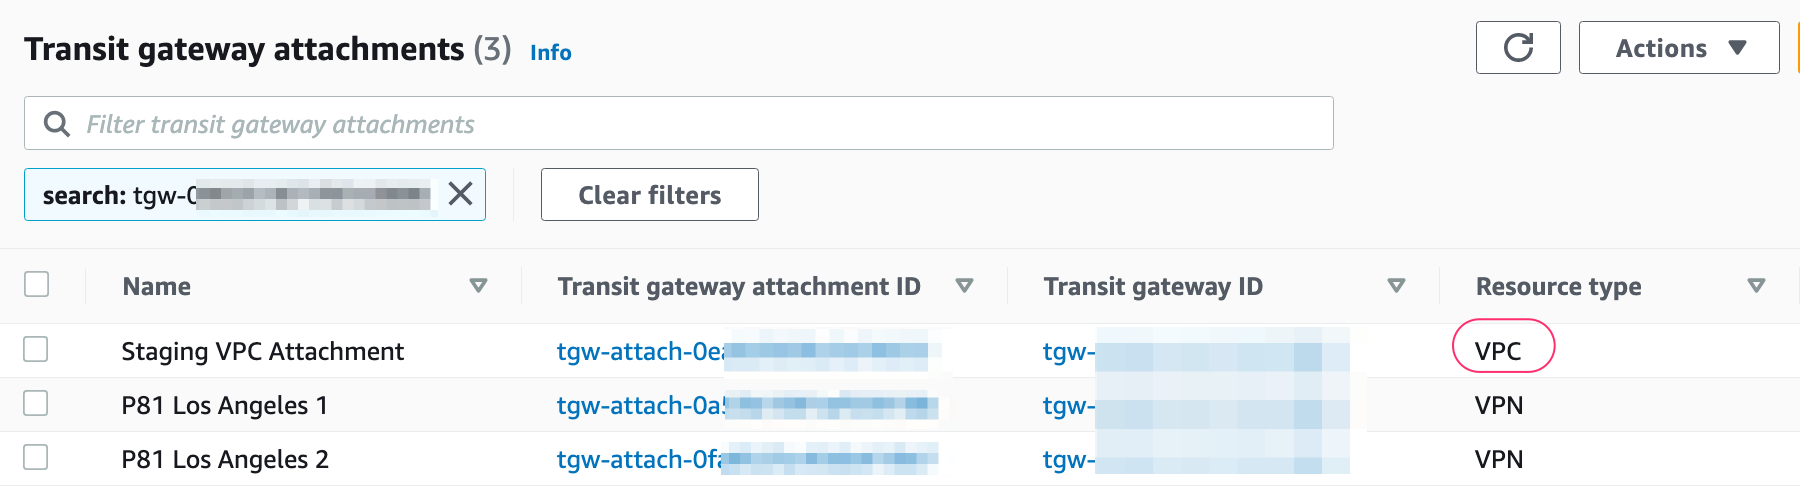
Creating the High Availability Check Point SASE Tunnel
- In Your Check Point SASE Admin console, Navigate to your network.
- Click "..." next to one of the gateways and select Add Tunnel.
- Choose IPSEC Site-2-Site Tunnel, then Continue.
.png)
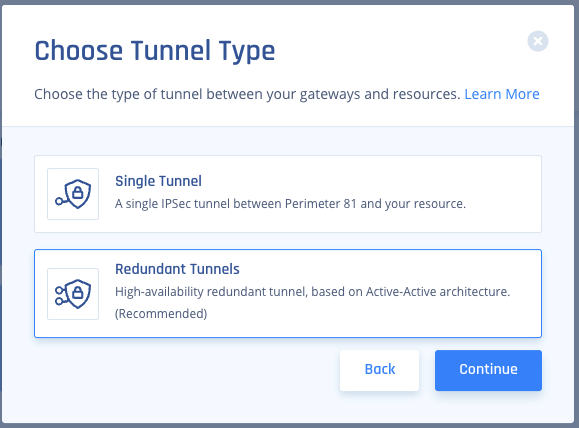
- Select Redundant Tunnels, and afterward, click Continue.
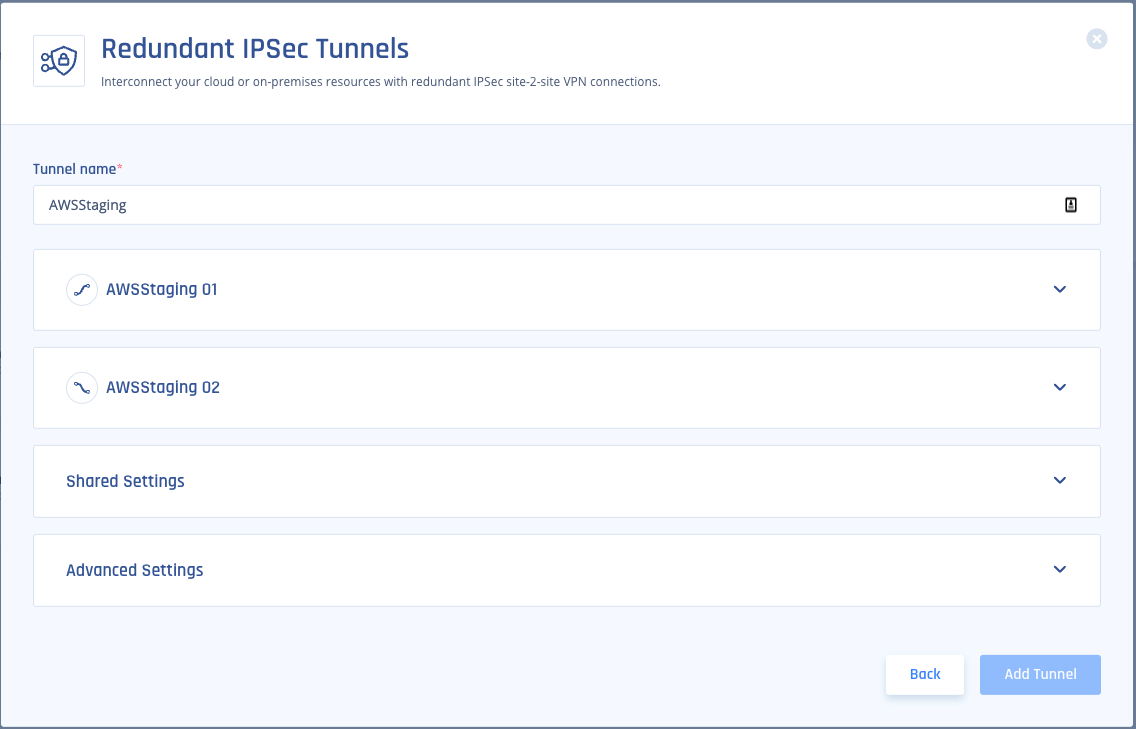
- Select a logical name for your Tunnel,
- For example, if your Transit gateway is located in the US-East region of AWS, you could name the tunnel "USEast." If this is your Staging environment, call it "Staging."
- For example, if your Transit gateway is located in the US-East region of AWS, you could name the tunnel "USEast." If this is your Staging environment, call it "Staging."
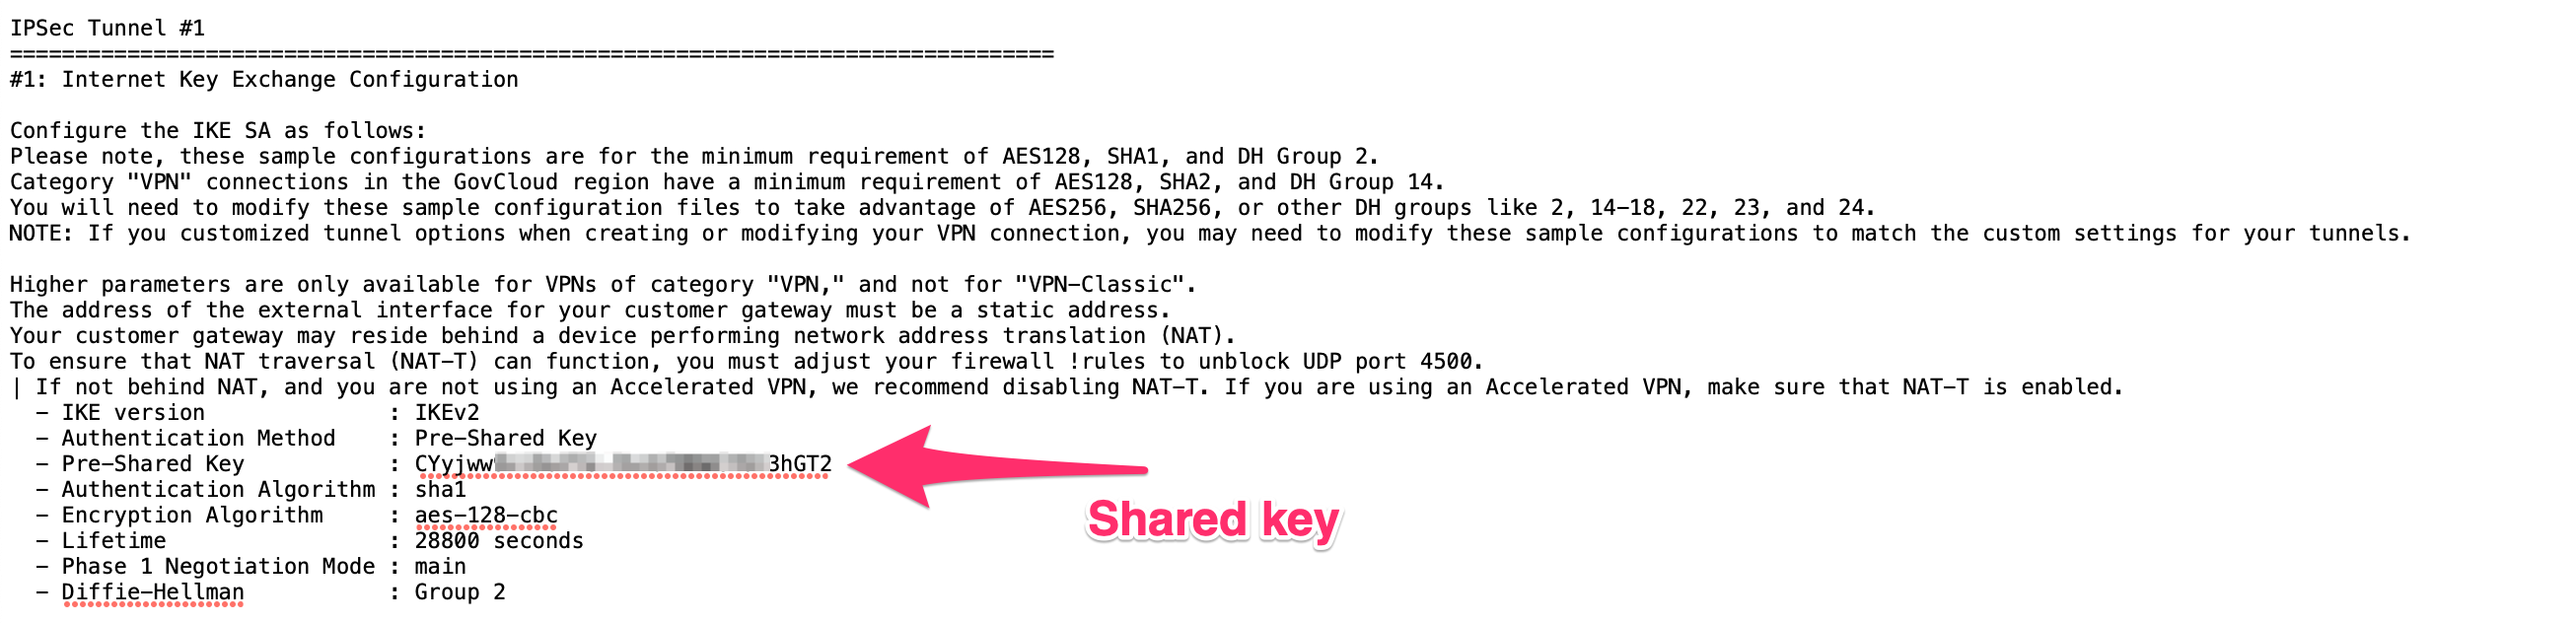
- Copy the values for the first Tunnel from Tunnel1.txt:
- Shared Secret: Pre-Shared Key
- Check Point SASE gateway Internal IP: Inside IP Addresses of Customer Gateway.
- Remote Public IP & Remote ID: Outside IP Addresses of Virtual Private Gateway.
- Remote Gateway internal IP: Inside IP Addresses of Virtual Private Gateway. The IP on the AWS side has a subnet (/30) that should be discarded when pasting.
- Remote Gateway ASN: BGP Configuration Options of Virtual Private Gateway ASN from the file.
.png)
- In the Tunnel 1 section, specify these:
- Gateway: Check Point SASE Gateway.
- Shared Secret: Character string of your own or click Generate.
- Check Point SASE Gateway Internal IP - Check Point SASE Internal IP for tunnel 1.
- Remote Public IP - AWS Gateway external IP.
- Remote Gateway Internal IP - AWS Gateway internal IP.
- Remote Gateway ASN - AWS ASN, 64512.
- Site ID - ID of the remote tunnel is the public IP of the tunnel.
.PNG)
- Shared Secret: Pre-Shared Key
- In the Tunnel 2 section, specify these:
- Gateway: Check Point SASE Gateway.
- Shared Secret: Character string of your own or click Generate.
- Harmony SASE Gateway Internal IP - Check Point SASE Internal IP for tunnel 1.
- Remote Public IP - AWS Gateway external IP.
- Remote Gateway Internal IP - AWS Gateway internal IP.
- Remote Gateways ASN - AWS ASN.
- Site ID - ID of the remote tunnel is the public IP of the tunnel.
.PNG)
- In the Shared Settings section, specify these:
- Check Point SASE Proposal Subnets: Leave Any (0.0.0.0/0) selected.
- Remote Gateway Proposal Subnets: Leave Any (0.0.0.0/0) selected.
- ASN - This should be the same for the Check Point SASE side as the Customer Gateway ASN you configured on AWS.
.PNG)
- In the Advanced Settings section, specify these:
- IKE Version: V2
- IKE Lifetime: 8h
- Tunnel Lifetime: 1h
- Dead Peer Detection Delay: 10s
- Dead Peer Detection Timeout: 30s
- Phase 1:
- Encryption(Phase 1): aes256
- Integrity (Phase 1): sha512
- Key Exchange Method: ecp521
- Phase 2:
- Encryption(Phase 2): aes256
- Integrity (Phase 2): sha512
- Key Exchange Method: ecp521
.PNG)
- Click Add Tunnel.
Creating Static Routes
- Navigate to VPC -> Select the corresponding VPC attached to the Transit Gateway -> Select the Main Route Table for the VPC.

- Edit the main Route Table for the VPC and add the subnet mask of your Check Point SASE network as the destination with the Transit Gateway as the target (Route for reverse traffic).
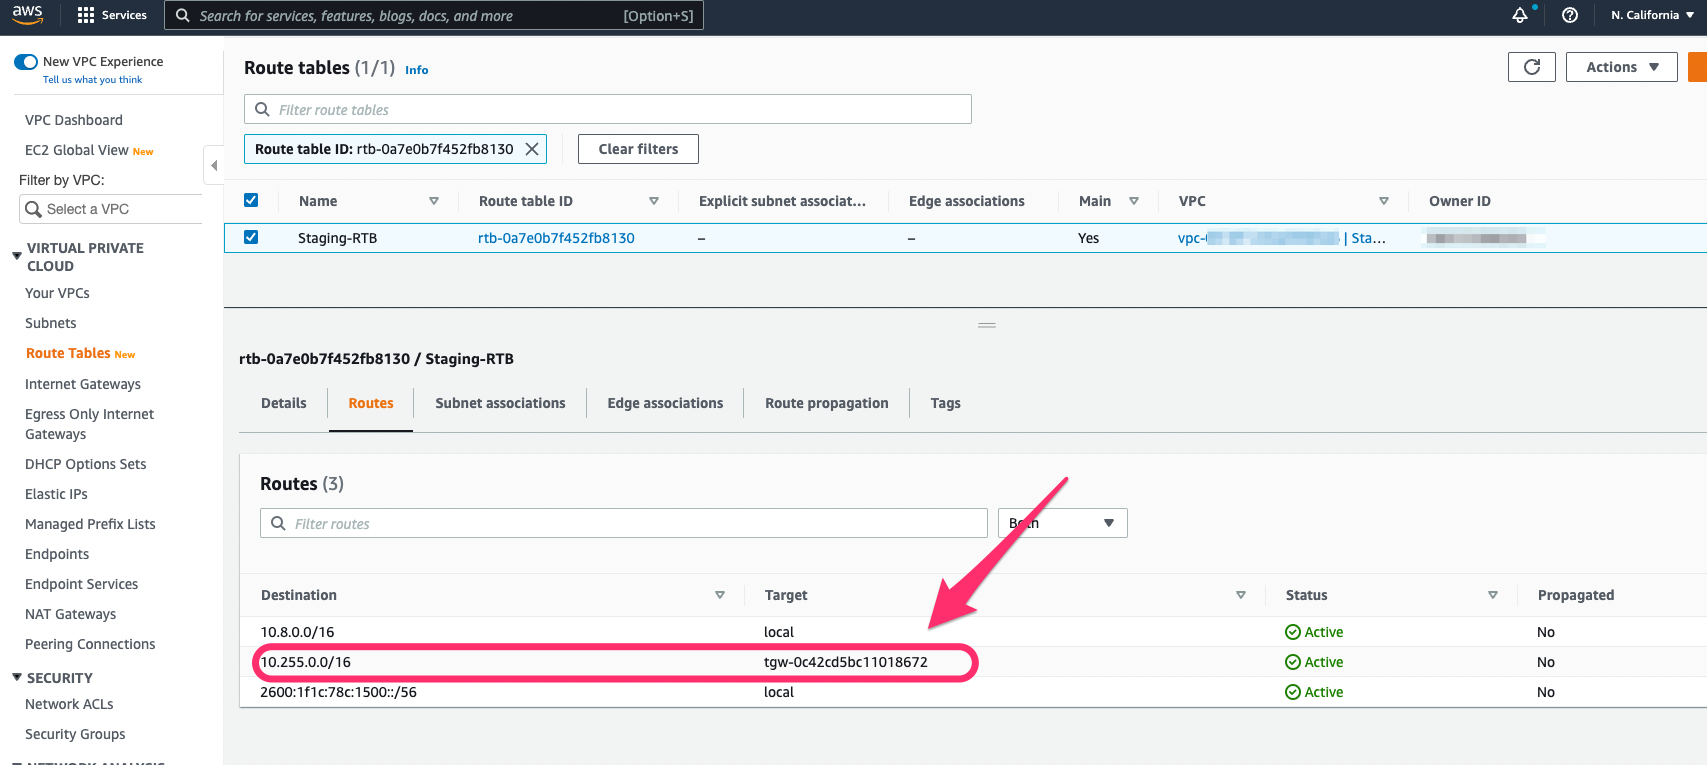
- Please note that this might not be the Main Route Table for the VPC; In that case, you will need to locate each subnet associated with the VPC and add the reverse route for the Check Point SASE internal subnet range.
- Navigate back to your Check Point SASE network and add the route to the corresponding subnet in AWS.
You'll want to select "..." next to your network and then Routes Table.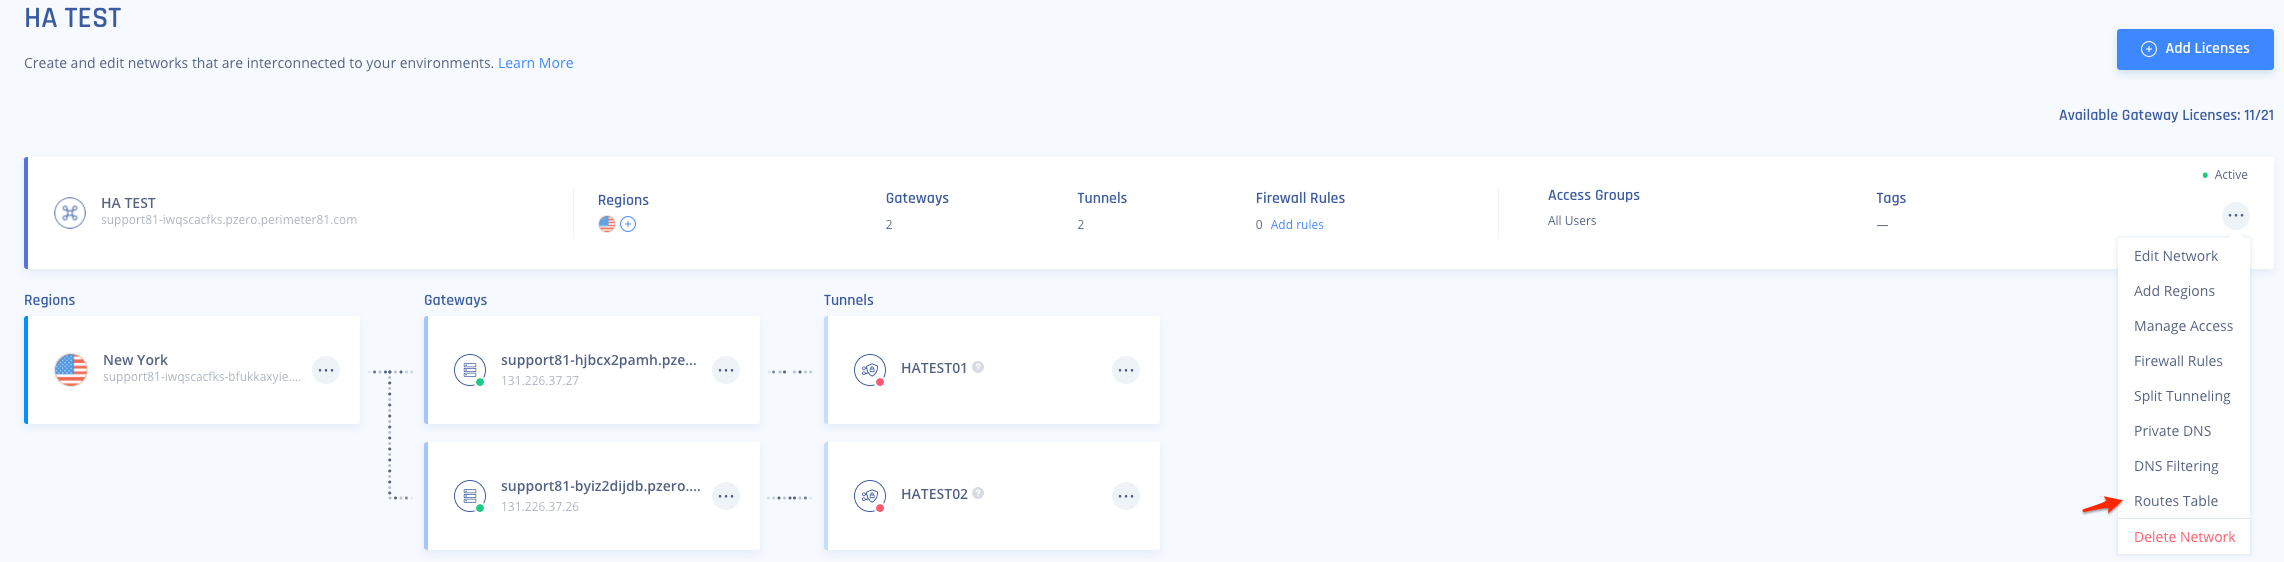
- Once completed, select "Apply Configuration" and let the route changes propagate on the Check Point SASE side.

Verifying the Setup
Once set up, your redundant tunnels should be active. To confirm, go to your Check Point SASE dashboard, find the tunnels you started, and ensure their status shows "Up". Connect to your network with the Check Point SASE agent and try accessing resources in your AWS environment.
Troubleshooting
If you encounter issues during or after the setup, try reviewing your settings to ensure everything matches the instructions. In particular, check the IP addresses and other details you entered during setup. If issues persist, please consult our dedicated support.
Support Contacts
If you have any difficulties or questions, don't hesitate to contact Check Point SASE's support team. We offer 24/7 chat support on our website at Perimeter81.com, or you can email us at sase-support@checkpoint.com. We're here to assist you and ensure your VPN tunnel setup is a success.