
When macOS and Windows agents have the Secure Web Gateway (SWG) feature enabled, additional steps are required after installation and first user sign‑in. These steps allow the agent to configure the required network extension, proxy settings, and certificate trust settings for secure web access.
Windows
When SWG is enabled, the agent may require administrator approval to complete the installation of web security components.
- Install the Check Point SASE Agent.
- Sign in to the agent.
- If prompted by Windows to approve additional components, click Allow or Yes.
- If prompted for administrator credentials, enter the credentials to continue. Note:Local administrator permissions are required to complete the SWG installation.
If the installation does not complete successfully, sign out of the agent and sign in again to restart the setup process.
MacOS
Note:
If you already downloaded and installed the Secure Web Gateway (SWG) root certificate, skip this procedure. For more information, see Downloading the Secure Web Gateway (SWG) root Certificate.
- Install the Check Point SASE Agent.
- Sign in to the agent.
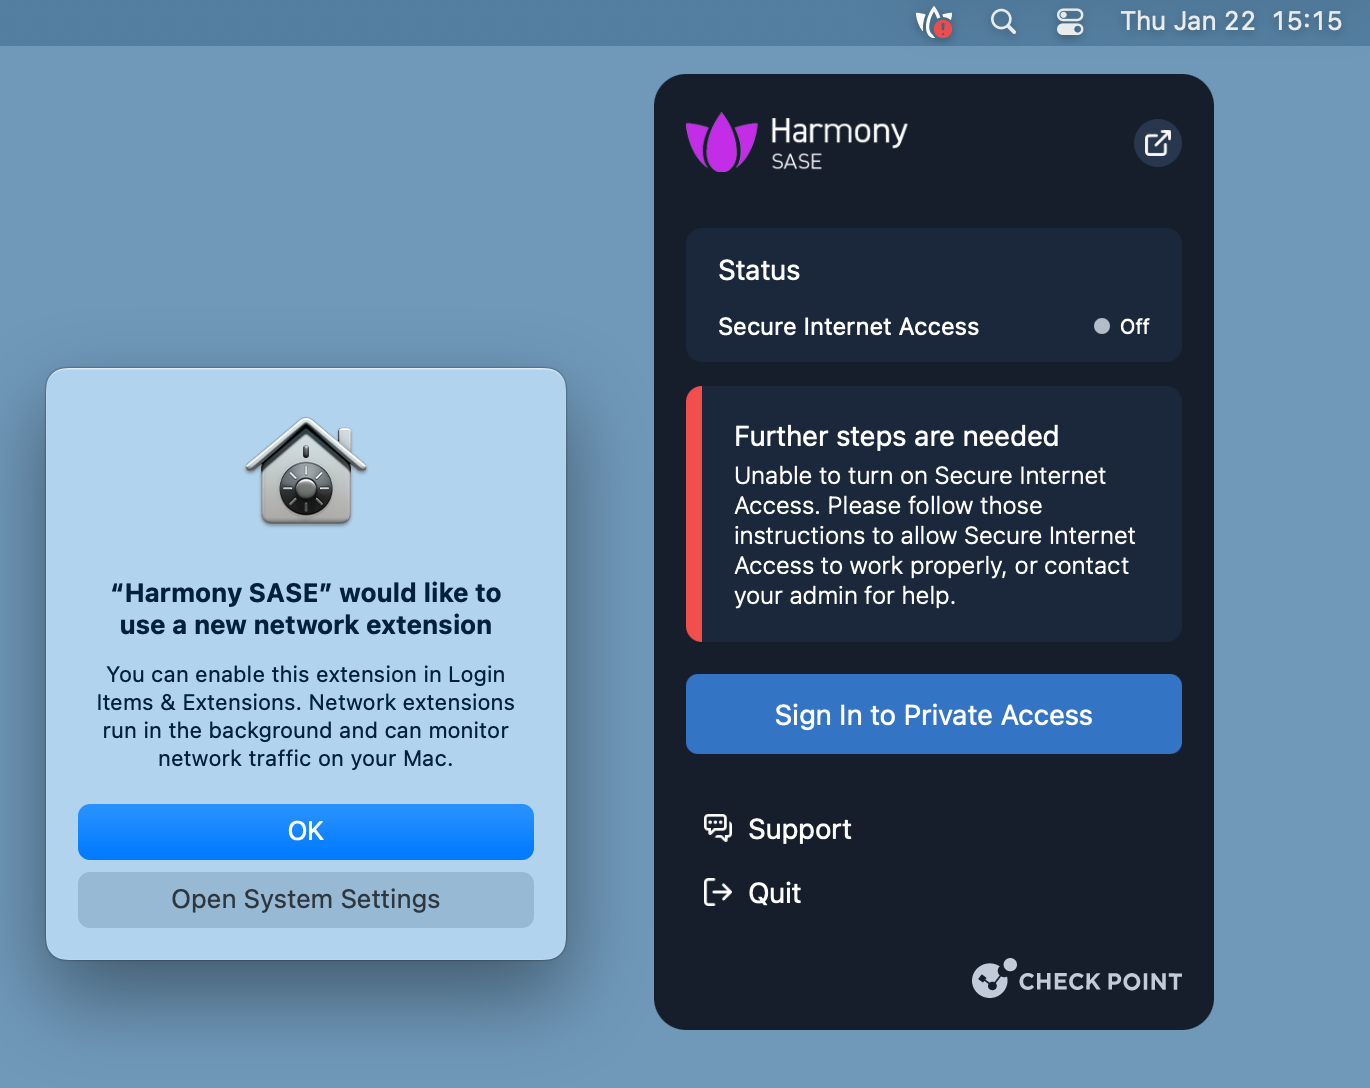 "Check Point SASE" would like to use a new network extension popup appears.
 - Click Open System Settings.
Alternatively, go to: System Settings → General → Login Items & Extensions → Network Extensions.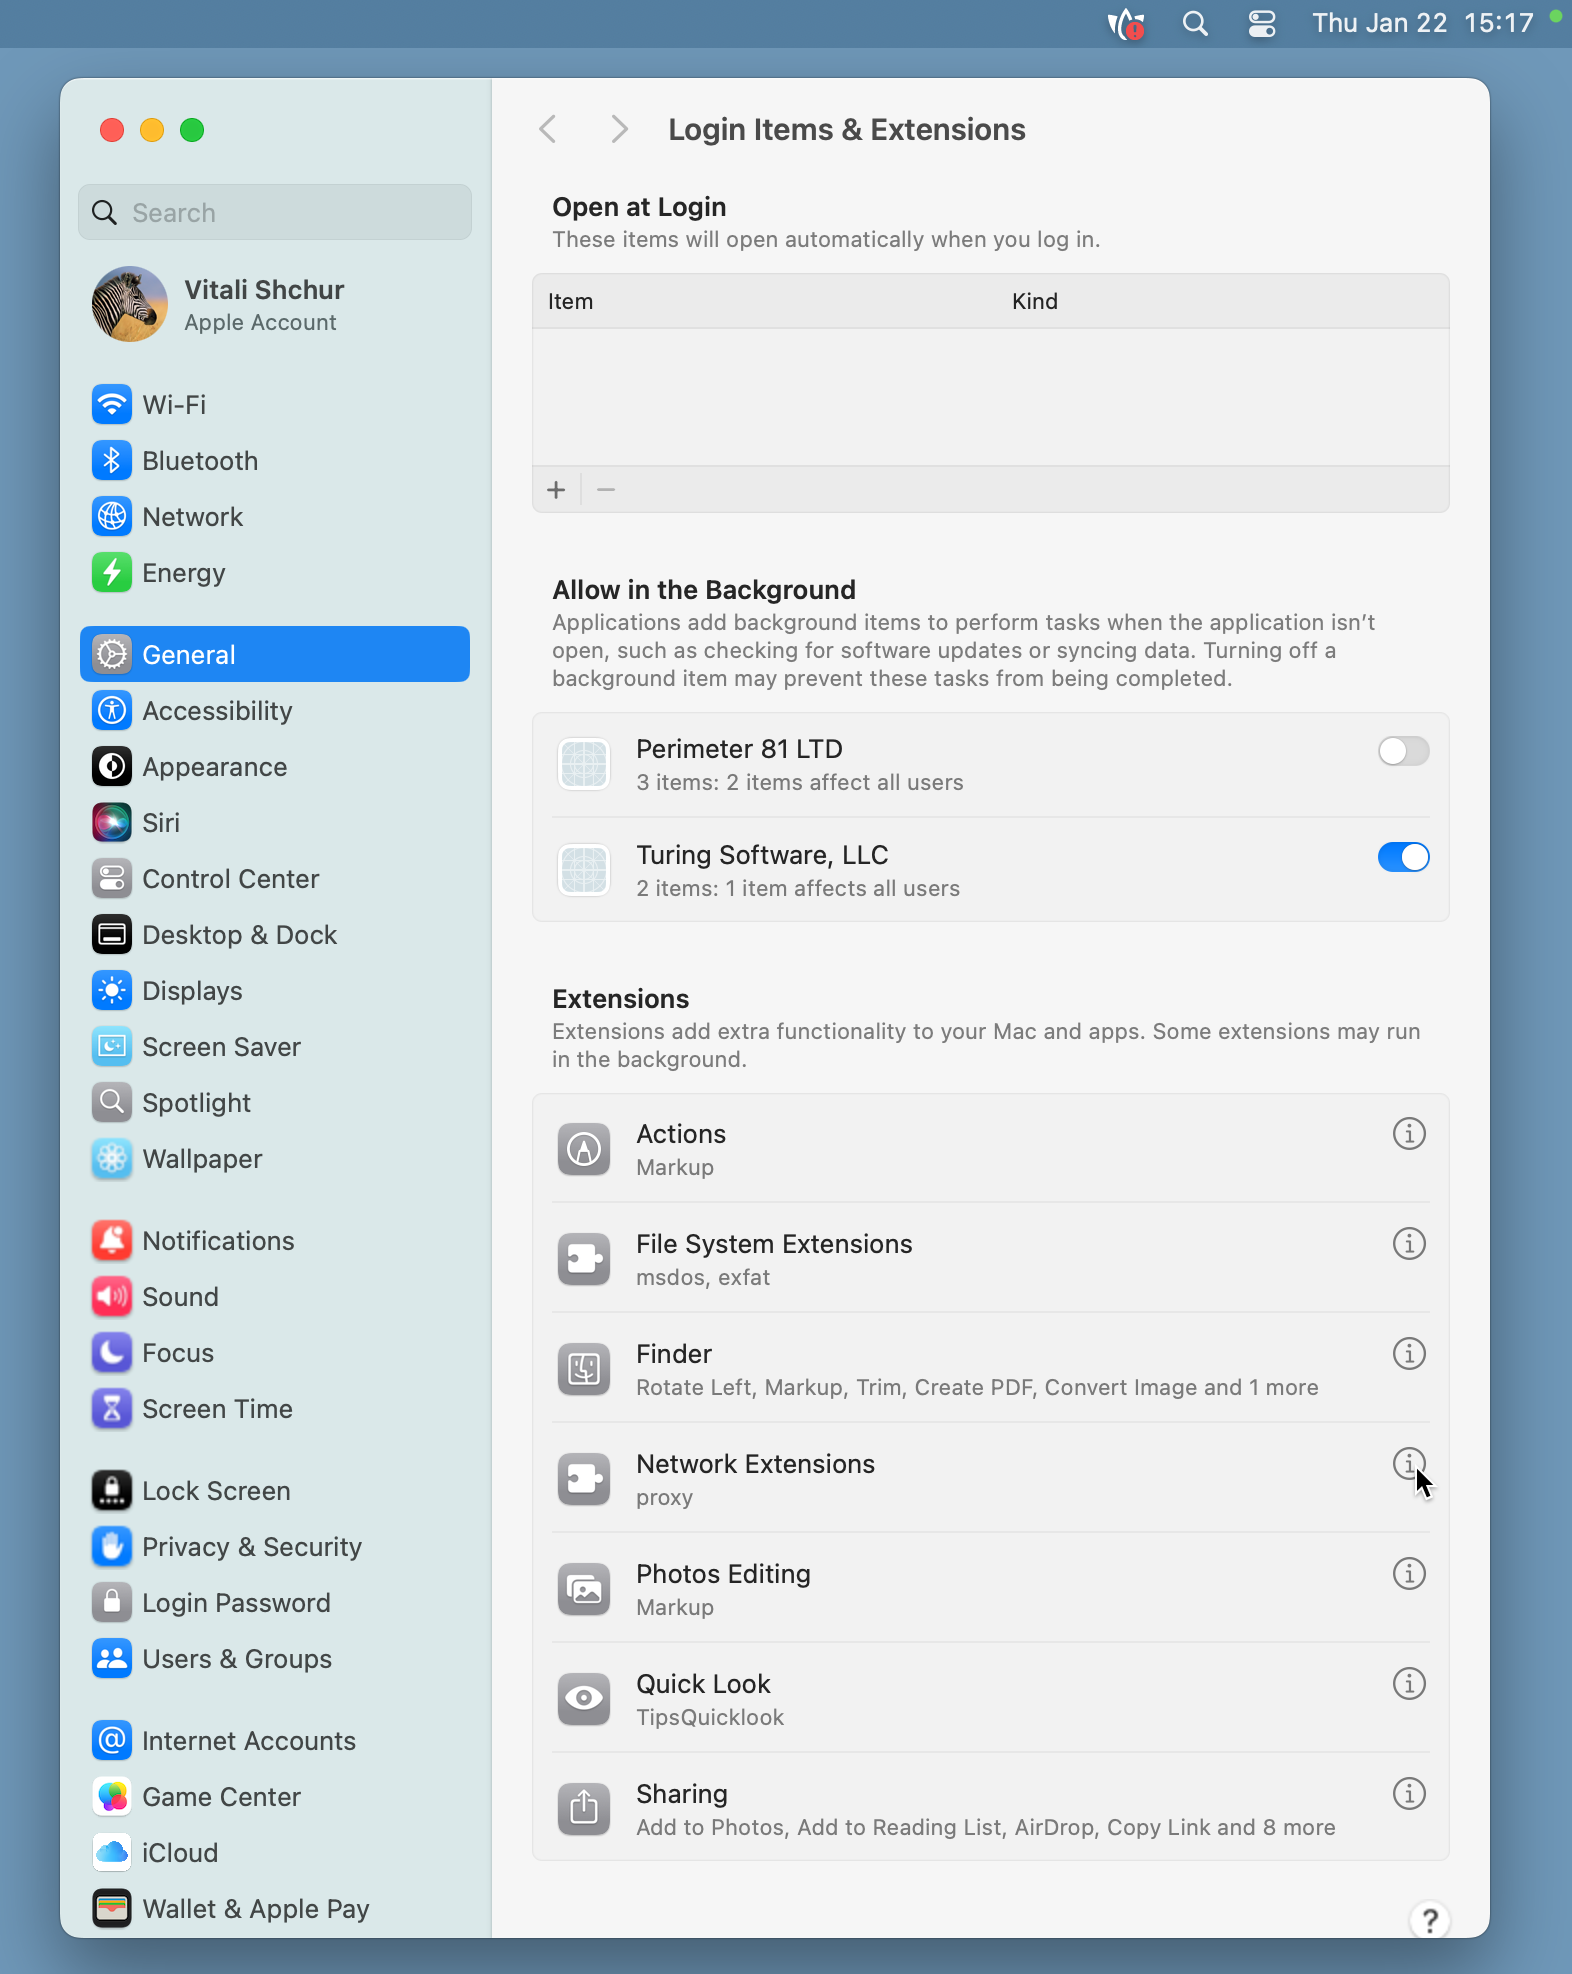
- In the Network Extensions section, enable the toggle for Check Point SASE.app.
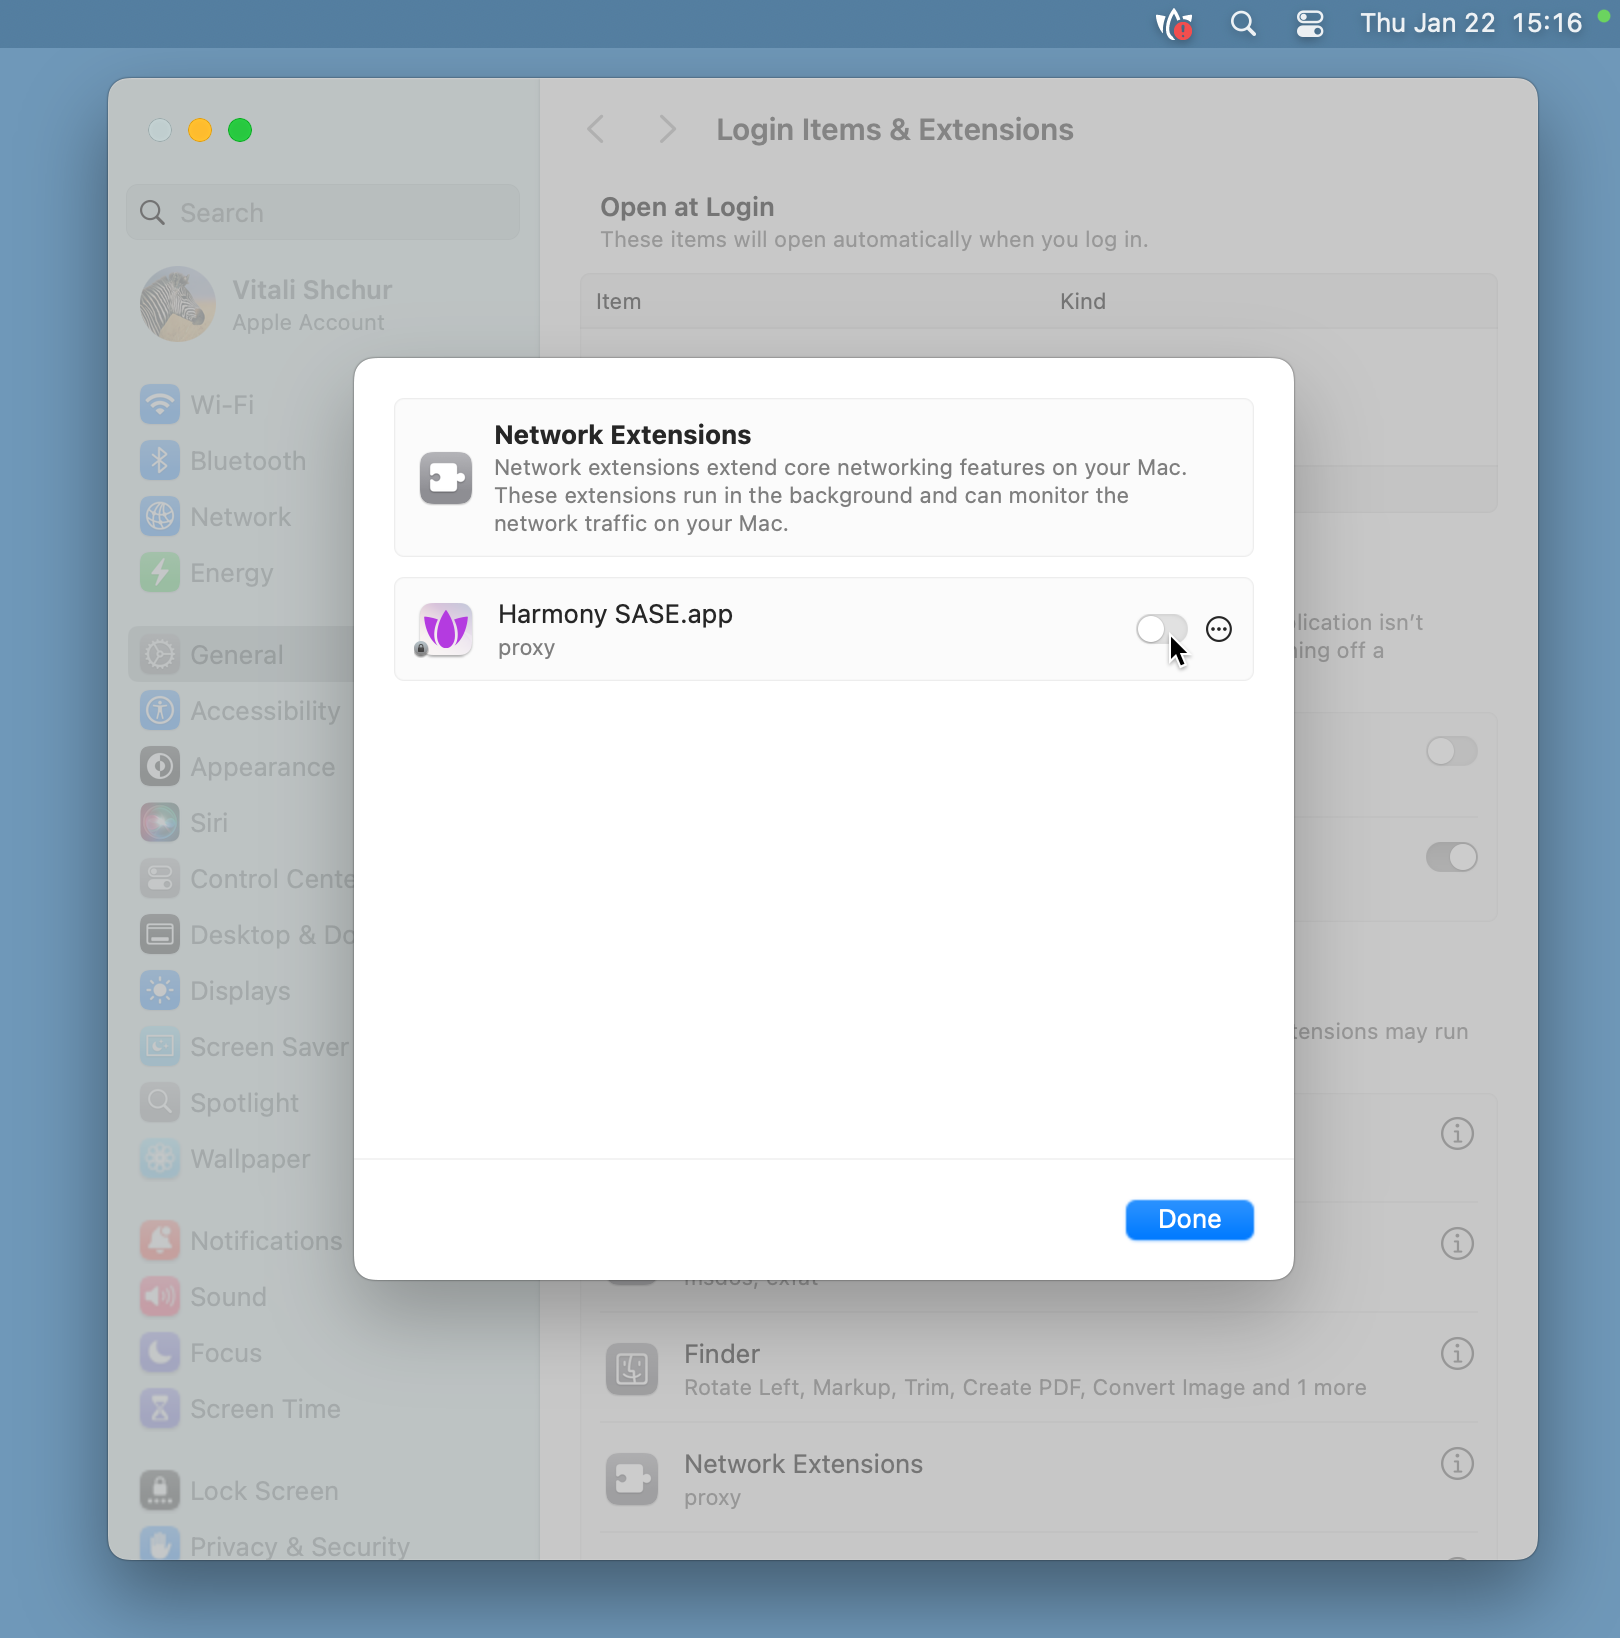
- Click Done.
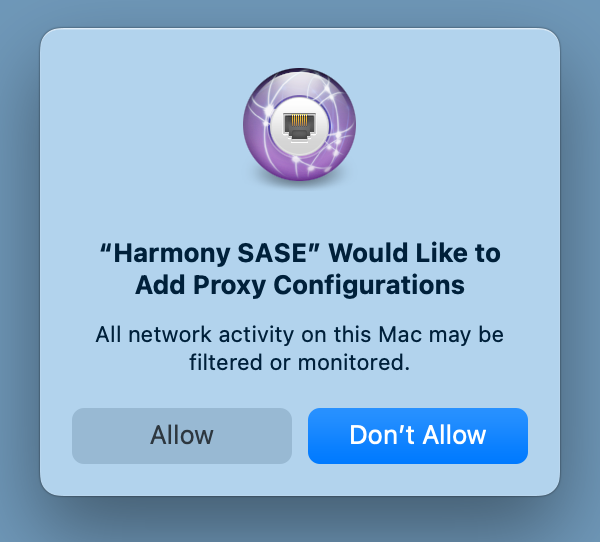 “Check Point SASE" Would Like to Add Proxy Configurations popup appears.
 - Click Allow.
- When the system displays the certificate trust dialog, enter your macOS password.
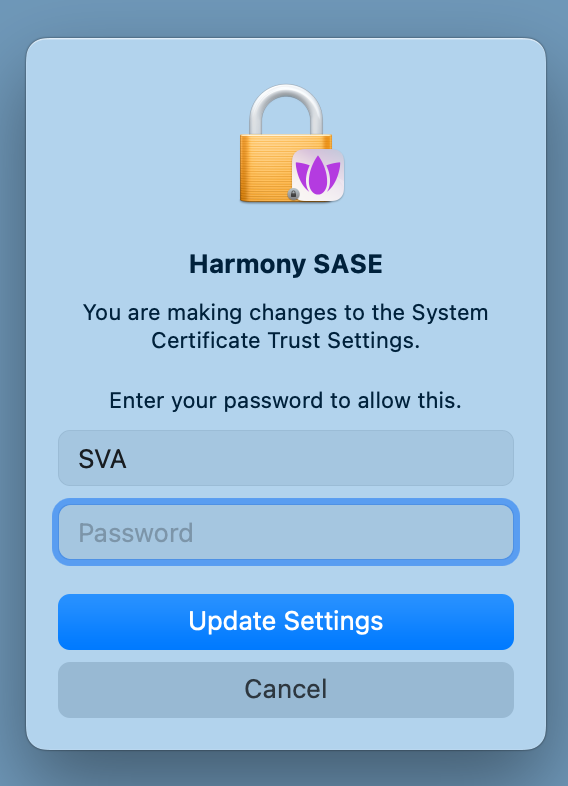
- Click Update Settings.
- The SWG setup process is complete.Note:If the SWG root certificate is already installed, the certificate approval prompt does not appear.
Troubleshooting
System Extension Installation Error
If the network extension was not approved during login:
- Sign out of the Check Point SASE Agent.
- Sign in again.
Complete the approval procedure when prompted.
SWG Certificate Denied or Blocked
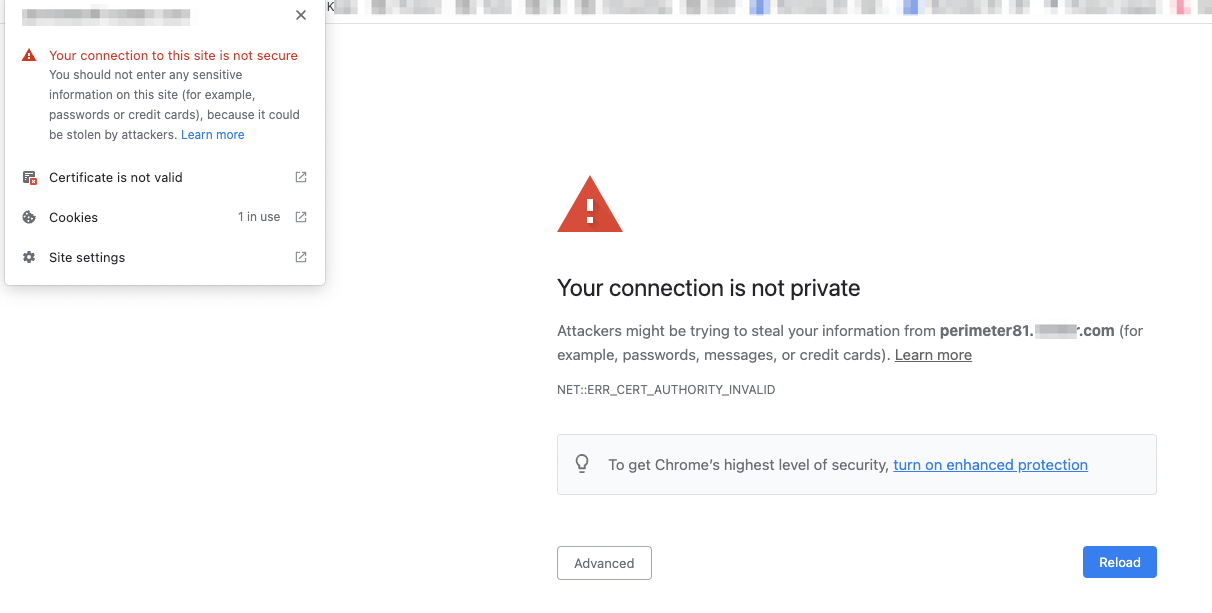
If the SWG certificate was denied, browsers display a certificate error when accessing websites.
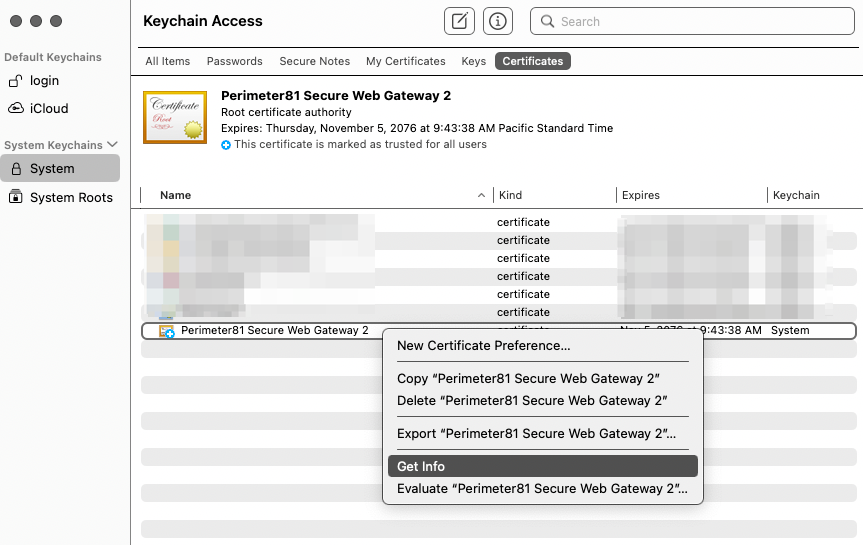
- Open Keychain Access (Press Cmd + Space, then search for Keychain Access).
- Locate the certificate named Check Point SASE Secure Web Gateway 2.
- Right-click the certificate and select Get Info.
- Set trust permissions to Always Trust.
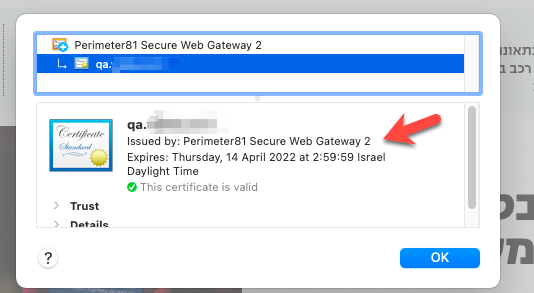 Refresh the web page. The site should load without certificate warnings.