Auth0
- 11 Apr 2024
- 1 Minute to read
- Contributors


Auth0
- Updated on 11 Apr 2024
- 1 Minute to read
- Contributors
Article Summary
Share feedback
Thanks for sharing your feedback!
Introduction
This article outlines the steps to configure Auth0 as an identity provider.
By integrating with Auth0, Harmony SASE can authenticate users seamlessly, leveraging the capabilities of the Security Assertion Markup Language (SAML) protocol.
Steps
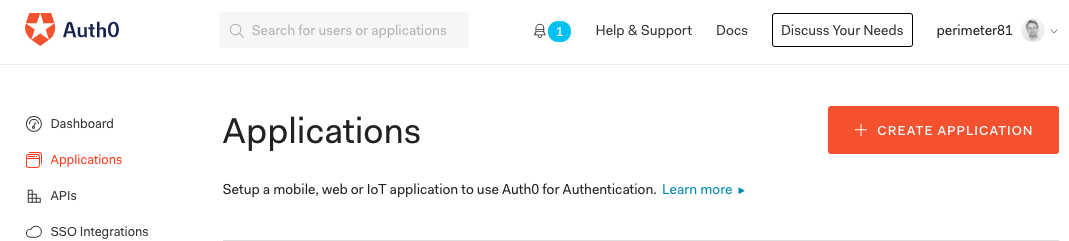
- Open the Auth0 Administrator Console.
- Select Applications in the main navigation panel.
- Select the + Create Application on the upper side of the screen.
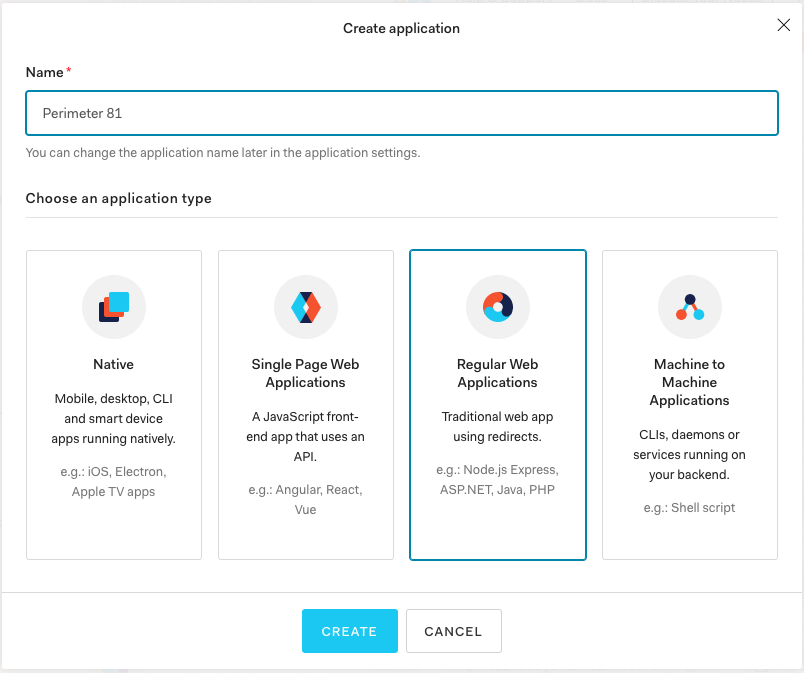
- Add Harmony SASE as the name of your Application.
- Select the "Regular Web Application " type, and click on Create.
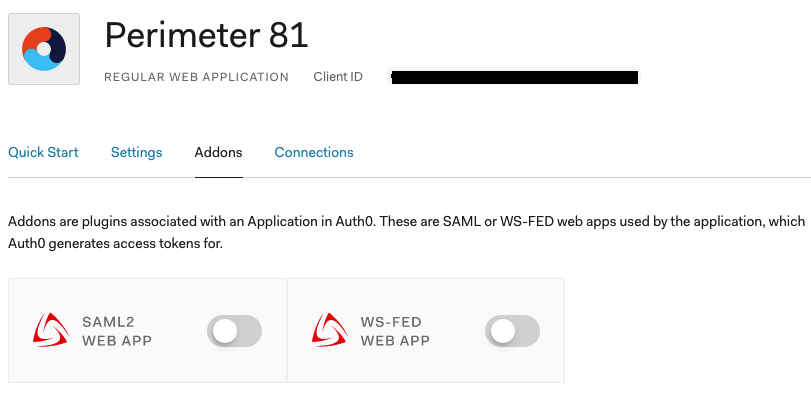
- Navigate to "Addons " and turn on the "SAML2 Web App " toggle.
- In the Addon: SAML2 Web App window:


- Application Callback URL :Enter https://auth.perimeter81.com/login/callback?connection={{WORKSPACE}}-oc for US based platform or https://auth.eu.sase.checkpoint.com/login/callback?connection={{WORKSPACE}}-oc for EU based platform
- Settings: Copy the following configuration**:**
US based platform:
`{

"audience": "urn:auth0:perimeter81: **{{WORKSPACE}}**	  -oc",

"mappings": {

"email": "http://schemas.xmlsoap.org/ws/2005/05/identity/claims/emailaddress",

"given_name": "http://schemas.xmlsoap.org/ws/2005/05/identity/claims/givenname",

"family_name": "http://schemas.xmlsoap.org/ws/2005/05/identity/claims/surname",

"groups": "http://schemas.xmlsoap.org/claims/Group"

}

}`
EU based platform:
`{

"audience": "urn:auth0:eu-sase-checkpoint: **{{WORKSPACE}}**	  -oc",

"mappings": {

"email": "http://schemas.xmlsoap.org/ws/2005/05/identity/claims/emailaddress",

"given_name": "http://schemas.xmlsoap.org/ws/2005/05/identity/claims/givenname",

"family_name": "http://schemas.xmlsoap.org/ws/2005/05/identity/claims/surname",

"groups": "http://schemas.xmlsoap.org/claims/Group"

}

}`
Hint: Remember to replace the {{WORKSPACE}} with your actual tenant name

8. Click Enable to save and activate the Application.
9. Click on Debug and verify your configuration.
10. Navigate to Usage.
11. Click on Download Auth0 certificate.
12. Write down the Identity Provider Login URL.

Configuring Auth0 in the Management Platform
At this point, you will configure the integration from the Harmony SASE side.
- Log in to your Harmony SASE Management Platform, and navigate to Settings and then IdentityProviders.
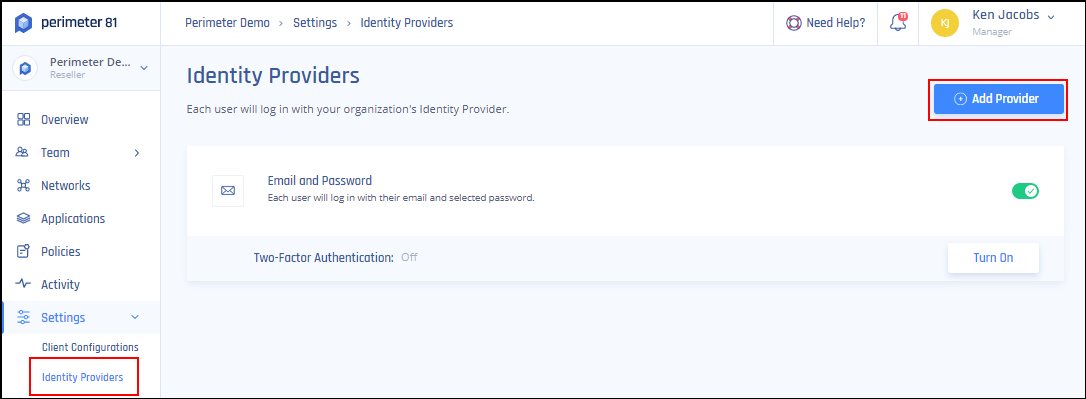
- Select + Add Provider.
- Choose SAML 2.0 Identity Providers.
- Sign In URL: Identity Provider Login URL
- Add your organization domain.
- Open the Auth0 certificate file and paste its content into the X509 Signing Certificate box.
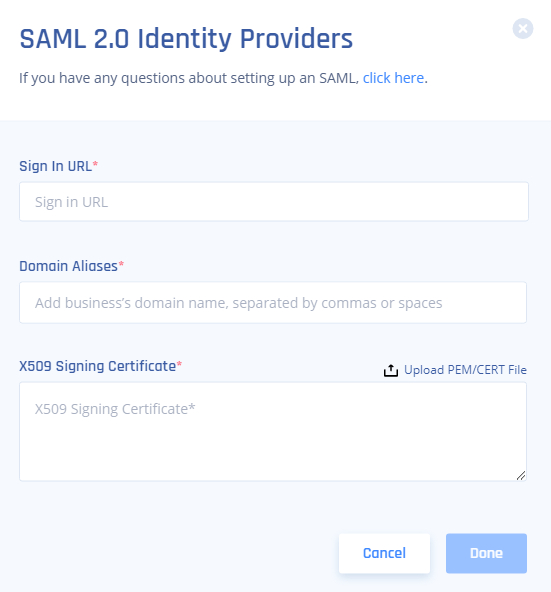
- Select Done.


Recommendations
- When creating an application in Auth0, ensure you select the "Regular Web Application" type.
- Always replace placeholders like {{WORKSPACE}} with the appropriate values during configuration.
- Ensure that the correct mappings are set up in the Auth0 SSO application for accurate user authentication and authorization.
- Periodically review your Auth0 configuration settings to ensure they align with any updates or changes made within the Harmony SASE platform
Troubleshooting
If you encounter issues during or after the setup, try reviewing your settings to ensure everything matches the instructions. In particular, check the IP addresses and other details you entered during setup. If issues persist, please consult our dedicated support.
Support Contacts
If you have any difficulties or questions, don't hesitate to contact Harmony SASE's support team. We offer 24/7 chat support on our website at Perimeter81.com, or you can email us at support@perimeter81.com. We're here to assist you and ensure your VPN tunnel setup is a success
Was this article helpful?