Active Directory Federation Services (ADFS)
- 11 Apr 2024
- 3 Minutes to read
- Contributors


Active Directory Federation Services (ADFS)
- Updated on 11 Apr 2024
- 3 Minutes to read
- Contributors
Article Summary
Share feedback
Thanks for sharing your feedback!
Understanding Active Directory Federation Services (ADFS)
This article provides insights into configuring ADFS as an identity provider.
By leveraging the Security Assertion Markup Language (SAML) protocol, Harmony SASE can authenticate users through ADFS, allowing for seamless integration and enhanced security.
How to integrate ADFS
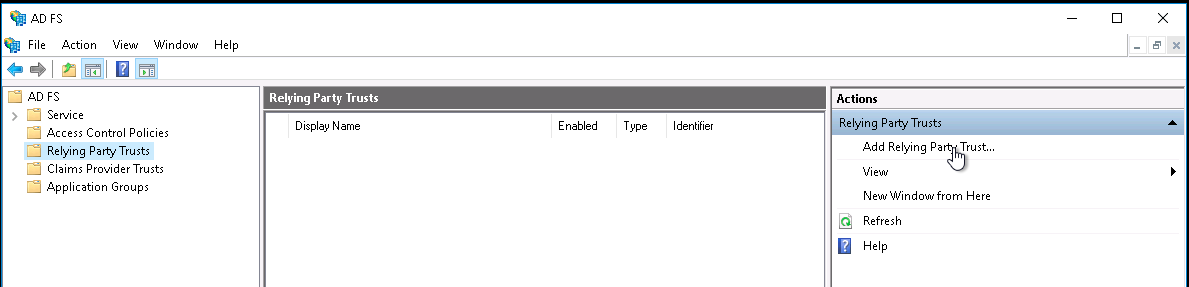
Adding a Relying Party Trust
See Create a relying party trust for complete details.
Launch your instance of ADFS and start the Add Relying Party Trust wizard.
- On the Welcome page, choose Claims aware and click Start.
On the Select Data Source page, select Enter data about the relying party manually and click Next.
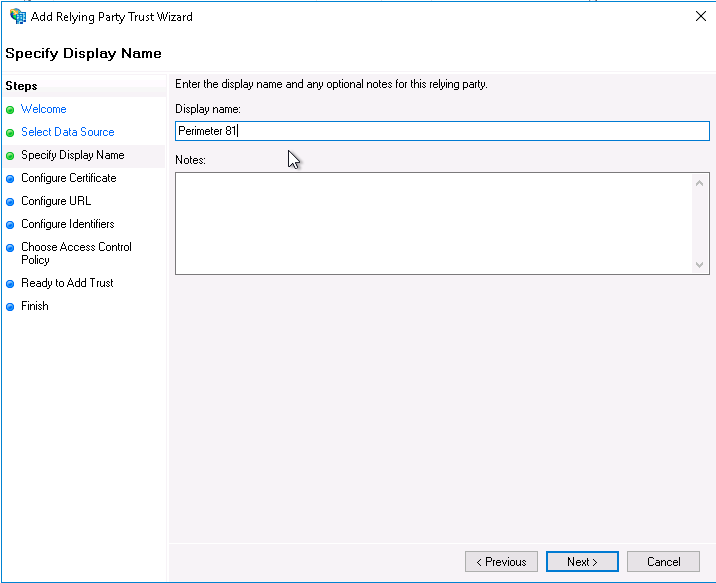
On the Specify Display Name page, provide a descriptive name for your relying party (the typical name is Harmony SASE) and a brief description under Notes. Click Next.
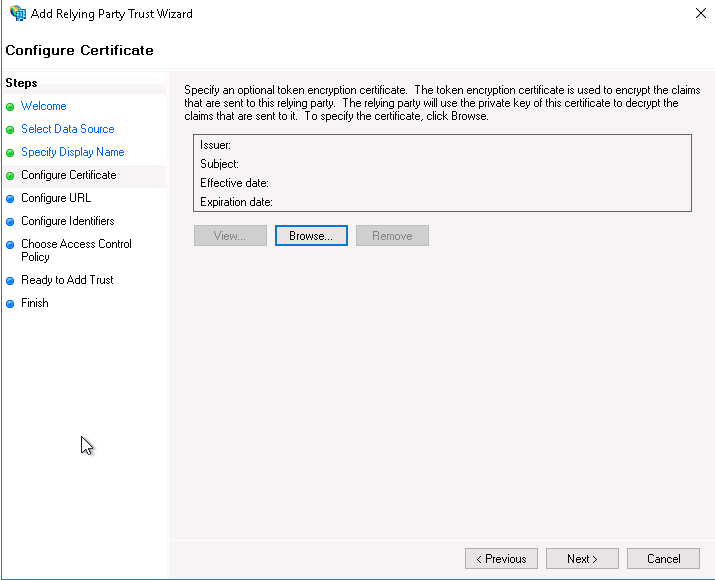
On the Configure Certificate page, click Next.
On the Configure URL page, check the box for Enable support for the SAML 2.0 WebSSO protocol.
Set Relying party SAML 2.0 SSO service URL to https://auth.perimeter81.com/login/callback?connection={{WORKSPACE}}-oc for US based platform or https://auth.eu.sase.checkpoint.com/login/callback?connection={{WORKSPACE}}-oc for EU based platform. Click Next .
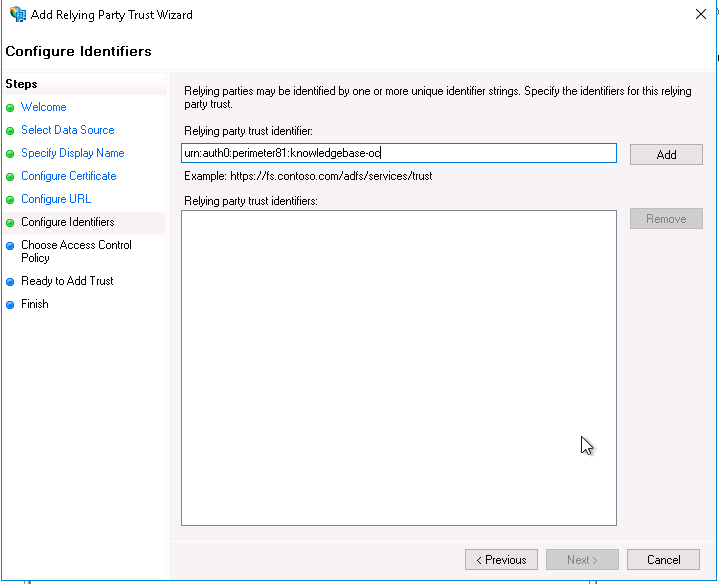
On the Configure Identifiers page, set the Relying party trust identifier to urn:auth0:perimeter81:{{WORKSPACE}}-oc for US based platform or urn:auth0:eu-sase-checkpoint:{{WORKSPACE}}-oc for EU based platform. Click Add and Next.
On the Choose Access Control Policy page, select Permit everyone, and click Next.
Review the settings you provided on the Ready to Add Trust page and click Next to save your information. If you were successful, you'll see a message indicating that on the Finish page.
Make sure that the Configure claims issuance policy for this application checkbox is selected, and click Close.


Editing the claim issuance policy
After you close the Add Relying Party Trust wizard, the Edit Claim Issuance Policy window appears.
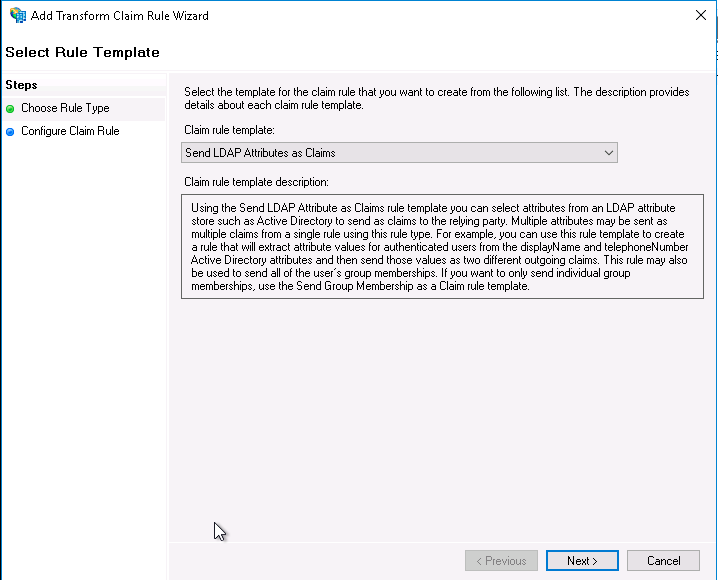
- Click Add Rule... to launch the wizard.
- Select Send LDAP Attributes as Claims for your Claim rule template, and click Next.
- Provide a value for the Claim rule name, such as "LDAP Attributes" (it can be anything you want).
- Choose Active Directory as your Attribute Store.
- Map your LDAP attributes to the following outgoing claim types:

| E-mail Addresses | email |
| Given-Name | given_name |
| Surname | family_name |
| Token-Groups Unqualified-Names | groups |
| User-Principal-Name | user_id |
6. Click Finish.
7. In the Edit Claim Issuance Policy window, click Apply. You can now exit out of this window.
Exporting the signing certificate
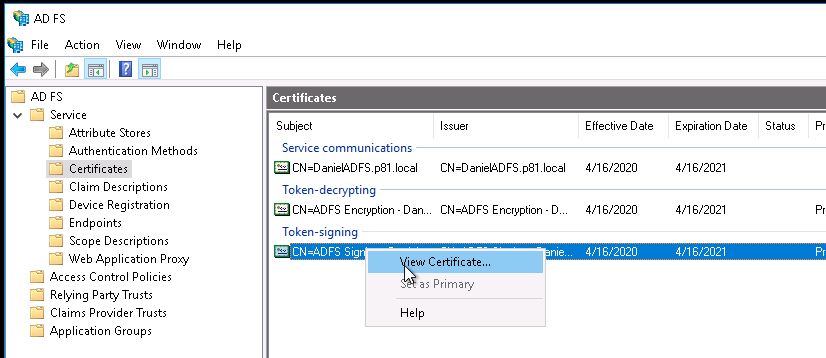
- Using the left-hand navigation pane, go to ADFS > Service > Certificates.
- Select the Token-signing certificate, and right-click to select View Certificate.
- On the Details tab, click Copy to File...

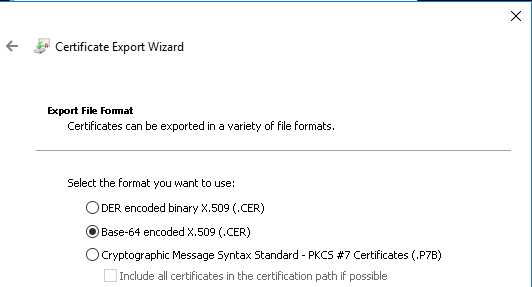
- In the Certificate Export Wizard Click Next.
- Choose Base-64 encoded X.509 (.CER) . Click Next.
- Provide the location for the certificate to be exported. Click Next.
- Verify that the certificate and click Finish.


Configuring the ADFS connection at the Management Platform
At this point, you will configure the integration from the Harmony SASE side.
- Log in to your Harmony SASE Management Platform, and navigate to Settings and then Identity Providers.
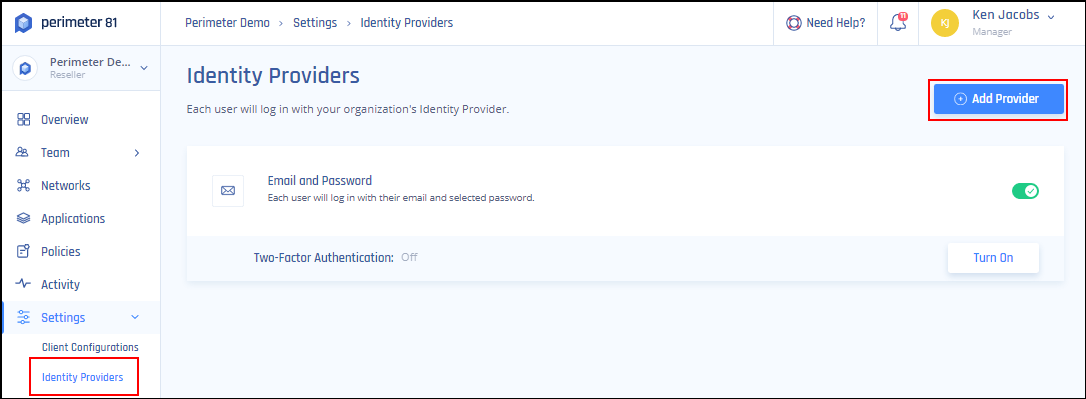
- Select + Add Provider.
- Choose SAML 2.0 Identity Providers.
- Sign In URL: https://{{YOUR.ADFS.DOMAIN}}/adfs/ls .
- Add your organization domain.
- Open the ADFS X.509 certificate file in a UNIX operating system and paste its content into the X509 Signing Certificate box.
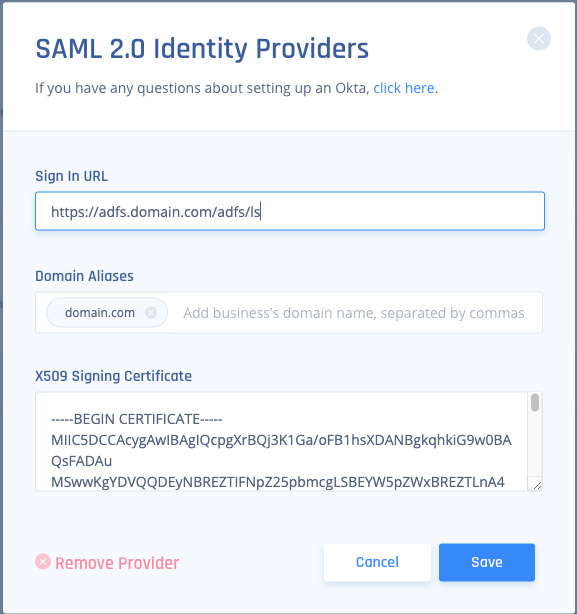
- Select Save.


Recommendations
- Always replace placeholders like {{WORKSPACE}} and {{YOUR.ADFS.DOMAIN}} with the appropriate values during configuration.
- Ensure that the correct LDAP attributes are mapped to the corresponding outgoing claim types for accurate user authentication and authorization.
- After setting up, it's crucial to test the integration to ensure seamless authentication and correct user and group assignments.
- Periodically review your ADFS configuration settings to ensure they align with any updates or changes made within the Harmony SASE platform
Troubleshooting
If you encounter issues during or after the setup, try reviewing your settings to ensure everything matches the instructions. In particular, check the IP addresses and other details you entered during setup. If issues persist, please consult our dedicated support.
Support Contacts
If you have any difficulties or questions, don't hesitate to contact Harmony SASE's support team. We offer 24/7 chat support on our website at Perimeter81.com, or you can email us at support@perimeter81.com. We're here to assist you and ensure your VPN tunnel setup is a success.
Was this article helpful?